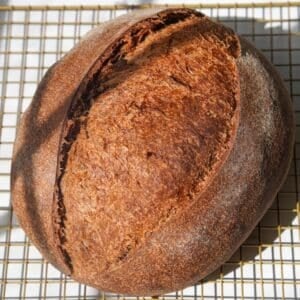
Sourdough Brown Bread
INGREDIENTS
Feed Your Starter
- 12 g sourdough starter
- 60 g water
- 60 g bread flour
Main Dough
- 280 g water
- 120 g active sourdough starter prepared above
- 60 g regular molasses do not use blackstrap
- 40 g brown sugar light or dark
- 30 g olive oil
- 10 g cocoa powder
- 250 g bread flour
- 250 g whole wheat flour
- 10 g salt
Before You Begin

Bulk fermentation takes longer than a typical artisan loaf. Refer to the Baker's Timeline section in the full post for estimated times and baking schedule options.You can bake in a loaf pan if you prefer — see the Recipe Notes at the very end for tips.Note: This recipe was developed and is written in metric (grams). Volume measurements (cups and spoons) are automatically converted and untested — use at your own risk. For best results, use a kitchen scale.
Equipment
- Bowl cover Use code THATSOURDOUGHGAL for 15% off
- Danish dough whisk if mixing by hand
- Banneton Use code TSG5 for 5% off
- Dutch oven Use code REBEKAH15 for $15 off
- Parchment paper or bread sling
- Bread bag Use code THATSOURDOUGHGAL for 15% off
Instructions
- Feed your starter: About 10–12 hours before you plan to mix the dough, in a medium glass jar, stir together 12 g sourdough starter and 60 g water. Mix in 60 g bread flour until smooth. Loosely cover and let it ferment for 10–12 hours at 68–75°F (20–24°C). This recipe uses 120 g, so you'll have 12 g left to maintain your starter.
- Mix the dough: When your starter is active and ready, combine 280 g water, 120 g active sourdough starter, 60 g regular molasses, 40 g brown sugar, 30 g olive oil, 10 g cocoa powder, 250 g bread flour, 250 g whole wheat flour, and 10 g salt in a large mixing bowl or stand mixer bowl. Knead until smooth — about 5 minutes by hand or 3–5 minutes on low speed in a stand mixer. If you want to skip the stretch and folds, mix in the stand mixer for about 10 minutes instead. (Bulk fermentation begins now.)
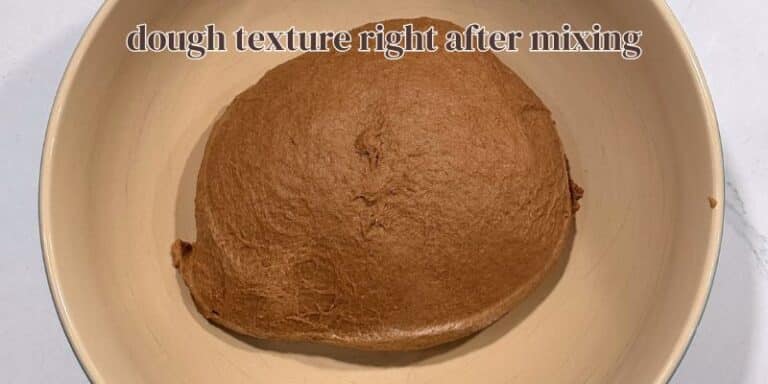
- Texture check: Compare your dough to the video below — if it's stiffer than mine, add water 1 tbsp at a time; if it's looser, add bread flour 1 tbsp at a time. Small adjustments are normal given all the variables in sourdough baking.
- Cover the bowl and let the dough rest for 1 hour.
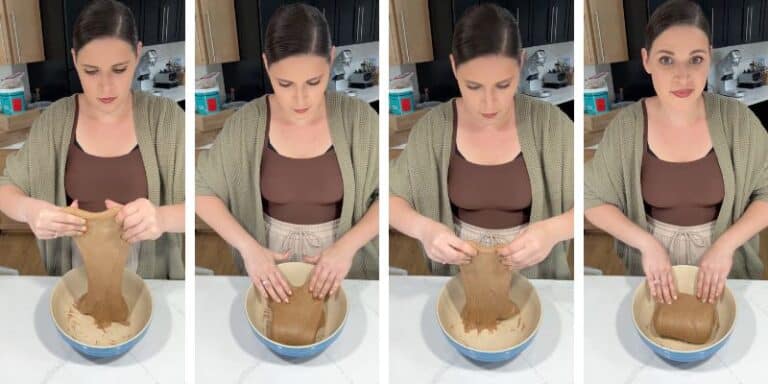
- Dough strengthening: Perform a set of stretch and folds. Cover and rest 1 hour, then perform a second set. Cover and rest another hour, then optionally perform a set of coil folds. Cover and let the dough finish bulk fermentation undisturbed.
- Finish bulk fermentation: Bulk fermentation began when you first mixed the dough. For me, it took 9 hours in a 74°F (23°C) kitchen. Recipe testers reported a similar range: about 8–9 hours at 74–76°F (23–24°C), 9–10 hours in cooler kitchens around 68–73°F (20–23°C), and 7–8 hours at 77–80°F (25–27°C). Timing varies, so trust the visual cues over the clock.
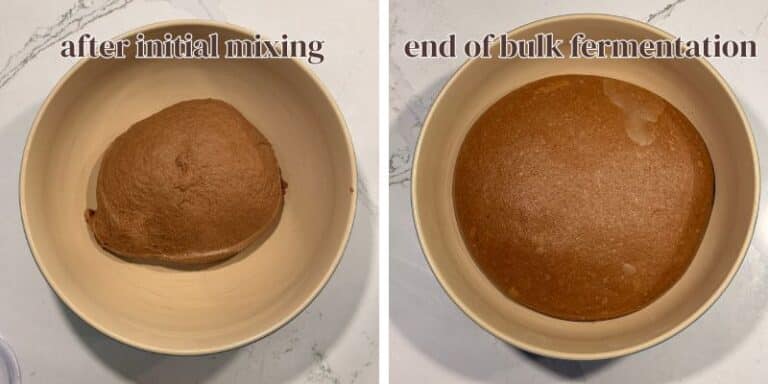
- Know when it’s ready: Bulk fermentation is done when the dough has increased in volume by about 75% and is covered in bubbles. If you press a finger into the surface, it should feel aerated and springy. Watch the video below to see what my dough looked like at the end of bulk fermentation.
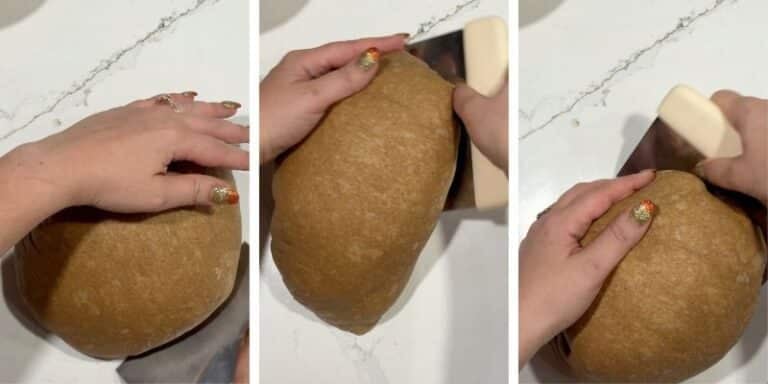
- Pre-shaping: If your dough feels tacky, lightly flour your work surface. Turn out your dough and flip it so the smoothest side is facing up. Use your bench scraper to push the mass of dough up, around, and back toward you (like a candy cane motion). Continue doing this motion gently until you've coaxed the mass of dough into a round. Let rest 10 minutes, uncovered.
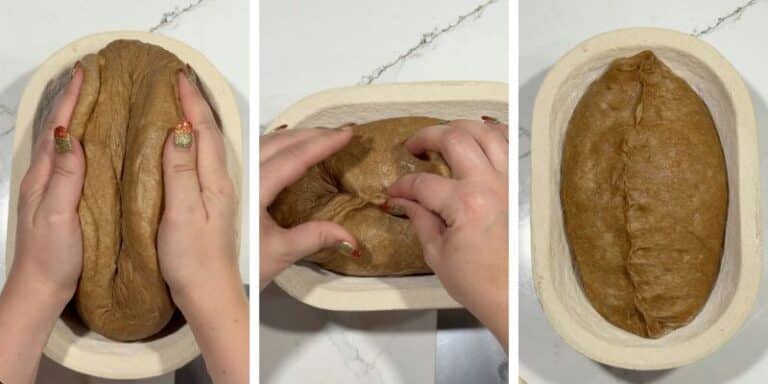
- Final shaping:For a boule (round): Repeat the pre-shaping motion to create more surface tension, then flip the dough into a floured banneton, smooth side down. Pinch the seams. Cover and refrigerate overnight, 12–36 hours.For a batard (oval): Use the caddy clasp technique — fold the dough together like closing a book and place it into a floured banneton. Pinch the center seam closed. Cover and refrigerate overnight, 8–36 hours.Optional: If you feel like the dough needs a little more rise before going in the fridge, let it rest on the counter for 30–60 minutes first.
- Preheat: When you're ready to bake, preheat the oven to 425°F (220°C) conventional with a Dutch oven inside.
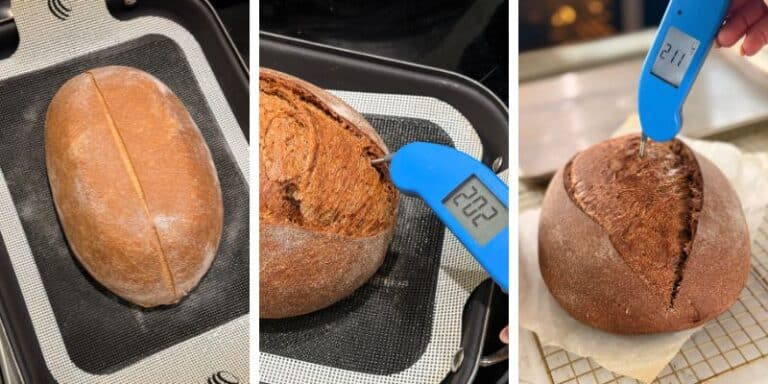
- Score: Transfer dough to parchment paper or a bread sling; score a shallow line straight down the middle.
- Bake: Place a sheet tray underneath the Dutch oven to prevent a burnt bottom. Bake for 40 minutes, covered. Remove the lid. If the internal temperature is below 190°F (88°C), re-cover and give it 5 more minutes. Otherwise bake 3–8 minutes uncovered, until the crust is set and the center reaches 200–210°F (93–99°C).
- Cool: Cool on a wire rack for at least 90 minutes before slicing.
- Storage: Store in a bread bag or airtight container at room temperature for up to 3 days. For longer storage, slice and freeze in a zip-top bag for up to 3 months. Toast straight from frozen.
Video
Notes
Loaf pan option: Shape and place the dough seam-side down in a 1 lb loaf pan (no banneton needed). If your pan isn't nonstick, consider lining it with parchment first. Bake with a second loaf pan inverted on top. Most testers needed 5–15 extra minutes covered — check the internal temperature before removing the top pan and keep it covered until it reads at least 190°F (88°C).
Nutrition facts are based on 12 slices in one loaf.
Nutrition Facts
Sourdough Brown Bread
Serving Size
1 slice
Amount per Serving
Calories
219
% Daily Value*
Fat
4
g
6
%
Saturated Fat
1
g
6
%
Polyunsaturated Fat
1
g
Monounsaturated Fat
2
g
Sodium
327
mg
14
%
Potassium
193
mg
6
%
Carbohydrates
42
g
14
%
Fiber
3
g
13
%
Sugar
7
g
8
%
Protein
6
g
12
%
Vitamin A
2
IU
0
%
Calcium
25
mg
3
%
Iron
1
mg
6
%
* Percent Daily Values are based on a 2000 calorie diet.
