
Budget Sourdough: 20+ Tool Swaps for Amazing Bread

Sourdough gear is fun. But when you’re just getting started, most of it is totally optional.
Don’t let fancy equipment hold you back from making amazing bread.
In this article, you’ll discover:
- The top community-voted alternatives to expensive Dutch ovens, bannetons, and more
- Clever DIY solutions for proofing, scoring, and storing your bread
- My personal experiment baking bread with absolutely no specialized tools
- The one tool that’s actually worth investing in (and why)
- Budget-friendly tips to stretch your sourdough dollars
Let’s get into it!
Most Popular Tool Swaps (Community Favorites)
The sourdough community really showed up when I asked for budget swaps and alternatives!
I have a lovely list of ideas up next, but I also filmed a short video showing some of my own favorite swaps:

Alright, let’s get into the great budget alternatives!
1. Dutch Oven Alternatives
- Black & white speckled roasting pans (like this one that’s less than $30)
- Two loaf pans (one as a lid)

Note: my friend Joselyn from A Friend In Knead recently posted a side-by-side experiment of baking with one loaf pan vs two. She found she actually preferred just one loaf pan! Check it out and consider testing out both methods.
- Oven-safe stockpot
- Loaf pan with foil tent
Make sure whatever you use is oven-safe (doesn’t have any plastic parts) and has a lid to trap the steam.
Related: How to Prevent Burnt Bottoms on Sourdough Bread (10 Simple Fixes)
2. Banneton Substitutes

- Glass bowls lined with kitchen towels
- Cereal bowls with cotton cloth
- Tupperware bowls with flour-dusted towels
- Dollar store plastic webbed hot dog baskets lined with a flour sack towel
- Colanders with tea towels
Note: A towel-lined bowl essentially does the same thing as a banneton: the bowl supports the shape, and the floured towel helps soak up a bit of surface moisture (and prevents sticking).
3. Dough Covering Options
- Shower caps (reusable, 100 for $1.25 at Dollar Tree)
- Dinner plates on top of glass bowls
- Tea towels
More Great Community Swaps
4. Starter Container Ideas

- Mason jars (wide mouth)
- Pickle jars and sauerkraut jars
- Talenti ice cream containers
- Restaurant soup containers (the deli containers)
5. Scoring Tools
- Box cutters
- Single-edge razor blades (100-pack)
- X-acto knife
- Scissors
- Serrated knife

6. Starter Mixing Tools

- Chopsticks (community favorite!)
- Fork
- Wooden spoon
- Butter knife
- Teaspoon
Clever DIY Solutions
7. DIY Proofing Environments
- Styrofoam cooler with temperature-controllable seed mat
- Microwave as proofing drawer
- Electric throw blanket
- Over-the-range microwave with stove light on low
- Seed warming mat (usually less than $10)
Tip: Before buying a proofing box, I used my oven! I put a cup of boiling water inside and refreshed it every so often, as needed. Many find their oven light alone provides enough heat, but mine didn’t.
8. Storage Solutions

- Cake stand with lid instead of bread bags (this is my new favorite way to store bread!)
- Dinner plate on top of glass bowls
- Rolling trolley for equipment storage (for small kitchens)
9. Other Smart Substitutions
- Grill gloves instead of oven mitts
- Silicone spatula instead of dough scraper
- Bundt pans for special shapes
- Wet hands instead of water mister
My “No-Gear” Loaf Experiment
To really test the limits of budget sourdough baking, I decided to make bread with absolutely zero specialized equipment.
Here’s how it went in a nutshell:

I asked ChatGPT to convert my usual sourdough bread recipe from grams to cups. Here’s what it came up with:
- 4 cups bread flour
- 1 ⅓ cups water
- 1/2 cup starter
- 2 tsp salt
Let’s just say… it came up short. 1 ⅓ cups was definitely not enough water. I added a few more splashes, but even then, the dough felt dry and stiff the whole way through.
But I was committed to the no-tools sourdough challenge… even though I admit I pulled out my scale at one point to check if the water measurements were accurate.
Here’s what I used instead of fancy tools:
- Bread bags = cake stand
- Scale = measuring cups
- Danish dough whisk = fork
- Water mister = my hands
- Bench scraper = my hands
- Banneton = bowl lined with a kitchen towel
- Bread sling = parchment paper
- Bread lame = serrated knife
- Dutch oven = oven-safe stockpot
And here’s how I made the loaf:
- I mixed everything together with a fork in a glass bowl. Right away, I could tell it needed more water, so I added three unmeasured splashes and called it good.
- I covered the bowl with plastic wrap and let it rest for 30–60 minutes before doing my first set of stretch and folds. The dough was so stiff that it was hard to get the full rotation of stretch and folds in.
- I did a total of 4 sets of stretch and folds, 30 minutes apart, then let it rest for the remainder of bulk fermentation.
- The bulk fermentation took about 11 hours at 75°F (24°C)—much longer than normal due to the lower hydration.
- For shaping, I flicked water on my counter and used my hands to pull the dough into a ball, then did a double caddy clasp after resting.
- I lined a glass bowl with a kitchen towel, lightly floured it, and refrigerated the dough overnight.
- Next day, I baked in my preheated stockpot with two ice cubes for steam: 30 minutes covered, 15 minutes uncovered, and a final 5-10 minutes directly on the rack for extra browning.
The result? A good-looking loaf with solid flavor. The crumb wasn’t as open as usual, but it had great oven spring.

Overall, it was good sandwich bread—proving you don’t need fancy tools to make decent sourdough.
One Tool Worth Buying
Let me just say this loud and clear: I missed my scale.

Measuring cups are fine in a pinch, and some people only ever use them.
But for me, weighing the ingredients takes out the guesswork. It makes baking predictable. Plus, fewer dishes to wash!
If you’re going to invest in one tool, make it a scale.
You can get one, like this Amazon brand one, for around $10.
If you can’t afford it, please email me, and I’ll send you one (I beg you not to abuse this offer if you can afford it, but I do want to make this tool accessible to everyone).
Even More Ways to Stretch Your Sourdough Budget
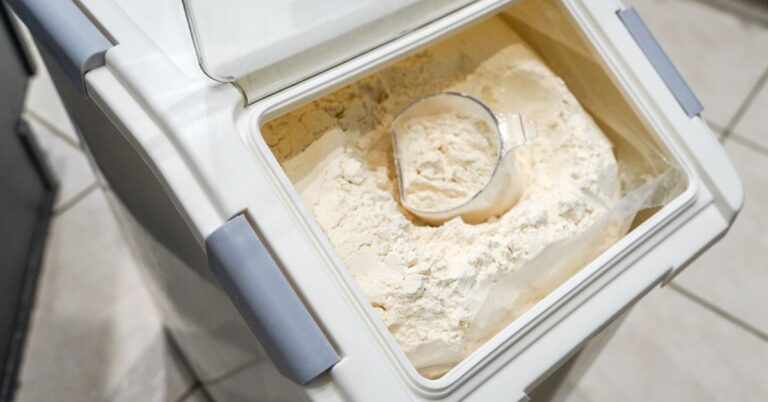
- Buy flour in bulk – It’s cheaper per pound and great if you bake often.
- Don’t waste discard – Use your discard in waffles, crackers, tortillas, and more.
- Thrift stores and flea markets – Great places to find baking supplies at a fraction of the cost.
Related: What’s hiding in thrift stores? Sourdough bakers are finding gold
Conclusion
You can make amazing bread with what you already have. Fancy tools can make things easier and maybe even prettier, but they’re not required to make sourdough bread.
If you’re on a budget or just getting started and don’t want to go all-in on pricey gear, don’t let a lack of equipment hold you back.
The bread doesn’t care what tools you use!


Outstanding! I am still a struggling newbie and this article spells things out so nicely. Love your new site too.
So glad! And awesome, thank you!
The only fancy equipment I had when I received my starter was the mason jar it came in and a scale! I used many of the listed alternatives but I baked my bread in an old round covered Pyrex casserole dish! No preheating either because I didn’t think the Pyrex would survive but my bread turned out great anyway!
I bought the Weck jars and now actually prefer the deli containers. I was spending a lot of time cleaning those jars, ugh. The deli containers are so much easier to clean and you get easy dehydrated starter! It just flakes off. I’m not freaking out about the plastic.
Hello,
I just found you through the homegrown living Summit. Thank you so much for sharing your vast experience. I started baking with only fresh milled flour last November and I’ve been thinking about making my own sourdough starter with it. Do you have any experience with fresh milled flour ?
Hey! So glad you are here! I do not have experience with fresh milled flour, unfortunately!
I’ve been baking sourdough for just over a year. I bought the bannetons, the Danish dough whisk, the cast iron dutch oven,etc.
I’ve finally just started doing a less stressful way of baking.
I mix my dough. Let it sit for an hour in the bowl. Do a couple of stretch and folds. Let it bulk ferment on the counter for 3 to 6 hours. Roll it into a ball in my hands while stretching under. (I don’t flour the counter and shape the boule) then I lay it in a parchment lined loaf pan with seam down. Let it continue to rise and ferment on the counter until I’m ready to bake. Usually 2 to 4 hours.
I put the loaf pan, uncovered, into a cold oven with a small pan of water. I put a cookie sheet upside down on the bottom rack.
I turn on the oven to 390. After the first 10 minutes, when the top has a faint dry film on it, I score the loaf. It’s fun to watch it poof out.
Put it back in the oven for about 40 minutes, or until internal temperature is 200 and the crust is the color I want.
It’s been so easy to do a regular loaf this way.
I saw on an instagram video recently where you recommended a specific bread knife. Now I can’t find that. Would you share that info here?
Sorry, never mind. I found it on your Amazon links here on your website. Thanks!
I just want to thank u for being u!
So real and honest and refreshing!
I’m 72 and been making sourdough for a year and a half! Not too long but I think I’m doing ok😊
Love your ideas w the tool swaps!
Enjoy today!!
Thanks for all the great ideas! I tried using my glass cake dome stand to store bread and maybe it’s the moisture in the bread but the bread got moldy after a couple of days and the glass fogged up a little. Any suggestions on this?
Yes make sure your bread is fully cooled before putting it in there!
I have a dutch oven but my favorite item to bake my bread in these days is a 13-in old fashioned roaster pan with a old pizza stone on the rack underneath to prevent the bottom from over browning. I bought mine second hand from someone local but Amazon sells them for relatively cheap. I toss it in a cold oven at 450 for an hour. No preheating, no taking the lid off. Super easy and I get great results
Awesome, I love that idea!!
I use a hotel key card as a bowl scraper.
Haha great idea!
About 70% of my kitchenware is thrifted. I started using a thrifted turkey roaster pan instead of my Dutch ovens months ago, so much easier to deal with. I also got a beautiful domed glass cake holder at the thrift store, but haven’t used it much yet as I usually slice/freeze my bread. How well does it keep bread fresh? Thank you for all of your videos and recipes!!
I love storing bread in my glass cake stand!! Some people say putting a stick of celery in there also helps extend the freshness.
What dough thermometer do you use? (Christmas gift from me to me!) Really do need a more reliable one! Thank you for all your hard work and hv a blessed Christmas!
Here’s the link to my favorite one: https://thermoworks.sjv.io/yq5xJ3. And this is the budget-friendly option I recommend: https://shop.thatsourdoughgal.com/amzn/atogou-thermometer
I love using my rice paddle (that comes with rice cookers) to mix my dough. I use a no knead method, with a few stretch and folds, so it woks well and it’s easy to scrape the dough off the paddle.
To mix the starter, I use the handle of a large spoon. After I spoon out the flour, I use the handle to stir.
Love that idea, thanks for sharing!
Please give me a recommendation for an inexpensive proofing box (less than $100). I’d like to be able to fold it up to put away. My house is too cool. I can’t afford $300 for a proofing box. Thanks for your thoughts.
I’ve been loving this budget-friendly option from Amazon! (affiliate link) https://shop.thatsourdoughgal.com/amzn/giyudot-proofing-box
Hi, I started using the single pan method too for my sandwich bread without any issues. I made your jalapeno cheddar bread which was delicious! I found my Dutch oven was getting to be too heavy for me and was wondering if the speckled roasting pan would work. Do you recommend buying the 15 inch?
I am not sure, I know a lot of bakers use that but I don’t have one to get any kind of measurement for you
I was determined to start with what I already had and spend as little as possible. I use 2 wide mouth pint mason jars for my starter (I put in a fresh, clean one daily). I already had a cast iron dutch oven that had belonged to my Mom. I already had old loaf pans. I have stainless steel bowls. I bought organic, unbleached flour and the Tovola spatula as a little treat to myself once my starter got going. The only things I have added are a cast iron loaf pan set (I just prefer cast iron, my old aluminum ones now serve as tops to the pretty set I got to make two at a time. I did buy some precut parchment sheets and loaf pan liners for ease. An inexpensive silicone bowl scraper. Bought a bread bag, but I like the cake plate idea better, the bread gets forgotten about in the bag. No bannetons, no dough whisk, plates over the bowls instead of plastic. My loaves come out great!
I love that!! You don’t always need all the fancy tools and equipment!
I love my Amazon scale. It’s more reliable than the Brod and Taylor scale. B&T fluctuates between numbers a lot and all of a sudden theres 25 g if salt when ya only need 10🫠
Love that, thanks for sharing!!