
Easy Overnight Sourdough Bagel Recipe
I was initially very intimidated by the idea of making any kind of homemade bagel, let alone a sourdough bagel. Then I actually tried it… and realized I’d been afraid of nothing!! Bagels are one of the most forgiving, beginner-friendly sourdough recipes out there.
The dough comes together before bed, you shape the bagels in the morning, and you’ll have golden, chewy perfection around lunchtime.
Plus, thanks to a secret ingredient, these bagels stay squishy for days instead of turning into hockey pucks overnight.
I typically make a batch of bagels several times per month, and my kids fight over who gets the first warm one out of the oven. If you’ve been putting off making sourdough bagels because they seem hard, I sincerely believe this recipe will change your mind.
Disclaimer: Some of the products I recommend in this post are affiliate links – if you choose to purchase after clicking one of my links, I may earn a small commission, which helps fund this website, recipe development, and monthly giveaways. I sincerely appreciate your support.
Why You’ll Love These Easy Overnight Sourdough Bagels
- New and improved recipe: My tried-and-true sourdough bagel recipe got a facelift! I made 3 main revisions:
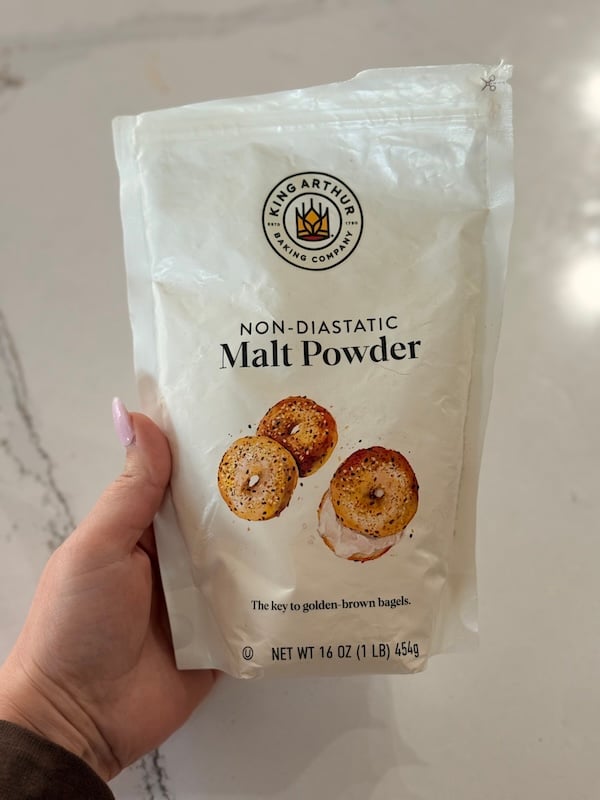
- 1) Added non-diastatic malt powder to delay staling (it has other perks, too!)
- 2) Scaled the recipe up to make 12 full-sized bagels
- 3) Decreased the starter percentage to help prevent overproofing during our long overnight fermentation
- Super easy (and flexible) timeline: Mix the dough before bed, and let it rise while you sleep. In the morning, shape the bagels. You can let them do their second proof and bake around lunchtime. Or, you can put the shaped bagels in the fridge while you’re at work. When you get home, put them in a proofing box or other warm spot, let them finish their second rise, and boil and bake before bedtime.
- Stays squishy for days: Thanks to the non-diastatic malt powder, these bagels resist staling. No more rock-hard bagels on day 2! And don’t worry – that ingredient is optional, so if you leave it out, the bagels are still delish – they just stale a lot faster. Easily remedied by toasting or re-heating.
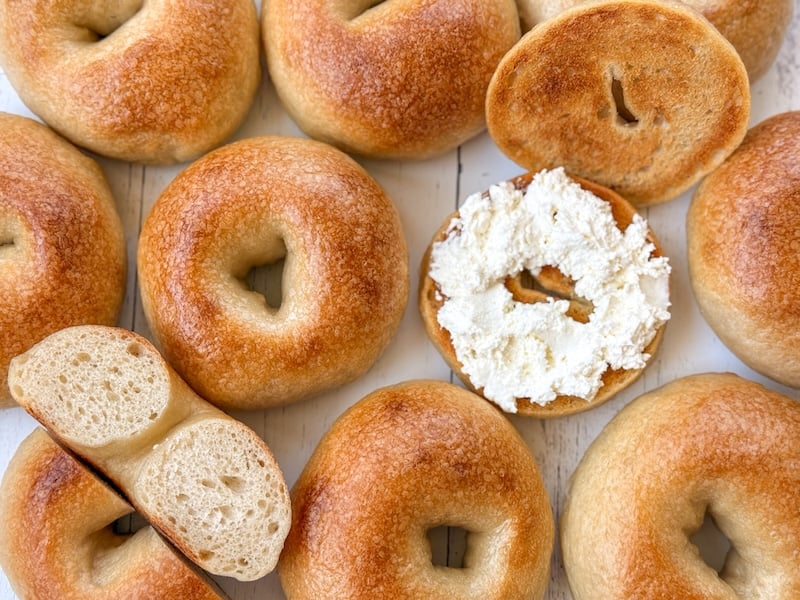
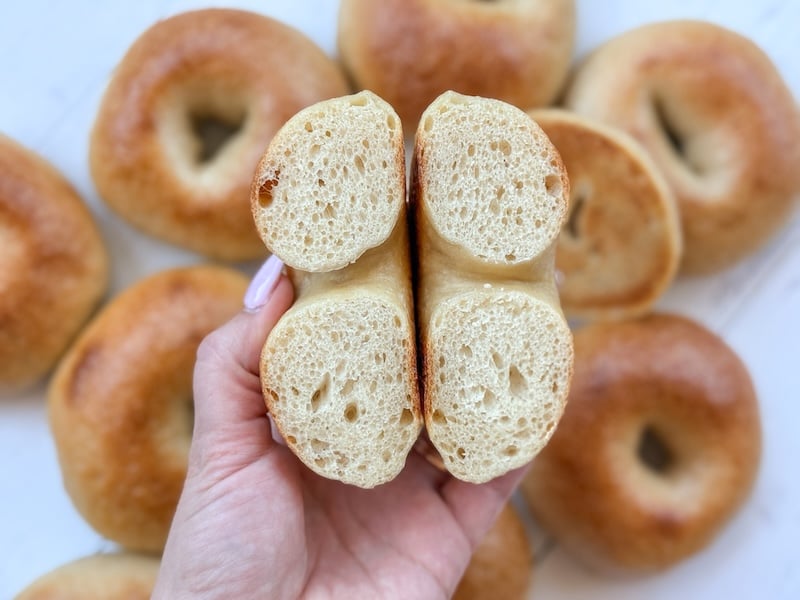
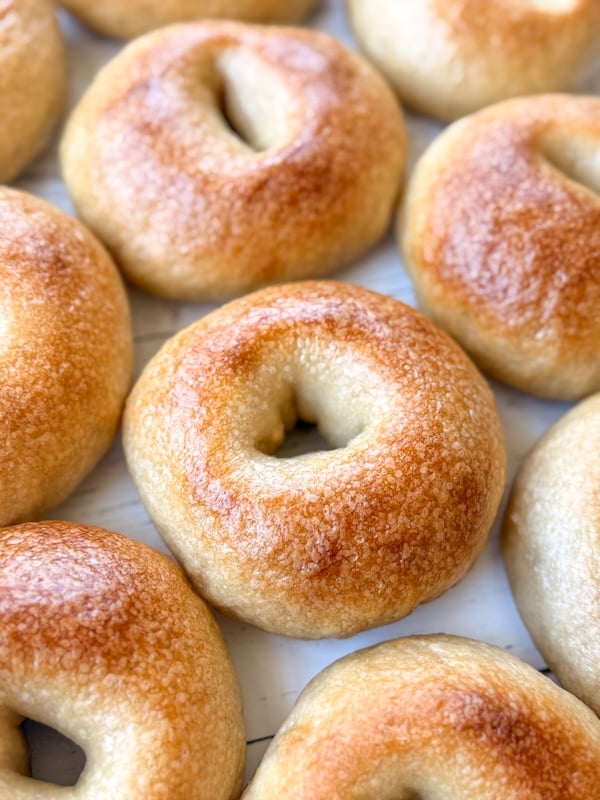
- Chewy interior: The inside of these bagels is perfectly chewy, just like a New York-style bagel should be. When they’re fresh out of the oven, the exterior is crisp – nothing beats a fresh-out-of-the-oven bagel!!
- Customizable: This bagel recipe can be topped with anything you like – asiago cheese, everything bagel seasoning, cheddar & jalapeno, cinnamon crunch topping… the options are endless.
- Freezer-friendly: Fresh bagels are the best, but you can freeze extras for quick breakfasts all week long. I toast mine straight from frozen.
- New Yorker-approved: perhaps most importantly, we had a friend who used to live in New York try these, and he said they’re some of the best bagels he’s had.
Baker’s Timeline for Sourdough Bagels
Here’s a sample timeline to help you plan out your bake:
| Day 1 | 8:00 AM (or when you wake up) | Feed your starter at a 1:5:5 ratio. It should be ready to use in 10-12 hours, or right before bedtime. |
| 8:00 PM (or before bed) | Mix the dough. (This starts the bulk fermentation.) | |
| Day 2 | 7:00 AM | Shape your bagels. |
| 12:00 PM | Boil, bake, and enjoy your bagels! |
Here’s an alternate option if you work a typical 9 to 5:
| Day 1 | 8:00 AM (or when you wake up) | Feed your starter at a 1:5:5 ratio. It should be ready to use in 10-12 hours, or right before bedtime. |
| 8:00 PM (or before bed) | Mix the dough. (This starts the bulk fermentation.) | |
| Day 2 | 7:00 AM | Shape your bagels, let them sit out as long as you can in a warm spot before you leave home, and then pop in the fridge. |
| 5:30 PM | Put your bagels in a proofing box or other warm area (80-85°F/26-29°C) and continue rising until puffy and noticeably larger in size. | |
| 8:30 PM | Boil, bake, and enjoy your bagels! |
Ingredients in Overnight Sourdough Bagels
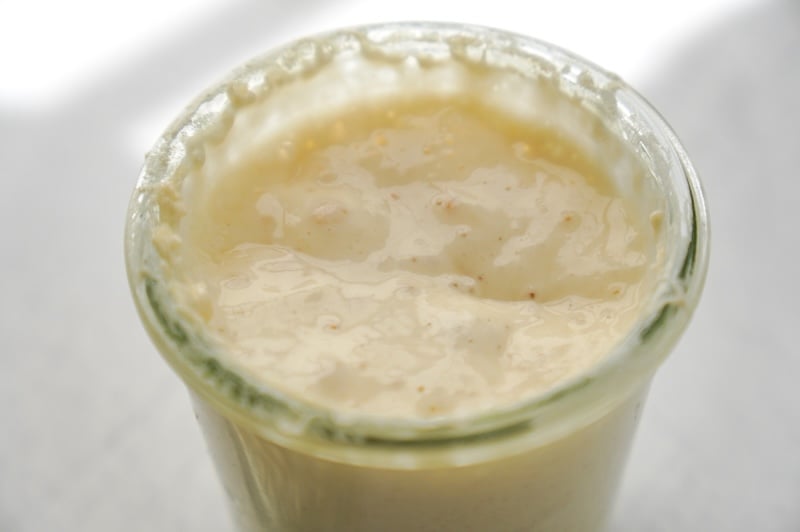
- Active sourdough starter: Your starter should be at its peak – ideally, it has tripled in size from when you fed it, it’s full of bubbles, the surface is flat (not domed) and potentially caving in slightly in the center. If you smell it, it should be yeasty, earthy, or maybe even a little sweet. If it smells sharp or acidic, I advise discarding and feeding your starter again before starting this recipe.
- Bread flour: Bread flour works best for bagels – its higher protein content gives them a nice chewiness. I often use King Arthur unbleached bread flour (12.7% protein), though I’m currently on a Central Milling High Mountain bread flour kick (13.5% protein).
- If you use a lower-protein flour, such as Costco’s all-purpose flour (11.5% protein), add 1 tbsp of vital wheat gluten to help it perform like a higher-protein flour. Otherwise, you’ll want to decrease the water in the dough slightly.
- Water: I typically use cold or room-temperature water. Because this is a long overnight fermentation, we don’t necessarily want to use warm water, which would speed things up.
- Sea salt: The salt adds flavor and strengthens the dough. Don’t forget it! I love Redmond’s Real Salt (15% off with code TSG15).
- Sugar: A little touch of sweetness to balance the sourdough flavor. You can sub for honey if you prefer. In fact, my original bagel recipe called for honey, but I’ve simply found sugar to be more cost-effective. If you sub for honey, no other changes to the dough are needed.
- Molasses: just a little to add to the boiling water – it enhances the flavor of the bagels and also assists slightly with browning.
Ingredient Substitutions
- Molasses (for the boiling water): you can substitute honey or brown sugar. All work wonderfully!
- Sugar (in the dough): you can substitute for honey – I haven’t personally tried it, but many have told me they sub for maple syrup with great results as well. No changes to the dough needed.
- Non-diastatic malt powder: If you only have diastatic malt powder (or non-diastatic is out of stock, which is the case at the time of this writing), toast it at 325°F (160°C) for 5 minutes first to deactivate the enzymes (otherwise it will speed up fermentation, which we don’t really want). You can also omit entirely – bagels will just stale faster.
- Bread flour: If you use a lower-protein flour, such as Costco’s all-purpose flour (11.5% protein), add 1 tbsp of vital wheat gluten to help it perform like a higher-protein flour. Otherwise, you’ll want to decrease the water in the dough slightly.
How to Make Overnight Sourdough Bagels (Step by Step)

Step 1: Feed your starter
Feed your starter a 1:5:5 feeding ratio in the morning when you wake up. It should peak in about 10-12 hours, which is perfect timing for mixing our dough before bed.
You’ll need 150g of active starter for this recipe, so I’d prepare around 165g to have a little leftover to feed again. At a 1:5:5 feeding ratio, this means you’ll mix together 15g starter, 75g water, and 75g flour.
If you need your starter to peak faster, you can adjust the feeding ratio.
Let’s say it’s 3 pm, and you realize you need to feed your starter to make bagels before bedtime. In that case, I’d use a lower feeding ratio, like 1:1:1. This means I’d mix together 55g starter, 55g water, and 55g flour. That should peak in 4-6 hours.
Again, that makes a little more starter than we need for the recipe, so that we have enough to feed again.
To learn more about feeding ratios, you can visit The Ultimate Guide to Sourdough Starter Feeding Ratios.
Step 2: Mix the dough
Quick mixing overview: I mix my dough for 5-7 minutes, then let it rest for 30-60 minutes. Then I’ll do one more quick knead to smooth it out further. You can skip the quick second kneading, but it does improve the final result.
Once your starter is ready, it’s time to mix our dough, which consists of water, active starter, sugar, bread flour, non-diastatic malt powder (if using), and sea salt.
Bagel dough is very stiff, so it’s a lot easier to use a stand mixer fitted with the dough hook. Don’t get me wrong – you can mix bagel dough by hand. But it’ll be a 10-15-minute arm workout, so prepare yourself.

If you use a stand mixer, knead the dough on low speed for about 5-7 minutes, or until the dough starts to smooth out and has a playdough-like texture.
If your mixer struggles, don’t push it – we don’t want to burn out your motor. Stop the machine and cover the bowl. Let it rest for 5-10 minutes; then, resume mixing.
Another option is to let the machine mix your ingredients together initially (1-2 minutes); then, bring out the dough and knead it by hand for a couple of minutes. When done with the initial mix, cover your dough for 30-60 minutes.
Adjusting the hydration as needed: If your dough texture seems too dry, add 1 tbsp of water at a time until it reaches that stiff Play-Doh texture. If it seems sticky or tacky, add 1 tbsp of flour at a time. These small adjustments are fairly common, as there are many variables in sourdough. The health of your starter, the exact flour you use, and even the humidity in your home can all affect it.
After the 30-60 minute rest, knead your dough for 1-2 minutes more. You can use your stand mixer for this, or you can knead by hand.
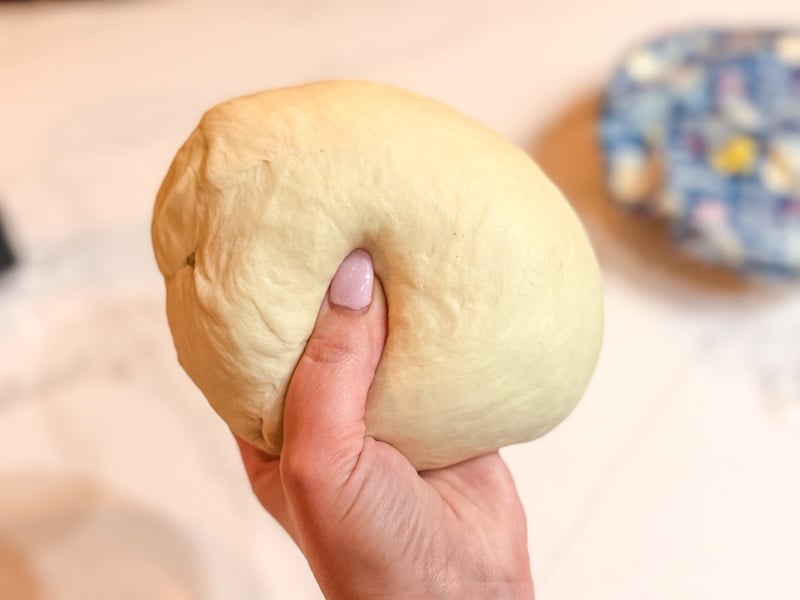
We just want to smooth the dough out a little more before covering it for the overnight bulk fermentation.
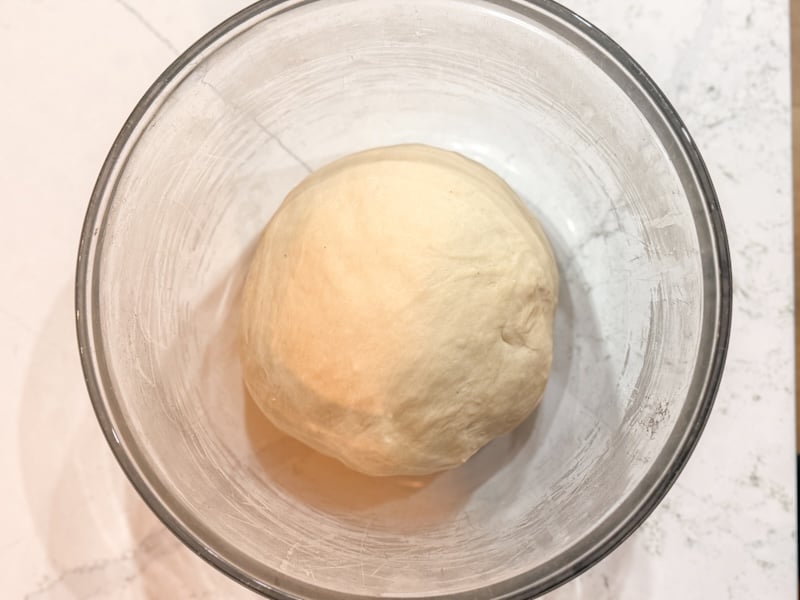
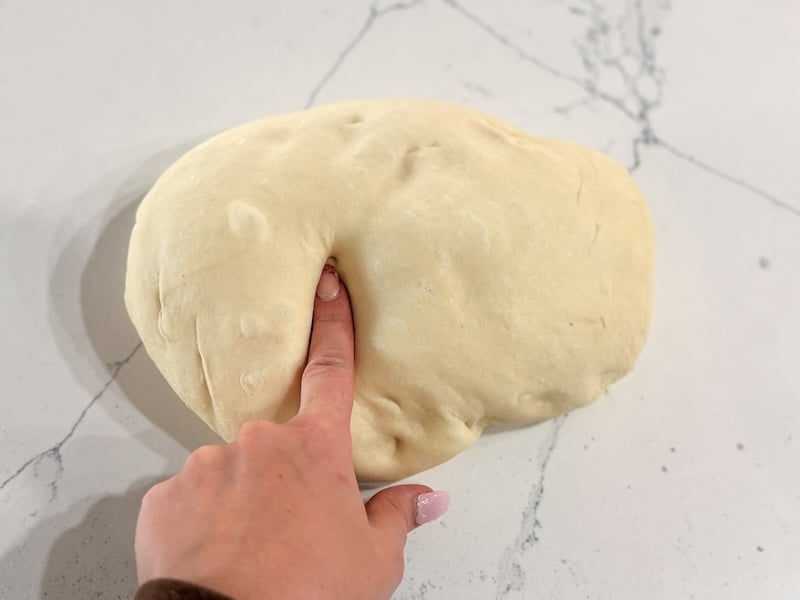
Step 3: Bulk fermentation
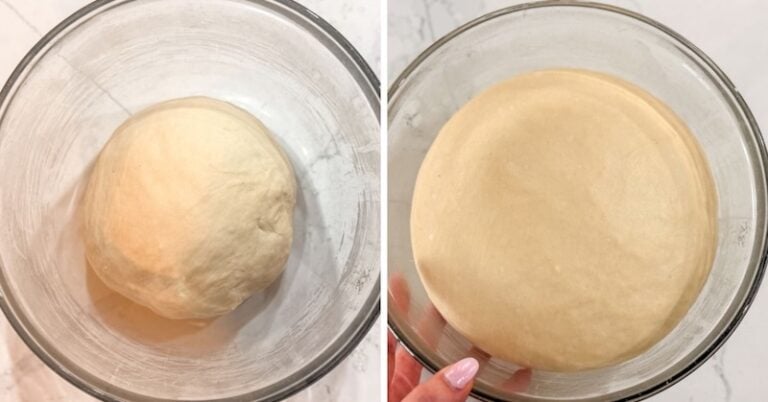
Cover your bowl and let it rise overnight, or about 10-12 hours. We’re looking for the dough to puff up nicely.
Note: If your home is warmer than 75°F (24°C), I probably wouldn’t do an overnight fermentation unless you can keep your dough slightly cooler (e.g., by placing ice packs under your bowl). In a warm home, I’d prefer to flip the timeline and mix my dough in the morning so I can better monitor the fermentation.
Visually, the dough looks about doubled in size, but I don’t fuss with exact measurements. This dough is very forgiving.
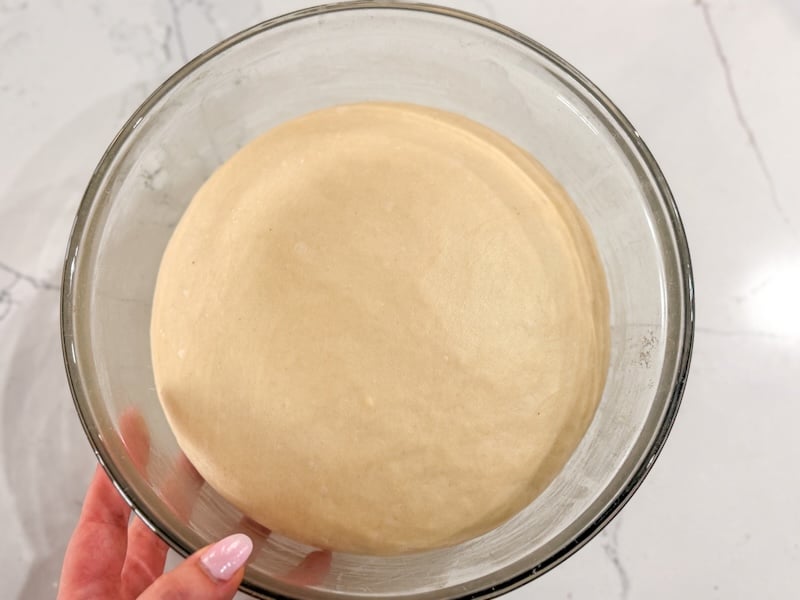
The more water you add to a dough, the faster it ferments, so this low-hydration dough isn’t likely to become a sticky, soupy mess by morning. If yours did, your environment is either too hot or your dough contains too much water.
Step 4: Shape the bagels
Dump out your dough – you can punch it down or give it a quick knead if you’d like – and divide into 12 equal-sized portions. They should be about 120g each.
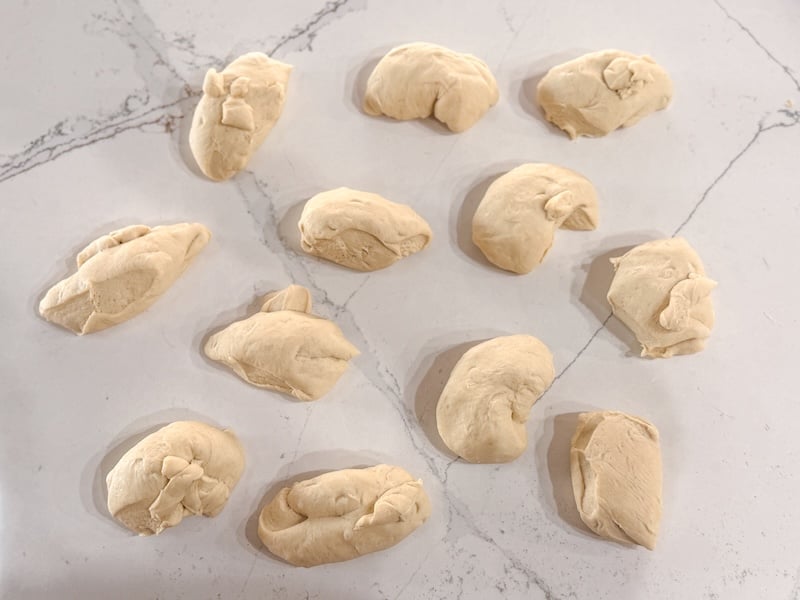
Quick hack: Place your bowl (with the dough still in it) on your scale. Zero it out. Dump out your dough and place your empty bowl back on the scale – the number you see is your total dough weight. Divide that by 12 to get 12 evenly sized bagels.
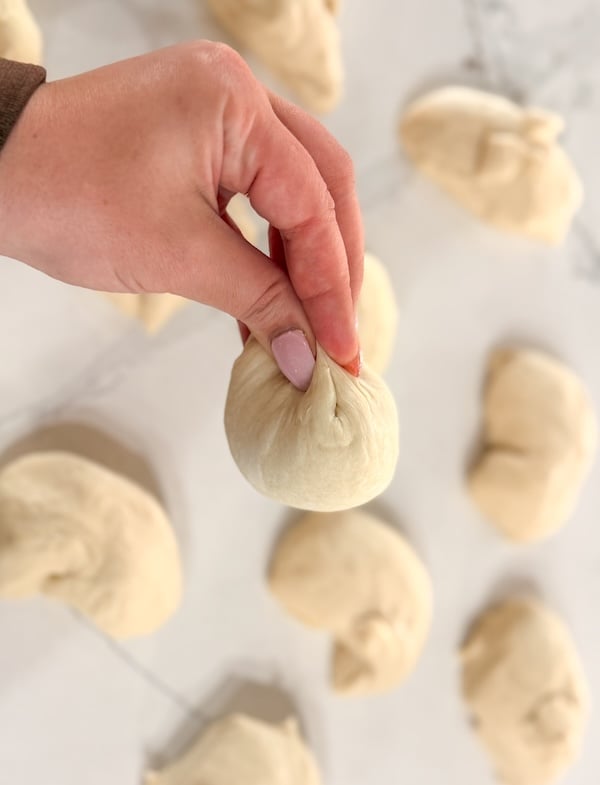
Now, we’re going to turn each portion of dough into a taut ball.
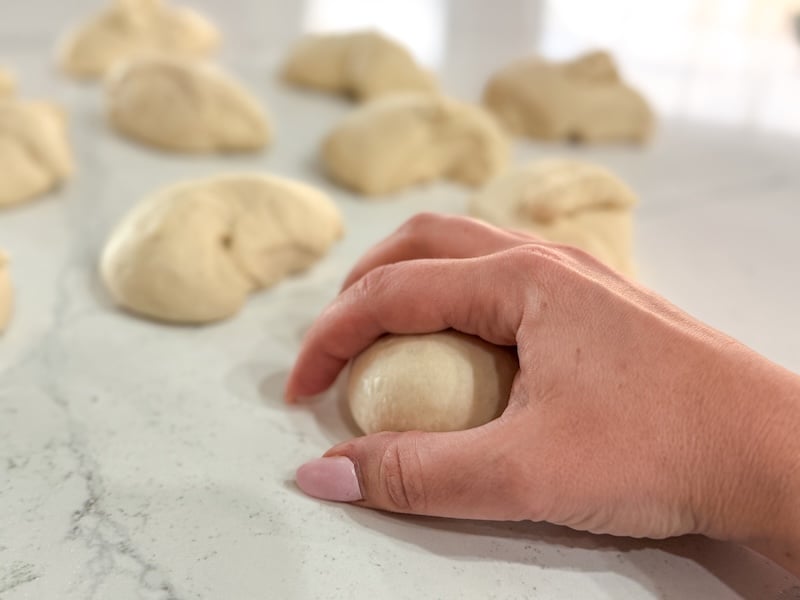
I like to fold the dough (like a book) several times. Then, I’ll pinch the dough seam on the bottom. Finally, I place the dough ball on my counter and cup my hand over it, gently rolling it around to smooth it out.
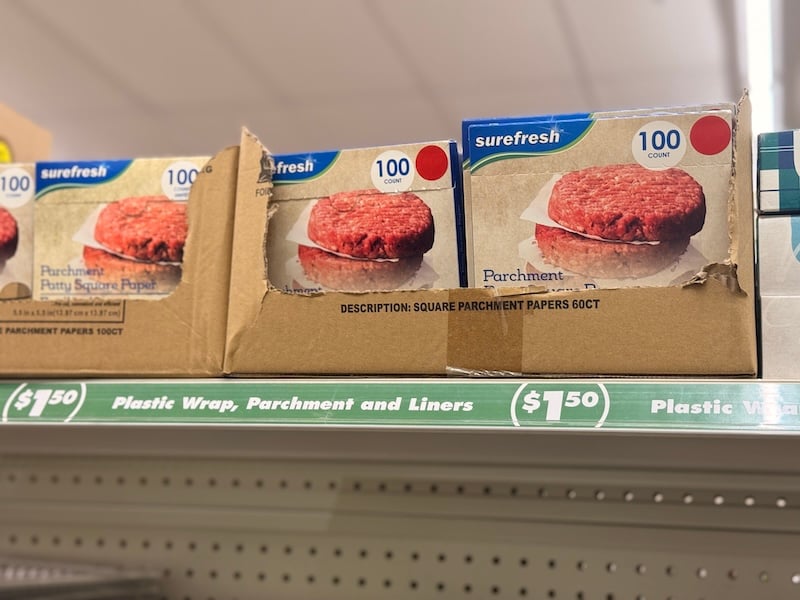
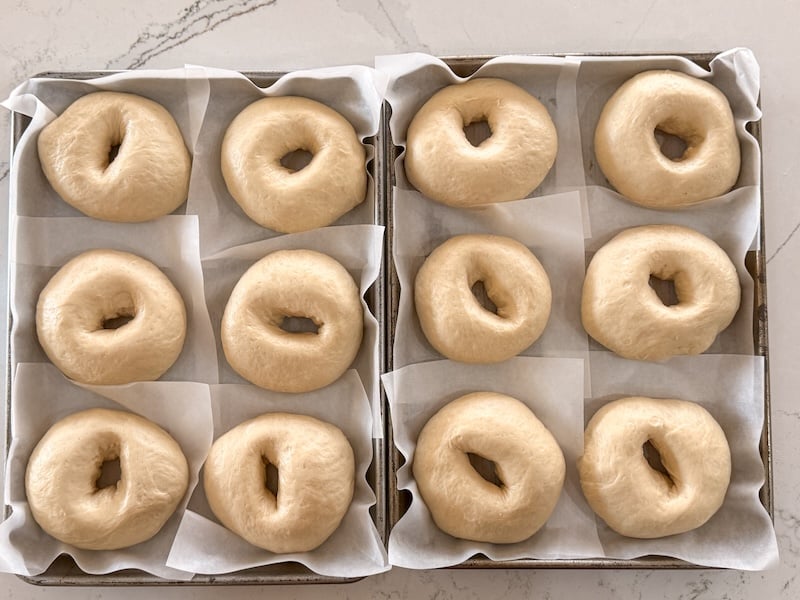
Place your dough balls on individual parchment squares.
Why I prefer individual parchment squares: When you lift the bagels to place them in the boiling water, they don’t warp or deflate (since you’re not touching the bagels). If you overproof your bagels, this is a godsend.
I buy mine at the Dollar Tree – they’re $1.50 for a pack of 100. Of course, you can also cut your own parchment squares or buy some on Amazon.
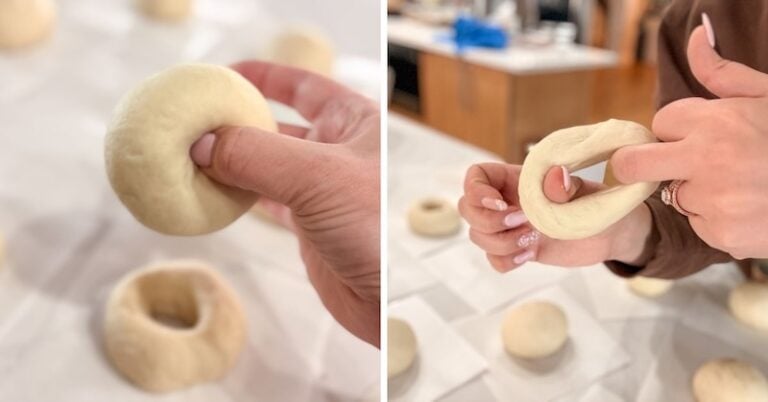
Go back to your first ball and poke a hole in the middle. Using your fingers, stretch out the center hole.
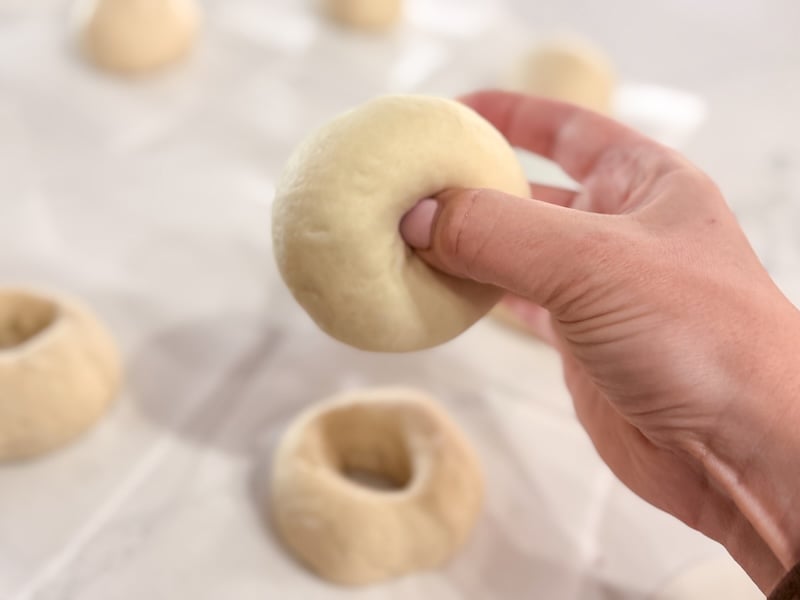
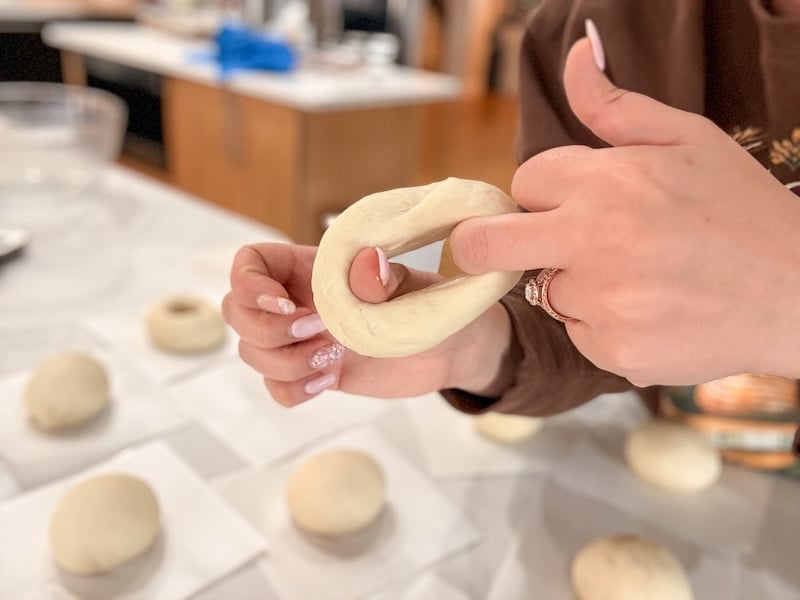
Make the hole a little larger than you want – it’ll shrink up a bit as the bagels puff up during their second proof.
If your hole keeps shrinking, the gluten is too tight and needs to relax. You can cover the dough balls for 20 minutes, then come back to stretch out the holes.

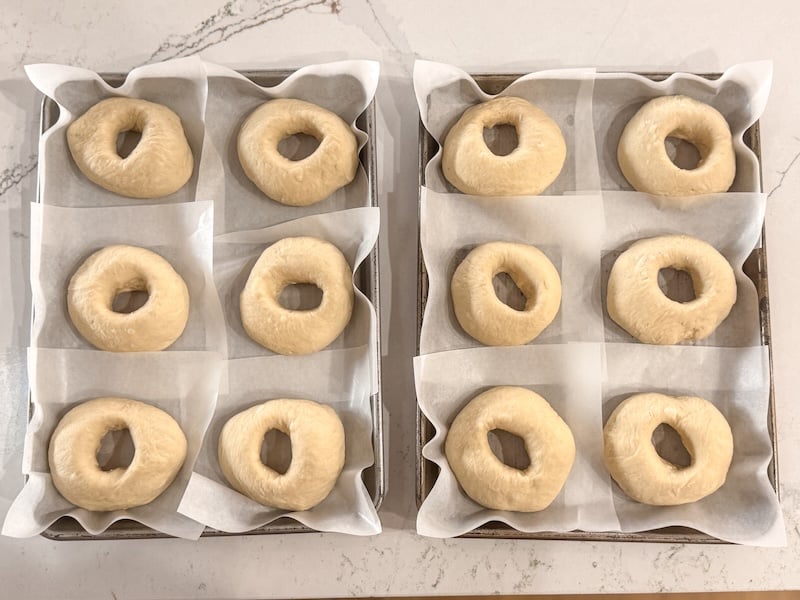
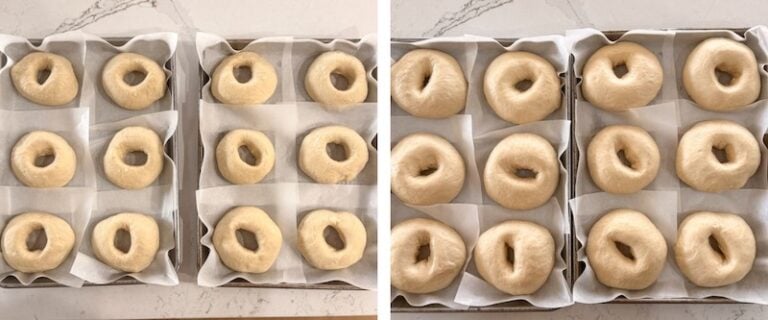
Step 5: Second proof
Now that you’ve got your shaped bagels on the baking sheet, let them sit on your counter to proof for about 5-6 hours. If you want to speed this up, put them in a proofing box set to around 80°F (26.6°C).
Note: Instead of doing the second proof right now, you could place your shaped bagels in the fridge. They can hold there for a few hours up to 2 or even 3 days. The key is doing the second proof after they come out of the fridge. We still need our bagels to puff up prior to boiling and baking. But feel free to use the fridge to “pause” the process.
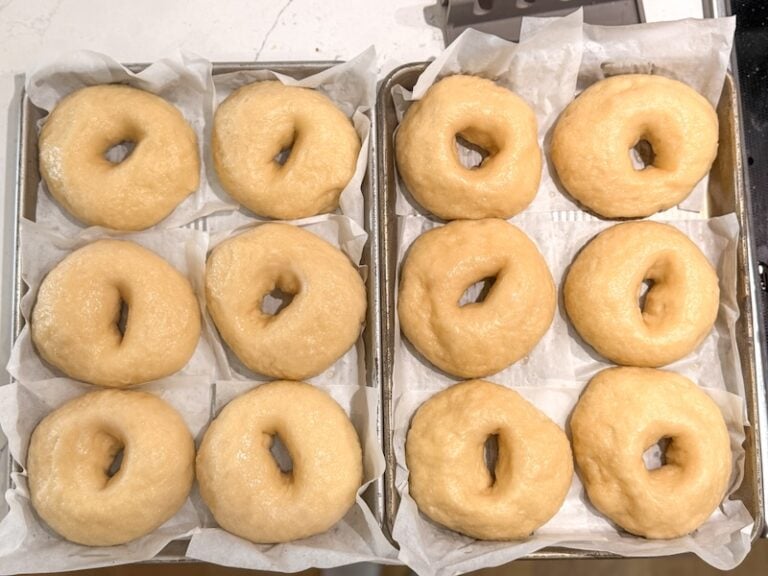
We want our bagels to puff up. They appear to increase in size by about 50% (feel free to challenge me on that), but again, I’m not fussing with specific measurements.
I’m simply looking for a puffed-up bagel. If you touch it, it should feel like it’s airy inside, not dense.
When we boil the bagels, they should float in the water. If you drop the first one in and it sinks, you know they haven’t proofed long enough. In that case, you’d stop the process and let your bagels continue to rise.
Step 6: Boil
Preheat your oven to 425°F (220°C) convection. If you don’t have convection, set it to 450°F (230°C) conventional.
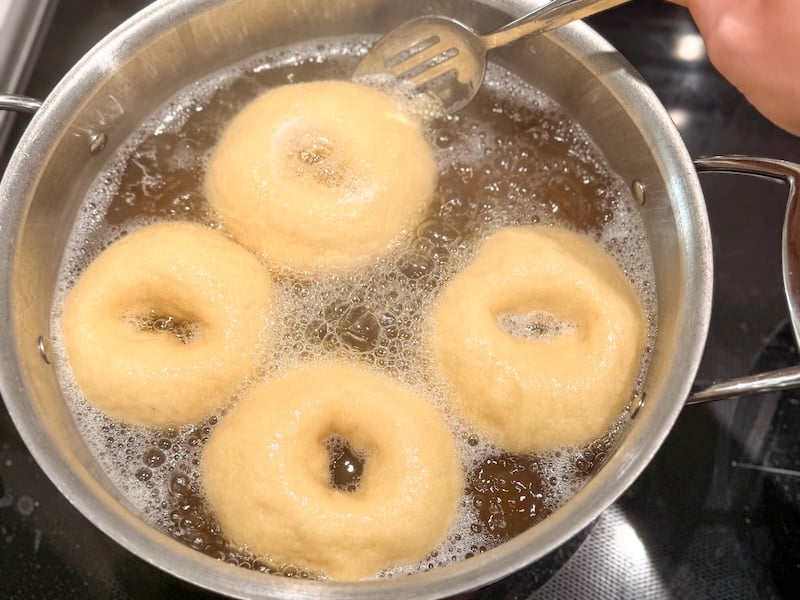
Bring a large pot of water (about 4 quarts) to a boil. Once boiling, add about 1 tbsp of molasses (you can sub honey or brown sugar, if preferred).
Note: I also used to add baking soda to the water, but I’ve found it’s no longer needed. You can see the comparison of bagels boiled with and without baking soda in this short video:

Drop 4 bagels (still on their parchment squares) into the boiling water at a time. The steam from the water will help release the parchment, which you can then peel off.
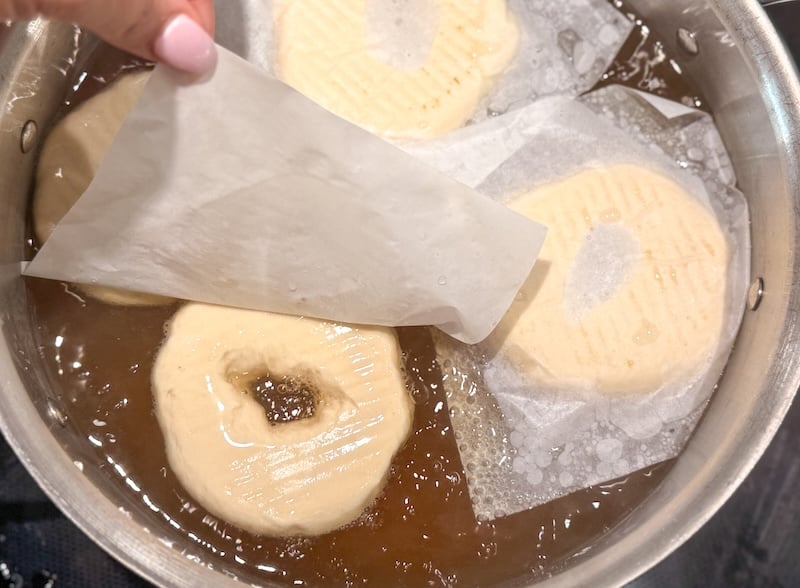
If needed, you can use tongs to remove the parchment.
Note: If your first bagel sinks to the bottom, stop what you’re doing! This indicates they haven’t proofed long enough, so let the bagels rise longer.
Let the bagels boil for about 1 minute on each side, using a slotted spoon to flip them. When done boiling on each side, gently place them back on the parchment squares.

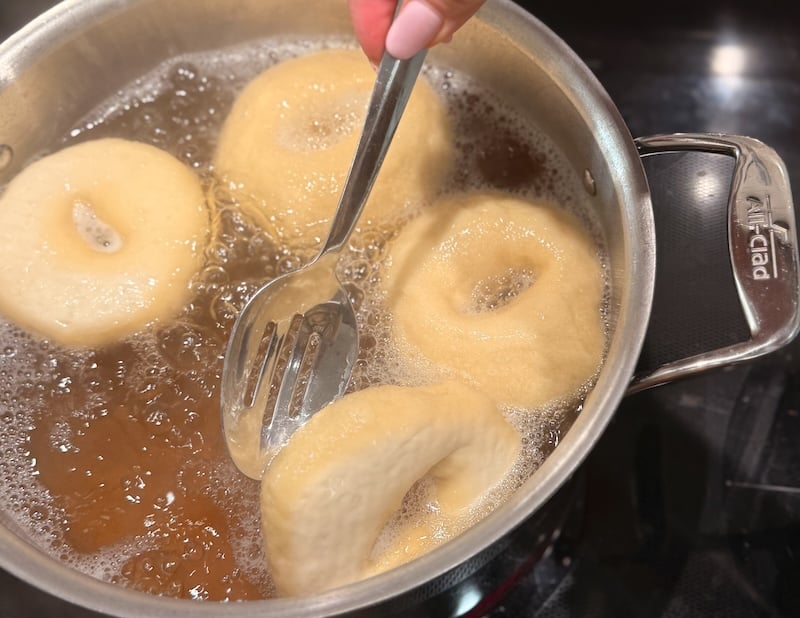

Once all are boiled, they are ready for the oven.
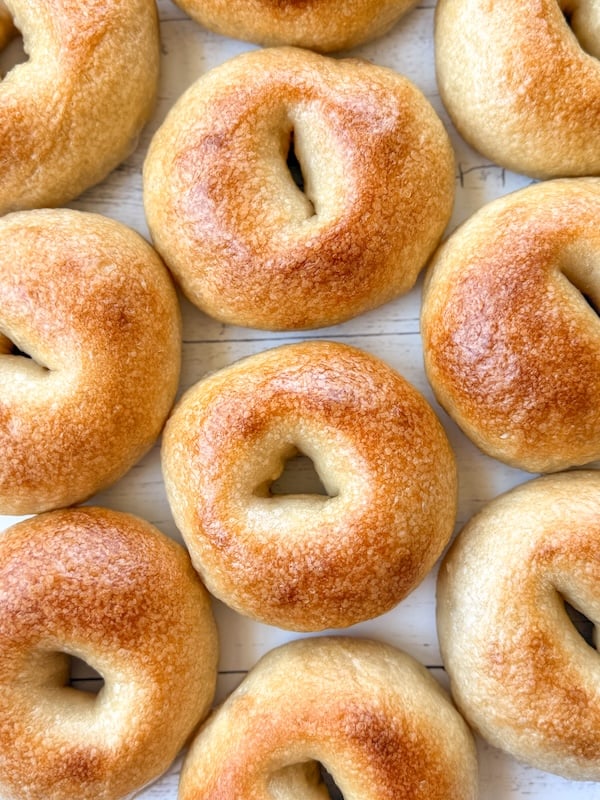
Step 7: Bake
Before baking, you can add toppings such as everything bagel seasoning or Asiago cheese.
Pop the bagels in the oven for 20-25 minutes, or until they are golden brown on top and have reached 205°F (96°C). Higher than that is fine, by the way – my bagels are often just over 210°F (99°C) at the end of baking.
Extra points if you remember to rotate your sheet tray halfway through the bake!
If you prefer darker bagels, bake them a little longer (and vice versa).
When finished, let the bagels cool on a wire rack. I love a warm bagel (about 30 minutes after they come out of the oven), but letting them fully cool is ideal (about 1-2 hours after they come out).
Bagel Storage Tips
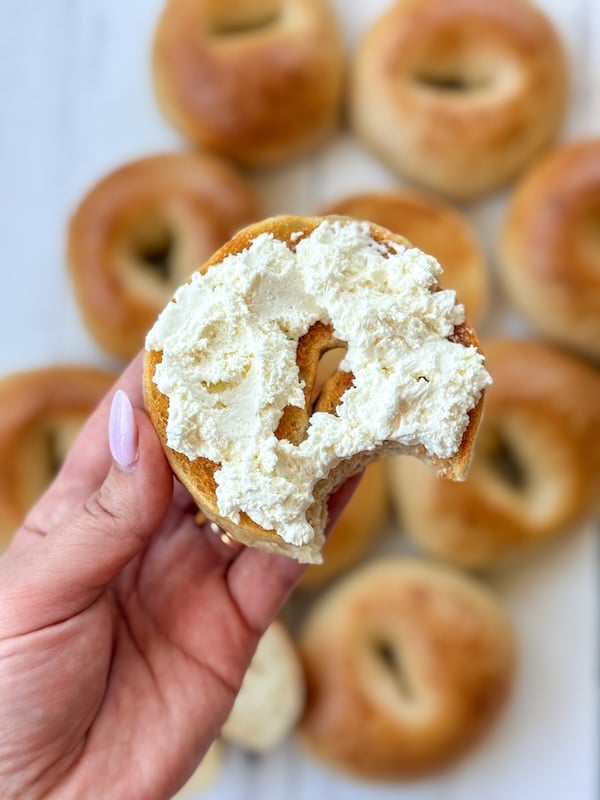
Nothing beats a freshly-baked bagel. They’re still crisp on the outside and warm and squishy in the center – heaven.
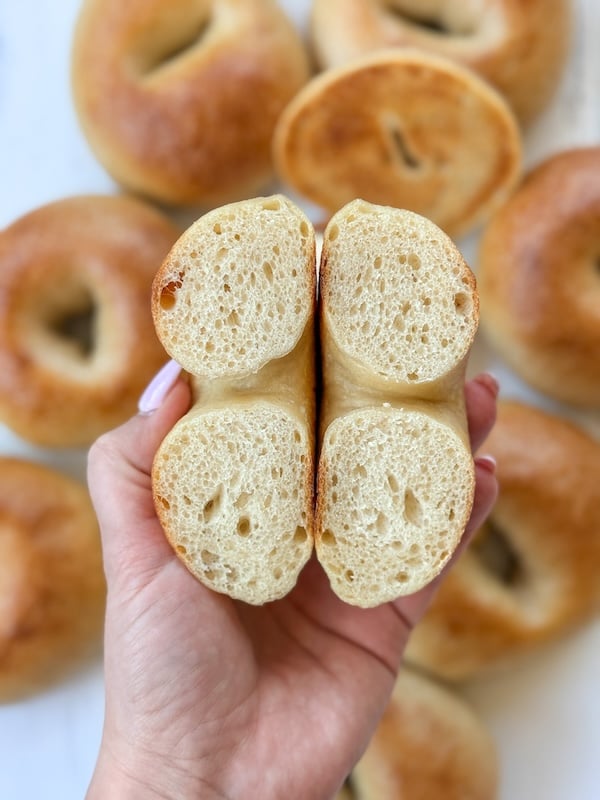
However, thanks to the non-diastatic malt powder, these bagels actually stay squishy for days – even up to 5 days in my experience. They are never quite as crisp on the outside after that first day, though. (A quick toast in the toaster fixes that!)
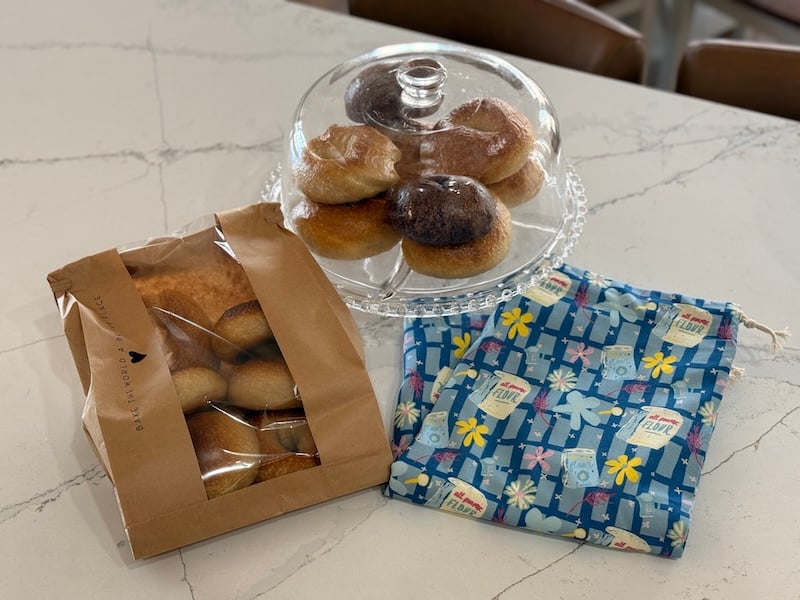
Let the bagels cool completely on a cooling rack, then store them in a bread bag, zip-top bag, or even a cake stand! (Do not store in the fridge, as that speeds up staling.)
These are my favorite bread bags (code THATSOURDOUGHGAL for 15% off), and these are my favorite paper bags (great for gifting).
For eating leftovers, I like to give them a 20-second warm-up in the microwave to soften them for my kids, or I’ll pop one in the toaster to get it nice and crunchy for myself.
Bagels freeze really well, too. Freeze them whole or sliced in a sealed freezer bag for up to 3 or 4 months.
Looking for another great, overnight breakfast recipe? Try The Best Sourdough Buttermilk Biscuit Recipe
Frequently Asked Questions
Yes, absolutely! If you don’t have your timing just right, no worries. You can pop the dough in the fridge at any point, and when you’re ready, bring it back to room temp and pick up where you left off.
Note: the bagels will be more sour if you do this, and the surface will be slightly crunchier. It will also have more blistering. I actually really enjoy those things!
The dough should feel like Play-Doh. If it feels too dry or the flour isn’t incorporating after about a minute of mixing, add additional water in 1 tbsp increments.
First, don’t panic! It’s totally normal for bagels to deflate slightly in spots after boiling, especially as they sit on the sheet tray waiting to be baked. They’ll puff right back up in the oven, and you’ll never know it happened.
However, if the deflating is severe and doesn’t fix itself during baking, you’re likely dealing with overproofed dough. This usually happens because your dough had too much water in it, which speeds up fermentation and throws off the timing. (A too-warm environment can also cause this, but excess water is the more common culprit.) The tell-tale sign? If your bagels feel sticky to the touch before boiling, that’s your clue. Next time, make sure your bagel dough is stiffer.
My favorite prevention method is using individual parchment squares under each bagel. This way, once they’re fully proofed, you don’t have to touch them at all – just pick up the parchment gently and drop the whole thing into the boiling water. The parchment will naturally release once the steam loosens it from the dough. This is especially helpful if you suspect overproofing, since handling delicate dough can cause it to deflate.
Yes, don’t skip this step! If you skip the boiling, you’ll end up with something more like a dinner roll than a bagel.
The molasses helps create that shiny, deep golden-brown crust. It also adds a hint of sweetness and complexity to the exterior flavor. But the bagels will still have great texture, chew, and taste without it. If you don’t like molasses, you can sub for honey or brown sugar instead!
These bagels definitely have a sour tang. If you don’t like that, you can add a little sugar (or honey) to your starter feeding. That will tone down the tanginess. The recipe currently advises you to feed your starter: 15g starter, 75g water, and 75g flour. To make it sweet, I’d feed: 15g starter, 20g sugar (or honey), 75g water, and 75g flour.
Another option is to flip the timeline and proof the bagels in a warm spot to speed things up. Make your dough in the morning, bulk ferment in a proofing box, shape, second proof in a proofing box, and boil and bake. A faster fermentation equals a less tangy flavor.
Other overnight sourdough recipes:
- Overnight Double Chocolate Sourdough Bagels
- Pillowy Soft Sourdough Hamburger Buns (with Tangzhong)
- Overnight Sourdough Hot Dog Buns (Super Soft & Easy)

Easy, Overnight Sourdough Bagel Recipe
Equipment
- Stand mixer fitted with the dough hook; you can also knead by hand
- Half sheet tray or two quarter sheet trays
- Slotted spoon
- Bread bag use code THATSOURDOUGHGAL for 15% off
Ingredients
Feed Your Starter
- 15 g sourdough starter
- 75 g water
- 75 g bread flour
Main Dough
- 420 g water
- 150 g active starter that you made, from above
- 30 g sugar or honey
- 825 g bread flour 12.7–13.5% protein is ideal, See Notes
- 25 g non-diastatic malt powder optional
- 15 g sea salt
For the Boiling Water
- 1 tbsp molasses or honey, or brown sugar
Instructions
Day 1: Feed Your Starter & Mix Your Dough
- In the morning, feed your starter using a 1:5:5 ratio: 15 g sourdough starter, 75 g water, and 75 g bread flour. This will give you a tiny bit more than you need for this recipe, so that you have leftovers to feed.
- About 10–12 hours later (or before you go to bed that night), add 420 g water, 150 g active starter, 30 g sugar, 825 g bread flour, 25 g non-diastatic malt powder, and 15 g sea salt to your stand mixer fitted with the dough hook.
- Stand mixer method: Mix on low speed for 5–7 minutes, or until the dough is smooth and has a stiff Play-Doh texture. If your mixer struggles, stop and let it rest for 10–20 minutes, then resume mixing.Hand mixing method: Combine all ingredients in a large bowl and stir until it comes together. Turn out onto a clean counter and knead for 10–15 minutes until smooth and pliable. (It's a workout, but totally doable!)Hydration adjustment: If your dough seems too dry, add 1 tbsp water at a time. If too sticky, add 1 tbsp flour at a time.

- Cover the dough and let it rest for 30–60 minutes. Then, knead again for 1–2 minutes to smooth it out further.
- Cover and let the dough bulk ferment on the counter overnight (about 10–12 hours at 68–75°F/20–24°C). It should puff up nicely and roughly double in size.


Day 2: Shape, Boil, & Bake
- The next morning, dump out your dough and divide into 12 equal portions (about 120g each). Shape each portion into a smooth, taut ball and place on individual parchment squares.
- Then, poke a hole in the center of each ball and stretch it out using your fingers to form the bagel shape. Make the hole slightly larger than desired — it will fill in a bit during proofing.
- Optional pause point: You can refrigerate the shaped bagels here for a few hours up to 2–3 days. When ready to continue, remove from fridge and proceed with the second proof at room temperature or in a proofing box until puffy.
- Cover the bagels (so they don't dry out) and let them proof for 5–6 hours at room temperature (or use a proofing box at 80°F/26°C to speed things up). They should puff up and feel airy when gently touched.

- Preheat your oven to 425°F (220°C) convection, or 450°F (230°C) conventional. Bring a large pot of water (about 4 quarts) to a boil. Once boiling, add 1 tbsp molasses.
- Drop 4 bagels at a time (still on their parchment squares) into the boiling water. The parchment will naturally release — peel it off and set it aside to reuse. Boil for 1 minute on each side, using a slotted spoon to flip.

- Remove boiled bagels and place them back on your parchment-lined sheet tray. Optional: lightly spritz the parchment with cooking oil if concerned about sticking — I've never needed to, but some bakers prefer this. This is also the time to add toppings, if desired (everything bagel seasoning, Asiago cheese, etc.).
- Bake for 20–25 minutes until golden brown (up to 30 minutes if you like a very deep brown), and the internal temperature reaches 205°F (96°C) or higher.
- Let cool on a wire rack for at least 30 minutes before enjoying (or 1–2 hours for best results).


Video

Notes
- Warm homes (above 75°F/24°C): If your kitchen is warmer than 75°F (24°C), skip the overnight fermentation and flip the timeline instead. Mix your dough in the morning, monitor the bulk fermentation throughout the day (watching for it to double), then shape and proof in the afternoon/evening. This prevents overproofing.
- Bread flour: Bread flour works best for bagels — its higher protein content gives them a nice chewiness. I’ve tested this recipe with King Arthur unbleached bread flour (12.7% protein) and Central Milling High Mountain bread flour (13.5% protein). If you use a lower-protein flour, such as Kirkland all-purpose flour (11.5% protein), add 1 tbsp of vital wheat gluten to help it perform like a higher-protein flour, or decrease the water in the dough slightly.
- Non-diastatic malt powder: This is optional but highly recommended — it keeps bagels soft for days and enhances flavor and browning. If you only have diastatic malt powder (or non-diastatic is out of stock, which is the case at the time of this writing), toast it at 325°F (160°C) for 5 minutes first to deactivate the enzymes. Those enzymes would speed up the fermentation, which is not ideal for an overnight fermentation recipe.
- Flexible timeline/long-ferment option: You can refrigerate shaped bagels for a few hours up to 2–3 days, then complete the second proof before boiling and baking.
Conclusion
These sourdough bagels have my heart. The recipe is so easy that once you do it a couple of times, you won’t even need to reference this post. Except maybe to remind yourself of the ingredient quantities.
But the steps are simple, which is why I make bagels so often. My kids also adore them.
If you make this updated bagel recipe, please let me know how it went in the comments below. I also love it when you tag me in your stories on Instagram – I’m @thatsourdoughgal!
Happy baking!!


This recipe was sooooo easy and I love that you make it so easy to follow! I thought it was going to be much more difficult!
You have THE BEST recipes and I think that your attention to all the detail is AMAZING!!!!
THANK YOU for all you do for all the Sourdough Gals 😁
Aw thanks Peggy!!
These bagels are so good!! — and really simple:))
My KitchenAid mixer couldn’t handle the dough — it was too stiff. So I only added 600g of flour till I was getting a weak windowpane then I added the rest of the flour — 225g (if you do this, don’t add it all at once or hold a towel over your mixer, cause the flour will go everywhere, lol).
I also found that my bagels only needed to cook for 15 – 17 minutes at 425F convection. (the first time I made them I burnt them a bit cause I didn’t realize this…)
Looks great! Thanks for sharing!
I’ve made a few different Sourdough bagel recipes and these are by far the best. Lightly crunchy on the outside and soft and chewy on the inside. I had to knead by hand because my kitchen aid said “absolutely not”; tough but doable. I mixed and fermented during the day, shaped before bed and put the shaped bagels in the fridge overnight. The only thing I would do differently is make them a bit smaller. They are a bit big for kids (personal opinion). And she does say in the post that these are big bagels. I also like to make mini bagels for pizza bagels. Can’t wait to make them again!
Love it, thanks for sharing Beth! Pizza bagels are a great idea!
Loved making these and look beautiful except i lost the holes. Any thoughts on that?
Make the hole a little larger than you want – it’ll shrink up a bit as the bagels puff up during their second proof. If your hole keeps shrinking, the gluten is too tight and needs to relax. You can cover the dough balls for 20 minutes, then come back to stretch out the holes.