
The Best Foolproof White Sourdough Bread Recipe
Discover the secrets to foolproof white sourdough bread with this beginner-friendly, detailed recipe.
With just flour, water, salt, and about 40 minutes of hands-on work, you can create classic white sourdough loaves your family will adore!
Plus, it’s the perfect base recipe for all kinds of fun inclusions like cinnamon raisin, jalapeño cheddar, and my favorite: sun-dried tomato and goat cheese.
Here’s your super-detailed guide to making the perfect loaf of white sourdough bread.
A quick reading tip: if you want literally every detail of how to make white sourdough bread, follow the steps outlined in the How to Make White Sourdough Bread section. If you're somewhat familiar with the sourdough bread making process already, you can skip ahead to the recipe card at the end, but please note it's not nearly as detailed.
You Can Master Sourdough Bread!
You can make sourdough bread. Anyone can. I promise you.
Once you make a few successful loaves, you will never use or refer to a recipe again.
The ingredients and process are that simple.
It’s just understanding the process and being able to read the dough – that’s the art of sourdough that takes a little practice and patience. And that’s what I’m going to start teaching you here.
Let’s do this!
Sourdough Bread Ingredients
White sourdough bread only contains bread flour, water, salt, and a sourdough starter.

Bread Flour
Bread flour is important – after all, it’s our main ingredient.
For classic white bread, I recommend any of these bread flour options:
- Central Milling High Mountain (13.5% protein)
- Central Milling ABC (11.5% protein) – this is almost identical to Costco’s All-Purpose flour
- Ballerina Farms Farm Flour (14% protein)
- King Arthur unbleached bread flour (12.7% protein)
You can experiment with other types of flours, such as whole wheat (check out this 20% whole wheat sourdough bread recipe), rye, or Einkorn (an ancient grain).
But if you’re just starting out, I personally would suggest mastering a 100% bread flour loaf first. It’s the most forgiving.
Water
You’ll want lukewarm water – not cold and definitely not hot. Water over 120°F may kill your sourdough starter. Cold water will prevent your dough from rising at a normal pace.
Update: the temperature of your water will impact the temperature of your dough, which will ultimately determine how long your bulk fermentation is. Warmer water = faster fermentation. Maurizio Leo has a great water temperature calculator that makes this easy!
Also, I use water straight from my faucet. I live in the country and have well water; I’ve never had any issues.
However, I’ve seen others recommend using filtered water, especially if they have city water with chlorine in it. You can buy filtered water from the store, or you can boil your own water and let it cool before using it in any recipes.
Salt
I primarily use Redmond’s sea salt. You can use code TSG15 for a discount.
Tip: Check the ingredients in your salt. Some brands add an anti-caking agent, which can impact your bread.
Sourdough Starter
Sourdough starter is the star of the show here. It’s a simple mixture of flour, water, wild yeasts, and bacteria. The wild yeasts and bacteria are natural (found in nature).
There are no commercial yeast packets when it comes to sourdough baking – we’re cultivating the little microbes around us that the good Lord gave us!
You can make your own sourdough starter with flour, water, and lots of time, but I strongly suggest just borrowing some from a friend or buying some from a local baker.
Kelly Liston was kind enough to ship me some of hers, named Suzette, and she is a wonderful, happy one. She comes in liquid form, so you don’t have to mess with rehydrating. You can get 15% off with the affiliate code THATSOURDOUGHGAL.
If you’re hell-bent on making it yourself, I suggest this recipe from Maurizio Leo.

You can also request some for free from Carl Griffith.
I got some from a local baker and made my first loaf of bread right away.
If you make your own starter—and you’re successful—it’ll realistically take a few weeks before you can start baking with it.
Tools You’ll Need + Basic Kitchen Equipment Swaps
You can make sourdough bread with no special tools. As long as you have basic kitchen equipment, there are workarounds for every sourdough tool out there.
However, some things are definitely nice to have and will make your experience a lot easier and smoother.
Related: Budget Sourdough: 20+ Tool Swaps for Amazing Bread
Here’s a list of what I use to make sourdough, along with substitutions for items you probably already have.
- 3/4 L Weck jar (for your starter)
- Substitution: a mason jar
- Large bowl
- Digital scale (the most important tool IMO, and the OXO one I linked here is the best scale I’ve ever owned – I did review 20 scales if you want to read about that here)
- Substitution: measuring cups, but they aren’t as accurate as measuring in grams
- Thermometer (this is the best one on the market IMO)
- Substitution: I highly suggest getting a thermometer if you don’t have one already. Sourdough is very temperature-dependent, and all of my teaching references your dough temperature to help guide you. We also use it to check the doneness of our baked goodies. Here’s a good budget option I like if my favorite is too expensive!
- Dough whisk (this is the best one on the market)
- Substitution: your hands
- Bowl scraper
- Substitution: nothing – you’ll just have bits stuck to the sides of the bowl, which makes clean-up a little more time-consuming, but it’s not essential
- Bench scraper (dough scraper)
- Substitution: Knife for dividing dough, but a knife won’t help you with the shaping process. I really like using the bench scraper to assist with the candy cane motion that helps tighten up the dough.
- Bread lame (this heavy-duty stainless steel one is my favorite)
- Substitution: razor blade or sharp knife
- Bannetons (wood pulp bannetons are my favorite – FLOURSIDE’s medium oval batard is very universal – code TSG5 gets you a discount)
- Substitution: Colander lined with a thin towel (such as cheesecloth or muslin)
- Parchment paper (to go under your bread when baking)
- Dutch oven (Krustic is my favorite – use code REBEKAH15 for a discount) or Brod & Taylor’s dome and baking steel set-up
- Substitution: Roasting pan or consider the open baking method (I’ve tried open baking and cannot figure it out, so I’m a bad resource for this)
- Bulk flour storage container (I like buying my flour in 50# bags as it saves me a lot of money)
- Substitution: buy 5# bags from the local grocery store

- Water mister (for the pre-shaping and shaping process)
- Dusting wand for rice flour
- Substitution: Sprinkle it with your fingers
- Rice flour for dusting the loaves
- Substitution: Bread flour, but be careful as too much can alter the outcome of your bread
- Bread bags for sharing with friends and family
- Substitution: Ziploc bag

👉 How to Make White Sourdough Bread: Detailed, Step-by-Step Guide
Here are all of the steps to making a delicious loaf of sourdough bread. These steps are very detailed to help you avoid any pitfalls.
I know the physical size of these instructions on the page looks daunting, but making bread is simple, I promise. Just stick with me!
If you prefer learning visually, this YouTube video shows you how to make this recipe, step by step.

Step 1: Feed Your Starter
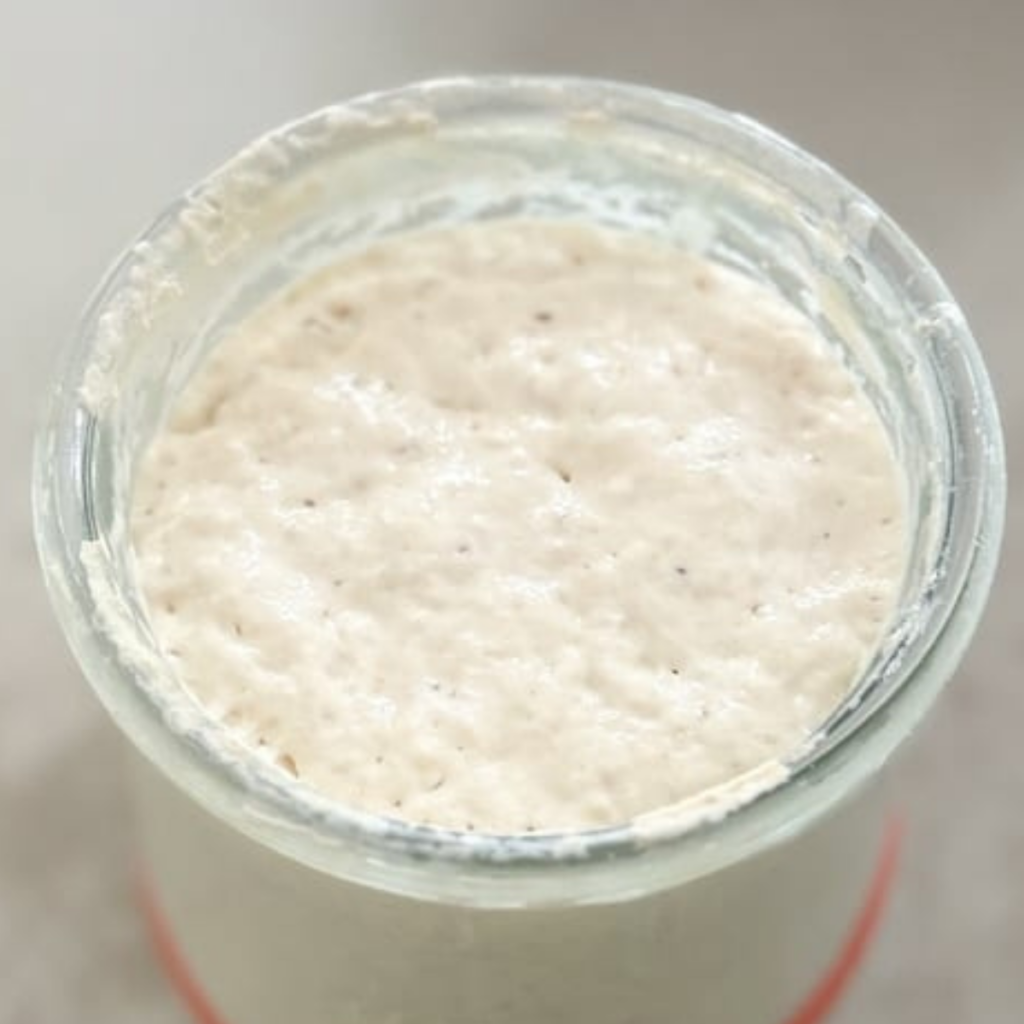
The first step to making sourdough bread is feeding your starter and waiting for it to peak. When it peaks and is ready to use in a recipe, it’s often called a “ripe” starter.
This will become second nature once you do it a few times.
I typically do a 1:5:5 feeding ratio at night and in the morning, which allows me to start a new recipe before bed (great for overnight recipes) or first thing in the morning (perfect for a recipe like this one).
For this recipe, before you go to bed, mix together:
- 25g starter
- 125g water
- 125g unbleached bread flour
That’ll give you a tiny bit more than you’ll need for the bread recipe. It’ll be peaked when you wake up in the morning!
Tip: If you want to feed your starter in the morning and put this dough together around lunch or early afternoon, do a 1:1:1 feeding ratio, which peaks in 4-6 hours. Mix together 90g starter, 90g, flour, and 90g water.
This will help you if you’re new to feeding ratios and want to understand them better: Sourdough Starter Ratio Calculators
Step 2: Mix Your Dough
When your starter peaks, it’s time to mix your bread ingredients.
Here’s what to look for to know your starter is ready to use:
I typically make two loaves at a time. There’s just no point in putting in all of this effort for a single loaf of bread. Freeze or gift that second loaf if you won’t eat it in time.
Here’s my recipe for two loaves of sourdough bread:
- 1,000g unbleached bread flour
- 640g warm water
- 240g active sourdough starter
- 20g salt

That’s literally it.
I like do what’s called a fermentolyse. I mix together the flour, 600g of the water, and the active starter.
Fermentolyse just means mixing the flour, water, and starter together and letting it rest before adding the salt.
You can use a Danish dough whisk to keep your hands clean, or you can wet your hands and get down and dirty!
Autolyse: This means mixing the flour and water and letting it rest before adding the salt and starter. You can do this the night before and let it sit overnight, or you can even do it just 30 minutes before adding the salt and starter.

Fermentolyse: This means mixing the flour, water, and active starter and letting it rest before adding the salt. I typically do this and let it rest for 30-60 minutes before adding the salt.
After an hour, I add in the salt and the remaining 40g of water.
I knead the dough and do some slap-and-folds for a few minutes. I then cover the bowl and let it rest.
Also, I’m working on creating tutorials for different stand mixer brands, so this section will expand with time. But for now, here are my Ooni stand mixer tutorials:
Step 3: Stretch and Folds
After the dough has rested for 30 minutes, it’s time for stretch and folds!
Ideally, you would do four sets of stretch and folds, each round 30-60 minutes apart, but you can get away with three. Some people skip them altogether and come out with good bread, but this step helps develop strength. I wouldn’t skip it.
Update: I have transitioned to doing 2-3 sets of stretch and folds and 1-2 sets of coil folds. Coil folds are a lot gentler on the dough and don’t disturb the beautiful bubbles that start to form during the bulk fermentation!
Tip: if you want to add any inclusions (other than brown sugar, honey, or anything else sugar-y and/or liquidy), do it during the second round of stretch and folds. My personal favorite is sun-dried tomato with goat cheese, but the most popular is probably jalapeño cheddar. Get 50+ inclusion ideas here.
Here is the process for one set of stretch and folds:
- Wash your hands, but don’t dry them off – I find using wet hands to do stretch and folds is best.
- Pull the edge of the dough up, stretching but not tearing it, and lay it back down on top of the rest of the dough.
- Rotate the bowl a quarter of a turn and do it again.
- Keep doing this until the dough is very resistant to being stretched, at least four quarter-turns so every side of the dough has been stretched.
- Optional: Flip the dough over and tuck in the sides so it’s a tidy, round dough ball again.
- Cover the bowl with a shower cap and let it rest until the next round.


Step 4: Bulk Fermentation
Bulk fermentation begins as soon as the sourdough starter is added to the dough, not after the last set of stretch of folds (it’s a common misunderstanding).
Properly fermented dough is puffy, jiggles like Jell-O when shaken, is domed or has slightly rounded edges where the dough ball touches the sides of the bowl, and has lots of bubbles around the sides and bottom of the bowl.

Here’s a video showing how the dough behaves:
It’s the hardest part of the sourdough breadmaking process to master because there’s no specific time to guide you.
It could take 4 hours or 12 hours, and it’s mainly dependent on the temperature of your dough and the health of your starter.
Other factors include:
- How acidic is your starter?
- What was the temperature of your water when you added it to the dough?
- What’s your altitude?
- What types of flour are you using?
All of those things will impact your bulk fermentation time. I used to rely on things like charts and percentage rise, but the more I make sourdough, the more I believe learning to read your dough is the key.
Looking for those visual cues will serve you well, especially by paying attention to how puffy and aerated the dough feels.
You may decide to try new flours, adjust how much starter is in your dough, or replace the water in your dough with another liquid. All of these factors will impact the bulk fermentation, but once you learn to read the dough, you’ll be able to tell when it’s ready for shaping.
Step 5: Divide and Pre-Shape
When your dough is puffy, jiggly when you nudge the bowl, and has lots of bubbles around the sides and bottom of your bowl, it’s time to divide it into two separate dough balls and pre-shape it.
We essentially shape our dough into a nice, tidy ball twice. The first time is called the pre-shape. Doing it twice helps with oven spring and getting a beautiful, tall loaf of bread.
To pre-shape the dough:
- Mist a little water on your countertop and your bench scraper.
- Using a candy cane-like motion, push the dough up and to the left. Then, pull the dough back towards your body until the surface is taught and you have a nice, round-shaped ball.
- Set the dough aside and repeat the process for your second dough ball.
Let that dough rest for about 20 minutes; then, it’s time for the final shaping!
Step 6: Final Shape
After your pre-shaped dough balls have rested for about 30-40 minutes, you’ll do the shaping process one more time.
My favorite way to shape my dough these days is the single caddy clasp.
You simply fold your dough like a book, put it in your banneton, and pinch the seam together.

For a boule (round-shaped loaf), do a double caddy clasp. You’ll fold your dough like a book in both directions. Then, turn the dough onto your surface and use your bench scraper to coax it into a round shape. Flip into your banneton.
Watch me do this here:

Step 7: Cold Retard
Your bannetons will rest in the fridge, ideally overnight. I find the sweet spot is baking your bread the next day, but you can go several days for an extra-long fermentation.

Read More: How Long to Proof Sourdough in the Fridge (+ Tips)
Step 8: Score and Bake
The final step in the process is bringing the dough out of the fridge to score and bake it.

Watch this process here:
Preheat the oven to 450°F (230°C) convection with your Dutch oven(s) inside on the center rack. If you can, wait 20-30 minutes after the oven is preheated to ensure your Dutch oven is as hot as possible.
Put a piece of parchment paper on top of the dough in the banneton. Flip the banneton over and take it off.
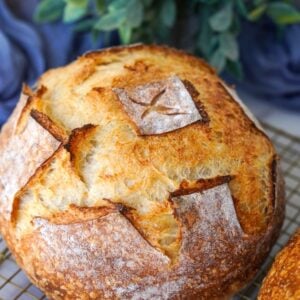
Using a bread lame or razor blade, score your dough.
Scoring tips: sourdough bread requires one deep expansion score. Feel free to add other decorative scores for fun.
Place your scored loaves in the hot Dutch ovens. Put the lids back on and bake for 25-30 minutes.
Ice hack: if you want blistering on the outside of the dough, add 1-2 ice cubes to the Dutch oven, below the parchment paper, before baking.
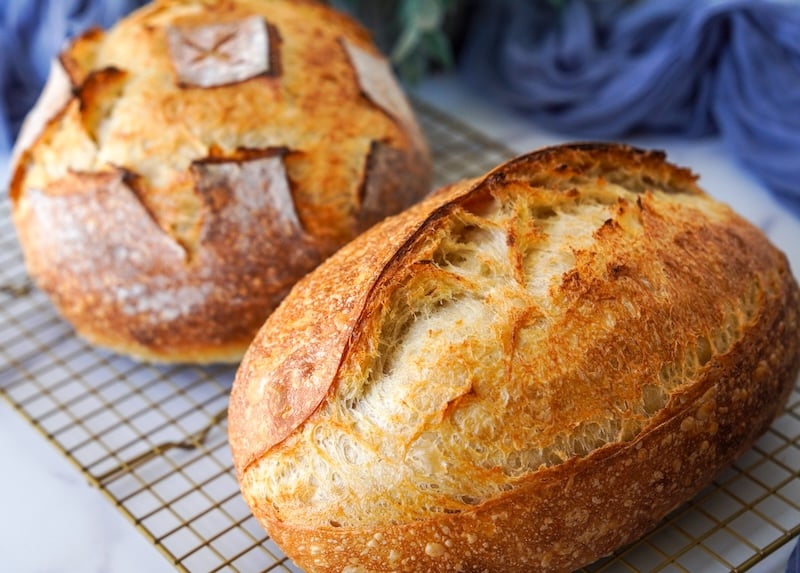
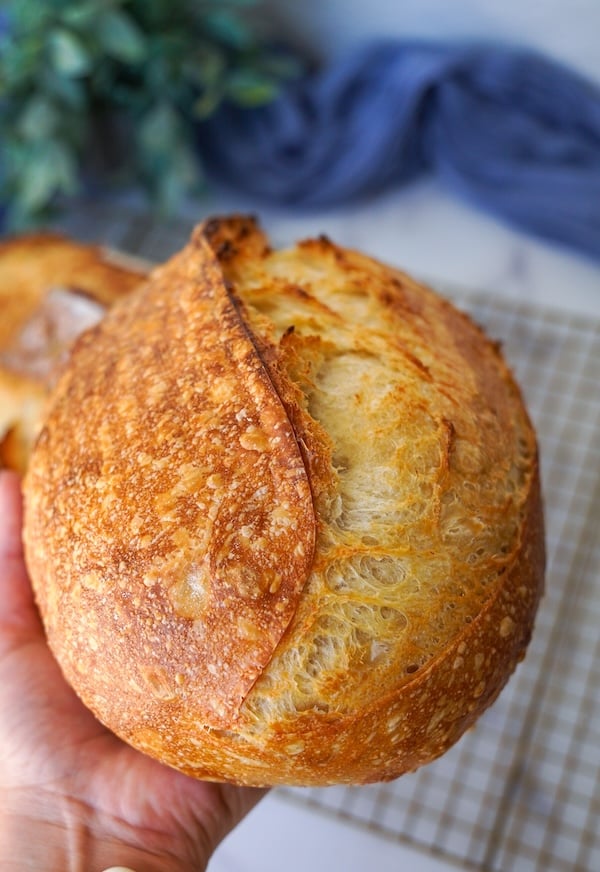
After 25-30 minutes, remove the lids and bake for an additional 10-15 minutes or until the outside of the dough is a dark, golden brown.
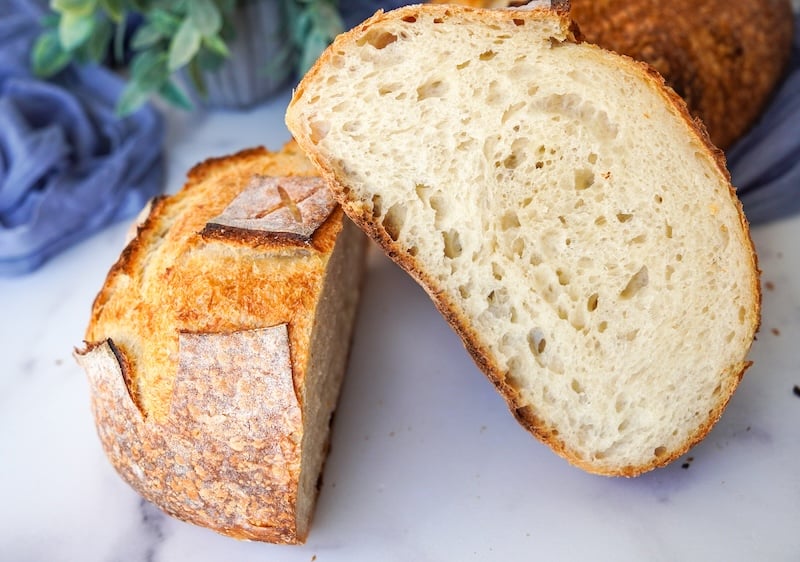
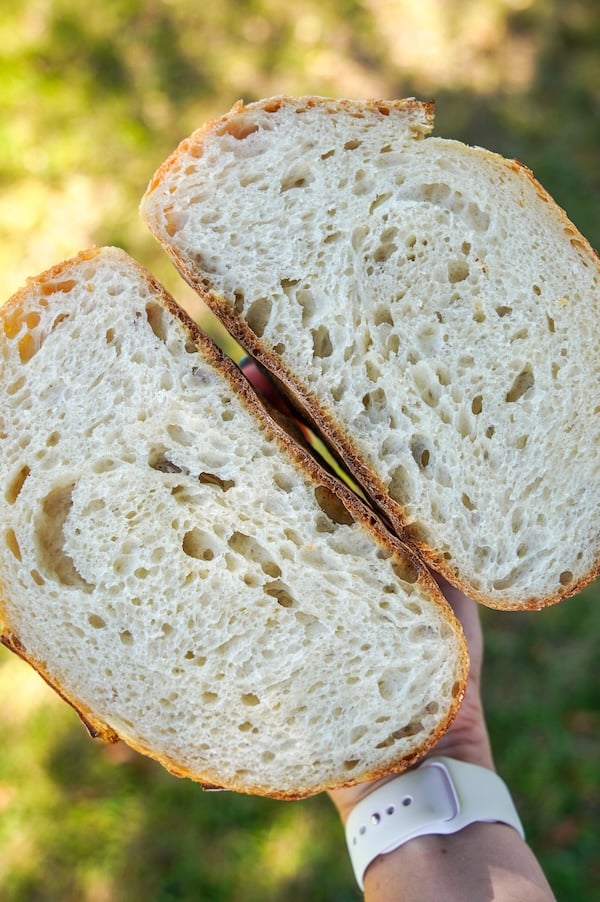
Place the hot loaves on a wire rack and let them cool for at least 90 minutes before slicing. You can be a rebel and dig in earlier, but you may experience a gummy texture if you cut them while they’re still hot.
Not sure what to do with stale or leftover slices? Try this recipe: Italian-Style Sourdough Breadcrumbs
White Sourdough Bread Recipe
The Best Foolproof White Sourdough Bread Recipe
Equipment
- Oval Dutch oven ($15 off with code REBEKAH15)
Ingredients
Sourdough Starter
- 25 g sourdough starter
- 125 g water
- 125 g bread flour
Main Dough
- 600 g warm water
- 240 g active sourdough starter (from above)
- 1,000 g bread flour
- 20 g sea salt
- 40 g warm water
Instructions
Step 1: Feed Your Starter
- The night before you plan to make your bread, combine 25 g sourdough starter, 125 g water, and 125 g bread flour in a jar. Note: This is a 1:5:5 feeding ratio.
- In my 75°F/24°C home, my starter peaks around the 10-hour mark and stays peaked for around 7 hours (at the 1:5:5 ratio from Step 1). You want the top of your starter to be flat and perhaps even starting to concave a little in the middle. It should be at least double, ideally tripled in size from when you fed it.
Step 2: Mix Your Dough
- Our desired dough temperature is 78°-80°F or 25.5-26.6°C. Use Maurizio Leo's water temperature calculator to determine the ideal temperature of your water (see notes).
- Combine 600 g warm water, 240 g active sourdough starter, and 1,000 g bread flour. Mix until a shaggy dough forms. To build some strength, remove the shaggy dough from the bowl and do slap and folds on the counter for 1-2 minutes. Put back in the bowl and cover for 1 hour.
- Note: At this time, I would feed the leftover starter from my jar to keep it active and happy!
- After the 1 hour rest, add 40 g warm water and 20 g sea salt. Knead the dough and then do slap and folds until the dough is strengthened and smooth. The dough will feel rubbery and start to separate as you work in the salt. This is normal. Keep squeezing the water into the dough! It will smooth out and come back together when it's fully mixed, which just takes a few minutes.
Step 3: Stretch and Folds
- Let the dough rest for 30 minutes.
- Perform 4 sets of stretch and folds, each set 30 minutes apart. You can also switch to coil folds for the final sets, which are gentler on the dough.
- After each stretch and fold, check the temperature of the dough. Our goal is to keep it between 78°-80°F or 25.5-26.6°C. If it is cooler, put it in the oven with the light on. If too warm, leave it on the counter.
- Optional: during the second set of stretch and folds, you can add inclusions to your dough as long as they aren’t sugar or syrup. For two loaves, you’re looking at adding 350-400g of inclusions. You can separate the dough into two if you prefer different types of bread.
Step 4: Bulk Fermentation
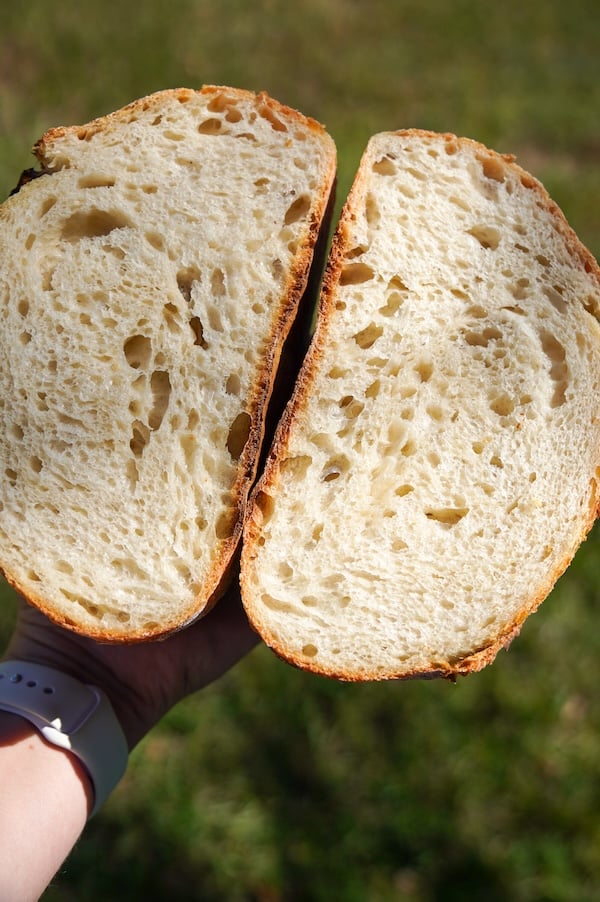
- Let the dough finish the bulk fermentation. The dough should have risen in volume and will appear puffy and domed on top. It should jiggle like Jell-O when you gently nudge the bowl and feel slightly tacky but not overly sticky to the touch. When you look at the sides and bottom of the bowl, you should see tons of bubbles. When in doubt, let the dough ferment longer. Overproofed dough is tastier than underproofed dough.

- If your dough has maintained a temperature of 78°-80°F or 25.5-26.6°C up to this point, it should take about 4-5 hours (that timer starts when you mix the starter into your dough). If the dough has fallen in temperature and is a bit cooler, it will take longer. Watch for the visual cues!

Step 5: Divide and Pre-Shape
- Using a bench scraper, divide the dough into two pieces (if you cut this recipe in half and are doing one loaf, no need to divide!). If you're experiencing any sticking, use a water mister to lightly moisten your surface and bench scraper.
- Use your bench scraper to push the mass of dough up, around, and back toward you (like a candy cane motion). Continue doing this motion, gently, until you've coaxed the mass of dough into a round. Do this again for your second dough ball. Let rest for 30 minutes.

Step 6: Final Shape
- Use the caddy clasp technique to easily and quickly shape your dough.
- For a batard, fold your dough round like a book and place it into your floured banneton. Pinch the seams closed.
- For a boule, do a double clasp (folding like a book in both directions), and flip it back onto your surface. Use a bench scraper to tighten the ball and make a more even round shape. Flip into the floured bannetons.

Step 7: Cold Retard
- Cover bannetons and refrigerate overnight. Ideal cold retard: 12-36 hours. Do not exceed 96 hours.
Step 8: Score and Bake
- Preheat oven to 450°F/230°C with Dutch oven(s) inside.
- Transfer dough to parchment paper or a bread sling, score, and place in Dutch oven. You can add 1-2 ice cubes to the bottom of the Dutch oven if you want blistering on the outside of the bread.
- Bake with lid on for 25 minutes.
- Remove lid and bake for 10-15 minutes more, or until golden brown and the internal temperature is 205-210°F (96-99°C).
- Cool on a wire rack for at least 90 minutes before slicing.
Video
Notes
- Central Milling High Mountain (13.5% protein)
- Central Milling ABC (11.5% protein) – this is almost identical to Costco’s All-Purpose flour
- Ballerina Farms Farm Flour (14% protein)
- King Arthur unbleached bread flour (12.7% protein)
Conclusion
Classic sourdough bread is a thing of beauty – it’s simple, delicious, and a crowd-pleaser.
Once you’ve baked a few loaves, the process will feel second nature, and you’ll be ready to experiment with new flavors, techniques, and ideas.
If you give this recipe a try, I’d love to hear about your experience!
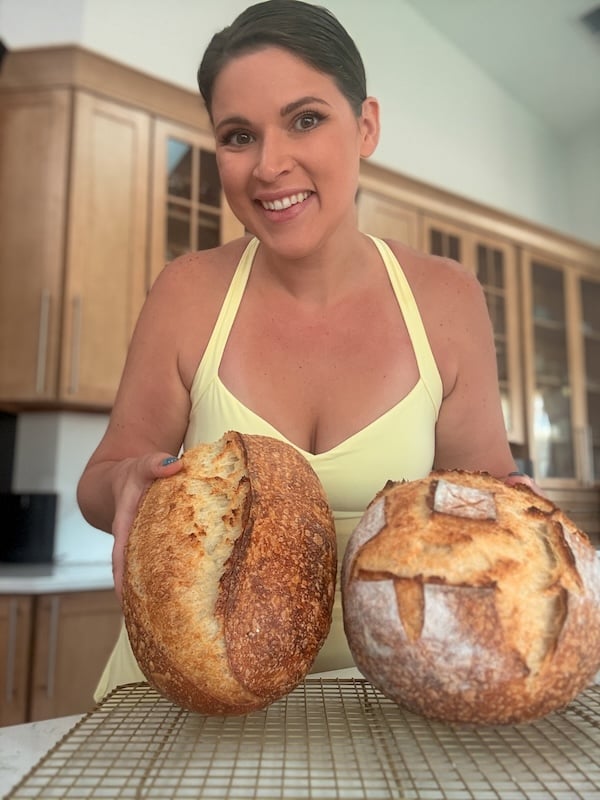
Share your results in the comments and tag me on Instagram @ThatSourdoughGal so I can see your creations.
Don’t forget to subscribe to my email newsletter for more beginner-friendly sourdough tips, recipes, and ideas to help you on your baking journey.
Related:


Beautiful! I will try on wednesday. Do you still use warm water with the Ooni, or cold water? Thank’s a lot!
I’d lean toward cool water!
I’ve made bread twice using this recipe and I really like it! I’ve tried others and so far this is the best. I’m fairly new to sourdough bread baking.
So happy to hear it Linda!!
Can you look at it tell me how it turned out or what I should change.
It was a little tender
Absolutely! I’m not seeing a photo though!
Is it visible now?
So sorry, still not seeing it! Please feel free to email it to me at hello@thatsourdoughgal.com
My go to favorite recipe!
Beautiful!