
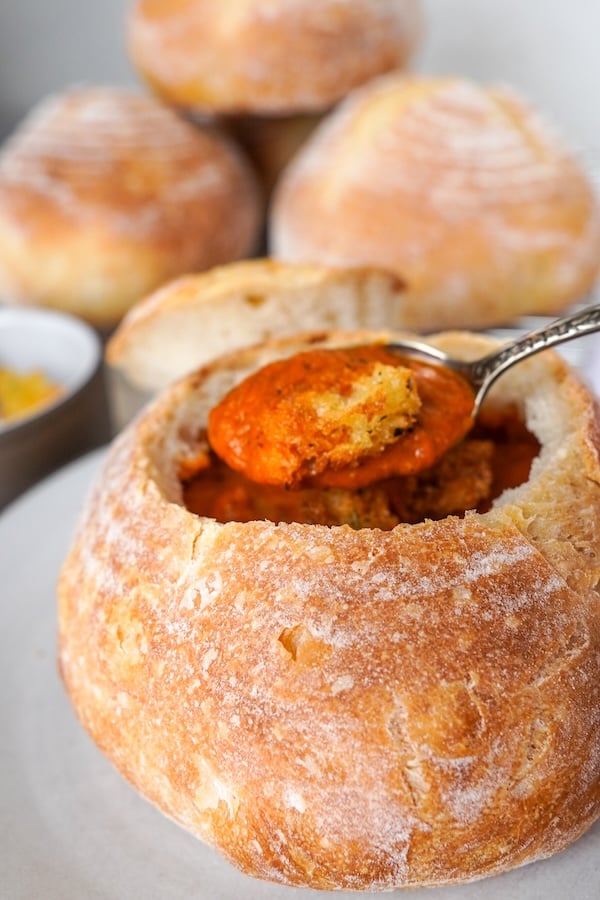
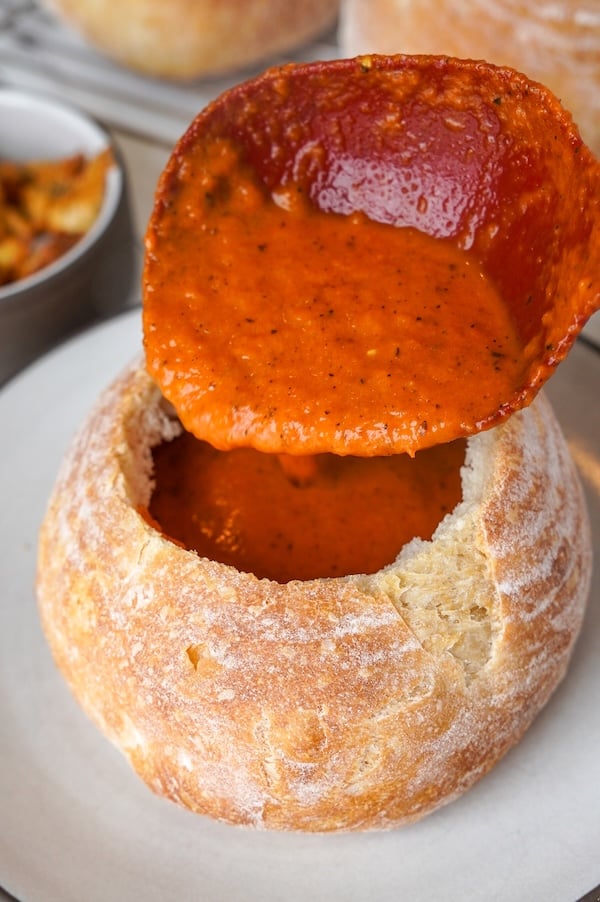
The Best Sourdough Bread Bowls (Same-Day or Long-Fermented)
Sourdough bread bowls are SO easy to make, and yet they look pretty impressive if you ask me!
I contemplated whether I should even post this recipe, because honestly? It’s basically the same as any artisan sourdough bread recipe.
The only differences are the size of the boules (300g each) and the bake times (a little shorter than normal). But I get it – sometimes, just having the instructions in one place makes life a bit easier.
I’ve also included instructions on turning the bread interior into quick croutons (takes 5 minutes in the air fryer!). So, pick your favorite soup and let’s make some bread bowls!
Disclaimer: Some of the products I recommend in this post are affiliate links – if you choose to purchase after clicking one of my links, I may earn a small commission, which helps fund this website, recipe development, and monthly giveaways. I sincerely appreciate your support.
Why You’ll Love These Sourdough Bread Bowls
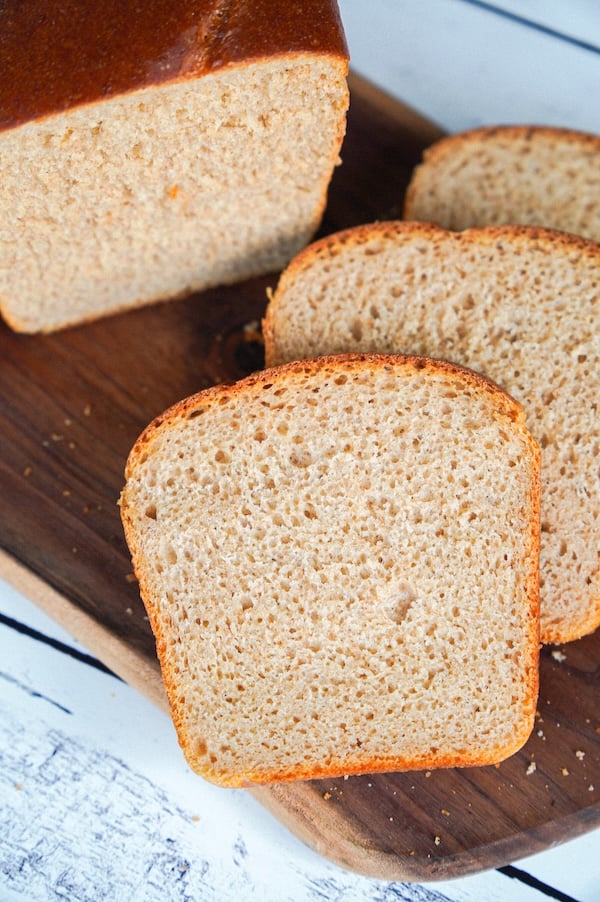
- They’re simple but impressive. You don’t need a new recipe, just a few easy tweaks to my foolproof white sourdough bread recipe, and you’ve got beautiful, bakery-style bread bowls that look way more complicated than they are.
- Crispy on the outside, soft inside. These have that signature crackly crust and chewy, pillowy interior.
- Same-day bake option. Your dough doesn’t have to sit in the fridge overnight, unless you want it to. You have the option to mix the dough, let it rise on the counter, and bake before dinner.
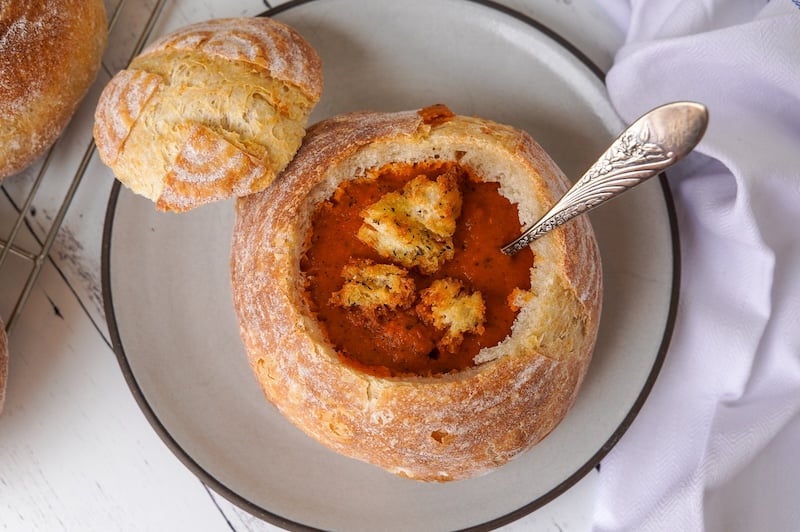
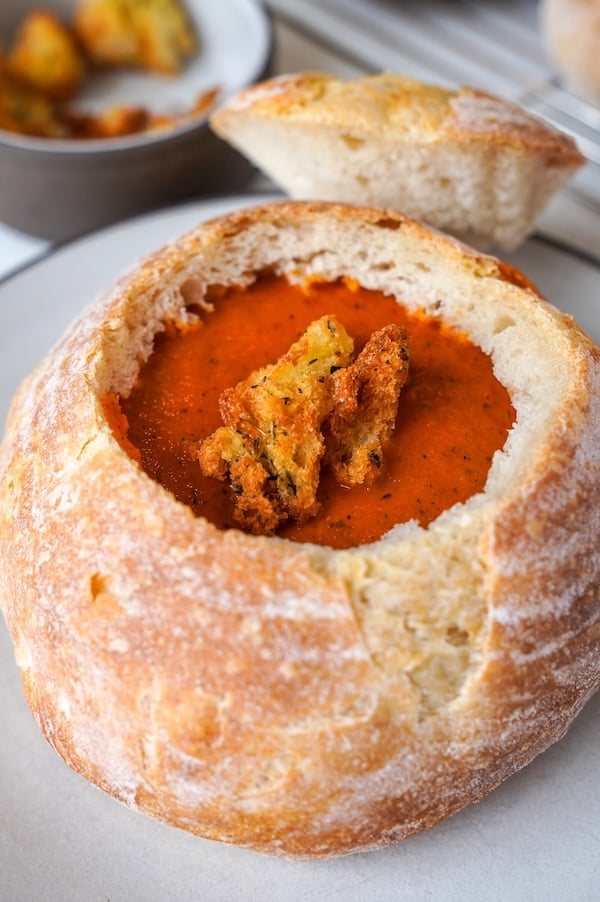
- Versatile for any meal. Ladle in soups (this tomato soup is my ride-or-die), chili, broccoli cheddar, or even mac and cheese. Then tear off a bite of the bowl itself. There’s something deeply satisfying about eating your dinner and the dish it came in.
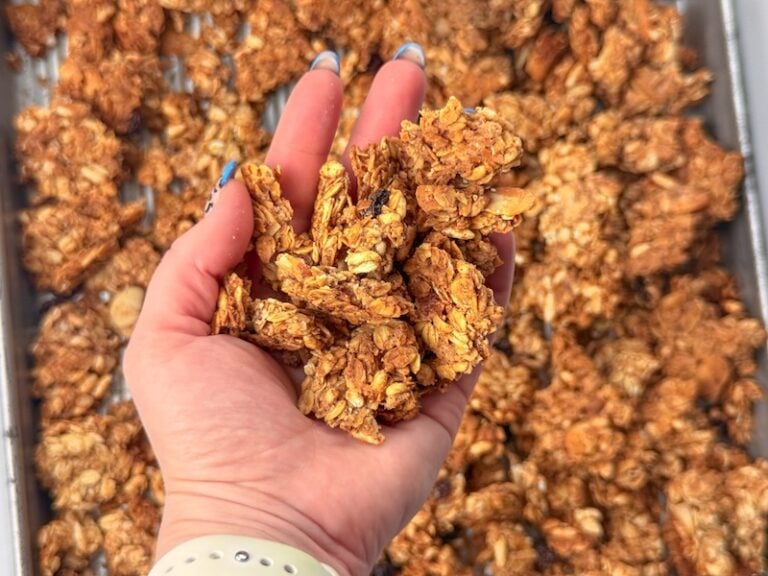
- Make croutons from the bread interior: I’ll show you how quick and easy it is to turn the “guts” of your bread bowls into croutons – it takes 5 minutes in the air fryer. No waste here!
- Make-ahead friendly. These store really well and reheat with a quick toast in the oven, which makes them ideal for meal prep or entertaining.
Another same-day recipe you’ll love: Same-Day Sourdough Focaccia (Tested by 627 Bakers!)
Ingredients
- Active sourdough starter: Your starter should be fully peaked and full of bubbles. If it’s been resting in the fridge, it will likely need an extra feeding before you start this recipe to perk it back up. This blog post explains the signs of a ready-to-use starter, if you need it!
- Water: Warm water is your friend here to help speed up the proofing times. I use the water straight from my tap, and it’s just fine (we have well water), but if your water has a lot of chlorine (city water often does), use filtered or boiled-and-cooled water instead.
- Bread flour: Bread flour is what makes these bowls sturdy enough to hold soup but still soft inside. It has a bit more strength than all-purpose flour, which helps your dough keep its shape. I usually grab Central Milling High Mountain or King Arthur Unbleached Bread Flour, but truly, use whatever good bread flour you have on hand.
- Sea salt: A must for both flavor and dough strength. Go for something fine-grained so it dissolves easily. I love Redmond Real Salt (get 15% off with my code TSG15), but any fine sea salt works great.
That’s it! Just the basics: starter, water, flour, and salt.
Nothing fancy, but together, they create bread bowl magic.
Equipment You’ll Need
- Kitchen scale: Measuring by weight keeps everything consistent.
- Danish dough whisk: Handy for mixing if you don’t want to use your hands right away.
- Mixing bowl: A large bowl to start your dough in. Be sure it’s big enough to give it space to grow.
- Clear proofing container: An alternative to a mixing bowl. I’ve been enjoying this as it makes coil folds a lot easier. More space!
- Proofing box: To keep our dough warm for faster fermentation. You can also find a warm spot in your home – we’re looking for about 82°F (28°C).
- Bench scraper: Ideal for dividing your dough balls and shaping.
- Mini bannetons (5″): These give your bread bowls structure while they proof. The ones I prefer say unavailable at the time of this publishing – if you need some, I also own these from Doyolla and they work well too (just a little pricier).
- 14″x20″ baking steel: All five mini loaves fit on this sized baking steel! Use code SDGAL10 for 10% off.
- Cast iron pan with lava rocks inside: Ideal for creating steam while we open bake our loaves.
- Parchment paper: Makes transferring to the hot Dutch oven (or baking vessel) easy and nonstick.
- Bread lame or sharp knife: For scoring the tops so your bread bowls expand nicely in the oven.
- Thermometer: A quick-read thermometer can help you check the dough temperature (ideal for gauging the length of fermentation) and let you know that your bread bowls are baked through.
- Rice flour (for dusting): A light dusting keeps your dough from sticking to the banneton. I love this dusting wand from OXO.
- Cooling rack: For letting your baked loaves cool.
Baker’s Timeline
I have two timeline options for you! In reality, there are a TON of timeline options, but if you feel a bit paralyzed by the idea of modifying a recipe on your own, you can choose from these.
The first is a same-day option, ideal for making and baking your bread all in one day. These bread bowls will taste less tangy and are not as gut-friendly as a bread that has rested in the fridge for a time.
The second option is a long-fermented version, which takes two days. The overnight cold retard really improves the flavor, and cold dough is a lot easier to score. There’s also lots of evidence that it’s easier on the gut (friendlier to those sensitive to gluten).
You can let the dough retard in the fridge for up to four days, though overnight (8-16 hours) is my preference. The longer it sits in the fridge, the more acidic the dough will become, and you’ll end up with a very sour loaf that bakes up a bit flat. Some people like that, though.
Option 1: Same-Day Bread Bowls (Faster, Milder Flavor, Not as Gut-Friendly as Option 2)
| Night Before (8 – 9 PM) | Feed starter |
| 8:30 AM | Mix dough |
| 9 – 2 PM | Stretch & folds/Bulk fermentation |
| 2 PM | Shaping |
| 2 – 5 PM | Second proof |
| 5 PM | Score and bake |
| 6:30 PM | Cool, slice the tops, scoop, fill with your favorite soup |
Option 2: Long-Fermented Bread Bowls (Slower, More Complex Flavors, Increased Potential Gut-Health Benefits)
| Day 1 | |
| Before bed (8 – 9 PM) | Feed starter |
| Day 2 | |
| 8:30 AM | Mix dough |
| 9 -2 PM | Stretch & folds/Bulk fermentation |
| 2 PM | Shaping & cold retard |
| Day 3 or 4 | *You can let the dough retard in the fridge for multiple days if desired, but overnight is my preference |
| Any time | Score and bake |
| 1 hour after baking | Cool, slice the tops, scoop, fill with your favorite soup |
How to Make Sourdough Bread Bowls: Step-by-Step Instructions
If you’ve already baked my Foolproof White Sourdough Bread, this process is very similar. We’re using the same tried-and-true base with a few tweaks to turn it into bread bowls.
In fact, if you have a favorite sourdough bread recipe, you can use that here and skip ahead to the shaping and baking for the bread bowl tips!
Step 1: Feed Your Starter
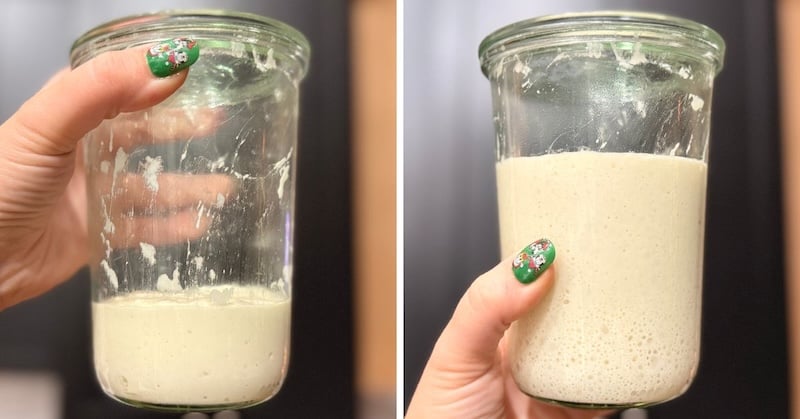
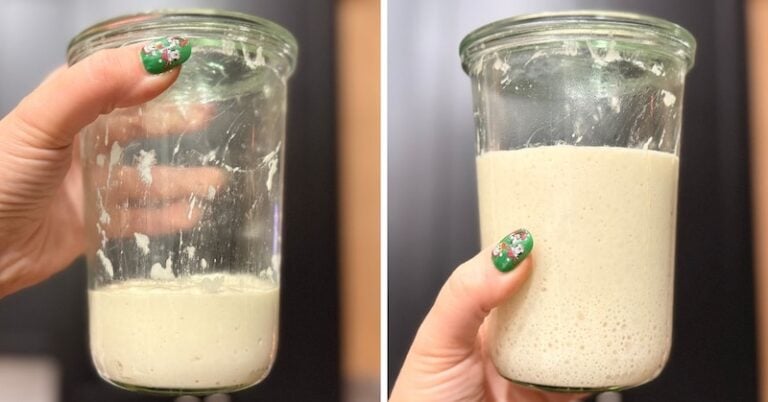
The first step to making sourdough bread bowls is feeding your starter and letting it get nice and bubbly before you bake. When your starter is at its peak, meaning it’s fully risen, full of bubbles, and smells sweet and yeasty, it’s often called a “ripe” starter.
I usually feed mine at night if I plan to mix my dough first thing in the morning.
- If you’d like it ready by morning, I recommend you feed your starter a 1:5:5 ratio (for example, 20 g starter + 100 g water + 100 g bread flour). Usually peaks in 10-12 hours.
- If you’d rather bake same-day, I’d do a 1:1:1 ratio first thing in the morning (70 g each of starter, flour, and water), which will peak much faster. Usually peaks in about 4 to 6 hours.
You’ll need 190 g of active starter for this recipe, so either of these feedings will give you a little extra to keep your starter going.
When it’s doubled in size and bubbly on top, you’re ready to move on to mixing your dough.
Step 2: Mix Your Dough
When your starter has peaked and looks bubbly and active, it’s time to mix your dough.
For this recipe, we’re making five mini loaves (around 300g each). That’s the perfect size for individual bread bowls.
Here’s what you’ll need:
- 790 g bread flour
- 505 g warm water
- 190 g active sourdough starter
- 16 g salt
That’s it!
Tip: If you’ve made my Foolproof White Sourdough Bread before, I usually do what’s called a fermentolyse, which means mixing the flour, water, and starter together first and letting it rest before adding the salt. That short rest helps jump-start fermentation and often leads to a loftier loaf. But if want to simplify things, you can skip that step entirely. I left it out of this recipe for simplicity, but you can definitely add it back in if you want!
To mix:
- Add your flour, water, starter, and salt to a large bowl.
- Use a dough whisk or your hands to combine until no dry bits remain. The dough will look rough and shaggy at first, but don’t worry, that’s exactly how it should look.
- Once everything is incorporated, cover the bowl and let it rest for about 30 minutes before moving on to your stretch and folds or coil folds (whichever you prefer).
You can also mix the dough in a stand mixer if you prefer. Add all your ingredients to a stand mixer bowl fitted with the dough hook and mix on a medium-low speed for about 5 minutes:
- Ooni: speed 30-40%
- KitchenAid: speed 1-2
- Bosch: speed 1
We don’t need a windowpane or a super smooth dough. We just need our ingredients mixed together well.
If you’re on the same-day timeline, put your dough in a proofing box set to 82°F (28°C). If you don’t have one, put your dough in a warm place like the oven or microwave with the light on.
Step 3: Stretch and Folds/Coil Folds
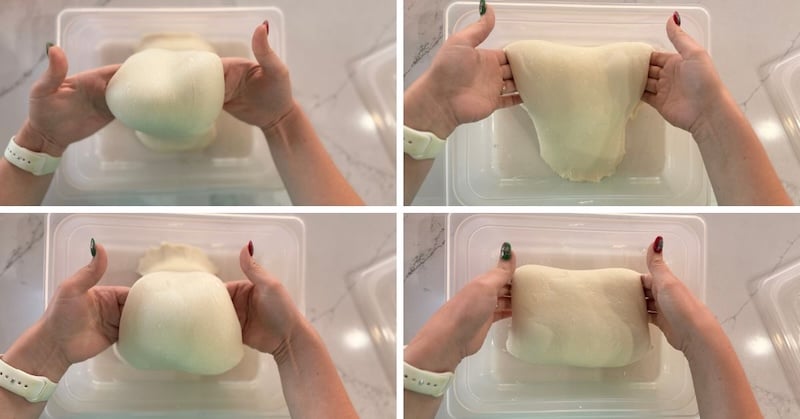
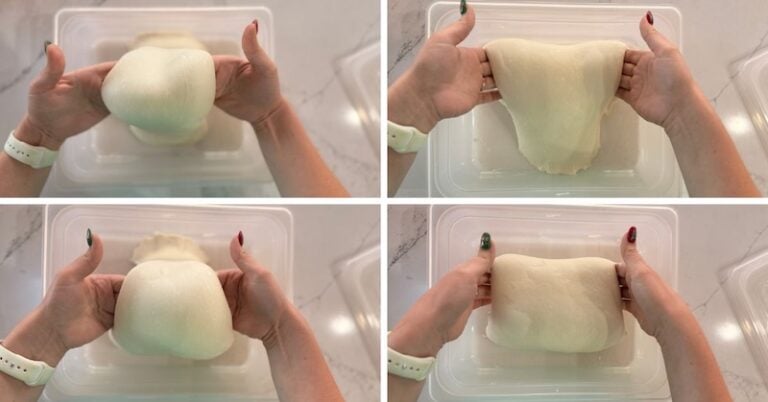
After the dough has rested for about 30 minutes, it’s time for stretch and folds or coil folds. You can do either – I’ve been preferring coil folds so that’s what’s pictured here.
This step builds strength in your dough.
You’ll do three to four rounds, spaced about 30–60 minutes apart.
Note: If you want to stay on the same-day timeline, keep your dough in the proofing box or a warm place throughout this whole process. Take the bowl or container out to do the dough strengthening, but put it back as soon as you’re done!
Here’s how to do one round:
- With slightly damp hands, grab one edge of the dough and stretch it up (without tearing) before folding it back over the center.
- Rotate the bowl a quarter turn and repeat.
- Continue until you’ve gone all the way around and the dough resists being stretched. For me, this is usually around 8 total folds.
If you prefer, you can switch to coil folds toward the end. These are gentler and help keep the bubbles intact as fermentation gets going.
After your final round, cover the bowl and let it rest for the remainder of the bulk fermentation. You’ll start noticing more volume and a few bubbles forming around the edges.
Step 4: Bulk Fermentation
Bulk fermentation begins as soon as your starter meets the rest of the ingredients, not after the last round of stretch and folds (that’s a common mix-up!). This stage is where your dough builds strength, flavor, and all those tiny air bubbles.
The exact amount of time this takes depends on your room temperature and the strength of your starter. If you’ve kept your dough in an 82°F (28°C) environment, it should be done bulk fermenting in about 4-6 hours. Mine was 5.5 hours.
Here’s what to look for:
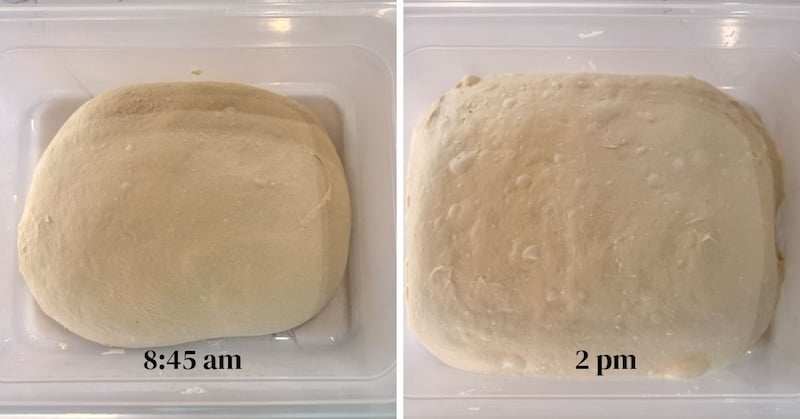
- The dough should look and feel puffy and aerated, with domed edges where it meets the side of the bowl.
- When you shake the bowl, it should jiggle like Jell-O.
- You’ll see bubbles forming around the sides and bottom.
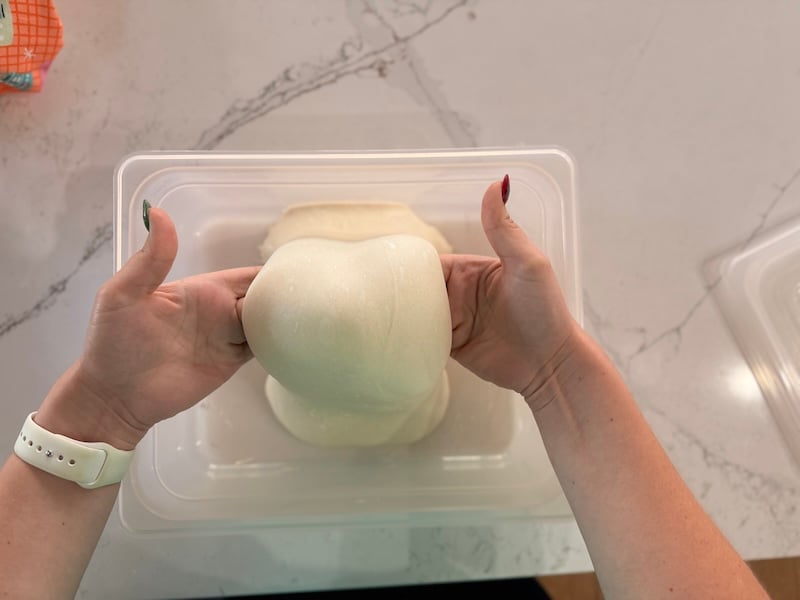
- With this recipe and method, the dough should pull away from the sides of the bowl or container when it’s finished bulk fermenting. This is not essential but just another sign to look for.

Once your dough is nice and puffy, it’s time for the next step: dividing and shaping into your individual bread bowls.
Tip: Every kitchen is different, and so is every starter. The temperature of your water, how strong or acidic your starter is, the type of flour you use, and even your altitude can all affect how long fermentation takes. That’s why those visual cues matter more than the clock.
Step 5: Divide and Shape
When your dough looks puffy, is jiggly when you nudge the bowl, and has bubbles along the sides and bottom, it’s ready to divide and shape.
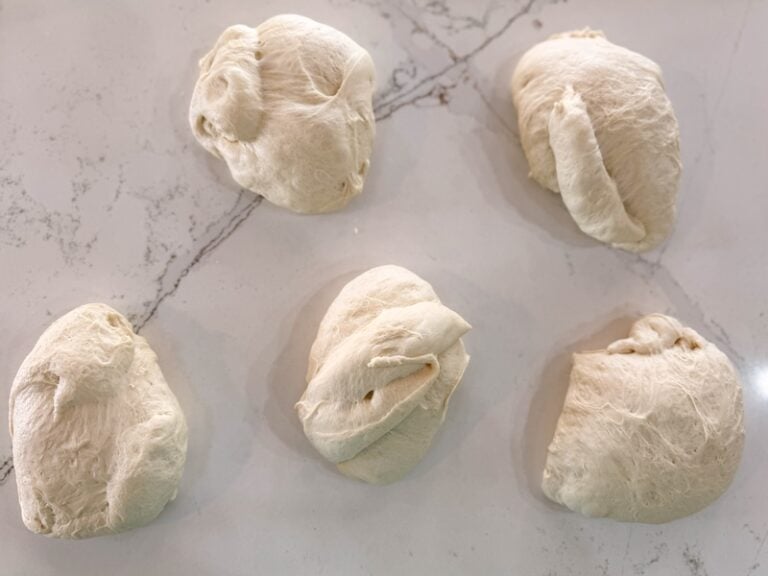
For bread bowls, you’ll divide the dough into five equal balls, about 300g each. I like to weigh my dough ball and divide that by five to make sure each bread bowl weighs exactly the same.
Lightly mist your countertop and bench scraper with a bit of water so the dough doesn’t stick (if needed). Using your scraper, cut the dough into five portions.
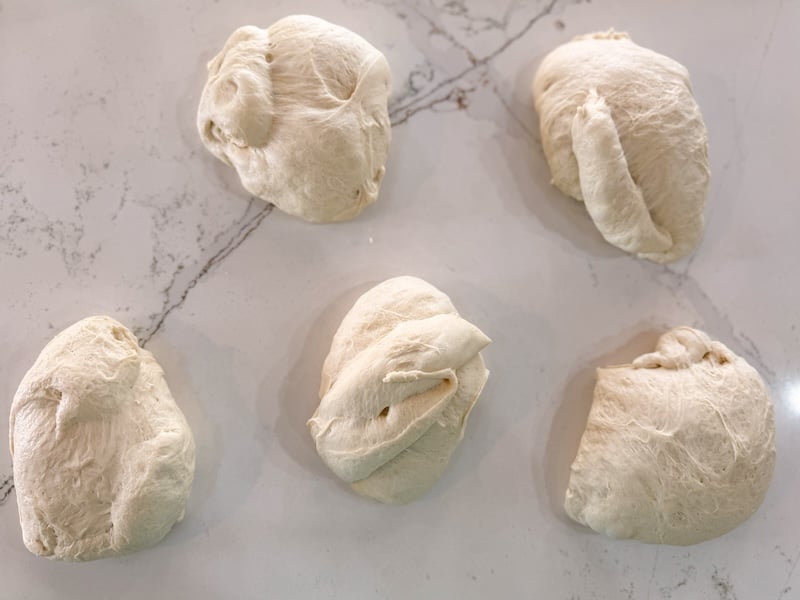
To shape each one:
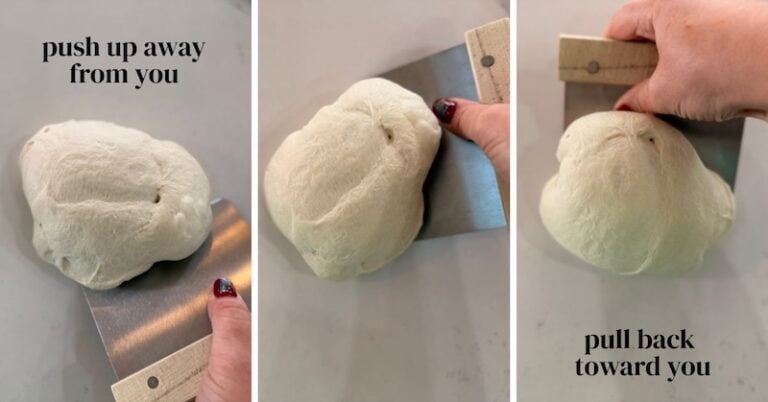
- Use your bench scraper to gently push the dough away from you, then pull it back toward your body to create surface tension.
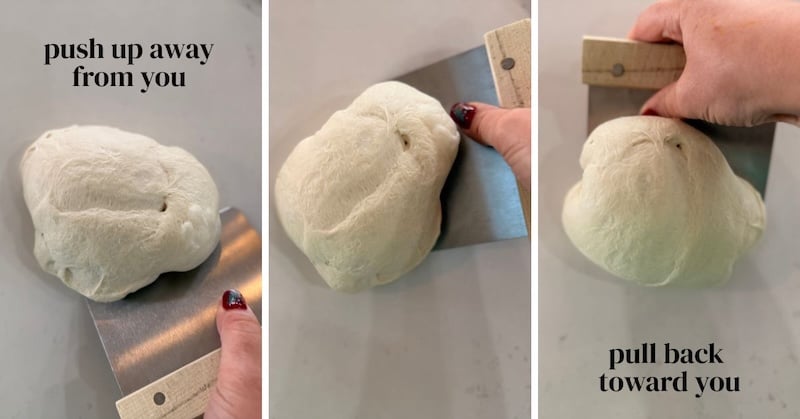
- Turn the dough as you go until it forms a smooth, round ball.
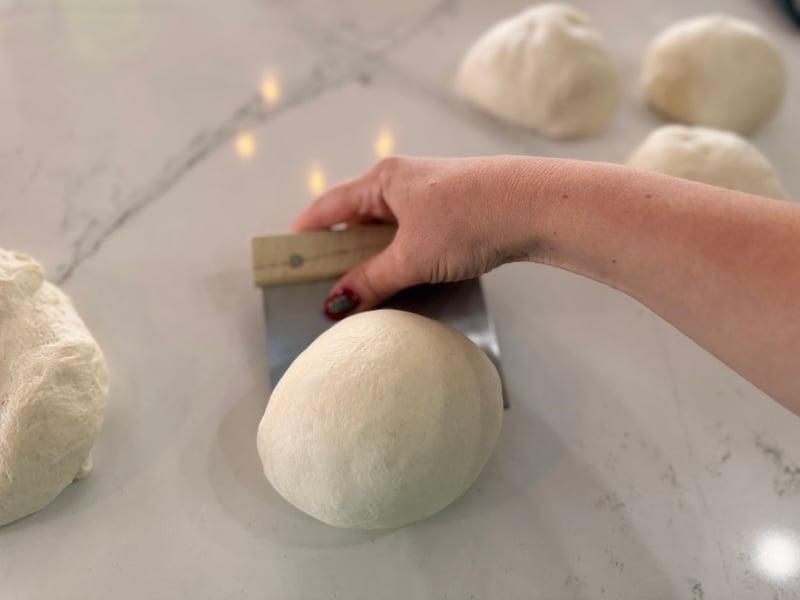
- Repeat with each piece until you have five round dough balls.
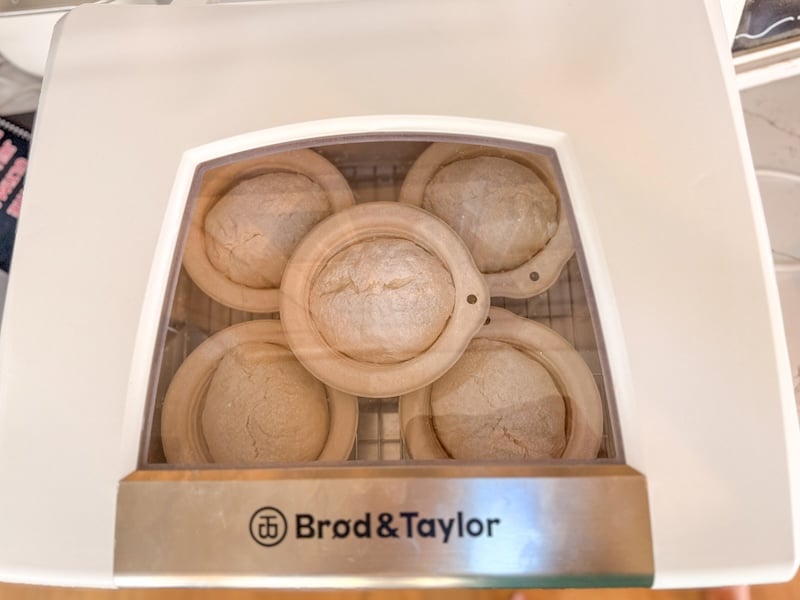
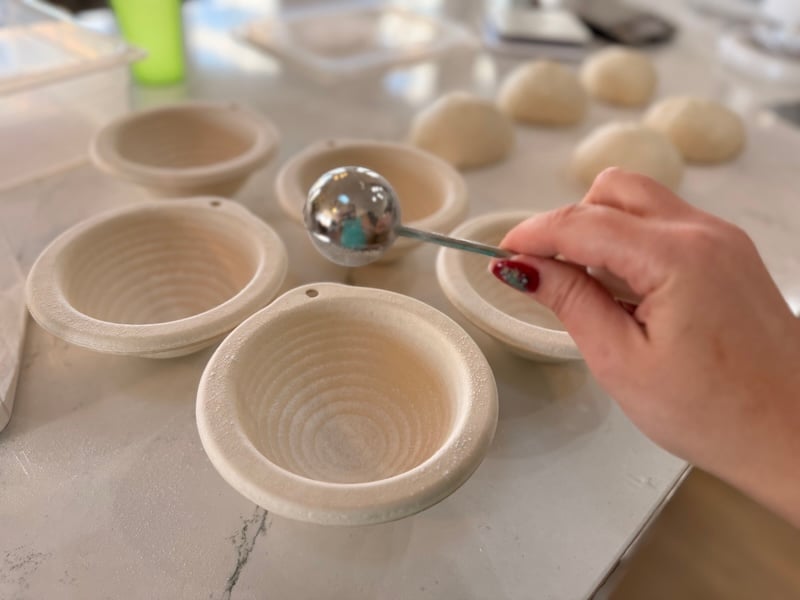
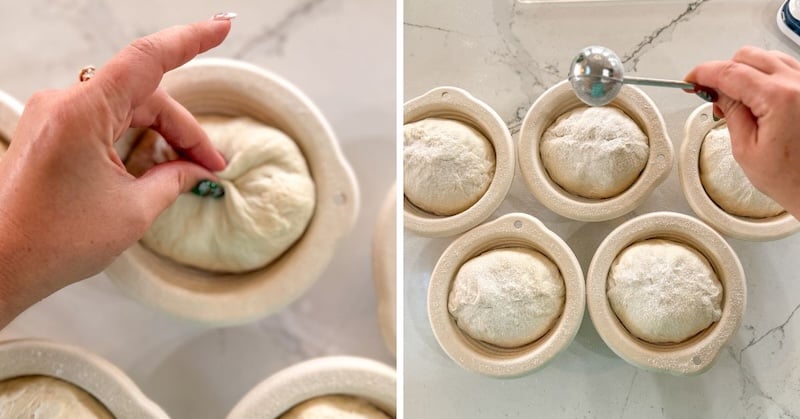
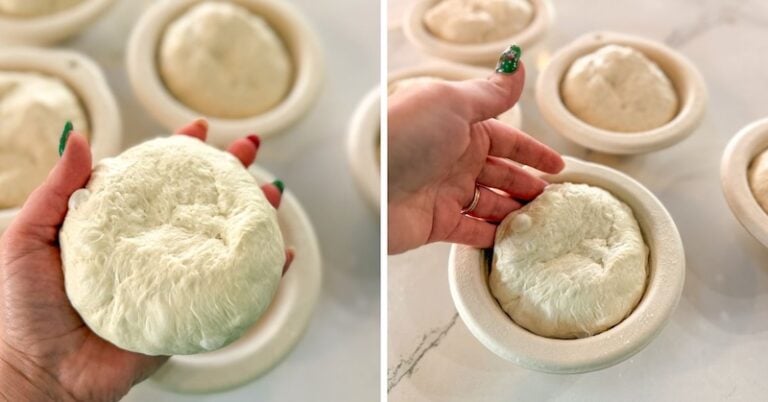
- Flip your shaped dough balls upside down and place them seam-side up in your lightly floured mini bannetons.

- Pinch the center seam and/or stitch the dough to create more surface tension. Dust with rice flour.
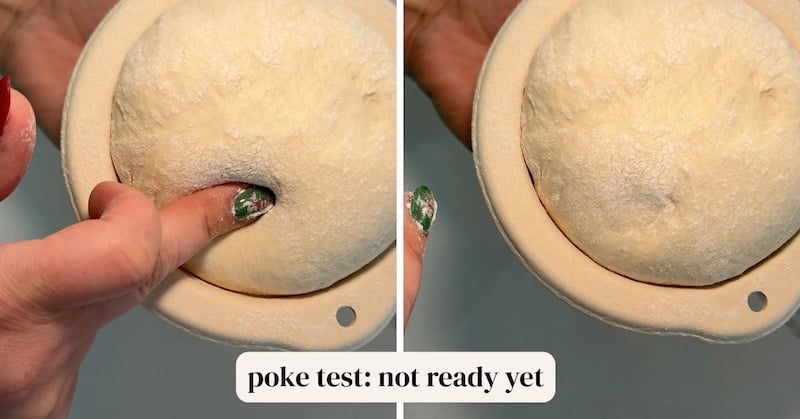
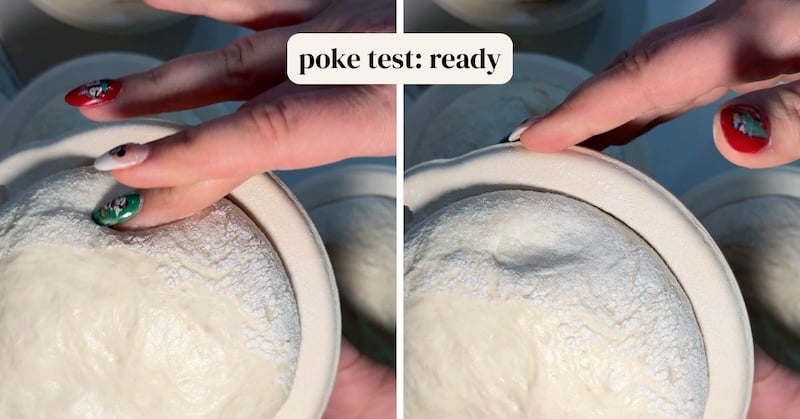
If baking same-day: Cover and let rise until slightly puffy, usually about 3 hours in a warm spot, before baking. It should pass the post test. When you poke the dough with a floured finger, it should remain indented and spring back ever so slightly (and slowly). If it springs back quickly and fully, it needs more time.
If doing a cold retard: Cover and refrigerate overnight, up to 4 days. I recommend doing it overnight (8-16 hours), as the longer the dough sits in the fridge, the more sour it will be and the less oven spring you’ll have. You do not need to do the poke test if you’re doing a cold retard (it doesn’t work on cold dough).
Step 6: Score and Bake
The final step… time to bake your bread bowls!
If your dough was in the fridge, you do not need to bring it out on the counter to warm up before baking.
Preheat your oven to 450°F (230°C) with your Dutch oven or bread steel (middle rack) inside.
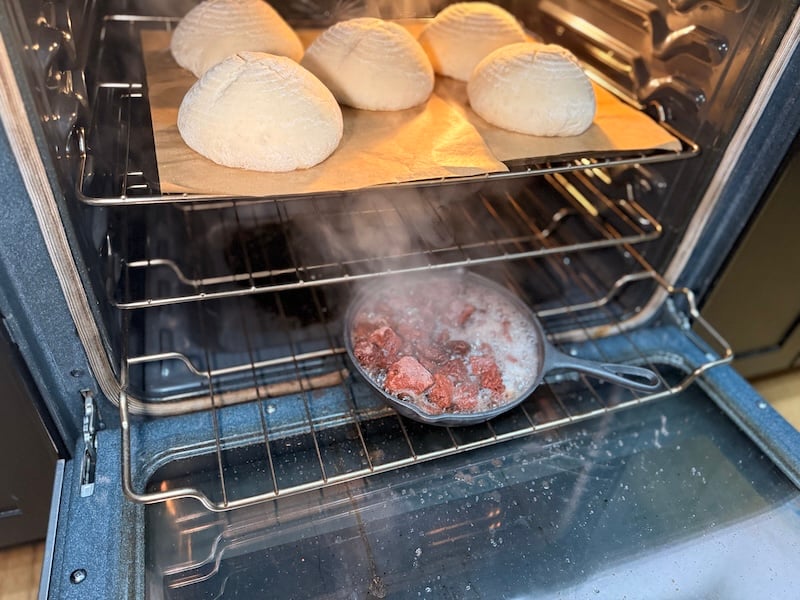
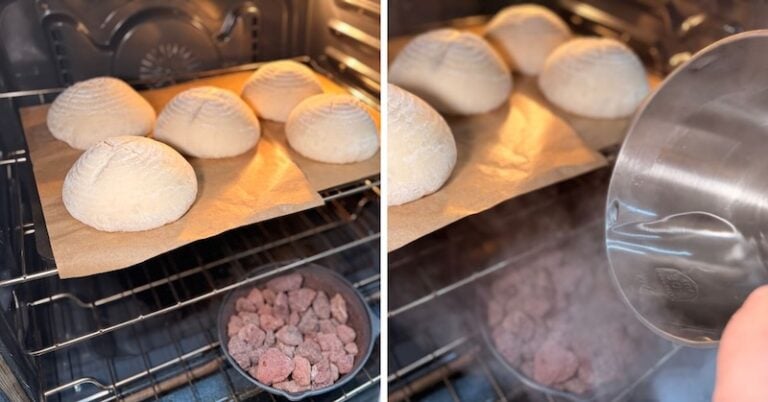
I’ve always used Dutch ovens, but recently tried my Cooking Steels 14″x20″ baking steel (use code SDGAL10 for 10% off). I love that I can fit all 5 mini loaves on it – one bake and I’m done! If you’re using a bread steel and are open baking, you’ll also need a cast iron pan full of lava rocks on lowest rack. We’ll use that to make steam.
Place a piece of parchment paper over the top of the dough, then gently flip it over. You can also gently turn your bannetons so the dough falls out onto the parchment if you prefer.
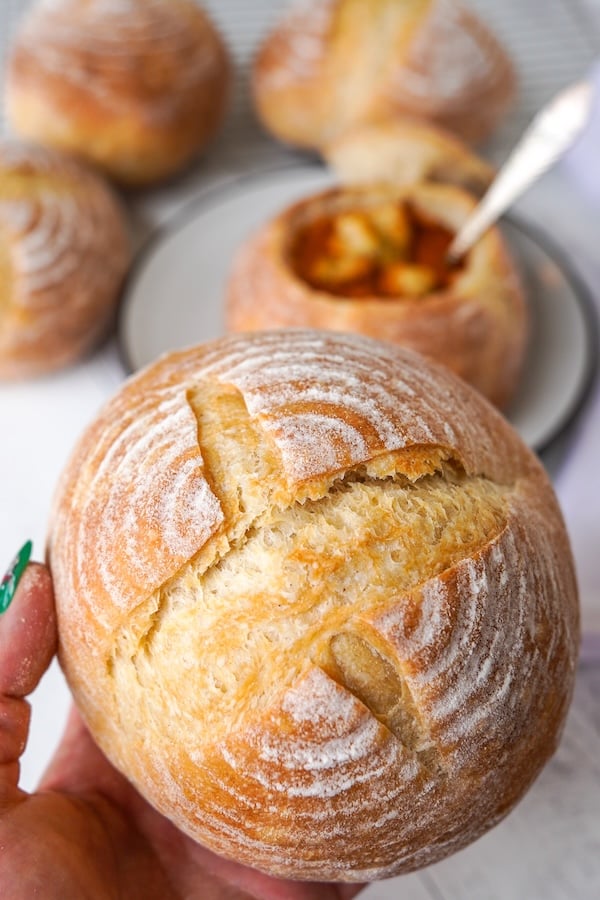
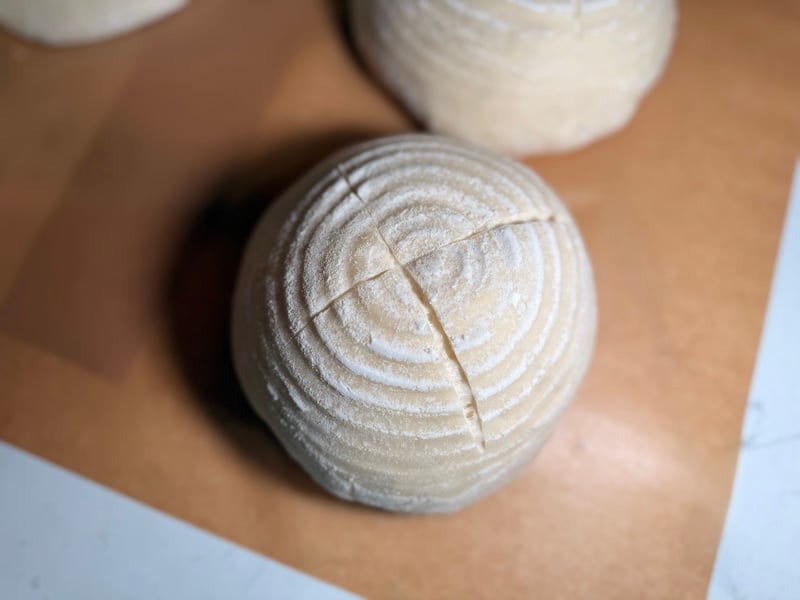
Use a bread lame or sharp knife to make a shallow X score on top of each dough ball.
If using a Dutch oven: you will have to bake in batches. Depending on the size of your vessel, you may be able to fit two bread bowls in there at a time. Use discretion! Carefully lower the dough (on its parchment) into the hot Dutch oven, cover with the lid, and bake for 20 minutes covered, then 10 minutes uncovered, or until the tops are golden brown and the internal temperature reaches 205°F-210°F. Repeat with your remaining rounds.
If open baking with a bread steel: Using a bread peel, place dough (on parchment) on the hot steel. Pour hot water into the cast iron pan – be careful as steam will immediately rise up. Close oven as fast as possible. If desired, you can toss some ice cubes in your oven to assist with additional steam. Bake for 20 minutes; then remove any remaining source of steam. Continue baking for 10-20 minutes, or until golden brown and the internal temperature is 205-210°F (96-99°C).

My uncovered bake time takes longer when open baking, hence the extended timeframe.

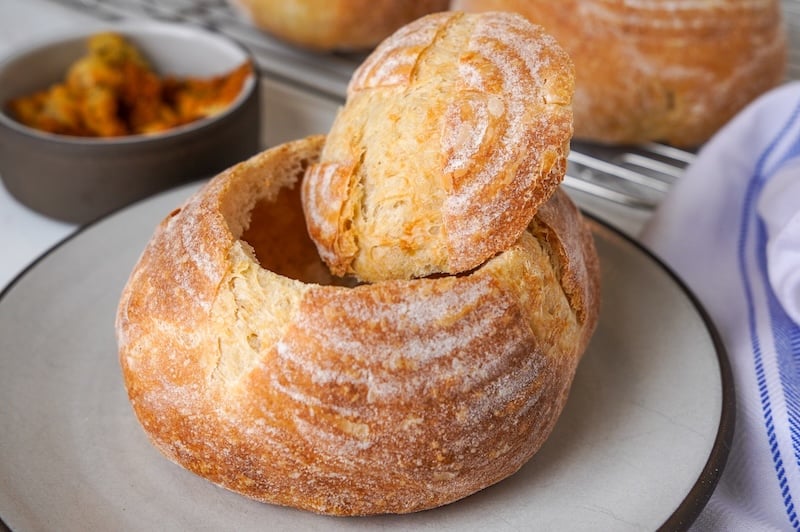
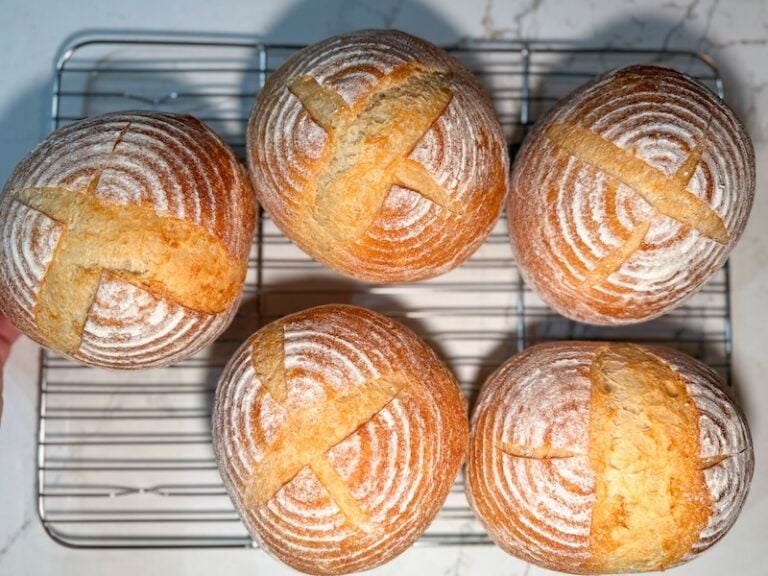
Once baked, transfer your bread bowls to a wire rack and let them cool completely (about 1 hour). Resist the temptation to slice too soon — the interior can be gummy if you dig in too soon.
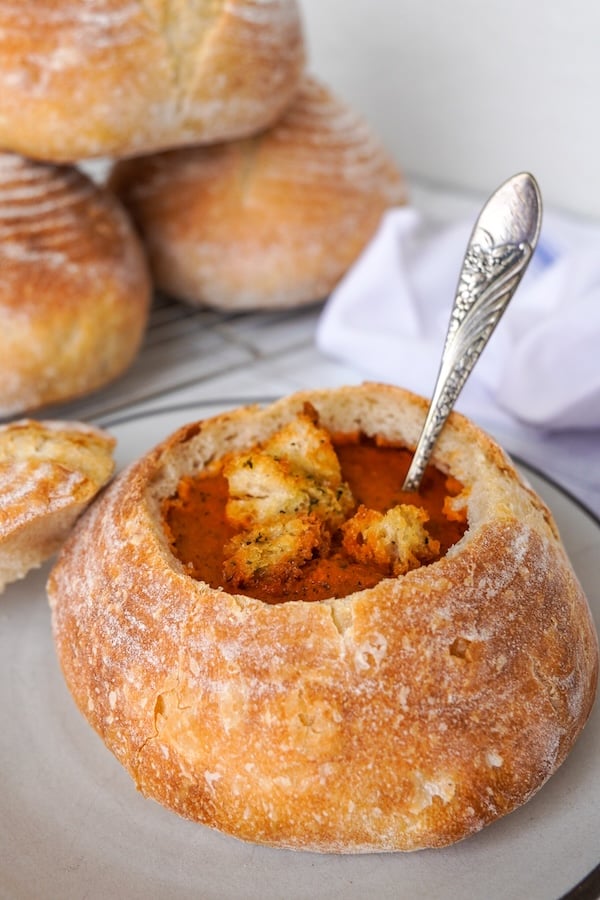
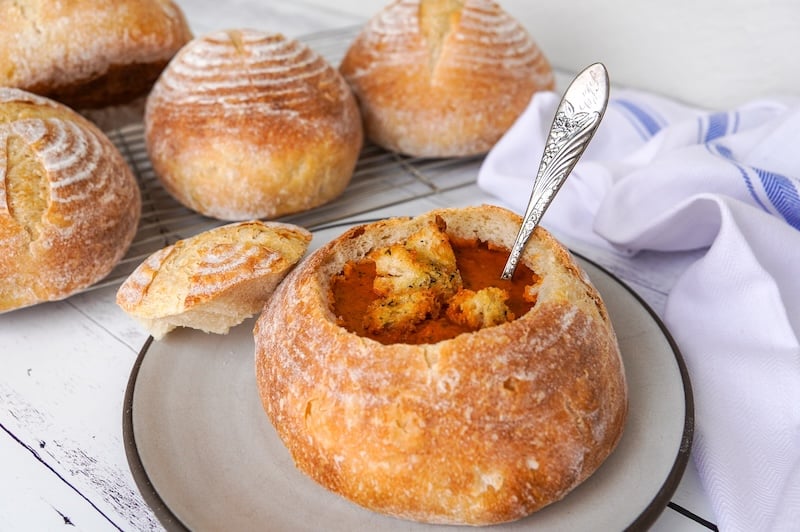
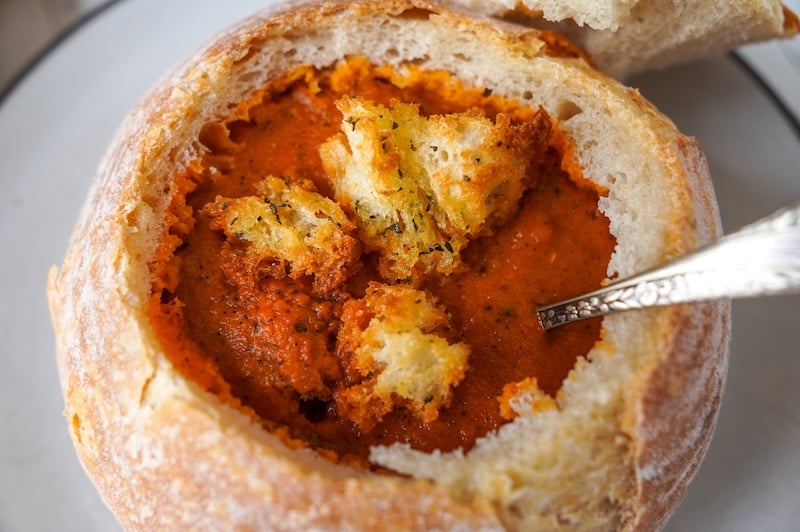
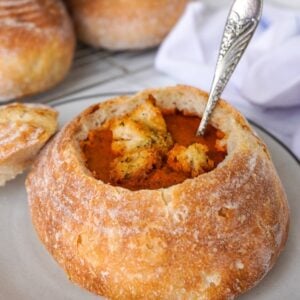
When cooled, slice the top off each loaf, scoop out some of the center, and fill with your favorite soup!
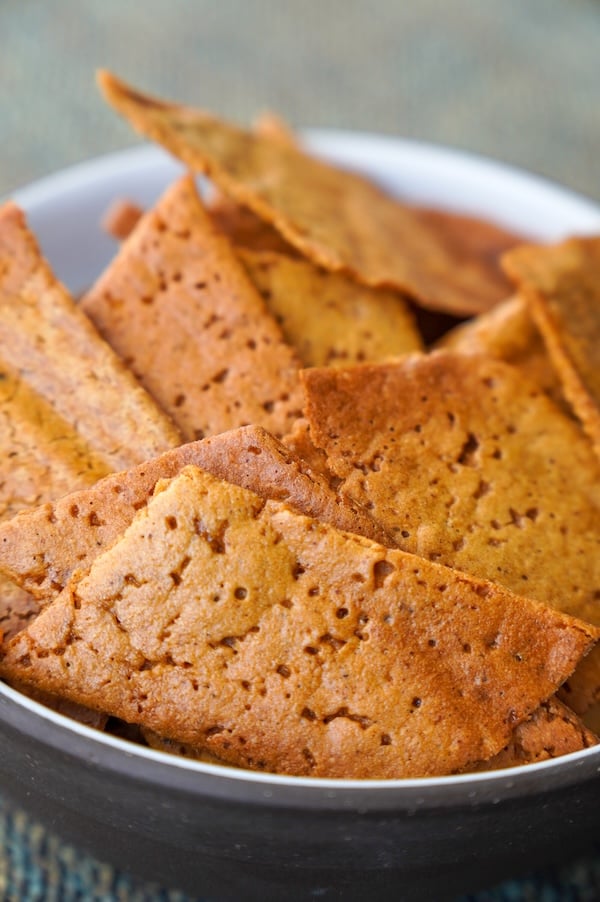
Bonus: How to Make Croutons
Don’t waste that bread interior – turn it into croutons!
Using your hands, tear the leftover bread into bite-sized pieces and put in a small bowl. Toss the bread pieces with:
- About 2 tsp olive oil (I just eyeball this)
- A pinch of salt and pepper
- A little Italian seasoning or Herbs de Provence (maybe 1/2 teaspoon or so)
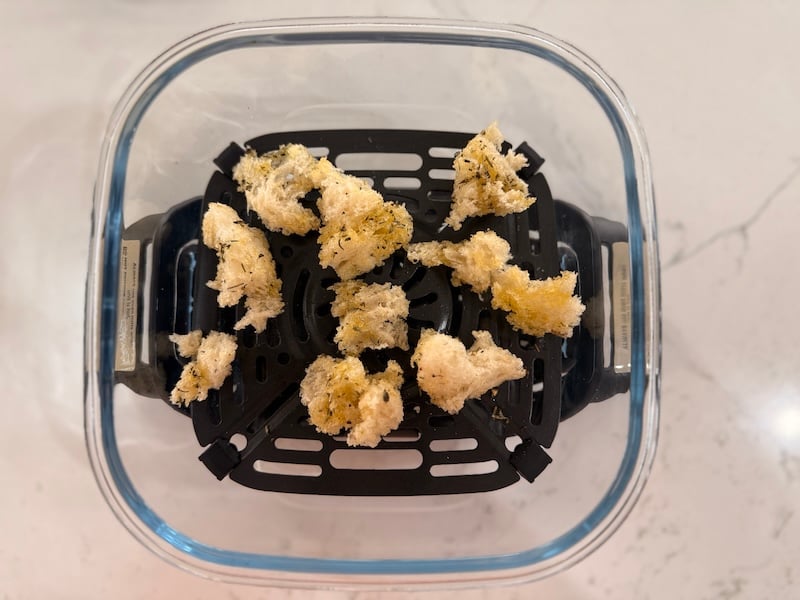
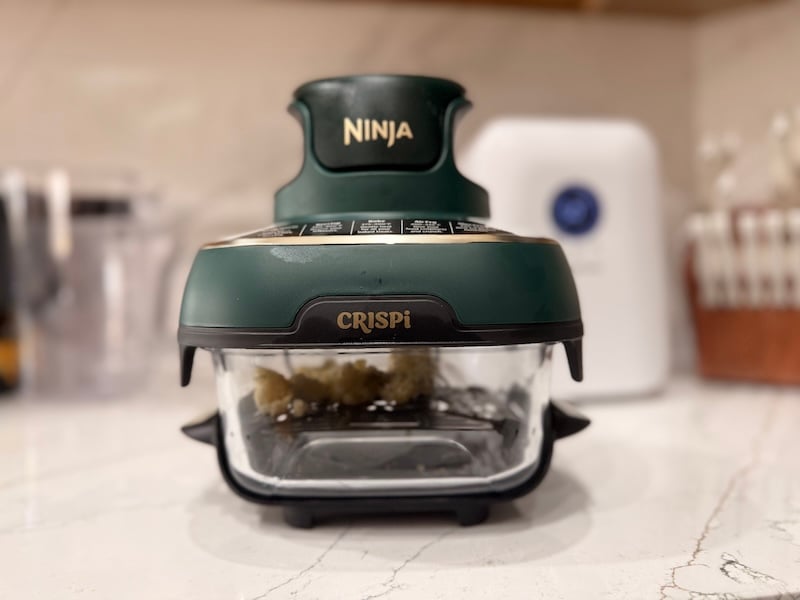
Pour into an air fryer set to 400-425°F (200-220°C) and cook for 4-5 minutes, or until golden brown on the edges and crisp.
Storing & Reheating Your Sourdough Bread Bowls
Room temperature: Once fully baked and cooled, store your bread bowls in an airtight container, bread bag, or glass cake stand for up to 2–3 days. I usually keep mine in a bread bag on the counter.
Freezer: If you want to prep ahead, these freeze really well. Once cooled, wrap each bread bowl tightly in plastic wrap and place them in a freezer bag. They’ll keep for a couple of months.
Reheating: To refresh bread that’s a day or two old, you can warm them in the oven at 350°F (175°C) for about 5–10 minutes. This is just enough to bring back that crisp crust.
To reheat from frozen, thaw at room temperature, then warm in the oven at 350°F (175°C) for 10–15 minutes until the crust feels crisp again.

FAQs
To make one bread bowl, you’ll need 101g warm water, 38g active sourdough starter, 158g bread flour, and 3g salt. Scale up for as many bread bowls as you need!
For individual bread bowls, I like these 5″ mini bannetons made from a sugarcane pulp material. They don’t feel like the highest quality ever, but you get 12 of them for under $30, which is hard to beat. They get the job done. If they’re unavailable, I also have these from Doyolla, and they work nicely, too (they’re just a little pricier).
They do help your bread bowls keep a nice, even shape. But you could use small mixing bowls lined with a flour sack towel (or perhaps a paper towel) instead.
I think 300g of dough is the perfect size for bread bowls.
I find that 20 minutes covered and about 10-20 minutes uncovered at 450°F (230°C) works really well. There may be some variance depending on your exact oven and whether you use a Dutch oven or open bake. You can double-check they are done by taking the internal temperature. They should reach 205-210°F. You can extend the uncovered portion of the bake to get the loaf as dark as you personally prefer.
Once the bread bowls are completely cool, use a small serrated knife to slice off the top, then gently pull out the center with your hands. Leave about a ½-inch wall inside so it stays sturdy when filled.

Sourdough Bread Bowls
Equipment
- Proofing box (or a warm place in your house)
- 14"x20" cooking steel Use code SDGAL10 for 10% off
- Cast iron pan with lava rocks inside to create steam during open baking
- Rice flour for dusting bannetons and loaves after shaping
Ingredients
Sourdough Starter
- 20 g sourdough starter
- 100 g water
- 100 g bread flour
Main Dough
- 505 g warm water
- 190 g active sourdough starter (from above)
- 790 g bread flour
- 16 g sea salt
Instructions
Step 1: Feed Your Starter
- The night before you plan to make your bread, combine 20 g sourdough starter, 100 g water, and 100 g bread flour in a jar. Note: This is a 1:5:5 feeding ratio and should peak in 10-12 hours. You'll have a little leftover so you can feed it and keep your starter going.

Step 2: Mix Your Dough
- Combine 505 g warm water, 190 g active sourdough starter, 790 g bread flour, and 16 g sea salt. Mix until a shaggy dough forms. To build some strength, remove the shaggy dough from the bowl and do slap and folds on the counter for 1-2 minutes. Put back in the bowl, place in a warm place or a proofing box to set 82°F (28°C) and cover for 30-60 minutes.Note: You can also mix the dough in a stand mixer. Mix on a medium-low speed with the dough hook for about 5 minutes.
- Tip: At this time, I would feed the leftover starter from my jar to keep it active and happy!
Step 3: Stretch and Folds/Coil Folds
- Perform 4 sets of stretch and folds or coil folds, each set 30 minutes apart.
Step 4: Bulk Fermentation
- Let the dough finish the bulk fermentation. The dough should have risen in volume and will appear puffy and domed on top. It should jiggle like Jell-O when you gently nudge the bowl and feel slightly tacky but not overly sticky to the touch. When you look at the sides and bottom of the bowl, you should see tons of bubbles. When in doubt, let the dough ferment longer. Overproofed dough is tastier than underproofed dough.
- If you've kept your dough in a warm spot (82°F/28°C), it should take about 4-6 hours (that timer starts when you mix the starter into your dough). If the dough has fallen in temperature and is a bit cooler, it will take longer. Watch for the visual cues!


Step 5: Divide and Shape
- Using a bench scraper, divide the dough into five equal pieces, about 300g each. I like to weigh my dough ball and divide by 5 to be more precise! If you're experiencing any sticking, use a water mister to lightly moisten your surface and bench scraper.

- Use your bench scraper to push the mass of dough up, around, and back toward you (like a candy cane motion). Continue doing this motion, gently, until you've coaxed the mass of dough into a round.
- Flip the dough ball upside down and place it seam-side up in a lightly floured mini banneton. Continue this process for all five bread bowls.
- After a 5-10 minute rest, pinch the seams and/or stitch the dough to increase surface tension. Dust the tops with rice flour.

Step 6: Second Proof (or Cold Retard)
- If doing a same-day bake: cover and put in a warm spot (82°F/28°C) for about 3 hours, or until the dough has puffed up more and passes the poke test. When you poke the dough with a floured finger, it should remain indented and spring back ever so slightly (and slowly). If it springs back quickly and fully, it needs more time.If you prefer long-fermented loaves: cover and refrigerate until tomorrow. Ideal cold retard: 8-16 hours. Do not exceed 96 hours. No need to do the poke test at any point.

Step 7: Score and Bake
- When ready to bake, preheat oven to 450°F/230°C with Dutch oven(s) or a bread steel inside. If using a bread steel, we need steam – I like putting a small cast iron pan with lava rocks on the lowest rack in my oven.Note: if you did the cold retard, you do not need to bring your dough to room temperature before baking!
- Transfer the dough balls to parchment paper and score a shallow X shape on top.
- If using a Dutch oven: you will have to bake in batches. Depending on the size of your vessel, you may be able to fit two bread bowls in there at a time. Use discretion! Transfer dough to the Dutch oven. If open baking with a bread steel: I can fit all five of these loaves on my Cooking Steels 14"x20" bread steel. Using a bread peel, place dough on the hot steel. Pour hot water into the cast iron pan – be careful as steam will immediately rise up. Close oven as fast as possible. If desired, you can toss some ice cubes in your oven to assist with additional steam.
- If using a Dutch oven: Bake with lid on for 20 minutes. Then remove lid and bake for about 10 minutes more, or until golden brown and the internal temperature is 205-210°F (96-99°C). Repeat this process for the remaining bread bowls, letting the Dutch oven heat back up between bakes.If open baking with a bread steel: Bake for 20 minutes; then remove any remaining source of steam. Continue baking for 10-20 minutes, or until golden brown and the internal temperature is 205-210°F (96-99°C). My uncovered bake time takes longer when open baking, hence the extended timeframe.
- Cool on a wire rack for about an hour before slicing off the tops and scraping out the interior!

Notes
- Central Milling High Mountain (13.5% protein)
- Central Milling ABC (11.5% protein) – this is almost identical to Costco’s All-Purpose flour
- Ballerina Farms Farm Flour (14% protein)
- King Arthur unbleached bread flour (12.7% protein)
- Bob’s Red Mill Artisan Bread Flour
Conclusion
There’s something that’s just so comforting about these sourdough bread bowls.
Golden on the outside, soft and chewy on the inside, and exactly what your favorite fall or winter soup needs.
If you make them, I’d love to see how they turn out! Share your results in the comments or tag me on Instagram @thatsourdoughgal. Seeing your bakes always makes my day.
And if you’re new to sourdough or just looking for more recipe ideas, be sure to subscribe to my newsletter. It’s packed with beginner-friendly tips, recipes, and giveaways!
Recipes to try next:


Love the recipe so much, definitely gonna try this!!!!! Love from India 🤍
Instagram – riyamxy05
I will define trying this recipe next! I have tried making bread bowls 3 times now. But each time I’ve had a problem with them expanding from the bottom! Even though I scored a good X on top! This has happened in the Dutch oven AND doing open bake. I never have that problem when I bake my normal loaves. Any suggestions?! It’s so discouraging 😔. Thank you for all that you do and share! 💕
Do you have a photo of what you mean?
This happened to me as well! I followed your recipe to the letter so any advice or ideas are welcome!
Consider scoring a bit deeper on top to guide the expansion!
I live at a high elevation and working with sourdough can be challenging! This dough was beautiful and easy to work with. The bowls turned out perfectly, thank you!
So glad to hear it!!
I haven’t tried this yet, but I’m excited to do it!! What is the overall finished size? I want to measure my Dutch oven to make sure they’ll fit.
About 5.5″ wide and 3″ tall after they’re baked
I did the same day recipe. It was the first time I used my proofing box and unfortunately, I over proofed the bread. I still baked it, and it was delicious with my clam chowder. I like that the recipe has multiple options – same day or next day baking.
So glad they still turned out and you were able to enjoy them!
So happy this was posted, perfect pairing for my lobster bisque I got at the farmers market this weekend. Great instructions,turned out so good. Thanks, Rebecca!
You’re welcome, glad you enjoyed it!!
Do you have any recommendations on what to use if I do not have mini boules?
You could use small mixing bowls lined with a flour sack towel (or perhaps a paper towel) instead.
Is this recipe correct? 505g of water seems like a lot. Maybe the flour ant is off. I tried this yesterday and it was soupy the dough never came together. I added a lot more flour and baked today. Loafs were just to wet. I am not complaining.
Yes it’s correct. The total hydration of this dough is 68%, which is actually fairly low in comparison to other artisan sourdough recipes (those are typically around 75%). If it was soupy, something else must be going on like a glitch with the scale.
I figured out what happened. I had 2 containers of water on my bench. I added one in order. As the dough was mixing I saw the other. Oh crap. Forgot the water. So added. Hence double the water. Uggh
I made these for Christmas Day! They were a hit. so delicious. Thank you
You’re welcome!
Your recipes are very fun to make and they are delicious. I’ve really enjoyed using your recipes for Sourdough, Jalapeño Cheddar, Italian Herb and Cheese, Cinnamon Swirl and Lemon Blueberry. I love to bake bread and I give away most of my bread to friends who love to eat it. My very favorite is the Italian Herb and Cheese💕
Aw thank you so much!!
I have my bowls in the fridge cold-proofing…they don’t look as pretty as yours! I struggled getting them smooth. In looking ahead to the bake, do I have to have lava rocks in my cast iron pan or can I just have water in it?
You can use just water. Some bakers, like Maurizio from The Perfect Loaf, suggest soaking some kitchen towels (thoroughly soaked!) and putting those in the cast iron pan to help generate steam. So that is also worth considering.
Mine didn’t golden, baking in bowls. Also the dough was very soft and hard to shape. I did 5 sets of S&F, so I don’t know. They taste good.
I made these to hold chili this week. The dough was a dream to work with! (That’s saying a lot for this novice sourdough baker.) I adjusted the recipe down to 4 bowls, since there are only 2 of us, and we had them 2 nights. I decided to bake 2 in my oval Krustic dutch oven (a perfect fit) the first day and I left 2 in the fridge to bake the next day. All 4 bread bowls had great oven spring and they tasted amazing! Thank you for the wonderful recipe!
Looks so yummy, thanks for sharing!
I like the way you scored that. I ma try that next time.
Made for a post-Christmas family gathering. Absolutely delicious and so well received! I did add about 1/8 t yeast since our house is so cold. Baked, wrapped in cling wrap and frozen until the day of the party, then defrosted and cut and scooped out.
Great idea to freeze them ahead of time and have them ready! Thanks for sharing!
I made these last weekend and gave two bowls to a friend who treated them like a mini loaf. She said it was literally the best sourdough bread she ever ate!
Thank you for helping me make a product that makes me look like I know what I’m doing in the kitchen!
Love it, so glad you enjoyed it!!
I have the cutest LeCreuset mini cocotte that were perfect for these. So easy and so much fun. I had to bake 2 at a time, but the result was worth the wait.
How fun are those!!
Amazing! These were easy. Because of my personal availability I changed the timing a little and then did the long ferment. They were delicious and we had them with home made cream of mushroom. And I made the bonus croutons too
Yum!!
Tried this recipe for the first time. But the bowls did not rise. There good, but flat. Do you have any suggestions?
They look quite pale which could be a baking time/temp issue, but it is typically underfermentation. Do you have a photo of the crumb? I can confirm if I can see the inside
What can I use in place of mini. Bannetons?
You could use small mixing bowls lined with a flour sack towel (or maybe a paper towel) instead!
Can we bake these and freeze them? If yes, directions for using from frozen for soup.
Thank you 😁
Yes! If you want to prep ahead, these freeze really well. Once cooled, wrap each bread bowl tightly in plastic wrap and place them in a freezer bag. They’ll keep for a couple of months.