
Italian Herbs & Cheese Artisan Sourdough Bread Recipe

I hate to mention Subway in the first sentence of an artisan sourdough bread recipe, but… that Italian herbs and cheese bread was always my go-to growing up.
Now that I make sourdough, I realize that while the bread was good at the time, it doesn’t compare to homemade sourdough.
Thinking back on those memories, I decided to make my own version of the Italian herbs and cheese loaf, but in an artisan-style sourdough loaf.
My husband – and his friends (and me) – think this might be the best loaf of bread I’ve made to date. The flavors are punchy, aromatic, and downright delicious. Here’s how to make it.
Note: If you already have an artisan sourdough recipe you swear by, just add the inclusions during your second set of stretch and folds.
Why You’ll Love This Recipe
- Very beginner-friendly: if you’re beginning to experiment with inclusions, this is a perfect starting place. It’s not messy or difficult – just toss the herbs and cheese in your dough, and you’re golden.
- The most flavorful sandwich base ever: imagine this herby, cheesy bread with some deli meat, cheese, lettuce, tomato, mayo… heaven.
- Delicious on its own: we ate this entire loaf plain with some butter smeared on top. It’s so divine on its own that you even need anything else with it!
- Almost exactly the same as making a regular artisan loaf: this inclusion addition is super simple and will feel almost the same as making a plain sourdough loaf.
Sourdough Bread Timeline
Here’s a sample timeline to help you plan out your bake.
| Day 1 | |
| Before bed | Feed your starter (1:5:5 ratio is best for overnight but experiment with your starter in your environment to nail it down) |
| Day 2 | |
| 8 am | Mix flour, starter, and most of the water (this starts the bulk fermentation) |
| 9 am | Add salt and remaining water; knead or slap and fold for 2-4 minutes |
| 9:30 am | Stretch and fold the inclusions into the dough |
| 10 am | Stretch and fold or coil fold #2 |
| 10:30 am | Stretch and fold or coil fold #3 |
| 11 am | Stretch and fold or coil fold #4 |
| 3:30 pm | Look for signs of bulk fermentation being done (more pointers in the recipe card); if ready, pre-shape dough |
| 4 pm | Final shape, put in banneton, and refrigerate overnight |
| Day 3 | |
| 7 am | Preheat Dutch oven to 450°F/230°C |
| 7:45 am | Score and bake the dough |
| 10:45 am | Let the bread cool; now, enjoy the bread! |
Ingredients
- Bread flour: King Arthur unbleached bread flour (12.7% protein) does the heavy lifting in this recipe. If your flour has a different protein percentage, you may need to adjust the amount of water.
- Whole wheat flour: Adding a touch of whole wheat flour adds nice flavor and a bit of nutrition. It also makes the starter happy!
- Active starter: You’ll need a ripe sourdough starter to leaven this dough. Make sure your starter is happy and healthy – ideally, triple in size when it’s peaked.
Related: Is My Sourdough Starter Ready to Bake With? How I Can Tell
- Warm water: You’ll want lukewarm water – water over 120°F may kill your sourdough starter. Cold water will prevent your dough from rising at a decent pace. Also, I use water straight from my faucet. I live in the country and have well water; I’ve never had any issues. However, I’ve seen others recommend using filtered water.
- Salt: I use sea salt. Just try to avoid salt with anti-caking agents.
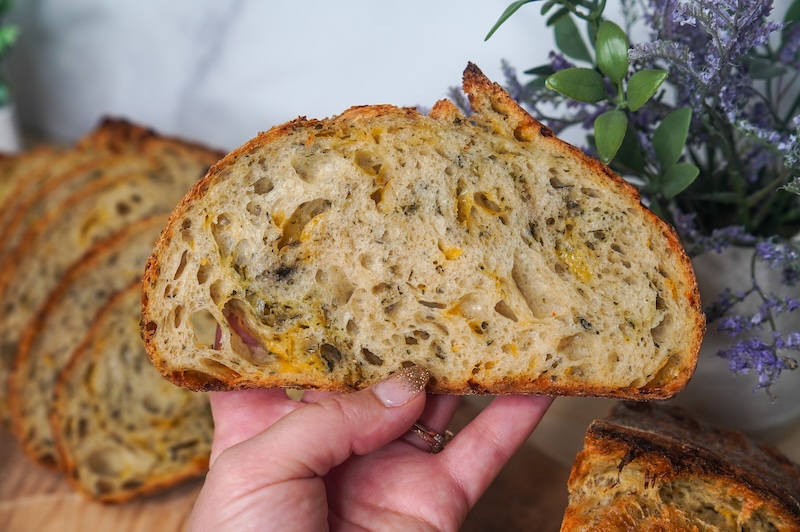
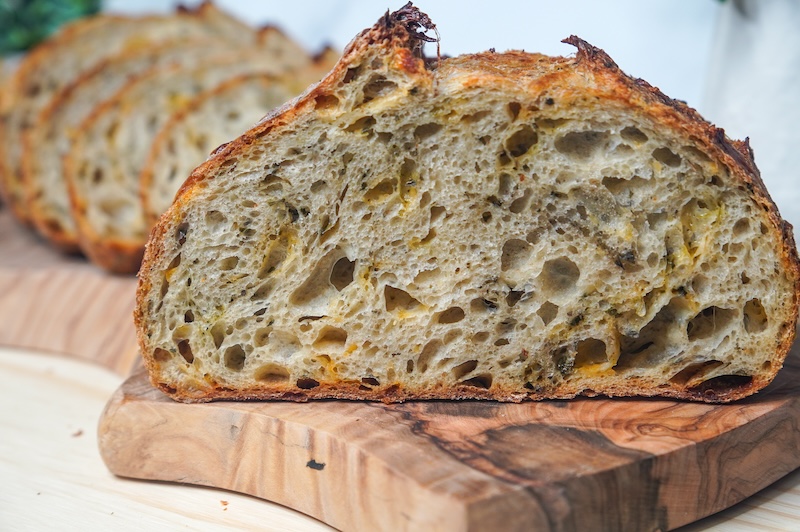
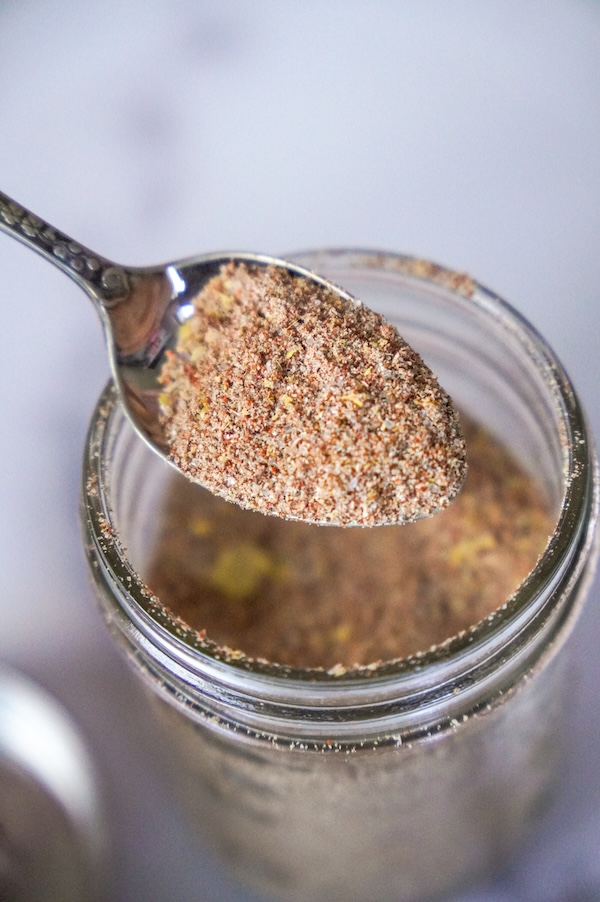
- Italian seasoning blend: this is a total staple in our spice cabinet! It includes a mix of oregano, basil, thyme, rosemary, marjoram, and garlic.
- Lightly dried basil: I added this to the dough because we had it; feel free to do the same with what’s in your fridge and pantry for extra flavor. To clarify, this isn’t dried basil in a spice jar. It’s found in the produce section and lasts up to 4 weeks in the fridge. It’s basically halfway between fresh basil and dried basil.
- Colby Jack cheese: once again, this is the cheese block we had in the fridge, so I used it. This recipe would be equally delicious with other types, so customize to your taste! The only thing I ask of you is to shred your own cheese – the pre-shredded stuff won’t melt into your dough well because it has added anti-caking ingredients.
- Parmigiano-Reggiano cheese: I don’t skimp on my parmesan cheese anymore. If you can help it, don’t use the dust in the green container – buy a real wedge of authentic parmigiano reggiano and grate it. The flavor difference is astounding. This also adds umami!
Need more inclusion ideas? Check out: 41 Sourdough Inclusion Ideas: Add-Ins You Should Try
How to Make Italian Herbs & Cheese Sourdough Bread (Video Tutorial)
This YouTube video takes you through this recipe, step by step. If you get stuck on any step in the recipe card, feel free to jump to this video to get a visual look.


Italian Herbs and Cheese Artisan Sourdough Bread
Equipment
- Oval banneton (5% off with code TSG5) | Size I'm Using: Oval – Spiral MD
- Oval Dutch oven ($15 off with code REBEKAH15)
Ingredients
Sourdough Starter
- 12 g sourdough starter (active or discard)
- 60 g water
- 60 g bread flour (unbleached, King Arthur)
Main Dough
- 325 g water
- 450 g bread flour (unbleached, King Arthur)
- 50 g whole wheat flour (Sunrise Flour Mills)
- 120 g active sourdough starter (from above)
- 25 g water
- 10 g sea salt (Redmonds)
Inclusions
- 3 g Italian seasoning blend
- 4 g lightly dried basil
- 110 g Colby jack cheese, shredded
- 15 g Parmigiano Reggiano, shredded
Instructions
Feed Your Starter
- The night before you plan to make your dough, feed your starter. Mix together 12 g sourdough starter, 60 g water, and 60 g bread flour. This gives you a little more than you need so you don't have to scrape out every last bit from the jar (you can also feed the leftovers to maintain your starter). At this feeding ratio, your starter should peak by morning (about 10-12 hours after you feed).
Make the Dough
- In the morning, mix 450 g bread flour, 50 g whole wheat flour, 120 g active sourdough starter, and 325 g water. (This is the beginning of the bulk fermentation.) Knead the ingredients together until fully incorporated and you have a shaggy dough. Cover with plastic wrap, a shower cap bowl cover, or cloth bowl cover, and let rest for about 1 hour.Optional: you can opt to do an autolyse by mixing just the flours and water and letting it rest for 30 minutes, up to overnight. Then, proceed by adding your starter.
- Add 10 g sea salt and 25 g water. Dimple in and squeeze the saltwater into the flour. The dough will break up, get stringy, and feel rubbery. This is normal. Mist your counter with water and turn out the mass of dough onto your counter. Do slap and folds for 2-4 minutes, or until the dough smooths out and the saltwater is fully incorporated. Cover and let rest for 30 minutes.
- Add inclusions (3 g Italian seasoning blend, 4 g lightly dried basil, 110 g Colby jack cheese, shredded, and 15 g Parmigiano Reggiano, shredded) on top of the dough in the bowl. Stretch and fold the inclusions into the dough. Cover and let rest for 30 minutes.
- Stretch and fold the dough. Cover and let rest for 30 minutes.
- Coil fold the dough. Cover and let rest for 30 minutes.
- Coil fold the dough. Cover and let rest for 30 minutes.
- The dough strengthening is now completed, so we wait until the dough has finished its bulk fermentation.Bulk fermentation is done when the dough is visibly larger (the exact percentage rise is not as important as the other visual signs), with bubbles all around the sides and underneath the surface. The dough should jiggle like jelly when you shake the bowl and feel light, airy, and puffy to the touch. It should be domed on the edges where the dough meets the bowl. Don’t worry about exact timing; trust these visual and tactile cues to guide you. Warmer dough ferments faster, colder dough takes longer, but slightly overproofed dough often makes better bread than underproofed. Don't be afraid to push the limits. For me, bulk fermentation took 7.5 hours; my dough was 70-72°F (21-22°C) and my home was 71°F (21.6°C), for reference.
- When bulk fermentation is done, dump out dough onto the counter. Gently pre-shape using a bench scraper to coax the dough into a tight ball. This is the end of the bulk fermentation.

- Final shape the dough using the single caddy clasp method. Flip into a floured banneton, seam-side up. Pinch the seam shut. Optional: Let the dough rest for about 10 minutes. Stitch the top of the dough to increase surface tension and cover. Put in the fridge overnight.


Score & Bake
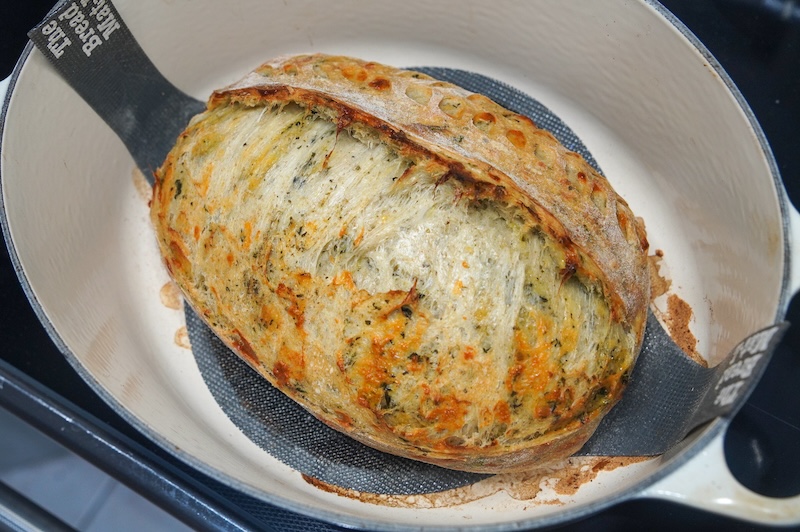
- The next day, at any time, preheat oven to 450°F/230°C with a Dutch oven inside.
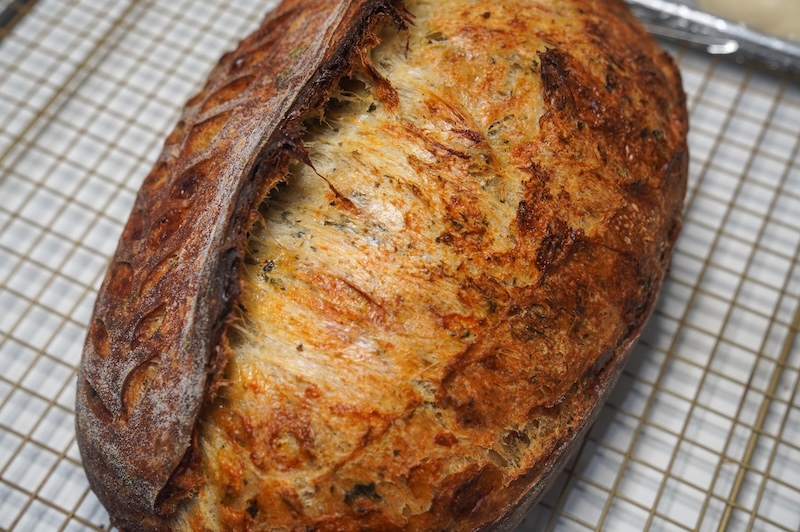
- Score the dough and place it in the preheated Dutch oven. Cover and bake for 30 minutes.
- Remove lid and lower oven temperature to 425°F/220°C. Bake for an additional 15-20 minutes, or until the top is as golden brown as you prefer. Feel free to temp the bread to ensure it is fully baked. It should be around 205-210°F (96-99°C).
- Wait for the bread to cool down, about 2 hours. Cut into the cooled bread and enjoy!!


Video
Notes
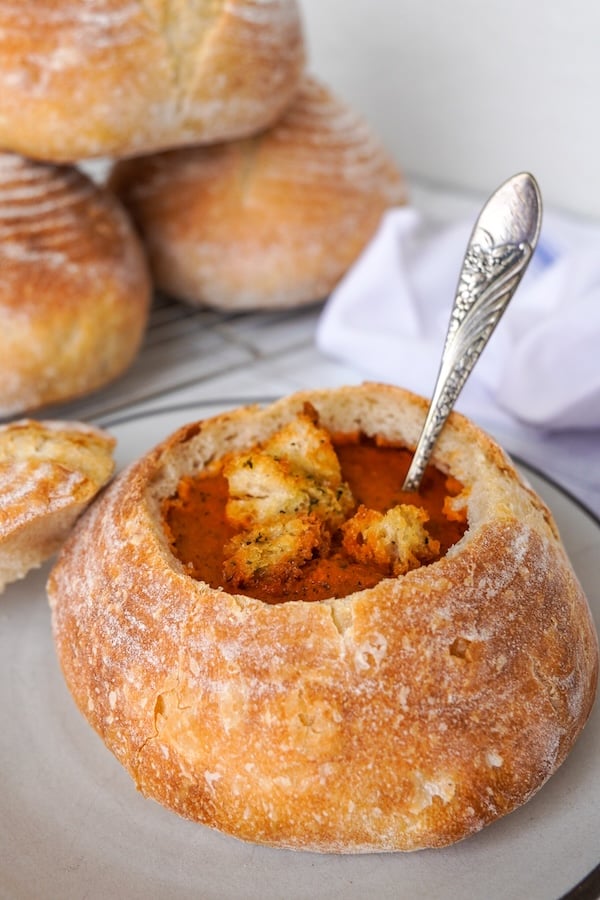
You might also want to try: The Best Jalapeño Cheddar Artisan Sourdough Bread Recipe
Conclusion
This inclusion combo is super beginner-friendly! Plus, the herbs and cheese blend is super versatile.
If you’re experimenting with adding flavors to your sourdough bread, this is one I’d start with. Save the cinnamon sugar for down the road (it’s the hardest!).
If you make this, let me know what you think. I’d LOVE to see your creations in an Instagram story! Just tag me @thatsourdoughgal.
Related:


So, so delicious! This is a winner, and so easy, too! I didn’t think adding the inclusions during stretch & folds would distribute them enough, but it really did! Keep ’em coming!
So looking forward to making this but wanted this as a focaccia bread. I’ve made regular artisan and overproofed to make a focaccia before so was hoping to make it with these inclusions.
This is not “my” favorite loaf as far as inclusions go, but it comes out perfect every time and my husband and co-workers love it! It paired well with broccoli and cheddar soup.
So glad your husband and co-workers are loving it!
Wow, my best loaf ever! No kidding. I also added some sauteed onions and otherwise followed the recipe. Tasty and beautiful loaf.
So glad you enjoyed it!
Hi! I’m in Spain and we don’t have lightly dried basil. Either fresh or dry. What is the better choise? Thanks!
Either one is fine – totally flexible.
Love this bread, it was amazing when I used it making grilled cheese, ham sandwiches. 10/10
Yum, great idea!
Another winner. So far I’ve made your 20% whole wheat, the chocolate chip, the jalapeño cheese and this one. They’ve all been huge hits in my house and with my neighbors.
I added a little parm on top in the last part of the bake. No regrets.
So glad you are enjoying all of the recipes so much!
Did this with Trader Joe’s everything but the elote seasoning, chipotle cheddar and pepper jack cheese. Also upped the loaf size as well. This loaf was soooo easy to work with! Thanks for the amazing recipe.
Great idea!! Sounds yummy!
Can this loaf be adjusted for overnight bulk ferment? Would the cheese need to be added at a different time?
Yes you can do that no problem. The cheese will be fine – the pH of the starter helps protect the dairy from going rancid.
OMG!!! I just made this today, it is absolutely the best!!! I didn’t use the basil, just used 2 tablespoons of Italian seasoning.
Baked this bread this morning! I followed your recipe to a tee. It proofed so nicely and smelled great! The depth of flavor is wonderful. My husband said I may have to bake another one in a few days! I’m excited to try more of your inclusion recipes. Thank you for clear instructions and helpful video.
Beautiful!! Glad you both enjoyed it!