
Italian Herbs & Cheese Artisan Sourdough Bread Recipe

I hate to mention Subway in the first sentence of an artisan sourdough bread recipe, but… that Italian herbs and cheese bread was always my go-to growing up.
Now that I make sourdough, I realize that while the bread was good at the time, it doesn’t compare to homemade sourdough.
Thinking back on those memories, I decided to make my own version of the Italian herbs and cheese loaf, but in an artisan-style sourdough loaf.
My husband – and his friends (and me) – think this might be the best loaf of bread I’ve made to date. The flavors are punchy, aromatic, and downright delicious. Here’s how to make it.
Note: If you already have an artisan sourdough recipe you swear by, just add the inclusions during your second set of stretch and folds.
Why You’ll Love This Recipe
- Very beginner-friendly: if you’re beginning to experiment with inclusions, this is a perfect starting place. It’s not messy or difficult – just toss the herbs and cheese in your dough, and you’re golden.
- The most flavorful sandwich base ever: imagine this herby, cheesy bread with some deli meat, cheese, lettuce, tomato, mayo… heaven.
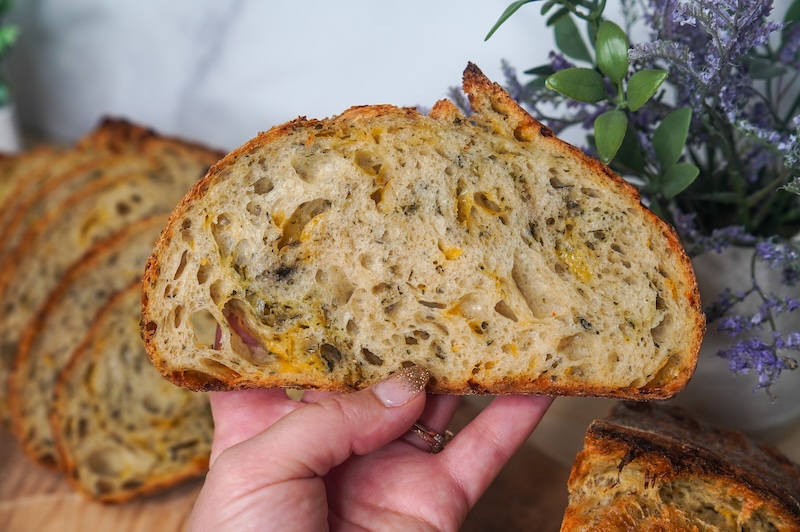
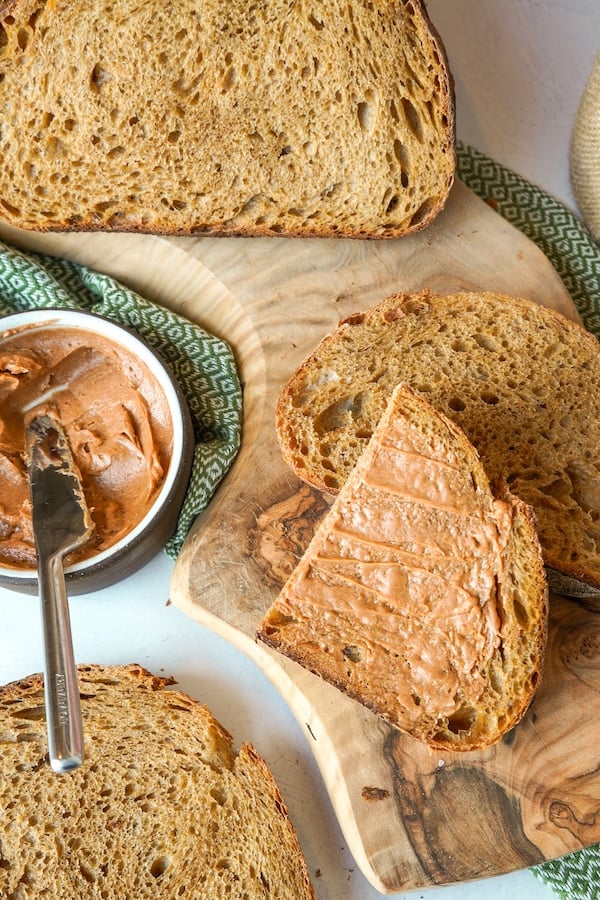
- Delicious on its own: we ate this entire loaf plain with some butter smeared on top. It’s so divine on its own that you even need anything else with it!
- Almost exactly the same as making a regular artisan loaf: this inclusion addition is super simple and will feel almost the same as making a plain sourdough loaf.
Sourdough Bread Timeline
Here’s a sample timeline to help you plan out your bake.
| Day 1 | |
| Before bed | Feed your starter (1:5:5 ratio is best for overnight but experiment with your starter in your environment to nail it down) |
| Day 2 | |
| 8 am | Mix flour, starter, and most of the water (this starts the bulk fermentation) |
| 9 am | Add salt and remaining water; knead or slap and fold for 2-4 minutes |
| 9:30 am | Stretch and fold the inclusions into the dough |
| 10 am | Stretch and fold or coil fold #2 |
| 10:30 am | Stretch and fold or coil fold #3 |
| 11 am | Stretch and fold or coil fold #4 |
| 3:30 pm | Look for signs of bulk fermentation being done (more pointers in the recipe card); if ready, pre-shape dough |
| 4 pm | Final shape, put in banneton, and refrigerate overnight |
| Day 3 | |
| 7 am | Preheat Dutch oven to 450°F/230°C |
| 7:45 am | Score and bake the dough |
| 10:45 am | Let the bread cool; now, enjoy the bread! |
Ingredients
- Bread flour: King Arthur unbleached bread flour (12.7% protein) does the heavy lifting in this recipe. If your flour has a different protein percentage, you may need to adjust the amount of water.
- Whole wheat flour: Adding a touch of whole wheat flour adds nice flavor and a bit of nutrition. It also makes the starter happy!
- Active starter: You’ll need a ripe sourdough starter to leaven this dough. Make sure your starter is happy and healthy – ideally, triple in size when it’s peaked.
Related: Is My Sourdough Starter Ready to Bake With? How I Can Tell
- Warm water: You’ll want lukewarm water – water over 120°F may kill your sourdough starter. Cold water will prevent your dough from rising at a decent pace. Also, I use water straight from my faucet. I live in the country and have well water; I’ve never had any issues. However, I’ve seen others recommend using filtered water.
- Salt: I use sea salt. Just try to avoid salt with anti-caking agents.
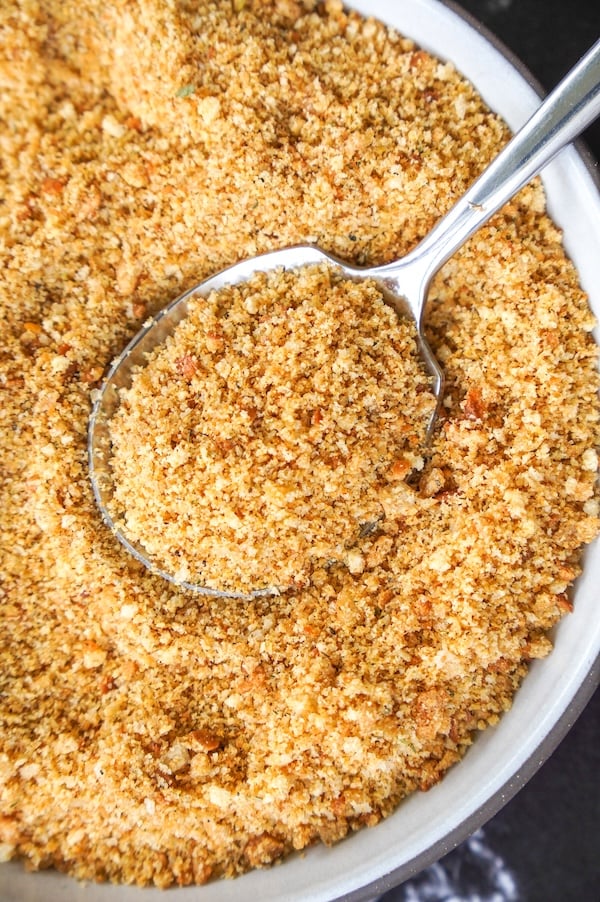
- Italian seasoning blend: this is a total staple in our spice cabinet! It includes a mix of oregano, basil, thyme, rosemary, marjoram, and garlic.
- Lightly dried basil: I added this to the dough because we had it; feel free to do the same with what’s in your fridge and pantry for extra flavor. To clarify, this isn’t dried basil in a spice jar. It’s found in the produce section and lasts up to 4 weeks in the fridge. It’s basically halfway between fresh basil and dried basil.
- Colby Jack cheese: once again, this is the cheese block we had in the fridge, so I used it. This recipe would be equally delicious with other types, so customize to your taste! The only thing I ask of you is to shred your own cheese – the pre-shredded stuff won’t melt into your dough well because it has added anti-caking ingredients.
- Parmigiano-Reggiano cheese: I don’t skimp on my parmesan cheese anymore. If you can help it, don’t use the dust in the green container – buy a real wedge of authentic parmigiano reggiano and grate it. The flavor difference is astounding. This also adds umami!
Need more inclusion ideas? Check out: 41 Sourdough Inclusion Ideas: Add-Ins You Should Try
How to Make Italian Herbs & Cheese Sourdough Bread (Video Tutorial)
This YouTube video takes you through this recipe, step by step. If you get stuck on any step in the recipe card, feel free to jump to this video to get a visual look.


Italian Herbs and Cheese Artisan Sourdough Bread
Equipment
- Oval banneton (5% off with code TSG5) | Size I'm Using: Oval – Spiral MD
- Oval Dutch oven ($15 off with code REBEKAH15)
Ingredients
Sourdough Starter
- 12 g sourdough starter (active or discard)
- 60 g water
- 60 g bread flour (unbleached, King Arthur)
Main Dough
- 325 g water
- 450 g bread flour (unbleached, King Arthur)
- 50 g whole wheat flour (Sunrise Flour Mills)
- 120 g active sourdough starter (from above)
- 25 g water
- 10 g sea salt (Redmonds)
Inclusions
- 3 g Italian seasoning blend
- 4 g lightly dried basil
- 110 g Colby jack cheese, shredded
- 15 g Parmigiano Reggiano, shredded
Instructions
Feed Your Starter
- The night before you plan to make your dough, feed your starter. Mix together 12 g sourdough starter, 60 g water, and 60 g bread flour. This gives you a little more than you need so you don't have to scrape out every last bit from the jar (you can also feed the leftovers to maintain your starter). At this feeding ratio, your starter should peak by morning (about 10-12 hours after you feed).
Make the Dough
- In the morning, mix 450 g bread flour, 50 g whole wheat flour, 120 g active sourdough starter, and 325 g water. (This is the beginning of the bulk fermentation.) Knead the ingredients together until fully incorporated and you have a shaggy dough. Cover with plastic wrap, a shower cap bowl cover, or cloth bowl cover, and let rest for about 1 hour.Optional: you can opt to do an autolyse by mixing just the flours and water and letting it rest for 30 minutes, up to overnight. Then, proceed by adding your starter.
- Add 10 g sea salt and 25 g water. Dimple in and squeeze the saltwater into the flour. The dough will break up, get stringy, and feel rubbery. This is normal. Mist your counter with water and turn out the mass of dough onto your counter. Do slap and folds for 2-4 minutes, or until the dough smooths out and the saltwater is fully incorporated. Cover and let rest for 30 minutes.
- Add inclusions (3 g Italian seasoning blend, 4 g lightly dried basil, 110 g Colby jack cheese, shredded, and 15 g Parmigiano Reggiano, shredded) on top of the dough in the bowl. Stretch and fold the inclusions into the dough. Cover and let rest for 30 minutes.
- Stretch and fold the dough. Cover and let rest for 30 minutes.
- Coil fold the dough. Cover and let rest for 30 minutes.
- Coil fold the dough. Cover and let rest for 30 minutes.
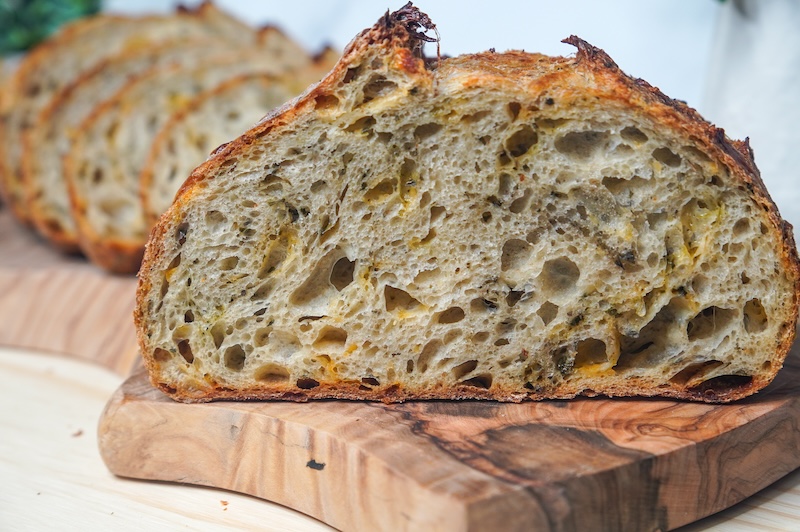
- The dough strengthening is now completed, so we wait until the dough has finished its bulk fermentation.Bulk fermentation is done when the dough is visibly larger (the exact percentage rise is not as important as the other visual signs), with bubbles all around the sides and underneath the surface. The dough should jiggle like jelly when you shake the bowl and feel light, airy, and puffy to the touch. It should be domed on the edges where the dough meets the bowl. Don’t worry about exact timing; trust these visual and tactile cues to guide you. Warmer dough ferments faster, colder dough takes longer, but slightly overproofed dough often makes better bread than underproofed. Don't be afraid to push the limits. For me, bulk fermentation took 7.5 hours; my dough was 70-72°F (21-22°C) and my home was 71°F (21.6°C), for reference.
- When bulk fermentation is done, dump out dough onto the counter. Gently pre-shape using a bench scraper to coax the dough into a tight ball. This is the end of the bulk fermentation.

- Final shape the dough using the single caddy clasp method. Flip into a floured banneton, seam-side up. Pinch the seam shut. Optional: Let the dough rest for about 10 minutes. Stitch the top of the dough to increase surface tension and cover. Put in the fridge overnight.


Score & Bake
- The next day, at any time, preheat oven to 450°F/230°C with a Dutch oven inside.
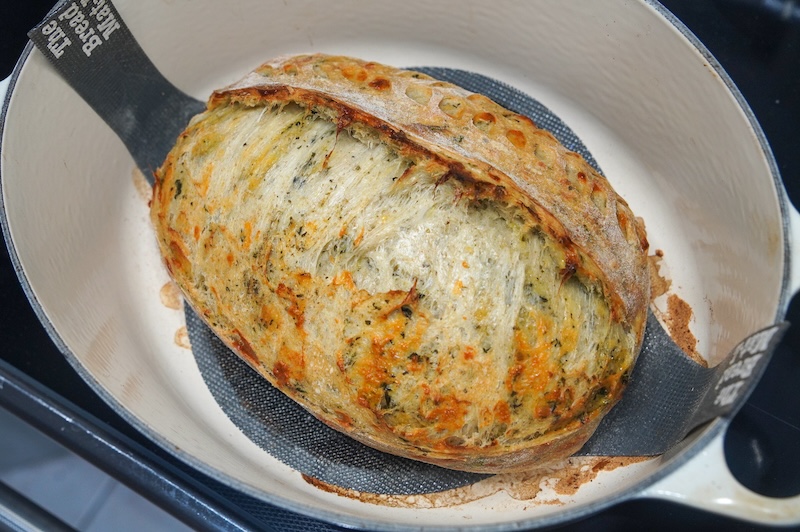
- Score the dough and place it in the preheated Dutch oven. Cover and bake for 30 minutes.
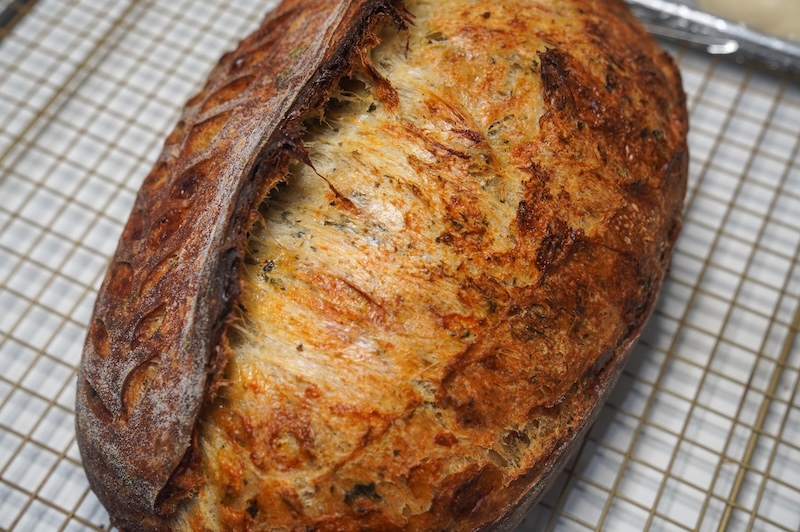
- Remove lid and lower oven temperature to 425°F/220°C. Bake for an additional 15-20 minutes, or until the top is as golden brown as you prefer. Feel free to temp the bread to ensure it is fully baked. It should be around 205-210°F (96-99°C).
- Wait for the bread to cool down, about 2 hours. Cut into the cooled bread and enjoy!!


Video
Notes
You might also want to try: The Best Jalapeño Cheddar Artisan Sourdough Bread Recipe
Conclusion
This inclusion combo is super beginner-friendly! Plus, the herbs and cheese blend is super versatile.
If you’re experimenting with adding flavors to your sourdough bread, this is one I’d start with. Save the cinnamon sugar for down the road (it’s the hardest!).
If you make this, let me know what you think. I’d LOVE to see your creations in an Instagram story! Just tag me @thatsourdoughgal.
Related:


I bake with only freshly milled whole grain flour. This is the second time I’ve made this recipe and am so impressed with the rise I get compared to most recipes. The ear and the design are the most distinctive of any I’ve made with FMF. Definitely not as much rise as with white (dead) flour but the taste and nutrition is …. Oh my!! Over the top. Thank you, Sourdough Gal!
Looks gorg! Thanks for sharing!
This one is a keeper for sure! OMG, the smell, the flavor….yum!!! This one came out absolutely perfect.
This is a perfect add to a nice pasta night or for dipping in oil or even a grilled cheese sandwich.
Looks amazing!! Thanks for leaving a review!
I’m wanting to try this recipe but I don’t have the pans you use. I use loaf pans and just bought the one you recommended for wonder bread recipe. Can I make it in a loaf pan? I’m not looking for a hard crust
Yes you can! There are detailed instructions for using loaf pans in this post if you want to reference that – https://thatsourdoughgal.com/easy-loaf-pan-sourdough-bread-recipe/
This might be one of my favorite inclusion that I’ve tried. It’s so delicious, smells heavenly, super soft inside. I’ve used cheddar cheese and parmesan that I have freshly grated as those were the cheeses that I’ve had. Thank you so much for sharing this recipe Rebekah!
Looks so yummy, glad you enjoyed it!
I’m looking forward to trying this recipe in a couple of days. I have AP flour, bread flour, and dark rye flour but no whole wheat. Can I substitute rye for the wheat and if so do I use the same measurements?
Yes you can!
This looks amazing! I’m so excited to try it! Can I just use white flour? If so, how much?
Yes you can sub more bread flour in place of the whole wheat flour
This recipe was so easy to follow and turned out amazing! So delicious… family loved it! Will totally be making this again!!
Love to hear that, it looks so yummy!!
I used the basic recipe skipping the additional step of squeezing in the salt and water. My dough was sticky and would relax while doing stretch and folds. My starter may have fallen too much before I mixed the dough. Used 10g of Italian seasoning and no basil. Let it bulk ferment for 7 hours and it had no visible bubbles on top but it was domed. Shaped and let it rest 10-15 minutes before I put it in the fridge. I baked after 30 hours and waited until the next morning to cut. Is Italian herb and cheese a breakfast bread?! Can’t wait to try at dinner!!!
My best loaf yet! Used Parmesan Romano greened cheese and aged Irish cheddar. Can’t wait to bite into it!
Stunning!!
This was my first time with an inclusion but I don’t know what went wrong. My oven doesn’t go more than 220 and I do an open bake with steam in a pan at the bottom , are you please able to help me out here.
Hey friend! What flour type/brand did you use? Also do you have a photo of the crumb (interior)?
Hi Rebekah, I use organic white bakers flour which we get here in Australia. The pic I have attached is a frozen piece so not sure how much it will help. When I cut it I felt the crumb was really nice. I did a score but can’t remember how deep it was.
OK it is in the overproofed arena but not bad. It did bake up strangely but it may just be a matter of shaping and dough handling – the way the top of the baked loaf looks, it’s almost as if the dough is layered and wasn’t sticking to itself during folds.
Oh ok. Thanks for your help Rebekah. Will make it again soon and post it here. Your feedback will help me become a better baker for this loaf.
This is the best Italian Herb and Cheese loaf! My son is new to sourdough baking and when he tasted your recipe, he said it would be the only recipe he would need.
Thanks so much for sharing.
Yay so glad to hear it!!
This is the best bread I have ever made!
I used Italian Style shredded cheese blend for all of the cheese in the recipe and it still turned out perfect.
It has so much flavor we’re enjoying it with just olive oil with a sprinkle of salt. So yummy!
So glad to hear it!!
I’ve made this a few times(sorry no pics), we love it!! I would like to make mini loaves (3.5”x 6.25”) out of this recipe. How many minis would I get from this recipe (not planning to double)?
I usually do 300g each for minis. So about 3!
I’m still a sourdough beginner and want to thank you again for this, and so many other fantastic recipes, tips & videos! We haven’t tasted ithis one yet but it smells soooo good! Except for the giant hole, how do you think it looks? I didn’t gave any colbyjack but I did have colby and mozzarella so I used 55g of each. Can’t wait to have it with pot roast tonight!
It looks stunning!! The shape of some of the alveoli look like they are veering on overproofing – do you see how they are long and stretched out? But many of us (including me) prefer our bread this way – it’s much softer and squishier!
This is my first official inclusion loaf and I followed your directions exactly as written, it came out so perfect and delicious!! When I pulled it from the oven I brushed it lightly with olive oil that had a light mix of Italian herbs & garlic powder.
I just love your tutorials, they are so helpful!
Looks amazing! Thanks for sharing!
Hello Rebecca
How would the mixing time change if I make this in my Ooni? It’s arriving tomorrow!
Thank you!
Here’s 2 videos that show you how to use the Ooni! https://www.youtube.com/shorts/rfMxkcDw_PM
https://www.youtube.com/shorts/2TiDaZEOArA
Making this bread was an olfactory and gustation delight! Yes, that’s fancy talk to say the aroma filled the house and it tasted good too.
We prefer the “practical-ness” of loaf bread so this was baked using the two loaf-pan method (https://thatsourdoughgal.com/easy-loaf-pan-sourdough-bread-recipe/).
It was a “same-day” bake as we didn’t have fridge space for a cold proof.
We already toasted a piece and my spouse loved it…she’s not a huge fan of STRONG Italian spices. We’ll call this our “split-top Italian” and can’t wait to make grilled cheese sandwiches and garlic bread next.
Can’t wait to try this one! Could this recipe be made into dinner rolls?
I don’t think I’d like this in a roll format – an enriched dough does a lot better!
What do I do if I accidentally added 110g of Parmesan cheese instead of 15g
Bask in the cheesy goodness
In your video, you stated that after the 30-minute bake with the lid on, you dropped the temperature to 325 degrees for 20 minutes without the lid, but in the recipe directions, it says 425. I’m just wondering which information is correct.
425F. If I said 325, I misspoke. Sorry about that.