
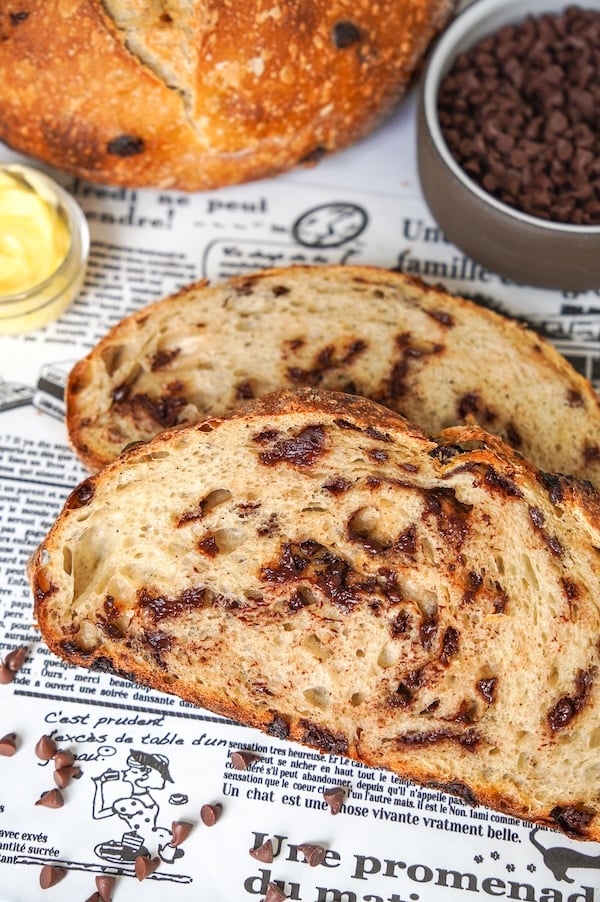
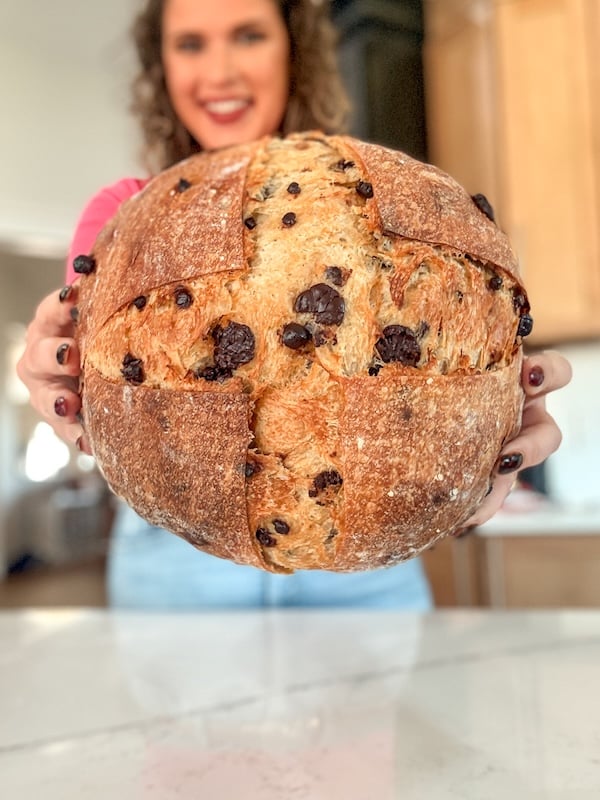
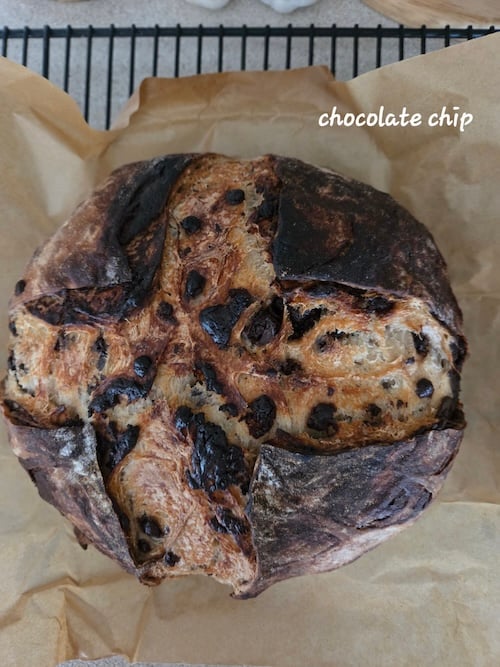
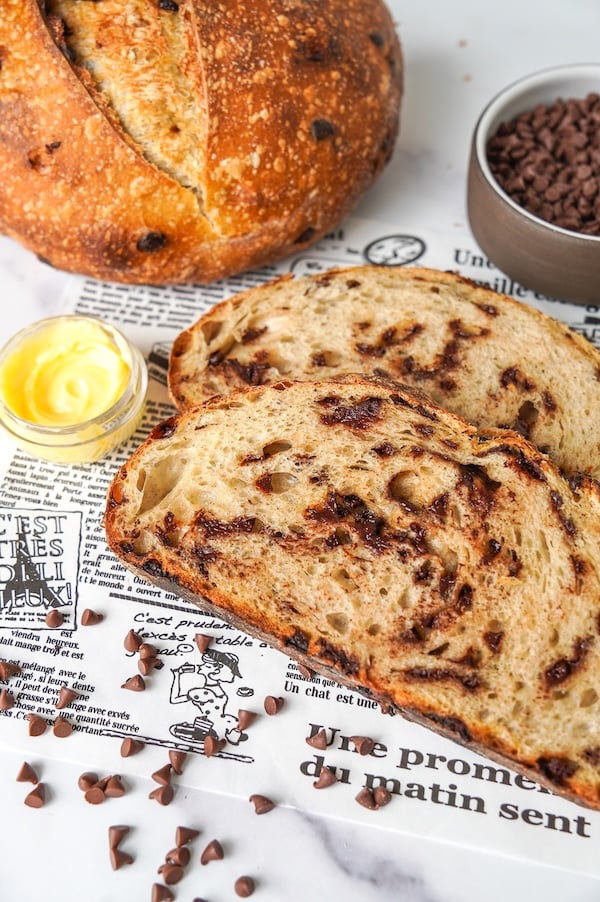
The Best Chocolate Chip Sourdough Bread Recipe
My mom asked me how to make chocolate chip sourdough bread, and the truth is, all you need to do is toss in some chocolate chips during your stretch and folds.
But then I got to thinking, as I often do… how can we jazz things up? Are there any little tricks of the trade we should know to improve our final result?
That’s how this chocolate chip sourdough bread recipe was born.
“If a chocolate chip cookie and a loaf of sourdough had a baby, this is it!” –Recipe tester from Pennsylvania
“Everyone said it’s one of the best breads I’ve ever made.” –Recipe tester from South Australia
“I love the recipe. It’s dangerously good.” –Recipe tester from Dillsburg, PA

Disclaimer: Some of the products I recommend in this post are affiliate links – if you choose to purchase after clicking one of my links, I may earn a small commission, which helps fund this website, recipe development, and monthly giveaways. I sincerely appreciate your support.
Why You’ll Love This Elevated Chocolate Chip Sourdough Bread
- Recipe tested by 415 home bakers: This chocolate chip sourdough recipe was tested by 415 home bakers across 6 continents, achieving a 4.69/5 star rating with 96.6% of testers giving it 4 or 5 stars. From humid Florida kitchens to high-altitude Colorado, from sea-level coastal areas to Australia, bakers everywhere achieved great results with this recipe!
“It was sooo good. I could eat the whole loaf. It’s not sour at all. Loved it!!! My new fav loaf.” –Recipe tester from Pembroke Pines, Florida
- Not your basic chocolate chip loaf: The dough itself is built to complement chocolate flavors. We’ve gently sweetened the dough and added complementary flavors like coffee (optional) and vanilla – it takes the whole thing up a notch.
- Well-dispersed chocolate chips: Laminating the dough and adding chocolate chips via my swirl technique gives really even distribution. The last thing we want is all the chocolate collecting in one little area of the dough.
“It was the best dough to work with. Totally worth the extra steps. I’m never going to just throw chocolate chips in, always follow this tested recipe!” –Recipe tester from DFW, Texas
- Lightly sweet flavor: The sweetened levain (that just means we added a little sugar to our starter) and brown sugar don’t make this taste like dessert — they just add a mellow sweetness that complements the dough instead of overwhelming it. Think “chocolate chip bread,” not “dessert pretending to be bread.”
- A classic sourdough loaf with the chocolate twist: Even with the vanilla, sugar, and chocolate, the dough still behaves like it’s a classic artisan loaf.
“Loved it!! Maybe one of the easiest/best loaves you’ve made. Very beginner friendly.” –Recipe tester from Charlotte, NC
Another recipe for chocolate lovers: Overnight Double Chocolate Sourdough Bagels
Ingredients
- Sweet starter: This softens the tangy flavors just enough, which works especially well in a chocolate-forward loaf like this. To cut tangy flavors even more, you could make a stiff sweet starter, but I wanted to retain a little bit of that complex sourdough flavor.
“This is a great recipe. The bread is so soft, it’s easy to make, the sweet starter definitely helps with getting rid of the tang and is delicious.” –Recipe tester from Fort Mill, SC
- Water: Room-temperature water is good. Nothing too hot or too cold, so it doesn’t shock or slow down your starter or dough.
- Brown sugar: Light or dark brown sugar both work. Adds moisture and a subtle caramel note that pairs really nicely with the chocolate.
Note: 89% of testers said the loaf had the perfect level of sweetness. However, most testers who wanted it less sweet were international bakers unfamiliar with how we Americans put sugar in everything. 😂 If you prefer less sweet, reduce the brown sugar by half or even omit it entirely.
- Vanilla paste or extract: Vanilla paste has a stronger, richer flavor, but homemade vanilla extract works beautifully, too. It’s an equal substitution either way.
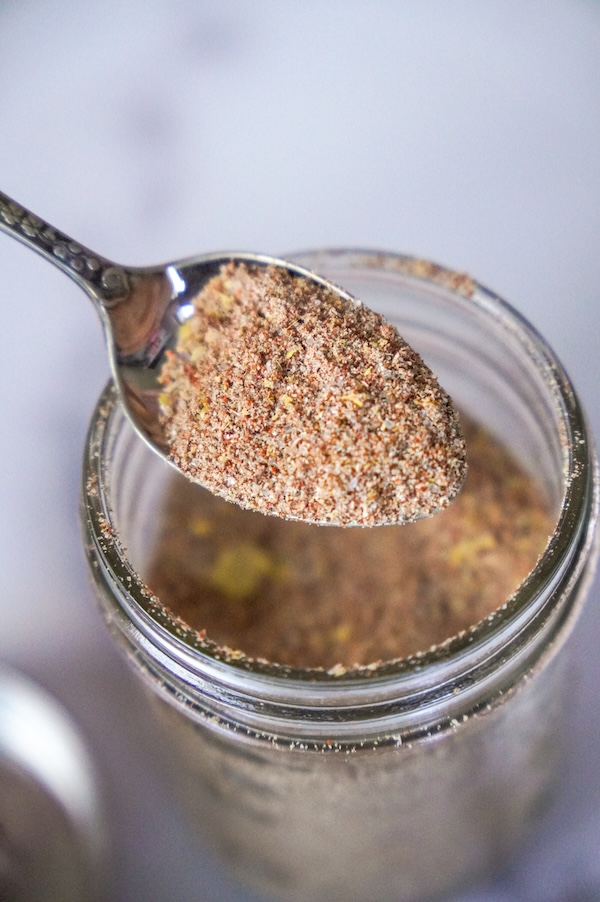
- Espresso powder (optional): Adds a slightly more complex flavor and enhances the chocolate without making the bread taste like coffee.
- Bread flour: Provides the strength and structure the dough needs to rise well, even with all the chocolate added.
- Whole wheat flour: Adds a touch of depth and nuttiness to the overall flavor. You can use all bread flour if you prefer, but I like sneaking in that little bit of whole wheat. You could easily substitute rye flour as well.
- Salt: I love Redmond’s Real Salt. You can get 15% off with code TSG15.
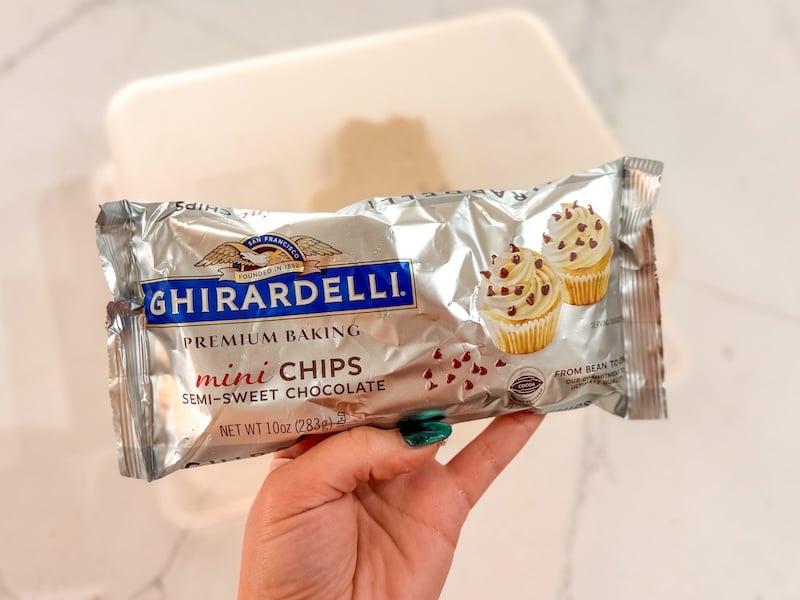
- Mini semi-sweet chocolate chips: The mini chips are the perfect size because they are easier to distribute evenly. If you don’t have them, you could roughly chop regular-sized chips, but the mini ones truly are a lot better. Believe me, I’ve made this loaf every which way possible, and the minis are where it’s at.

Ingredient Substitutions
- Whole wheat flour: You can use 100% bread flour instead of mixing in the little bit of whole wheat— I like the extra depth the whole wheat adds, but it’s optional. Some of my recipe testers also used other flours like rye or spelt, which work perfectly here.
- Regular starter: You can use 115g active liquid starter instead of the sweet levain. Add 15g extra brown sugar to the dough to replace the sugar that would’ve been in the levain (if you want).
- Sugar substitutes: Coconut sugar is a good brown sugar alternative.
- Chocolate options: Any chocolate you love will work here—semisweet, bittersweet, milk, white, sugar-free, peanut butter chips, salted caramel chips… all fair game. As a reminder, mini chips work the best. Don’t go too far overboard, though… even if it’s tempting to go heavy-handed with the chocolate, those who tried it had regrets.
Note: Multiple testers noted that full-size chips needed to be chopped and created more mess during laminating, but the end result was still delicious. Using a food processor to chop chips was NOT recommended – it creates powder instead of chunks.
5-star review from St. Louis, Missouri: “I used no sugar added dark chocolate chips. It was perfect! Chocolate flavor without much sugar.”
- Vanilla extract: Paste or extract are interchangeable. Paste has a more pronounced flavor, but extract works beautifully, too. I have a vanilla extract recipe here. I’ve been making my own vanilla paste as well, but I don’t have my own recipe – I’m still experimenting. But if you want to make it, it’s super easy – just do a quick online search and find a recipe you like!
- Espresso powder: You can leave it out or replace it with cocoa powder for a mild flavor boost without espresso.
“The espresso powder, vanilla bean paste and brown sugar really gave it chocolate chip cookie vibes.” –Recipe tester from Spring, TX
Equipment You’ll Need
- Kitchen Scale: The most accurate way to measure ingredients, especially flour. Keeps your dough consistent every time.
- Mixing bowl or Stand mixer: Either works to bring the dough together. A stand mixer saves a bit of arm strength, but totally optional. If mixing by hand, I love my Anchor Hocking glass bowls.
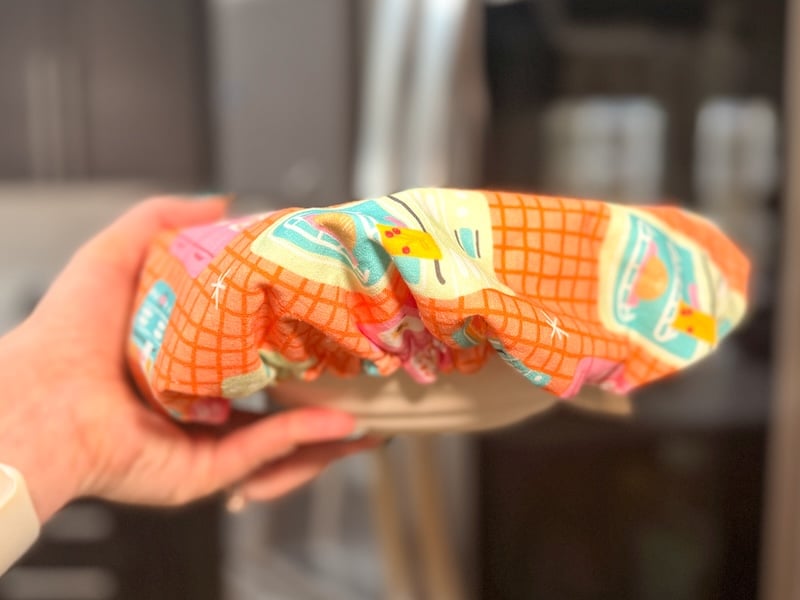
- Bowl cover: I’m a huge fan of these bowl covers from Doe a Deer. Amazing quality and it doesn’t dry out my dough. I use it to cover my bowl and my banneton. Get 15% off with code THATSOURDOUGHGAL.
- Danish dough whisk: Makes mixing doughs so much easier when mixing by hand. The one linked here is from Brod & Taylor and is my favorite as it’s dishwasher safe and has a grippy handle.
- Bench scraper: Super handy for rounding the dough, lifting sticky edges, and clearing your workspace in one swipe. I use the Brod & Taylor scraper as well and love it. It has that same grippy handle.
- Banneton: Wood-pulp bannetons are my favorite because they absorb just a bit of moisture and help create a crisp, clean crust. If you want one, Flourside’s are great – code TSG5 gets you 5% off. I’ve also been loving the new bannetons from Brod & Taylor.
- Bread lame: Gives you the control you need to make smooth, intentional scores.
- Parchment paper or bread sling: Either works to help transfer your dough to your Dutch oven.
- Dutch oven: My preferred baking setup for consistent oven spring and steam. If you want the one I use, Krustic’s Dutch ovens are fantastic. Code REBEKAH15 saves you $15.
- Bread knife: A sharp serrated knife makes cutting through the crust clean and effortless. The Mercer budget knife is still my top pick.
- Sheet pan or foil: As a heat buffer to keep the bottom from over-browning. Any basic sheet pan works here since you’re not baking on it; but if you’re curious, I usually keep USA Pans in my kitchen.
Baker’s Timeline
| DAY 1 | |
| 9 PM (or before you go to bed) | Mix the sweet levain |
| DAY 2 | |
| 8-8:15 AM | Mix the dough |
| 8:45 AM | Stretch & fold #1 |
| 9:30 AM | Stretch & fold #2 |
| 10:30 AM | Laminate + Add chocolate |
| 10:40 AM – 3-5 PM | Finish bulk fermentation (timing varies based on dough temperature) |
| 3-5 PM (when bulk fermentation is done) | Pre-shape |
| 5:20 PM | Caddy clasp, set in banneton, and cold proof overnight |
| DAY 3 | |
| Any time | Score, bake, and enjoy!! |
Recipe Testing Process
I didn’t go into this expecting a long or complicated testing process. This honestly started as a loaf I made just for fun.
But it turned out so well (and so many people loved it) that I decided to turn it into a fully developed recipe.
I only needed a few small adjustments along the way, and the tweaks I did make were simple ones:
- Switching from regular chips to minis so they distributed more evenly
- Laminating the chocolate in instead of stretch-and-folding it in, which gave MUCH better distribution (total game changer) – I tested two lamination methods and my tried-and-true swirl technique worked the best
- Adjusting the bake temp/time to help the bottom of the loaf not burn
When it went out to testers, it turned out to be one of the smoothest test cycles I’ve ever had.
415 bakers made this loaf in every environment you can imagine – from cold Alaskan kitchens to high-altitude Colorado, from humid summers in South Australia to tiny farmhouse kitchens in rural Tennessee. And 96.6% of testers gave it 4 or 5 stars!
Meet the Recipe Testers
This chocolate chip sourdough recipe was put to the ultimate test by 415 home bakers from around the world. I always get so nervous when others test a recipe draft, but this was a total delight.
- Average rating: 4.69 out of 5 stars
- 96.6% satisfaction rate (4-5 star ratings)
- Tested in 206 US locations spanning from Alaska to Florida
- And I can’t believe I’m typing this, but it was also tested in 19 international locations, including Canada, Germany, the UK, Australia, South Africa, Ireland, Wales, and Bosnia and Herzegovina
Bakers everywhere achieved success with this recipe. That’s all I ever aim for, and the fact that so many of you are willing to help me test recipes… I’m so blessed. Thank you so much.
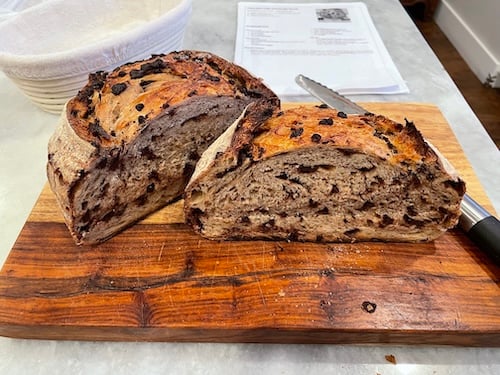
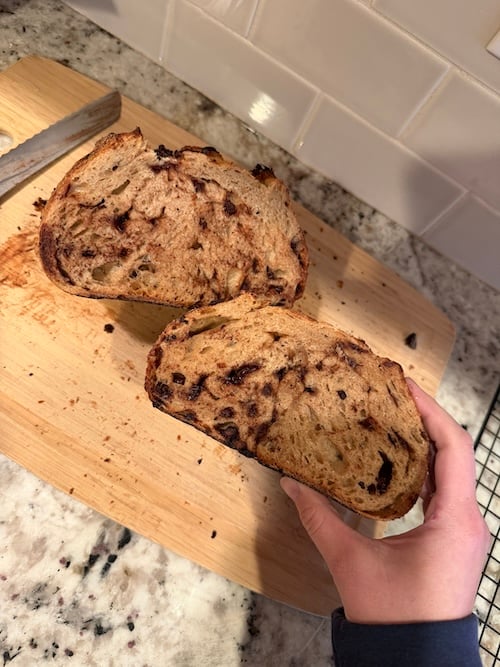
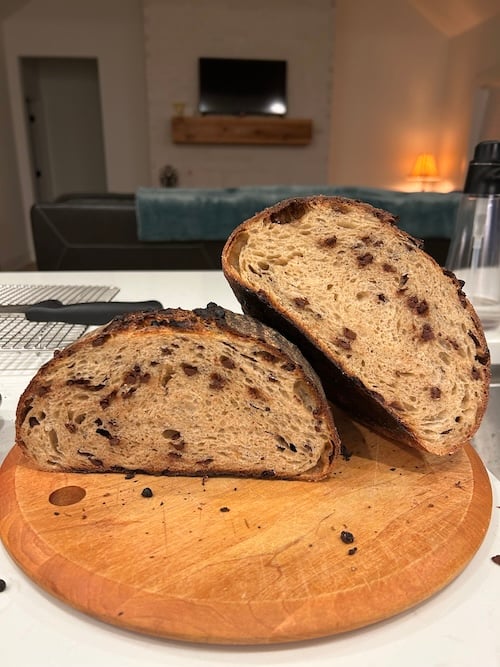
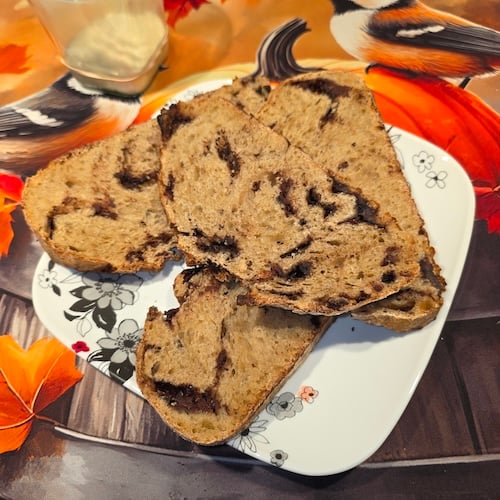
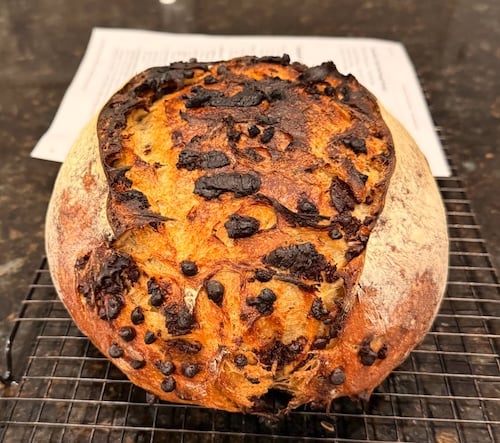
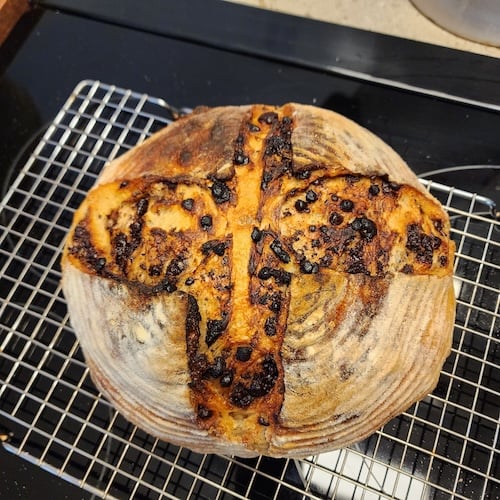
Here’s a look at a few of their amazing bakes:


How to Make the Best Chocolate Chip Sourdough Bread (Step-by-Step Instructions)
Step 1: Mix the Sweet Levain (Night Before)
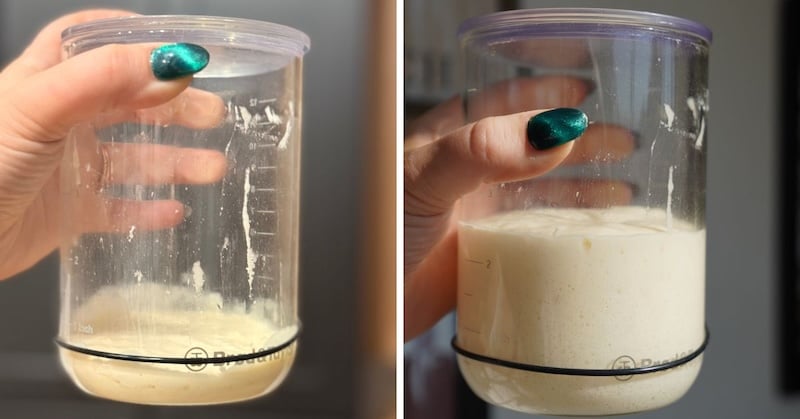
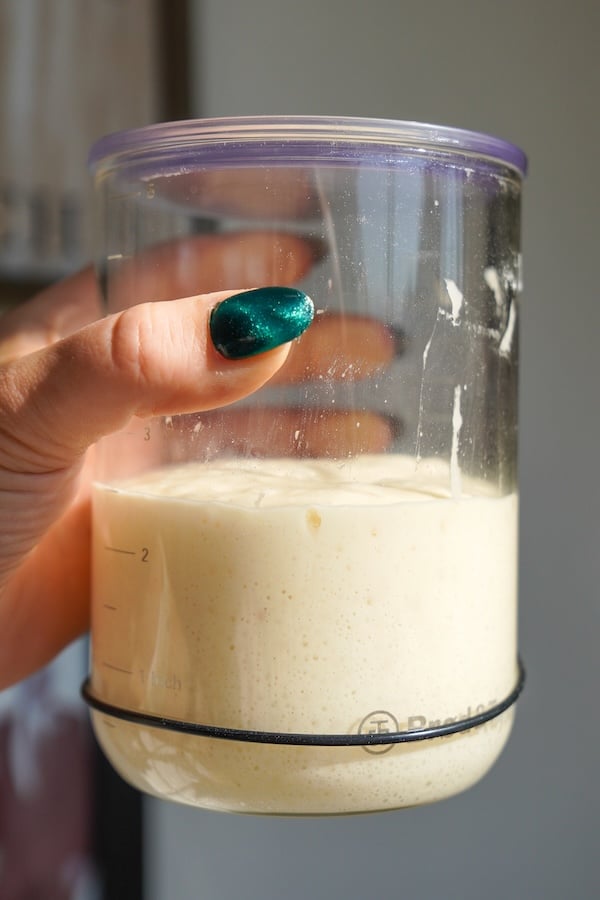
Before bed, mix together 15 g sourdough starter, 15 g sugar, and 50 g water in a 3/4-liter to 1-liter jar. Give it a quick stir so the sugar dissolves.
Then, add 50 g bread flour and stir until everything is smooth. Loosely cover the jar and let it sit on your counter for 10–12 hours.
Note: The 15g of starter you use to build this sweet levain should be healthy. Ideally, it has been fed within the last 24 hours. It can be at peak or recently deflated. If you use weak or acidic starter (or discard from the back of your fridge), you probably will not be happy with the final result.
By morning, it should be about tripled in volume, sweet-smelling, and full of bubbles.
Step 2: Mix the Dough
In a large glass bowl (or the bowl of your stand mixer), add:
- 310 g water
- All of your sweet levain
- 25 g brown sugar
- 5 g vanilla paste or extract
- 1 tsp espresso powder (optional, but it quietly boosts the chocolate flavor)
- 450 g bread flour
- 50 g whole wheat flour (or rye or spelt)
- 10 g salt
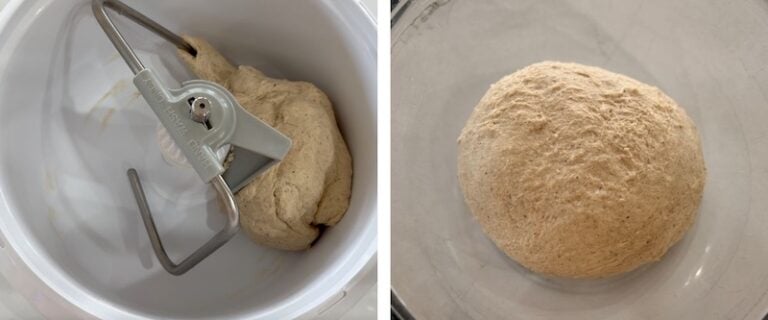
If mixing by hand, use a Danish whisk and stir until everything comes together and no dry flour remains. Then cover and let the dough rest for 30 minutes.
If using a stand mixer, mix on low speed for 3–4 minutes—or until fully combined—then transfer the dough to a glass bowl, cover, and rest for 30 minutes.

There’s wiggle room with the hydration on this recipe. Most of my tests were with 300g of water, but bumping it up to 310g was nice – the dough was slightly less stiff.
You can push it higher if you prefer a looser dough – it’s totally up to you. The more water you add, the faster the fermentation will be (just as a heads up).
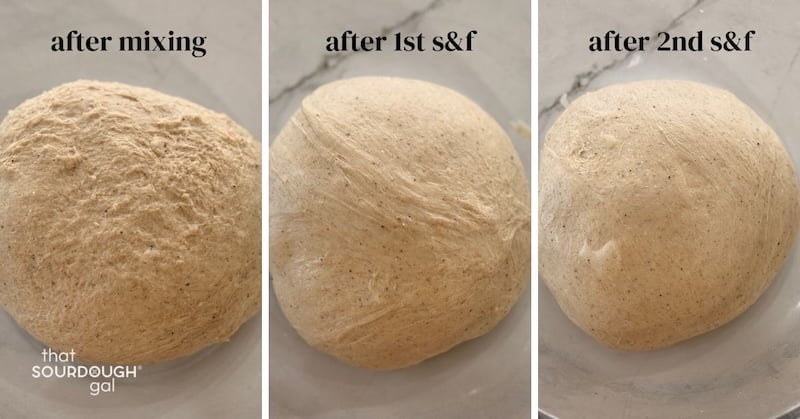
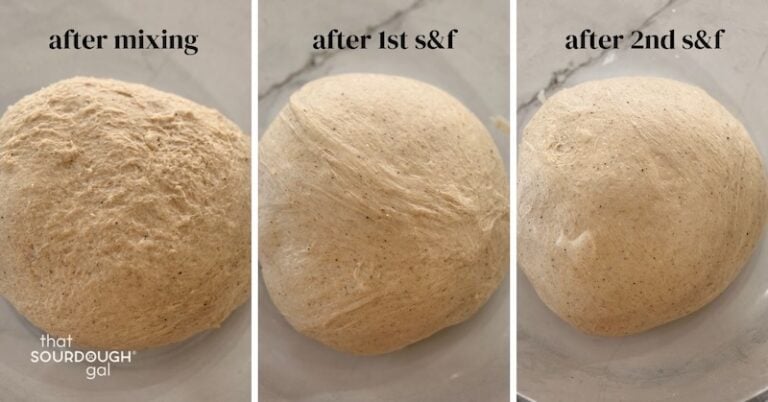
Step 3: Strengthen the Dough with Stretch and Folds
Uncover the bowl and lightly wet your hands so the dough doesn’t stick. Starting at the “top” edge (any side works), slide your fingers underneath, gently lift the dough until it stretches but doesn’t tear, and fold it over toward the center.

Rotate the bowl a quarter turn and repeat: scoop under, stretch up, and fold over. Continue around the bowl until you’ve hit all four sides or until the dough tightens and no longer wants to stretch.
Cover and let the dough rest for 30–60 minutes.
Repeat the same process one more time so you complete two total rounds of stretch and folds.
After the second set, the dough should feel smooth and strong. it should have a good windowpane – we’re going to be stretching it out pretty thin in the next step, and we need to make sure it’s not going to instantly tear.
If it still feels rough or slack, do one additional set followed by a 30-minute rest before moving on.
Step 4: Laminate the Dough and Add the Chocolate Chips
Time for the fun part: chocolate!
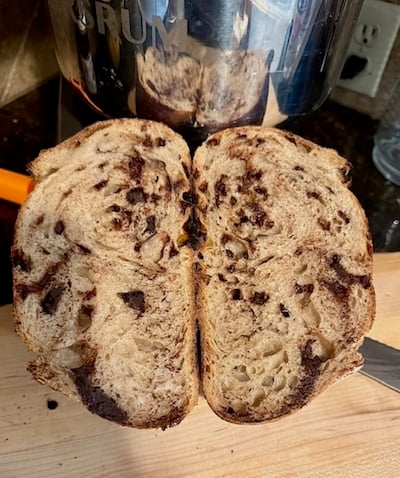
Laminating the chocolate chips into the dough is the best way to spread them evenly, and I’m convinced it’s part of why this loaf turns out so light and fluffy every time, so don’t skip it.
I initially was doing half semi-sweet and half dark chocolate chips, and I love that combination. But I can’t find mini dark chocolate chips, and chopping them didn’t give me the best result. So I’ve simplified it to all semi-sweet.
Just know you can go rogue here – but minis disperse the best. We’re using 170g total here.
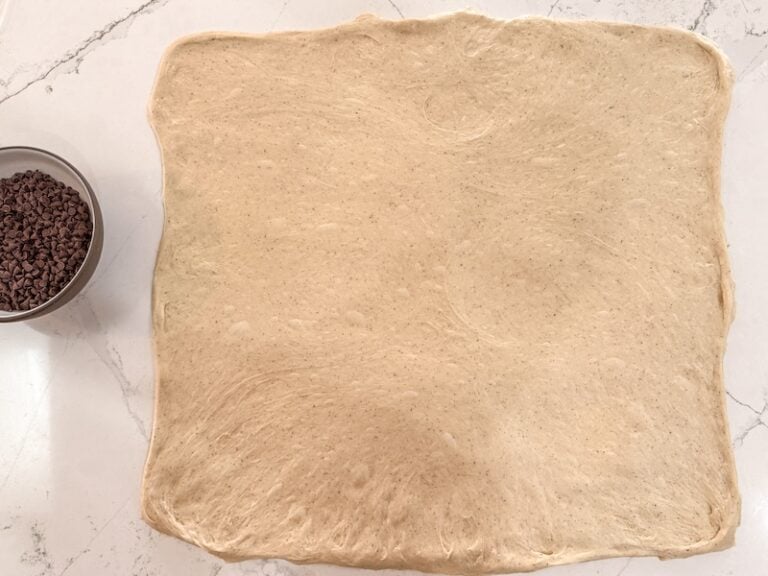
Gently pour the dough out of the bowl, letting gravity help it release. Don’t flour or mist the counter—you want a little grip to help stretch the dough.
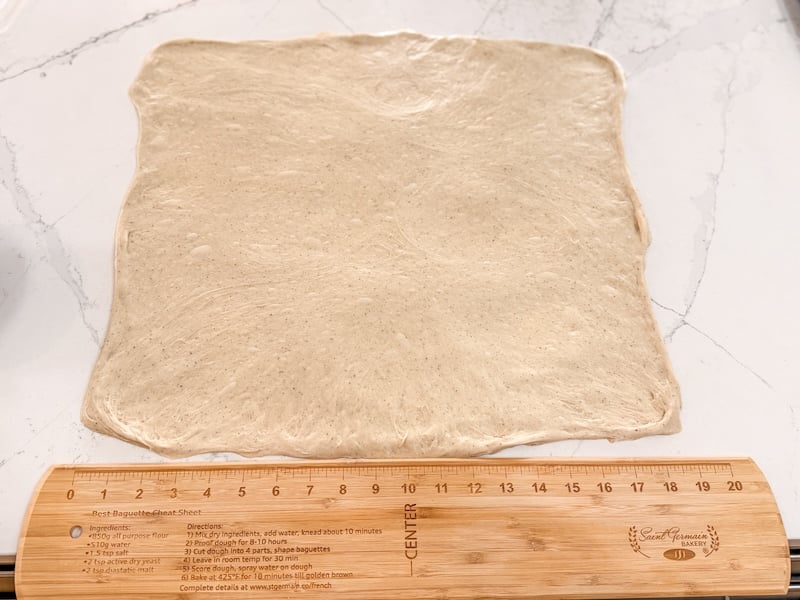
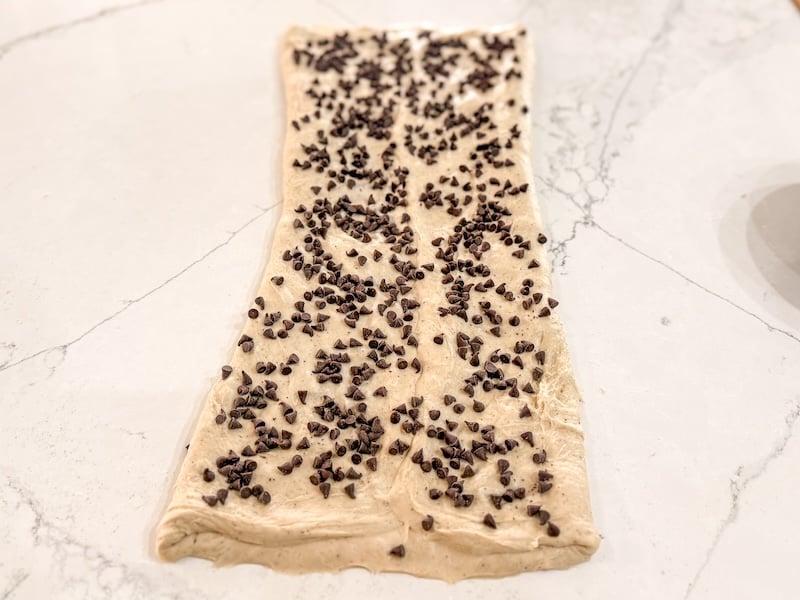
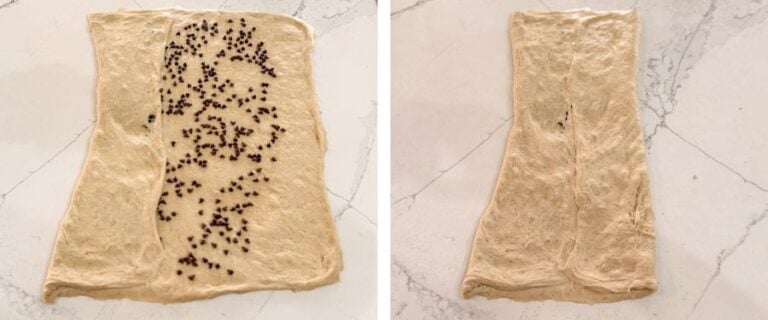
Stretch the dough into a large, thin rectangle, about 19 inches wide by 17 inches high. Use your hands and slow, gentle movements.
Ideally, our dough should be strong enough at this point to be stretched out without tearing. Use your surface to “grip” the edges of the dough as you stretch it – no bench flour or water misting is needed here.

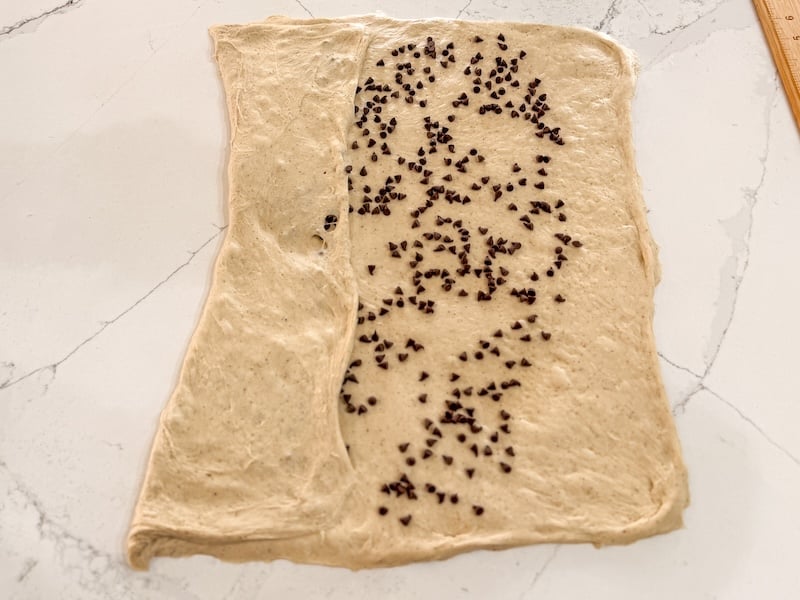
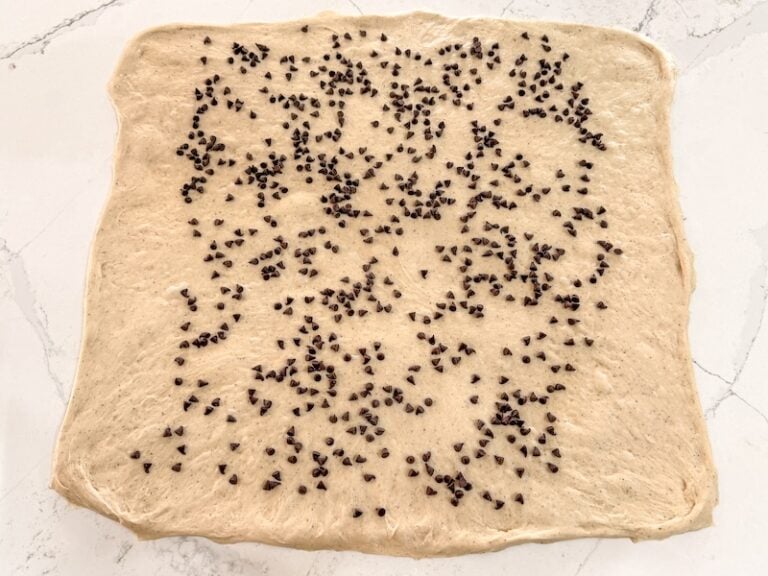
Sprinkle about two-thirds of the chocolate chips evenly over the surface, leaving a small gap on the left and right.
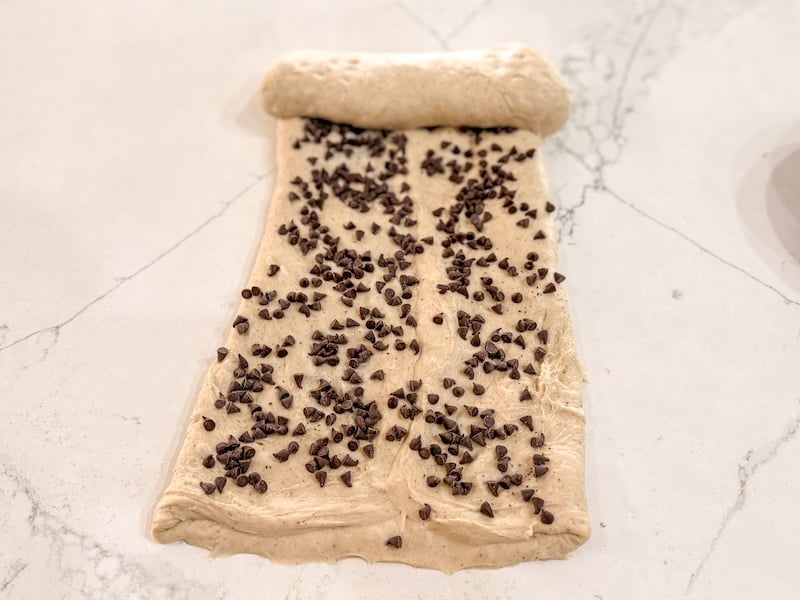
Visually divide the dough into thirds.
- Fold the left third of the dough over to the center.
- Then fold the right section to meet it in the center.
- Press that center seam closed.
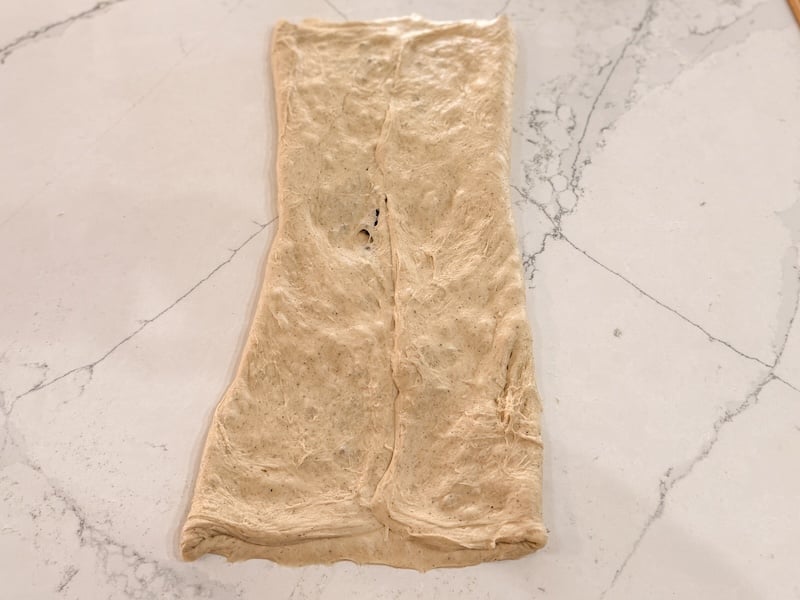
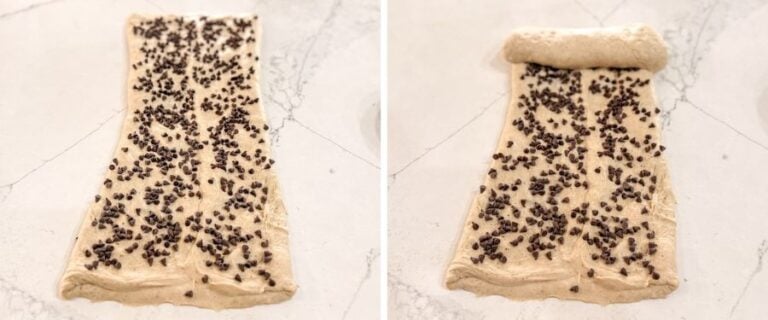
Sprinkle the remaining chocolate chips evenly over the top of that folded dough.
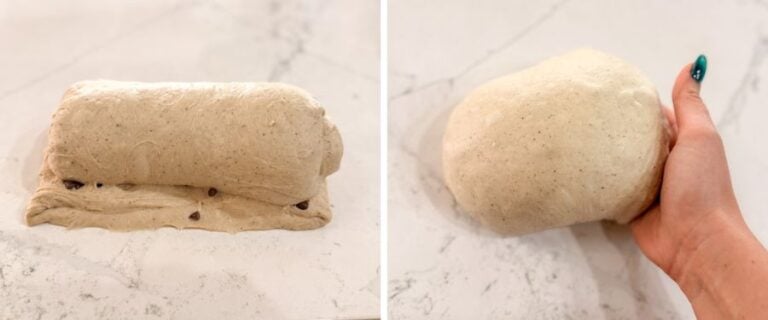
Starting from the top, roll the dough towards you into a tight log.


At this point, I like to gently push in the sides to get a slightly more round shape, and I place the dough back into the container or bowl.


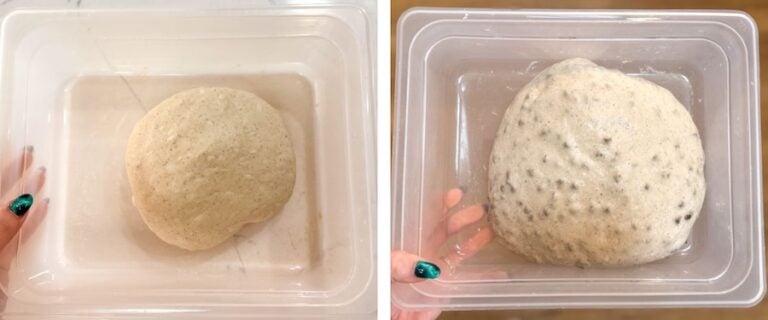
Cover and let it continue bulk fermenting at room temperature.
Step 5: Finish Bulk Fermentation
Let the dough continue to bulk ferment at room temperature until it shows several signs of readiness:
- The surface looks puffy and domed.
- When you gently shake the bowl, the dough jiggles like set Jell-O.
- If you pull gently at the edge of the dough, it releases cleanly from the side of the bowl.
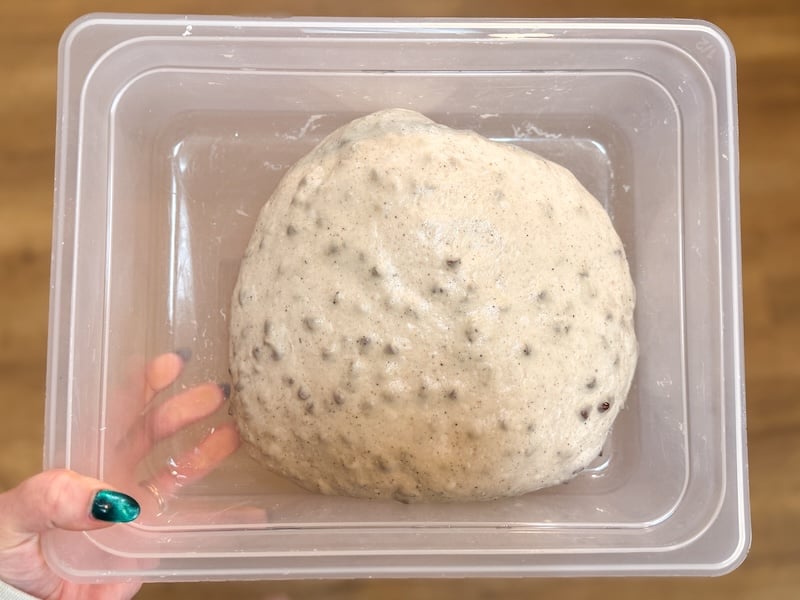
For reference, this took about 9 hours (starting from the time I mixed the dough) for me when my dough was around 72°F (22°C). Another time I made this recipe, my dough was around 74°F (23°C), and the bulk fermentation took about 7 hours.
If your kitchen is warmer, it may move faster; if it’s cooler, it may take longer.
Note: The bulk fermentation timing starts as soon as we mix our dough – once the starter enters the picture, fermentation begins.
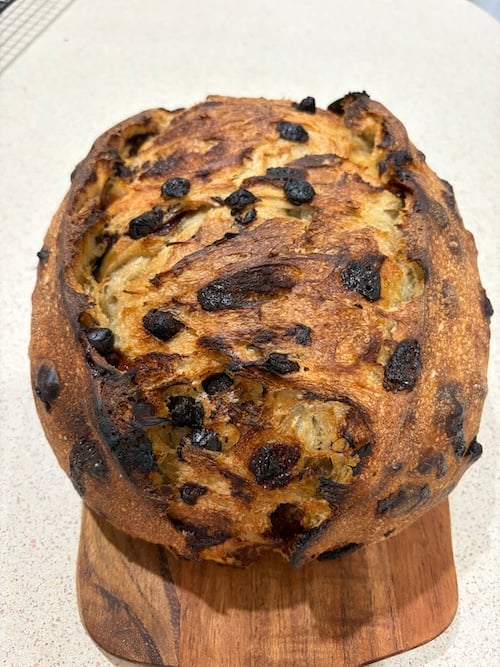
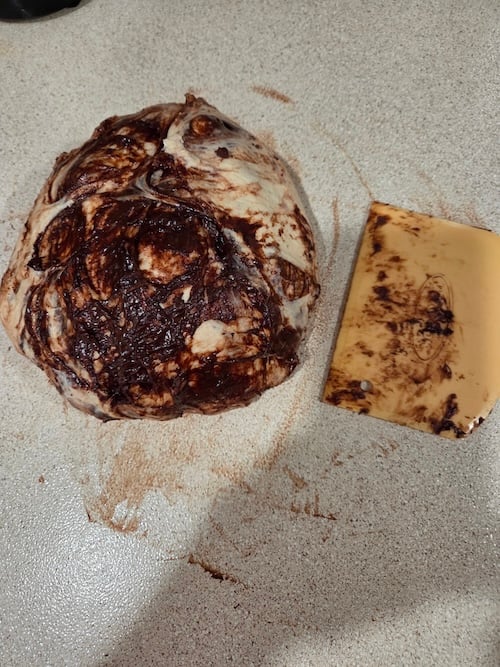
Tip: Don’t let your dough get too warm, or the chocolate chips may melt. I recommend proofing this dough at room temperature. Don’t go above 76°F (24°C) if you can help it, but as you can see from the tester photos below, it may be messy, but it’ll still turn out great!
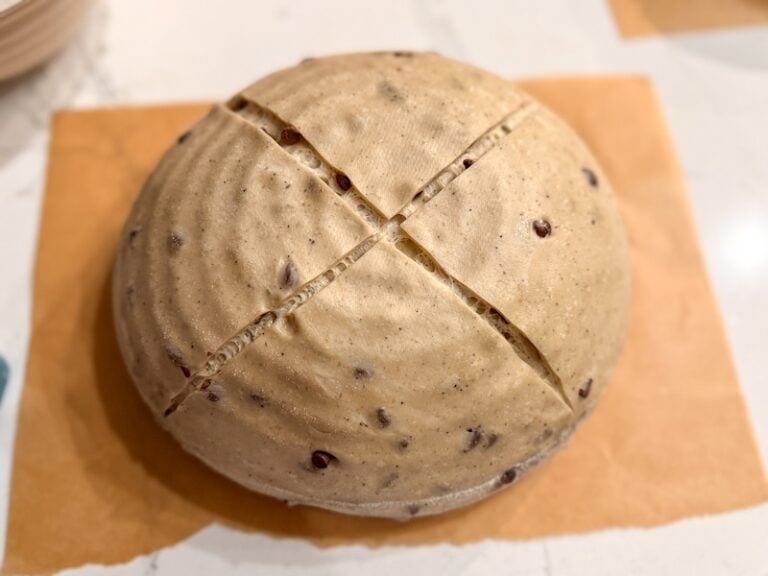
Step 6: Pre-Shape the Dough
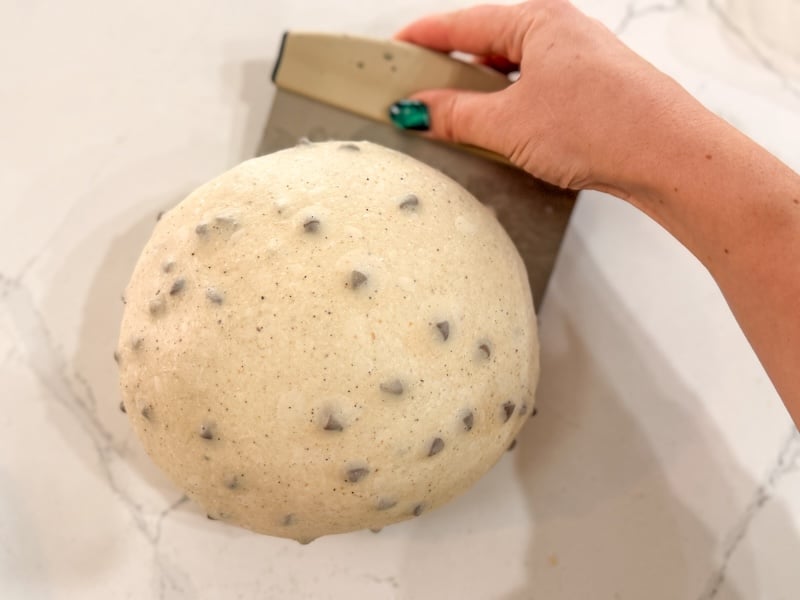
Once bulk fermentation is done, gently turn the dough out onto your work surface. This dough usually isn’t very sticky, so you likely won’t need bench flour.
Using a bench scraper (or your hands), pre-shape the dough. Push the dough up and then pull it back towards you. If you need a visual, watch this video showing how to pre-shape dough.

Continue until the dough forms a taut, rounded ball. It doesn’t need to be perfect; this is just the pre-shape.
Let the dough rest uncovered for 10–15 minutes to relax before final shaping.
Step 7: Final Shape and Cold Proof
Dust your banneton generously with rice flour to prevent sticking.
Flip the dough so the seam side is facing up on the counter. Grab both sides and fold them together like you’re closing a book (this is called the caddy clasp). If you’re doing a batard, this is all you need to do – set it in your banneton seam side up.
If you’re doing a boule (round loaf), turn your dough and fold it like a book again (here’s a video tutorial). Flip your shaped dough seam-side down and do a few pre-shaping motions to round it out. Then, set it in your banneton seam side up.
Pinch any seams closed and lightly dust the top with rice flour.

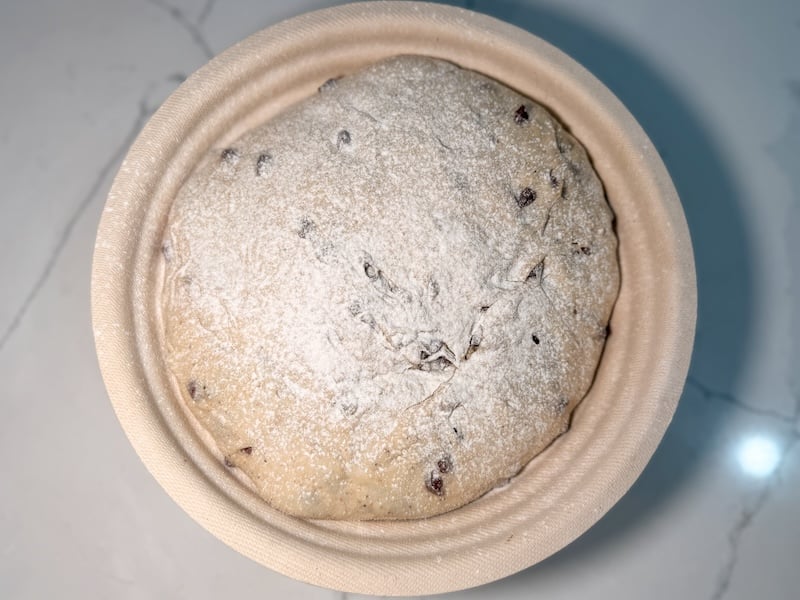
Cover with a bowl cover or tea towel and refrigerate overnight.
The cold proof deepens flavor, firms the dough for easier scoring, and slows fermentation so the timing is more flexible.
Step 8: Preheat Your Oven and Dutch Oven
When you’re ready to bake, place your Dutch oven into your oven and preheat to:
- 425°F (220°C) convection, or
- 450°F (230°C) conventional
Let the oven come all the way up to temperature, then give it an extra 10 minutes to make sure the Dutch oven is really hot.
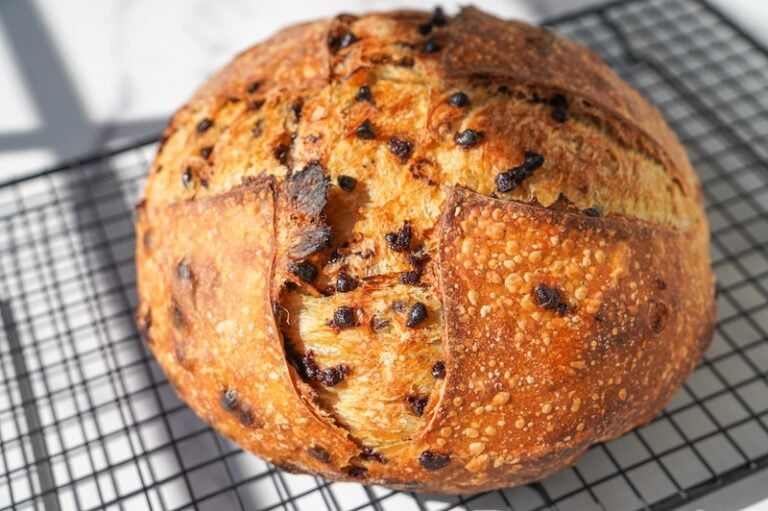
Step 9: Score and Bake
Take your dough out of the fridge and flip it onto a piece of parchment paper or a bread sling.
Using a sharp bread lame or knife, score the top of the dough:
- For a batard (oval): a single, confident slash down the center works great.
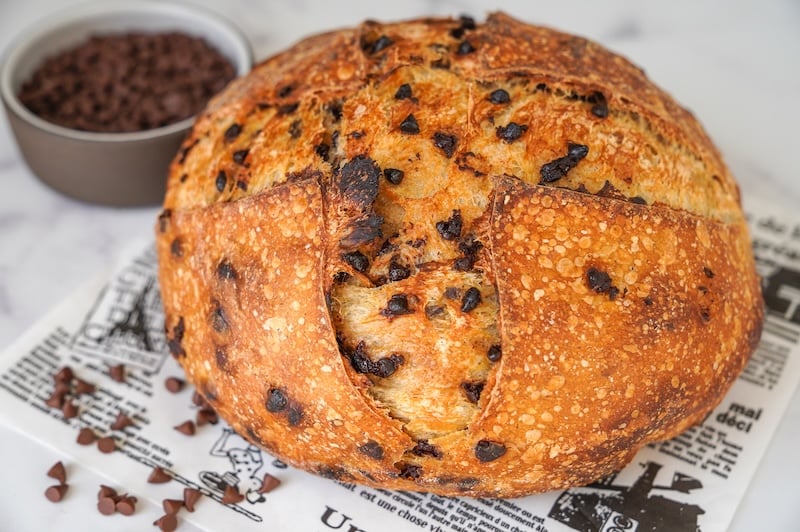
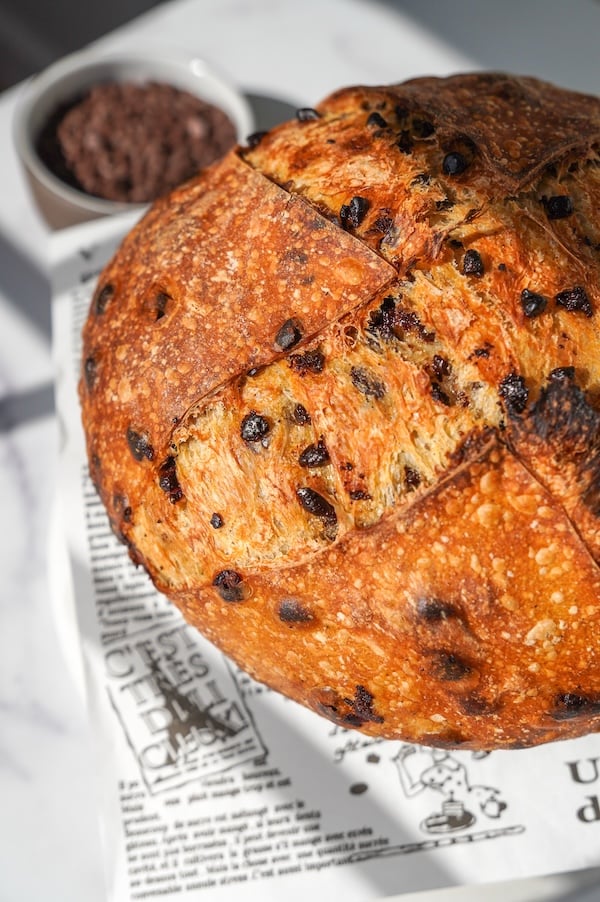
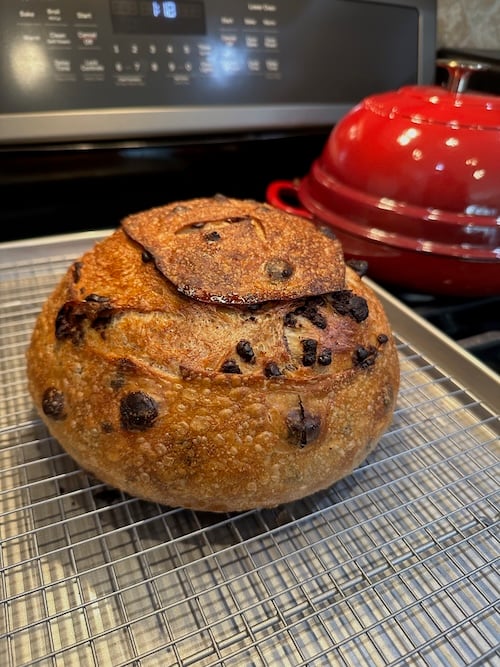
- For a boule (round): a large “X” across the top helps it open up nicely.


Carefully transfer the dough (with the parchment or sling) into the hot Dutch oven and put the lid on. Slide it back into the oven.
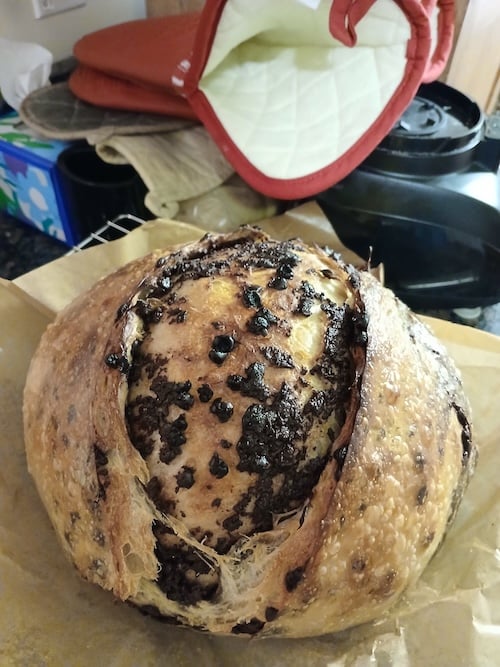
Because this loaf tends to brown quickly on the bottom, I highly recommend placing a sheet pan on the rack below your Dutch oven or slipping a small piece of foil under the parchment/bread sling (or both!) to act as a little heat buffer.
Note: Burnt bottoms is the No. 1 troubleshooting issue for this recipe. 39% of recipe testers reported a burnt bottom. Even if you don’t usually deal with burnt bottoms, I’d still take precautions.
Bake covered for 40 minutes, then remove the lid and bake for about 5 more minutes, just to help with final browning and drying out the loaf a bit. We’re looking for a final internal temperature of 205–210°F (96–99°C).
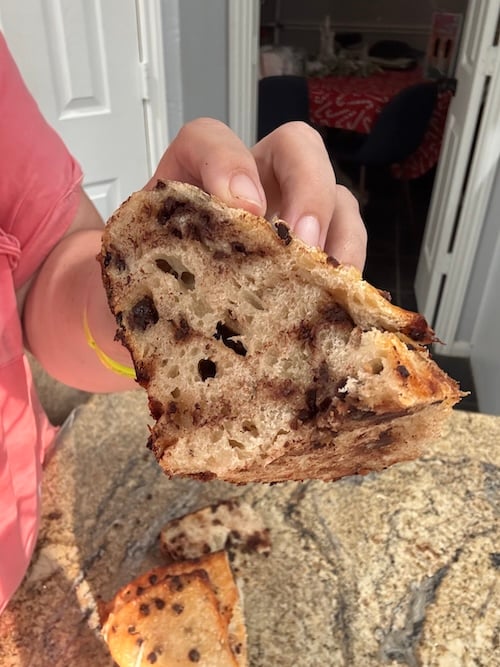
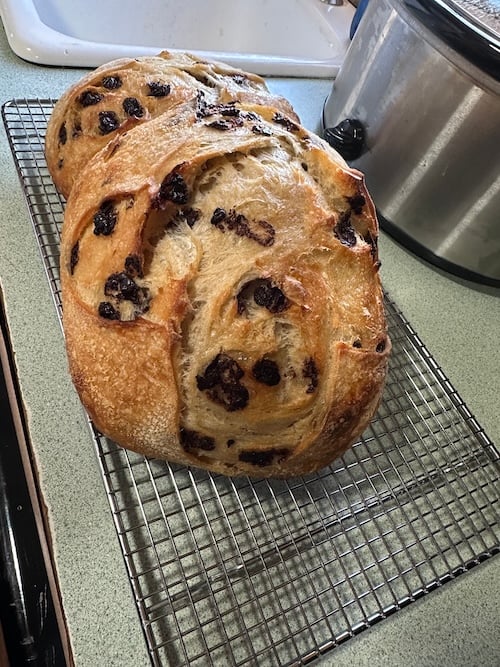
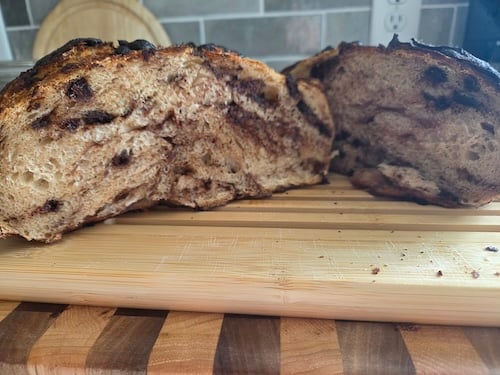
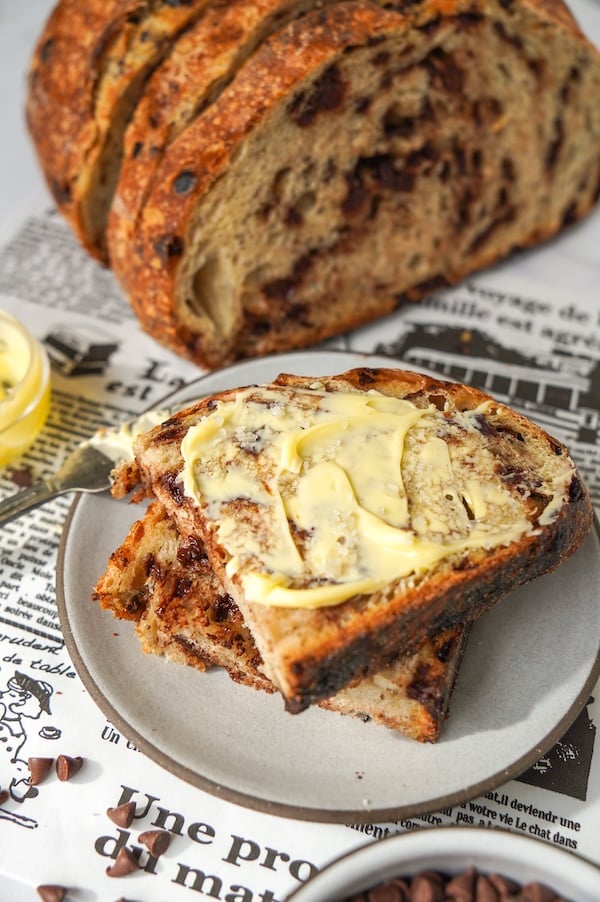
Let the loaf cool completely on a wire rack before slicing into it!
Storage & Reheating
- Room-temperature storage: Keep the loaf in a bread bag or glass cake stand for 2–3 days.
- Freeze for longer storage: Slice the loaf and place it in a freezer-safe bag. It’ll keep well for up to 3 months.
- Reheat from frozen: Toast slices straight from the freezer. As a bonus, freezing and then toasting sourdough can slightly reduce its glycemic impact.
- Revive the whole loaf: If the loaf feels dry, mist it with water (or run it under your faucet for like half a second) and warm it at 325°F (165°C) for about 10 minutes to soften it.
Troubleshooting Tips
- Burning on the bottom: This loaf browns fast on the bottom because of the chocolate and sugar. Place a sheet pan on the rack below, slip foil under your parchment/bread sling, or reduce your oven temp by 15–25°F.
- Sweet levain rising slowly: Temperature affects levain just as much as dough. If it didn’t peak overnight, your room might have been cooler than expected. Give it more time or place it in a warm spot to speed things up.
- Bake time adjustments: Everyone’s oven is so different. Some ovens finish early, and others take longer. Always use a thermometer and look for that internal temp of around 205–210°F (96–99°C).
- Dough getting too warm: If the dough warms up too much, the chocolate can start melting during folds or shaping. Aim to proof at room temperature and try not to go above 76°F (24°C) if you can.
FAQs
You can use all bread flour in this recipe if you prefer! I find the touch of whole wheat adds a nice dimension to the flavor profile, especially in loaves that have sweet components. So that’s just my style, but you won’t make or break the loaf by subbing in more bread flour.
Absolutely, you can! The sugar added to the levain in this recipe helps tame some sour flavors. But you can just use 115g of regular liquid starter. Add an additional 15g of brown sugar to the loaf to compensate for the lost sugar in the starter.
One recipe tester lives in high-altitude Colorado (4,460 feet), and she made adjustments to the cooking time. She cooked the loaf for 45 minutes covered and 10 minutes uncovered.
Yes, multiple recipe testers did this. The key is making sure your environment is cool so the dough doesn’t overproof. Here’s the tester feedback:
Manhattan, KS: “I made some adjustments to work better with my schedule like using cold water so I could bulk ferment overnight.” (5 stars)
Milwaukee, Wisconsin: “I mixed the dough and did the stretch and folds and inclusions before bed and bulk fermented over night. Shaped in the morning and cold proofed all day and baked in the evening. Turned out great.” (5 stars)
Yes! Multiple testers successfully made two smaller loaves instead of one large one. Some also made regular loaf pan loaves instead of boules/batards. Reduce baking time proportionally for smaller loaves (check internal temp).
Chocolate Chip Sourdough Bread
Equipment
- 3/4 L Weck jar for your starter
- Tovolo spatula for mixing your starter
- Stand mixer with the dough hook; optional – you can mix by hand
- Danish dough whisk if mixing by hand
- Mixing bowl or rectangular tub
- Bowl cover 15% off with code THATSOURDOUGHGAL
- Round Dutch oven $15 off with code REBEKAH15
- Brod & Taylor baking shell and steel alternative to Dutch oven
Ingredients
Sweet Levain
- 15 g sourdough starter
- 15 g sugar
- 50 g water
- 50 g bread flour
Main Dough
- 310 g water
- All of the sweet levain that you made, from above
- 25 g brown sugar
- 5 g vanilla paste or extract
- 1 tsp espresso powder optional
- 450 g bread flour
- 50 g whole wheat flour
- 10 g salt
Add-Ins
- 170 g mini semi-sweet chocolate chips
Instructions
- Make the sweet levain: Before bed, in a 3/4-liter or 1-liter jar, mix together 15 g sourdough starter, 15 g sugar, and 50 g water. Then, mix in 50 g bread flour until smooth. Loosely cover and let ferment on the counter overnight (10-12 hours).

- Initial dough mix: In a glass bowl with a Danish dough whisk OR a stand mixer fitted with the dough hook, add 310 g water, All of the sweet levain, 25 g brown sugar, 5 g vanilla paste or extract, 1 tsp espresso powder (optional), 450 g bread flour, 50 g whole wheat flour, and 10 g salt. Mix until all of the ingredients are fully incorporated and no dry flour bits remain (about 3-4 minutes). If you used a stand mixer, transfer the dough to a glass bowl. Cover for 30 minutes.

- Two rounds of stretch and folds: Uncover the dough and wet your hands. Stretch and fold all four corners of the dough. Continue stretching and folding your way around the bowl until the dough tightens up and doesn't want to stretch anymore. Cover and let rest for 30-60 minutes. Repeat the stretch and folds one more time, covering and letting the dough rest for another 30-60 minutes.
- After the 2nd set of stretch and folds, your dough should feel smooth and strong. If it still feels textured or like it's lacking strength, do an additional set of stretch and folds followed by a 30-minute rest before moving on.
- Laminate and add chocolate chips: Measure out 170 g mini semi-sweet chocolate chips. Dump out your dough and stretch it into a large, thin rectangle (about 19" wide by 17" high). Do not tear the dough when stretching. Use your surface to "grip" the edges of the dough as you stretch it – no bench flour or water misting is needed here.

- Spread about 2/3 of your chocolate chips over the dough.
- Visually divide the dough into thirds. Fold the left third of the dough over to the center. Then, fold the right section to meet it in the center. Press that center seam closed.
- Spread the remaining chocolate chips over the dough. Roll the dough tightly into a log.
- At this point, I like to gently push in the sides to get a slightly more round shape, and I place the dough back into the container or bowl.
- Finish bulk fermentation: Let the dough finish bulk fermenting until it is bubbly, jiggly when you shake the bowl, feels light and aerated when you tap the surface, and if you pull at the edge of the dough, it will easily release from the side of the bowl. For reference, this took me 9 hours when my dough was 72°F (22°C). Another time, it took 7 hours when my dough was 74°F (23°C).
- Pre-shaping: Turn out dough onto your work surface. Using a bench scraper (or your hands), do a push and pull motion to coerce the dough into a taut ball shape. Let rest uncovered for 10-15 minutes.
- Final shaping: Do a double caddy clasp – fold your dough like a book in both directions. Then, turn the dough onto your surface and use your bench scraper to coax it into a round shape. Flip into your banneton. Pinch any seams closed, dust with rice flour, and cover. Put in the fridge until tomorrow.
- Pre-heat oven: The next day, preheat your oven to 425°F (220°C) convection (or 450°F/230°C conventional) with a Dutch oven inside. After it has preheated, give it 10 more minutes to ensure your Dutch oven is super hot.
- Score and bake: Turn your dough out of your banneton onto parchment paper or a bread sling. Score the top (a straight line down the center for batards or a large X for boules), and place in your hot Dutch oven.Note: the bottom of this loaf has a tendency to burn, so consider placing a sheet tray on the rack below your Dutch oven, or slipping a piece of foil under your parchment paper or bread sling.
- Bake covered for 40 minutes. Remove the lid and bake an additional 5 minutes, to finish browning and dry out the interior slightly. When done, the internal temperature should be between 205-210°F (96-99°C). Let fully cool before slicing.


Notes
“A really lovely recipe. Hubby has already asked when I’m making it again!” –Recipe tester from United Kingdom
Conclusion
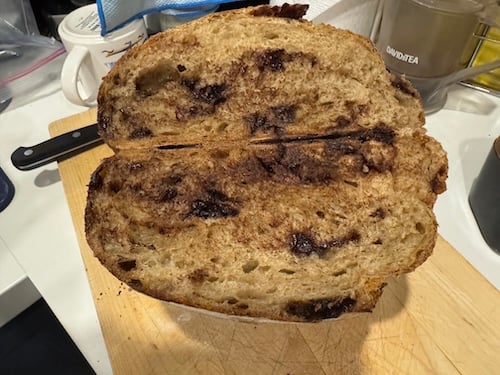
I’m not usually a sweet loaf person, but this one… this one is special.
Something about this dough is just magical! It’s easy to work with, puffs up beautifully, and makes this really tall, fluffy loaf.
I hope you love it as much as I do, and I can’t wait to see your beautiful loaves. Share them in the comment section below and tag me on Instagram @thatsourdoughgal – I love seeing your bakes!
Other sweet artisan bread recipes:


This bread is INCREDIBLE!!! it’s did burn just a teensy bit on the bottom but I don’t even care. I’m OBSESSED. It was SO HARD to wait for it to cool so I could slice it for a taste. Thanks for another great recipe. I’m just going to be working my way through all of them now.
Yay, so glad you loved it so much!! Looks beautiful!
My first time trying this inclusion, which I had no idea you can put vanilla extract, brown sugar or even think of add espresso. I was so excited making this and the results and taste was 10/10.
So glad to hear it!!
Let me start with the dough. It’s amazing to work with. It’s different than what I normally work with and find it to be lovely! For handling on the counter to laminate it, I found that *misting* my work area gave me the best results. The mini Chocolate chip amounts, well, again Rebekah nailed it! She says to use 2/3 on the base, then 1/3 in the top before you roll up the dough. I weighed my mini chips in a bowl, left the bowl on the scale and weighed down as I went. The 2/3 and 1/3 works beautifully! Don’t worry about getting the chips perfectly placed when you first put them down. The mini chips roll around like little ball bearings or BB’s with a gentle touch. They are so easy to place! The baking results are perfection. I make a lot of bread as a cottage baker and I open bake. I covered lightly with foil towards the end to prevent over browning. I also misted the dough before putting it in the oven and I added steam to the oven for the first 20 mins. The X scoring as shown in her photo is my preferred for this type of loaf. I did a traditional score with an ear and then an X on my second bake. The X is more fitting for my liking. I used this bread to make French toast. You talk about over the top goodness! I used 1/2 vanilla bean ice cream, 2 eggs and 1 tsp vanilla and mixed thoroughly. I let the thick slices of bread sit out for a couple of hours to prevent sogginess when I dipped the bread in the custard. I cooked the French toast on a cast iron griddle with butter. This was by far THE best French toast I have ever made or had. Definitely give it a try if you like French toast. Rebekah, thank you for another stellar recipe! I’m taking this one to market this weekend!
Ahh Sarah! Thank you SO much! I am so glad this turned out great for you. The french toast looks delicious!
This bread is addicting perfect amount of sweet and chocolate great with butter or a little cream cheese.
Just made a double batch of this, absolutely delicious!! Family are queuing up to taste it 😊
WOW it looks awesome!!
LOVE this recipe!! Just pulled this out the oven. Second try. Can’t wait to cut into it!!!
Looks so good!! Glad you like it!
Definitely going to try this one. Will regular chocolate chips work? I have a boatload of those and would like to use them up.
Thanks
If you don’t have mini, you could roughly chop regular-sized chips!
I don’t have a banneton, what can I use instead? Also, can I bake the same day after the last shape or does it have to go on the fridge?
You can use a towel-lined bowl, and yes you can bake the same day after you shape it. Just let the dough rise in a warm spot for a couple hours before baking!