
Cinnamon Raisin Swirl Sourdough Bread Recipe (Pepperidge Farms Copycat)
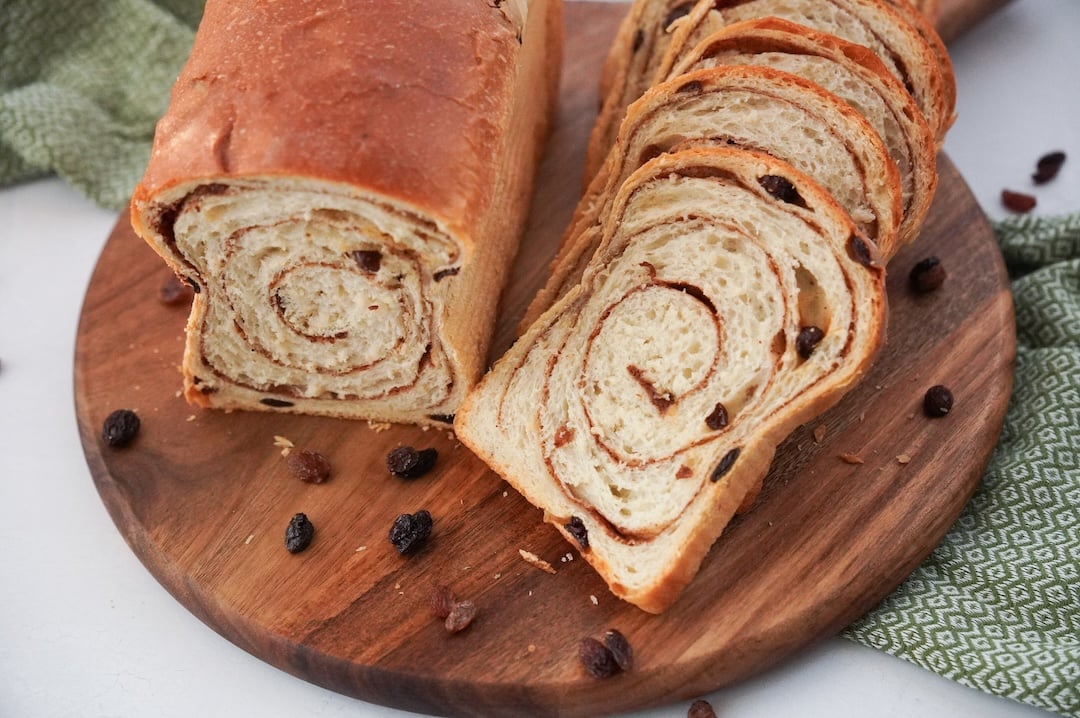
Craving that perfect Pepperidge Farm cinnamon raisin bread, but want to make it with sourdough?
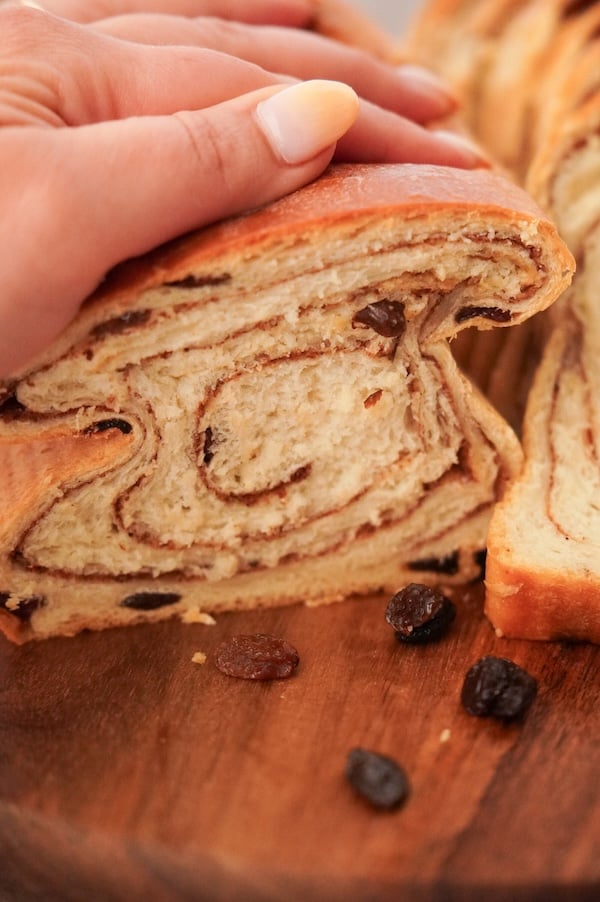
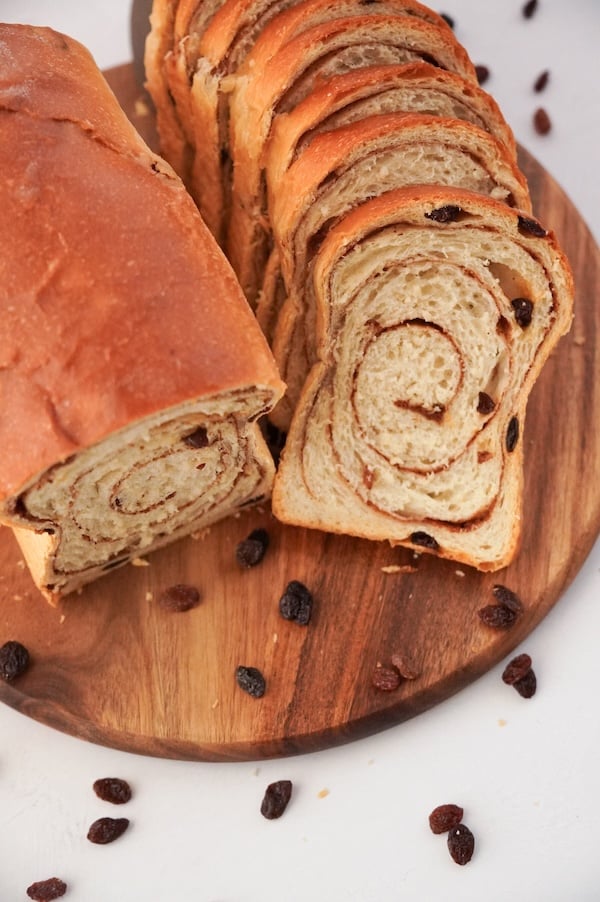
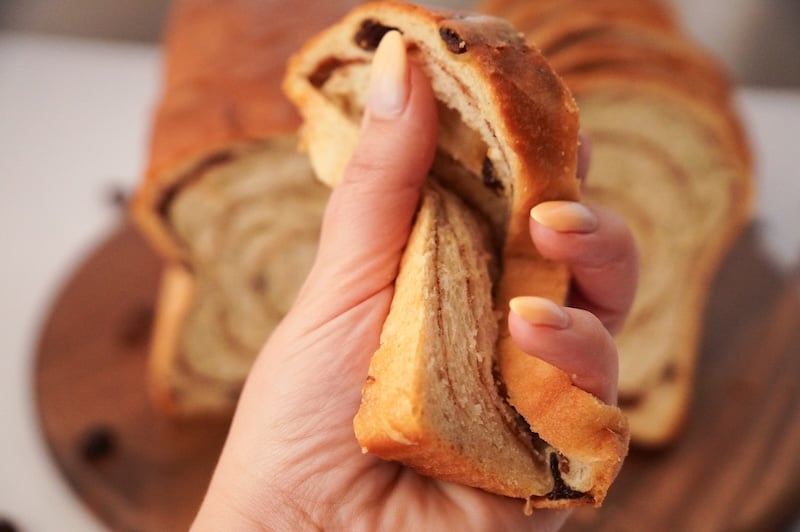
This recipe nails the incredibly soft, even crumb, and that signature swirl that actually stays put in the dough.
After developing my sourdough Wonder Bread copycat recipe, I knew we had the perfect base dough. The cinnamon raisin swirl, however, proved more challenging than expected.
After plenty of trial and error, I’m excited to share a foolproof method that delivers Pepperidge Farm results every single time!
“[This] will be a staple! No longer buying loaves of Pepperidge Farm anymore!” –Recipe tester from Prairieville, Louisiana
Disclaimer: Some of the products I recommend in this post are affiliate links – if you choose to purchase after clicking one of my links, I may earn a small commission, which helps fund this website, recipe development, and monthly giveaways. I sincerely appreciate your support.
Why You’ll Love This Recipe
- Perfect Pepperidge Farm copycat: Nails that incredibly soft, even crumb, and signature cinnamon swirl that actually stays integrated into the dough instead of separating like homemade versions often do.
- Done in one day: The proofing process has been streamlined to just one day, thanks to the extra starter and keeping the dough very warm. Mix the dough in the morning, shape midday, and bake by evening.
- Built on a proven winner: Uses the same dough base as my wildly popular sourdough Wonder Bread copycat recipe, but with an even faster timeline and less tangy flavor.
- As low tang as possible: This version has almost no detectable tangy flavor. I’d rate it a 1.5-2 out of 10 on the tang scale. But that doesn’t mean it lacks flavor – it tastes incredible on its own.
“Yes yes yes, will be making this on repeat!! It’s the softest thing ever and no sour flavour at all, in my opinion!” –Recipe tester from Manitoba, Canada
- Foolproof swirl technique: After lots of trial and error and help from many baker friends (looking at you Sam and Joselyn), I’ve cracked the code for a cinnamon swirl that won’t separate or create gaps in your bread. And it’s SO easy.
- Recipe tested by real bakers like you: This recipe was tested by 85 home bakers ranging from complete beginners to advanced bread makers, achieving an impressive 4.9/5 satisfaction rating across testers from locations spanning from Kentucky to Canada to Australia.
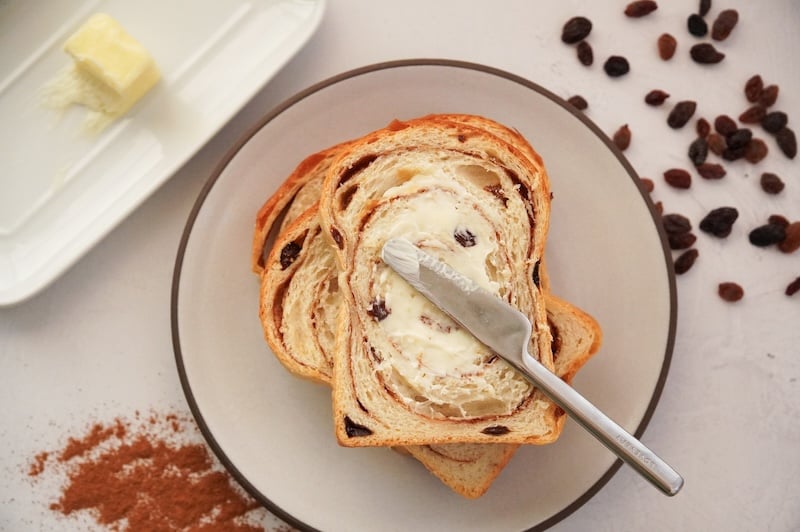
“Um, heck yes!! It’s instantly a family favorite” –Recipe tester from Azle, TX
A Quick Look at the Recipe Testers
I am seriously BLOWN AWAY that y’all are so willing to test recipes for me!! Especially since you don’t know if they’ll turn out well or not.
Over 80 bakers from around the globe gave it a shot, and I’m so happy to report the average rating was 4.87/5.
Here’s a sampling of some of the recipe testers’ bakes:
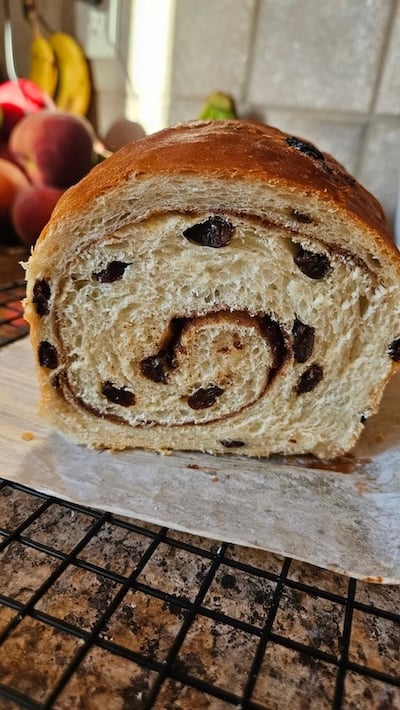
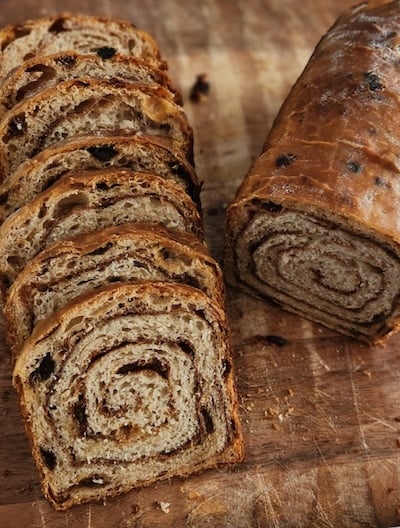
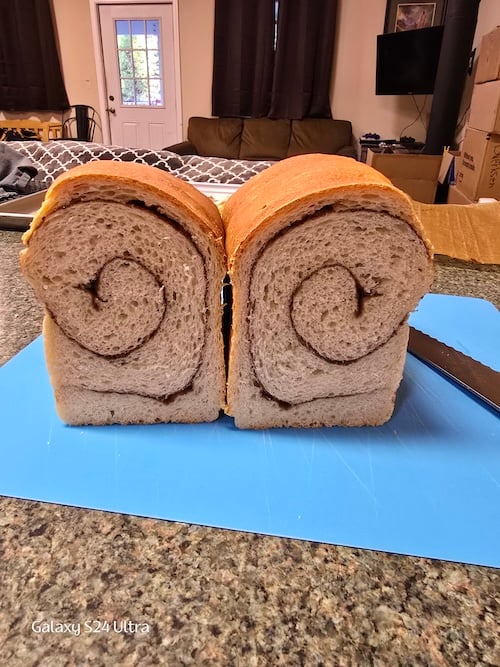
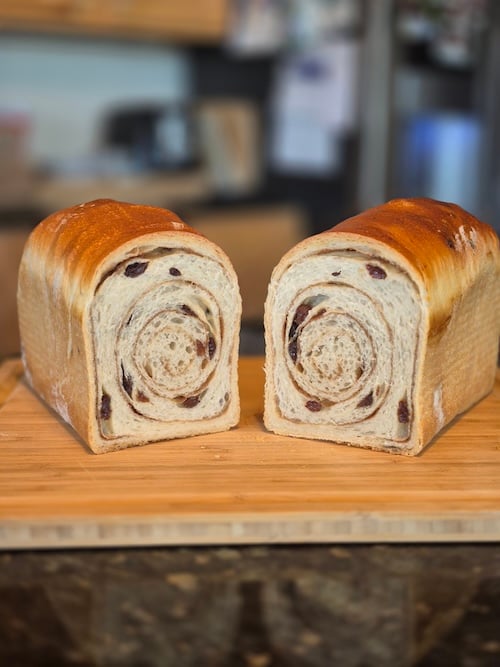
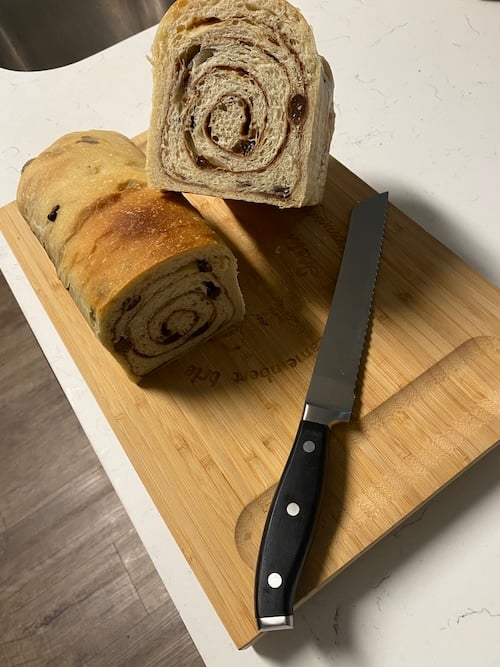
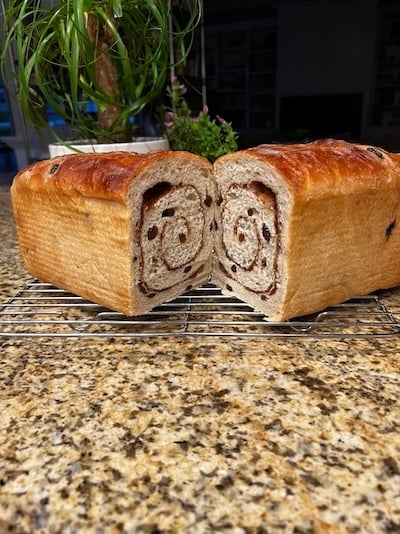
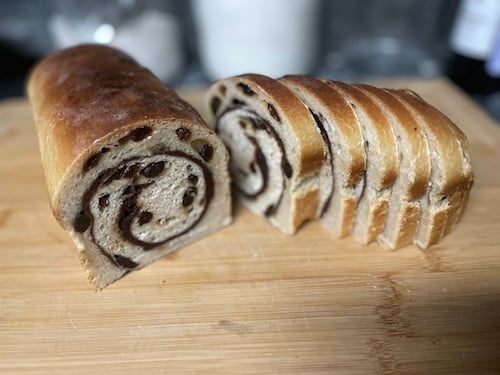
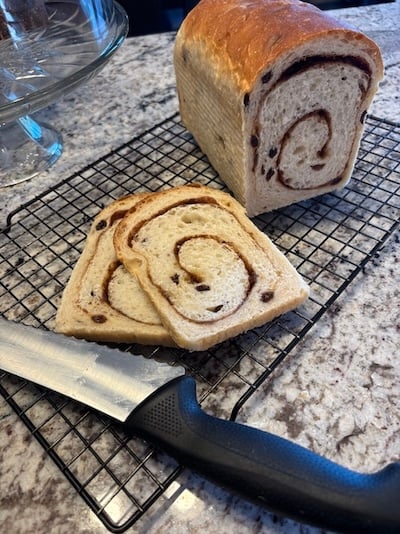
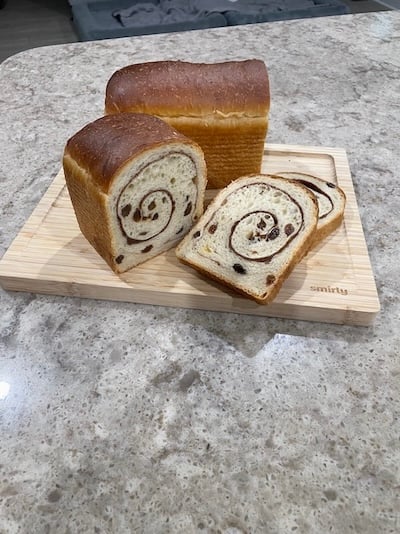
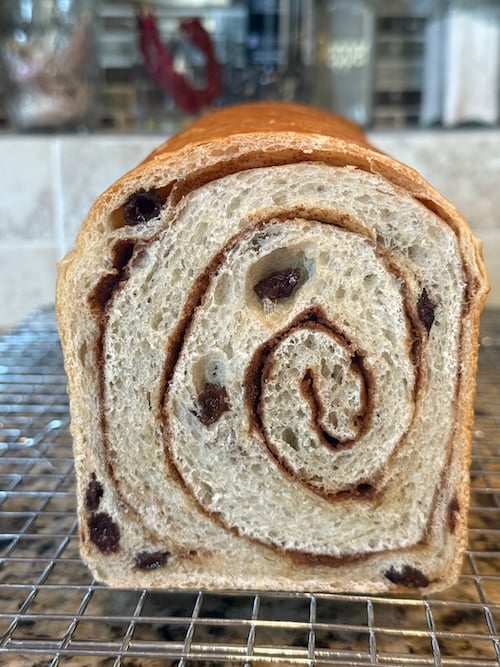
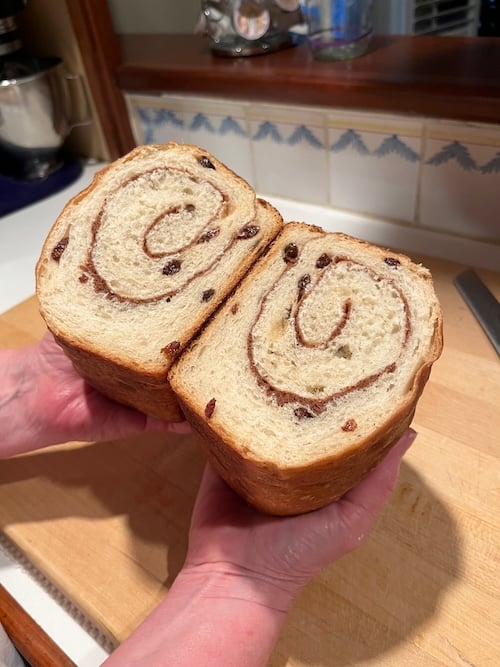
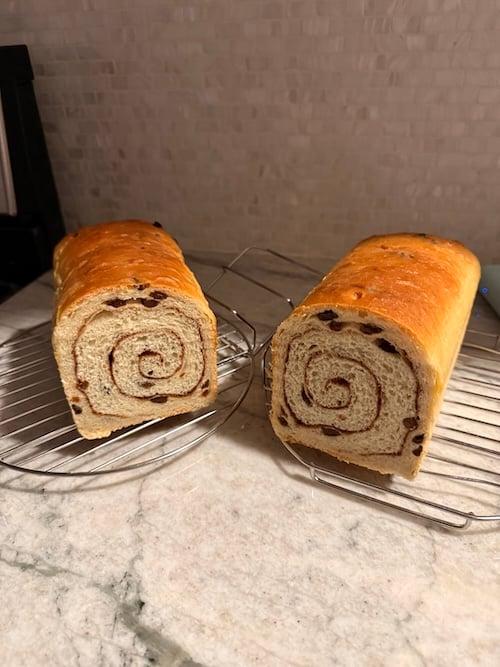
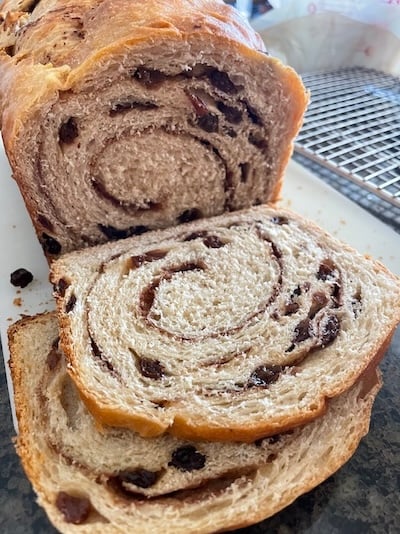
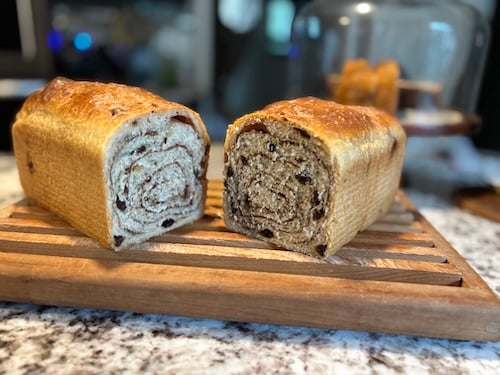
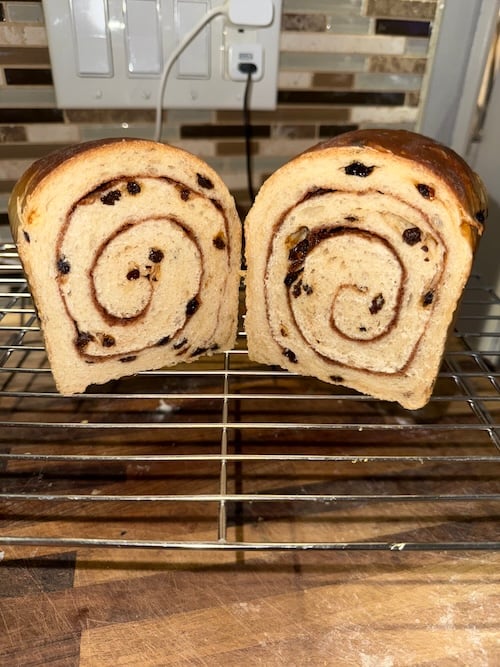
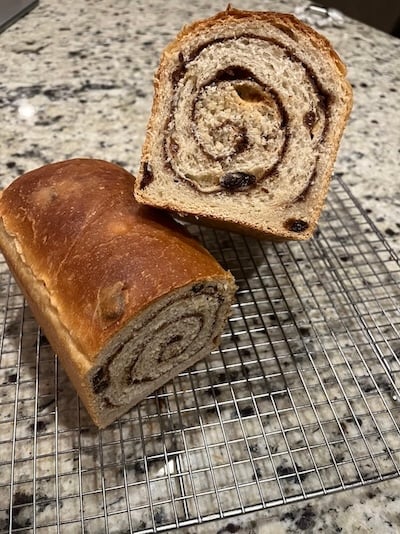
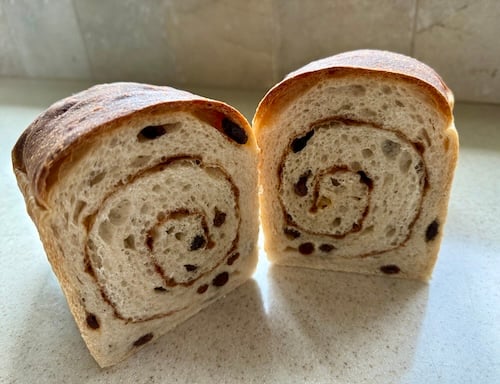
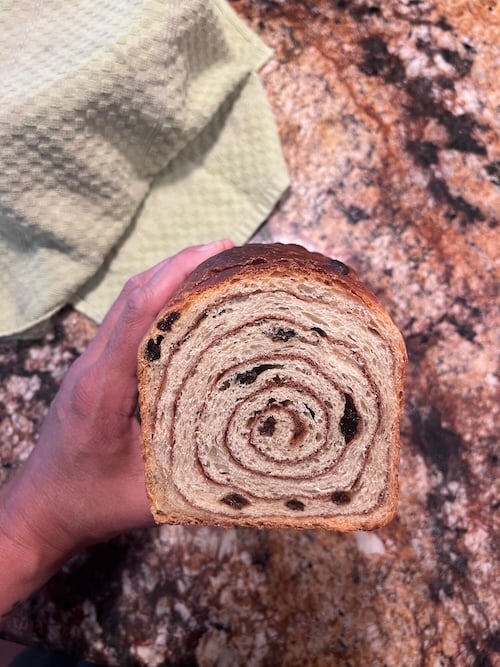
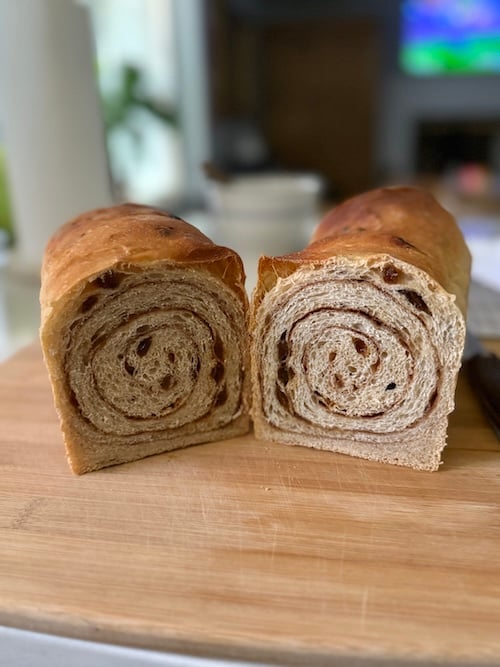
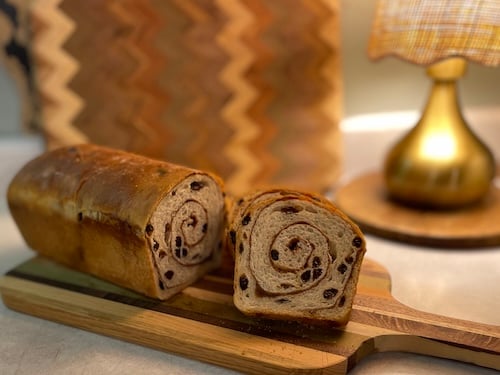
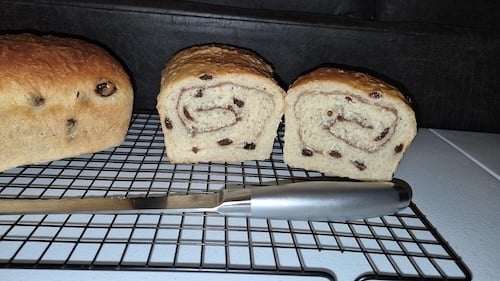
The recipe testers spanned an incredible geographic range – from Nevada City, California and Orlando, Florida all the way to New Zealand, Australia, and even Sarajevo, Bosnia and Herzegovina.
We had bakers testing at elevations of 2500 feet, in cold Australian winters, hot Canadian summers, and everything in between.
What humbles me the most is that 89.4% of testers gave this recipe a perfect 5/5 rating, with 90.6% rating the instruction clarity as excellent.
Whether you’re a beginner baker in Manitoba or an experienced bread maker in Texas, this recipe consistently delivers exceptional results that have bakers saying things like “it’s instantly a family favorite” and “will be making this on repeat!”
You got this!!
Baker’s Timeline
This timeline is so simple! But here’s a quick glance to help you schedule your bakes:
| The Night Before | Feed your starter and soak raisins |
| In the Morning (7-8am) | Make tangzhong, Mix your dough |
| Mid-day (12-1pm) | Shape your dough |
| Evening (6-7pm) | Bake your bread |
How to Make Cinnamon Raisin Swirl Bread (Step-by-Step)
If you’ve made my sourdough Wonder Bread copycat recipe before, this is the same dough, but we’re simply adding in the cinnamon raisin swirl elements.
The vanilla-soaked raisins get mixed in at the end of the mixing process, and the cinnamon swirl gets added during shaping.
Step 1: Make the Stiff Sweet Starter (The Night Before)
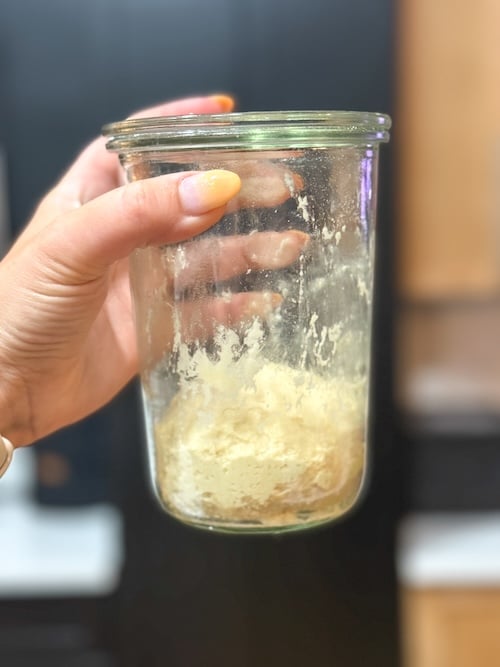
In a small jar or bowl, combine 30g sourdough starter, 30g honey, 60g water, and 120g bread flour. Mix until it starts to come together, then turn it out onto your counter and knead for a minute or two until it forms a cohesive ball.
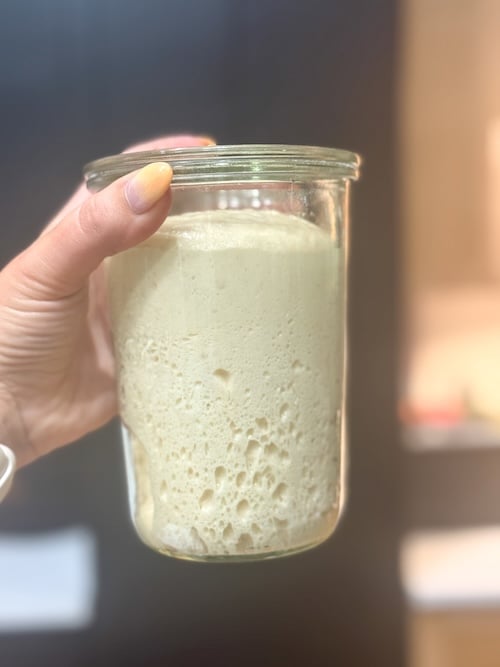
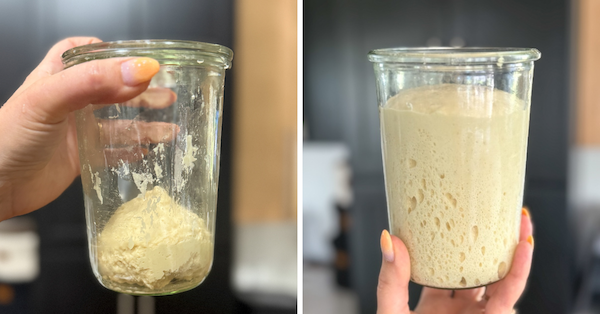
Place it back in your jar, cover loosely (I just rest the lid on top), and let it ferment at room temperature overnight. Your starter should triple, not just double. By morning, it should have grown significantly and feel light and airy with a sweet, yeasty smell.
I’m using a 3/4 L Weck jar, which I’m absolutely in love with. If you use the same jar, you can look for your starter to rise almost to the top!
In a small bowl, toss 100g raisins with 10g vanilla extract. Give them a good shake to coat evenly, then cover and let them sit overnight.
This vanilla soak adds incredible flavor and helps prevent the raisins from drawing moisture out of your bread. If you forget this step, you can soak them first thing in the morning for at least 30 minutes.
Step 2: Make the Tangzhong (Bake Day Morning)
The tangzhong is absolutely essential for this recipe – it’s what makes the bread so squishy and soft, and it stays that way for days. Do not skip or omit this, or the recipe will fail!
Whisk together 35g bread flour and 175g whole milk in a microwave-safe bowl until completely smooth. Microwave in 30-second intervals, stirring vigorously between each round. You’re looking for a thick, pudding-like consistency and a temperature of 150°F (65°C). This usually takes 3-5 rounds, depending on your microwave.
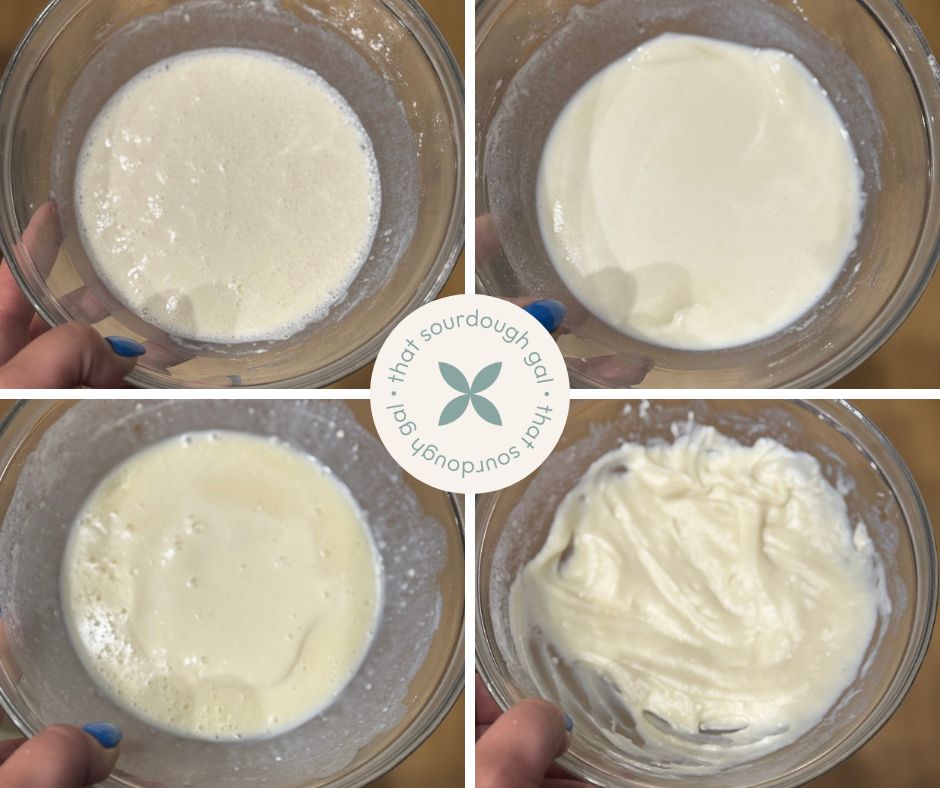
You can also make this on the stovetop over medium heat, whisking constantly. Don’t walk away, or it will overcook!
Once it’s thick and hot, let it cool on the counter for about 30 minutes until it drops below 100°F (38°C).
I love the Thermapen One as it’s lightning fast and ultra accurate (it’s what a lot of professional chefs use, and for good reason). But a great budget option I just found is this one from Atogou. It’s faster than my other budget thermometer, and it’s right around $20 on Amazon.
You can stick your finger right into it to test – it should feel barely warm. This cooling step is crucial because adding hot tangzhong will kill your starter.
The tangzhong can be made up to 2 days ahead and stored in the fridge.
Step 3: Mix the Dough
Add all of your stiff sweet starter and cooled tangzhong to your stand mixer bowl. Add 195g cool water, 40g sugar, 45g avocado oil, 515g bread flour, and 12g salt.
Mix on a low speed (KitchenAid’s stir or 1, Bosch’s 1, or Ooni’s 20-25) for 1-2 minutes just until everything comes together into a shaggy mass.
Once the ingredients are roughly combined, increase the speed a little and let the mixer do its work.

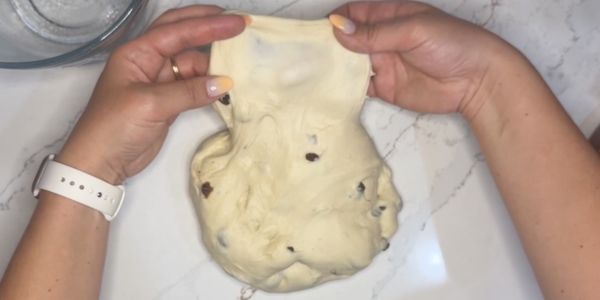
Continue mixing on speed 2 until you achieve at least a weak windowpane – when you stretch a small piece between your fingers, it should be thin enough to see light through without immediately tearing. The timing varies significantly by mixer:
- Ooni Halo Pro: 7-8 minutes
- Bosch: 10 minutes
- KitchenAid: 15-20+ minutes (don’t worry if it takes longer!)
The dough should feel soft and slightly tacky but hold its shape well. Many successful bakers noted the dough starts very sticky but comes together with continued mixing. Don’t panic and add too much flour too quickly.
If your dough still feels very sticky and loose after several minutes of mixing, add flour 1 tablespoon at a time. But be conservative – it’s better to have slightly tacky dough than dense bread from too much added flour.
Once your dough passes the windowpane test, add your vanilla-soaked raisins to the mixer bowl. Mix on low speed for just 1-2 minutes until they’re evenly distributed throughout the dough. Don’t overmix here – you just want them incorporated.
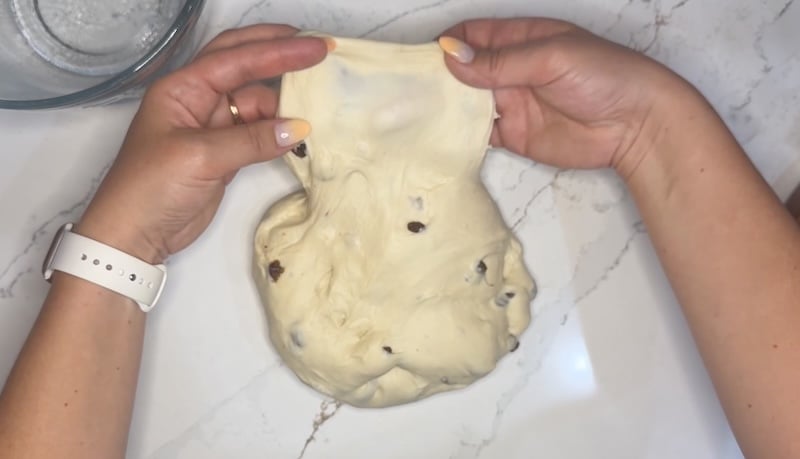
Step 4: Bulk Fermentation
Transfer your dough to a lightly oiled bowl and cover with plastic wrap or a damp towel.
Temperature is everything for timing – place it in your warmest spot, ideally between 80-85°F (27-29°C). Don’t exceed 90°F (32°C). Here are some options:
- Brod & Taylor proofing box set to 85°F (30°C)
- Oven with the light on
- Oven with a cup of boiling water in the corner
- Warming mat
- A sunny spot in your home
- Outside on a warm day (cover with plastic wrap)
You’re looking for about 30% growth and small bubbles forming around the edges of the bowl.
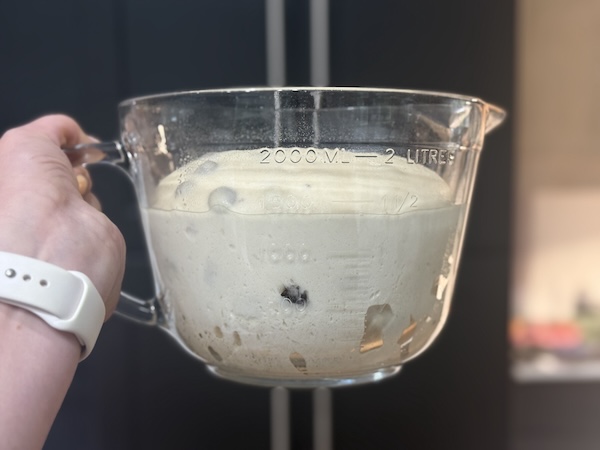
This takes about 3-5 hours, depending on your temperature, though it does need to be warm. If your home is cold, it could take double that amount.
The dough should feel lighter and aerated when you poke it.
Step 5: Prepare Your Filling
While your dough is finishing its rise, whisk together 1 egg with 1 teaspoon water for your egg wash.
In a separate bowl, combine 5 tablespoons brown sugar, 2 tablespoons bread flour, and 1 tablespoon cinnamon. The flour in this mixture is key – it absorbs moisture and prevents a gooey mess.
Step 6: Shape the Dough
Spray your 13×4 loaf pan with nonstick spray. Turn your dough out onto a lightly floured work surface. Using a rolling pin, roll it into a rectangle that’s slightly narrower than your pan width (about 10 inches wide by 21 inches long).
As you roll, use your rolling pin to pop any large air bubbles you see. These can create gaps in your final loaf.

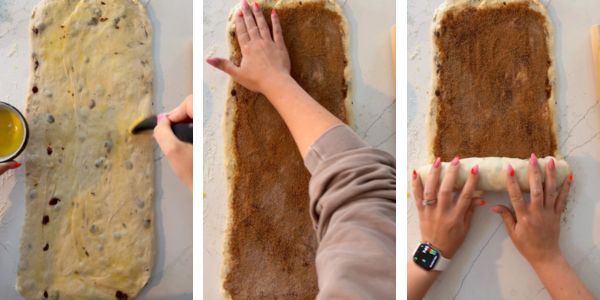
Brush the entire surface of your dough rectangle with the egg wash – this acts like glue to help your cinnamon mixture adhere. Evenly sprinkle the cinnamon sugar mixture over the egg wash, then use your hands to smooth it out.
Push the filling mixture down to the bottom edge that’s closest to you – this becomes the center of your swirl. Leave a small border at the top edge (farthest from you) clean – this will help you seal the roll.
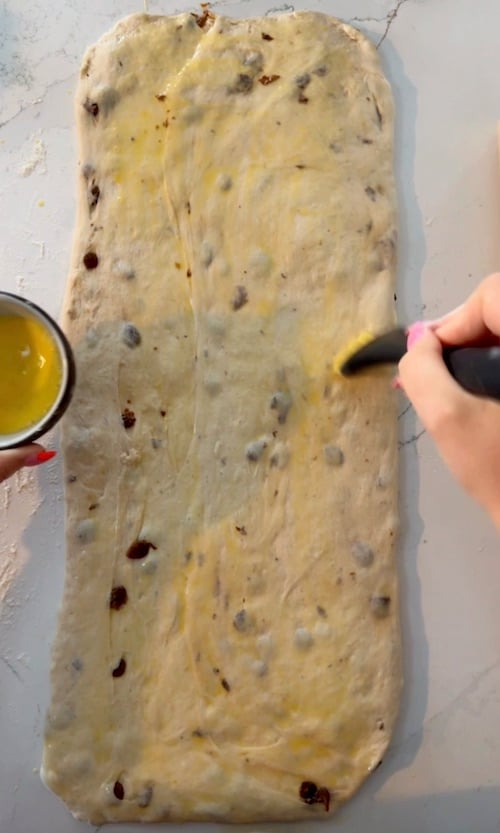
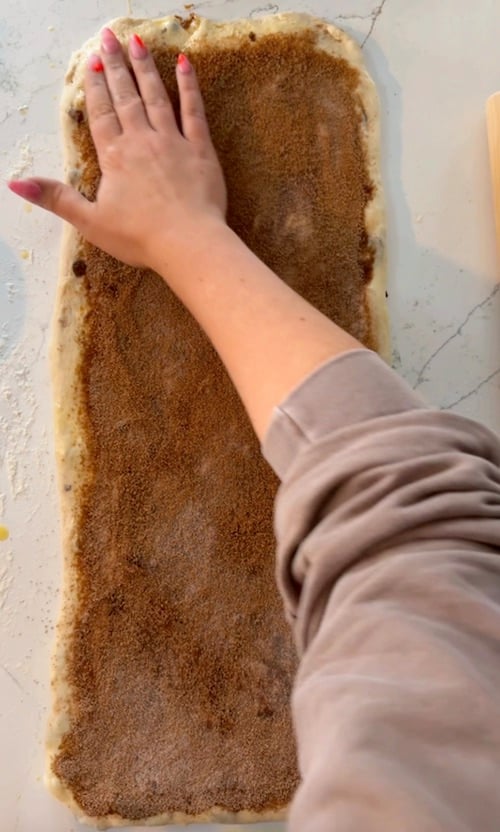
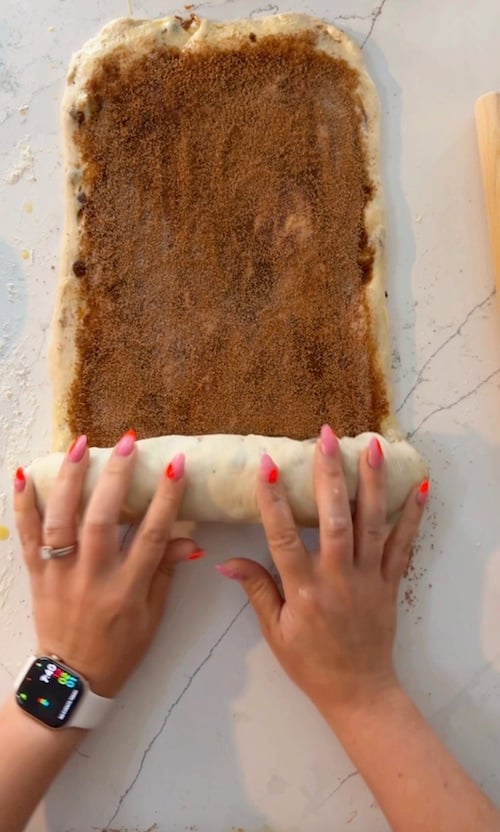
Starting from the bottom edge (closest to you), begin rolling the dough into a tight log. As you roll, occasionally pull the log back toward you to keep it tight. Pinch the seams on the ends as you roll to keep the filling from escaping.
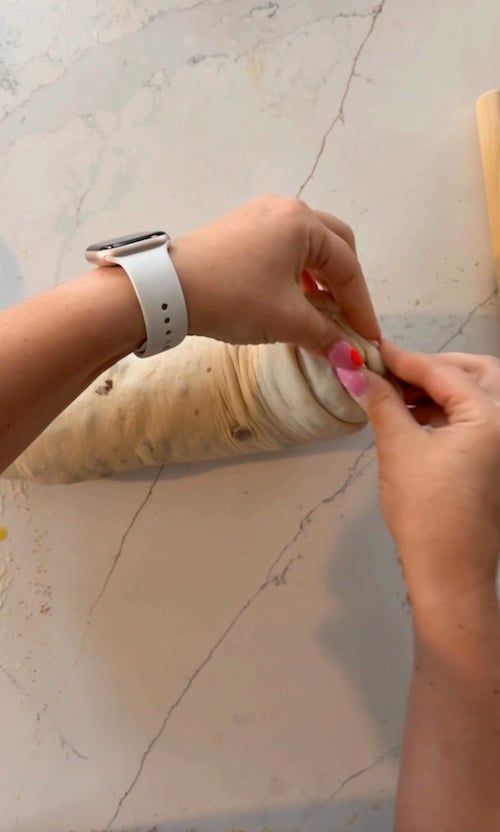
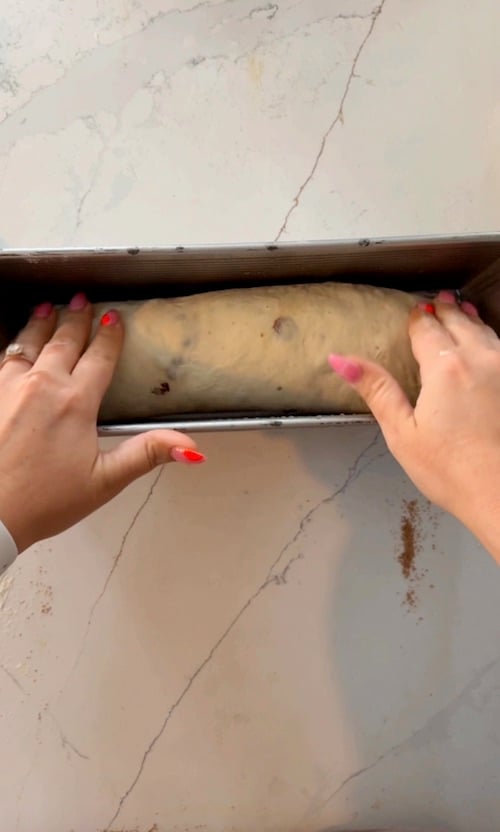
When you reach the clean top edge, pinch it firmly to seal, then place your log seam-side down in your prepared loaf pan. Use a toothpick to pop any air bubbles that appear on the surface.
Step 7: Final Rise and Baking
Cover your shaped loaf with plastic wrap and return it to your warm spot (80-85°F). Let it rise until the dough is even with the height of your pan rim – this usually takes 3-5 hours.
Don’t let it go much higher than the rim or you risk overproofing, which creates gaps in this bread. Overproofing causes separation in cinnamon swirl loaves, so bake as soon as it’s ready.
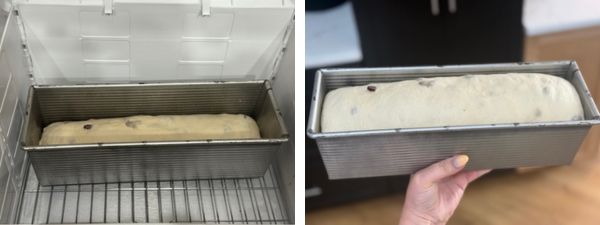
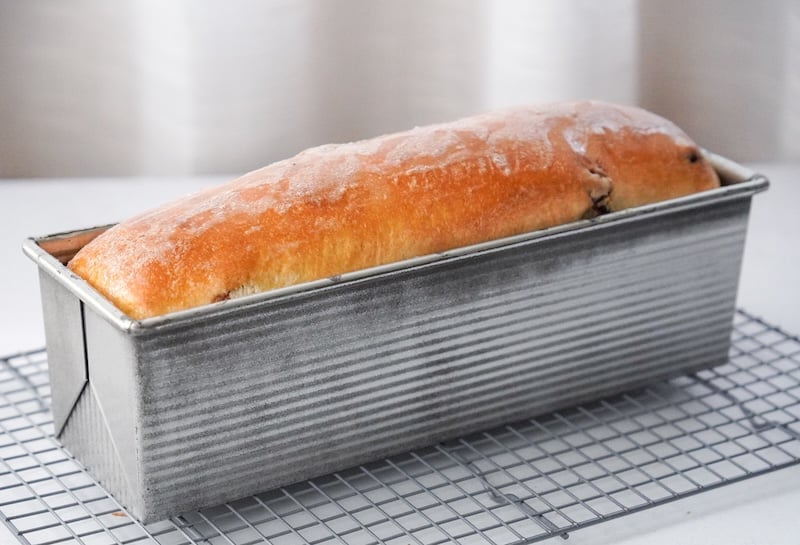
Preheat your oven to 350°F (175°C). Remove the plastic wrap and bake for 45-50 minutes until the internal temperature reaches 200-205°F (93-96°C). If the top gets too dark during baking, tent it with foil.
Different Pan Sizes:
- Mini loaf pan: 25-30 minutes
- Regular loaf pan (8.5×4.5): 30-35 minutes
- Sandwich bread loaf pan (13×4): 45-50 minutes
As soon as the bread comes out of the oven, brush the hot top with 1 tablespoon of butter – this creates a soft, tender crust. Let it cool in the pan for 5-10 minutes, then turn it out onto a wire rack.
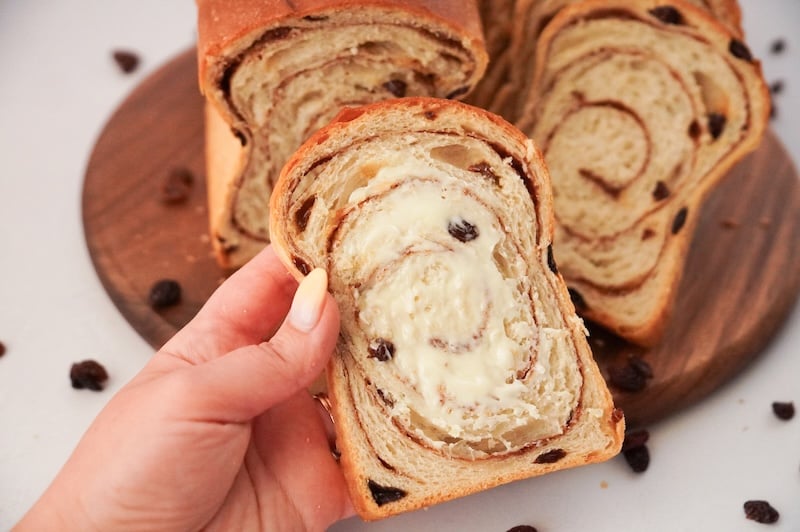
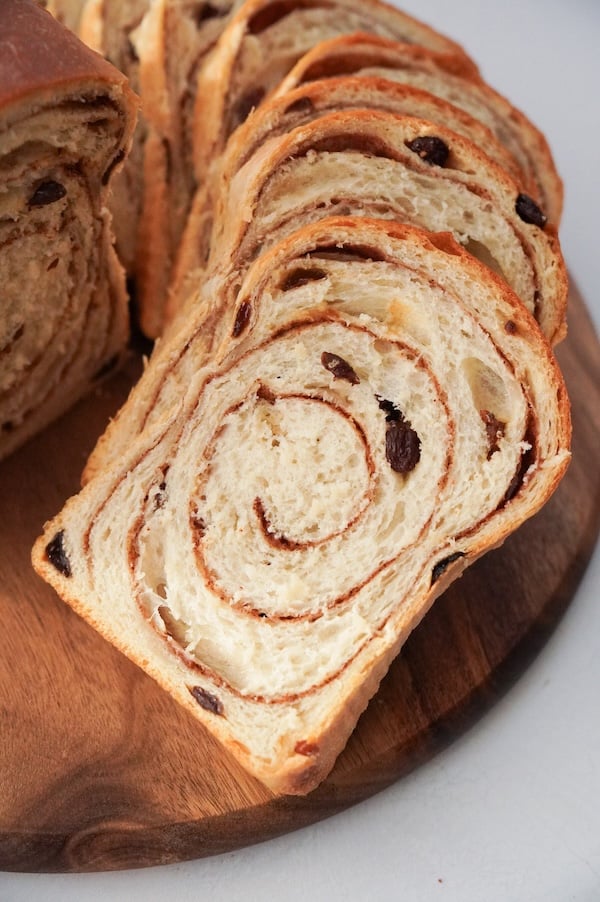
Let it cool completely before slicing! This takes 1-2 hours, but cutting into warm bread will result in gummy slices and a collapsed loaf. Trust me, the wait is worth it for perfect slices that show off that beautiful swirl.
Ingredient Substitutions
For the sweet stiff starter:
- Honey: sugar
For the tangzhong:
- Whole milk: any kind of milk (2%, skim, Fairlife), nut-milk (almond, cashew, soy), or just plain water will do!
For the dough:
- Sugar: honey, maple syrup, agave
- Avocado oil: grapeseed, vegetable, canola, sunflower, coconut, or olive oil
- Raisins: golden raisins, sultanas, craisins, or just omitting them entirely
- Bread flour: I prefer bread flour from all my testing, but some recipe testers used all-purpose flour instead and enjoyed it.
For the filling:
- Egg wash: heavy cream, melted butter, melted coconut oil; one recipe tester used psyllium husk powder with a little water and said it worked great
- Brown sugar: you can make your own with white sugar + molasses
Tips for Success
Here are those little details that can make all the difference:
- Flour your surface lightly: You don’t want your dough sticking to the counter during roll-up.
- Keep the bottom surface smooth: This becomes the top of your loaf – any tears will show.
- Roll out large air bubbles: Use your rolling pin to pop them for a tight, even crumb.
- Make your rectangle slightly narrower than your loaf pan: The dough will lengthen as you roll it up, so start a bit narrower to ensure it fits.
- Thin the top edge with your thumb: This helps it stick better when rolled and prevents a harsh seam line.
- Egg wash before adding filling: This helps the cinnamon mixture adhere instead of separating between layers.
- Add flour to your cinnamon sugar mixture: This absorbs moisture and prevents a messy, liquidy filling.
- Mix raisins into the dough, not the filling: Adding raisins on top of the cinnamon mixture before rolling doesn’t work – the moisture causes separation and the raisins fall out when slicing. Mix them into the dough instead.
- Push filling to the bottom edge: This becomes the center of your swirl – no need for a gap.
- Pull the log back toward you while rolling: This keeps your swirl tight.
- Pinch the seams as you roll: Tuck or pinch the edges to seal the filling inside.
- Use your bench scraper if the dough sticks: Slide flour under sticky spots with your scraper to keep rolling smooth.
- Bake when dough reaches pan height: Overproofing causes gaps in cinnamon swirl loaves, so bake as soon as it’s ready.
FAQs
I tested adding the raisins on top of the cinnamon mixture before rolling up the dough, and it did not work well! The moisture from the raisins caused a lot of separation in the final dough, and the raisins fell right out of the bread when slicing. Adding the raisins during mixing ensures the raisins are a part of the dough, so they stay put.
Yes, the egg wash gives the cinnamon sugar mixture something to adhere to, which keeps the swirl from separating. If you have an egg allergy, I’d try heavy cream or milk. If you have a dairy allergy, one recipe tester used psyllium husk powder with a little water and said it worked great.
I was lucky enough to have a recipe tester in Nevada City, CA (elevation 2500 ft), and she had to lower her oven to 325°F and bake for 45 minutes.
Please feel free to use the fridge at any time to “pause” the process. You can always bring your dough or shaped loaf out of the fridge, let come back to room temperature, and resume. One recipe tester said, “Life got in my way, so I had to refrigerate before rolling and again after.” It’s really no problem!
All ovens are different, so feel free to extend the baking time and tent your loaf with foil to prevent burning. One recipe tester had to bake an extra 10 minutes to reach the correct internal temperature.
Loaf Pan Size Calculator
Not using a 13×4 loaf pan like me? Use this calculator to get a revised ingredient list for different loaf pan sizes.
“My family loved it and ate all in the day.” –Recipe tester from NSW Australia
Cinnamon Raisin Swirl Soft Bread
Equipment
- 3/4 L Weck jar for the stiff sweet starter
- Stand mixer with dough hook
- 2-quart bowl for first rise
- 13×4 long loaf pan USA Pan is my favorite
- Brod & Taylor proofing box totally optional
- Long bread bag code THATSOURDOUGHGAL for 15% off
Ingredients
Stiff Sweet Starter
- 30 g sourdough starter (ideally, fed within the last 24 hours)
- 30 g honey
- 60 g water
- 120 g bread flour
Tangzhong
- 35 g bread flour
- 175 g whole milk
Main Dough
- All of the stiff sweet starter (from above)
- All of the tangzhong (from above)
- 195 g cool water
- 40 g sugar
- 45 g avocado oil
- 515 g high-protein bread flour (see Notes)
- 12 g salt
- 100 g raisins
- 10 g vanilla extract
- 1 tbsp butter (for buttering the baked loaf)
Filling
- 1 egg
- 1 tsp water
- 5 tbsp brown sugar (packed)
- 2 tbsp bread flour
- 1 tbsp cinnamon
Instructions
- Before you begin: This recipe is written for a 13×4 loaf pan. If you are using a different size, use the calculator above this recipe card for a revised ingredient list. Additionally, a ton of ingredient substitutions have been tested. Please see the substitutions section for tips.
The Night Before
- Make the stiff sweet starter: In a small jar, mix 30 g sourdough starter, 30 g honey, 60 g water, and 120 g bread flour until it forms a ball. Knead outside of the jar to fully incorporate the ingredients. Cover loosely and let ferment at room temperature until morning.

- Soak your raisins: In a small bowl, combine 100 g raisins with 10 g vanilla extract. Give it a shake and cover until morning. If you forget this step, soak the raisins first thing in the morning, or for at least 30 minutes.
Bake Day
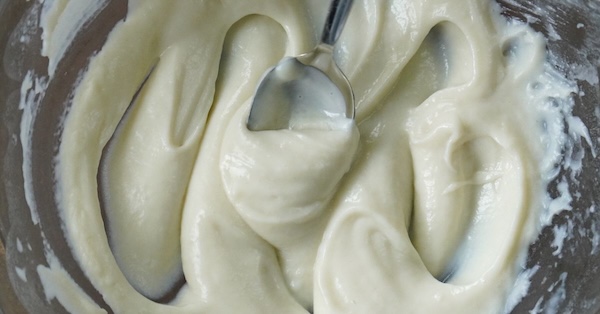
- Make the tangzhong: Mix 35 g bread flour and 175 g whole milk in a microwave-safe bowl. Microwave in 30-second intervals, stirring between each, until thickened and reaches 150°F (65°C). For me, it usually takes 3-5 rounds to finish. Let rest on the counter for about 30 minutes, or until the mixture has cooled down to below 100°F (38°C).Note: you can also do this the night before and refrigerate the tangzhong overnight.
- Mix the dough: In stand mixer bowl, combine All of the stiff sweet starter, All of the tangzhong, 195 g cool water, 40 g sugar, 45 g avocado oil, 515 g high-protein bread flour, and 12 g salt. Mix on a low speed for 1-2 minutes until ingredients come together, then increase to a medium-low speed and mix until dough reaches at least a weak windowpane. It takes about 7 minutes in the Ooni Halo Pro, 10 minutes in a Bosch and upwards of 15-20 minutes in a KitchenAid, for reference. Please see the Notes section at the bottom for hand mixing instructions.
- The dough will feel slightly tacky after mixing, but it should hold its shape and have a soft texture when you poke it. If the dough still feels loose and overly sticky after several minutes of mixing, add additional flour in 1 tbsp increments, but please be sparing, or you'll end up with a dense loaf.
- Add your soaked raisins to the stand mixer and mix on low speed for 1-2 minutes, or just until the raisins are fully incorporated into the dough.

- Bulk fermentation: Transfer to lightly oiled bowl, cover, and let rise in a warm place (80-85°F/27-29°C) until risen by about 30% and small bubbles appear around the sides of the bowl (about 3-5 hours).

- Prepare filling: In a small bowl, whisk together 1 egg with 1 tsp water. In a separate bowl, combine 5 tbsp brown sugar, 2 tbsp bread flour, and 1 tbsp cinnamon.
- Shape the dough: Spritz your loaf pan with a nonstick oil spray. Dump dough onto a lightly floured work surface. Using a rolling pin, roll dough into a long rectangle slightly narrower than pan width (about 10" wide by 21" long). Try to pop large bubbles as you roll. Brush the dough with your egg wash and evenly sprinkle the cinnamon sugar mixture over the egg wash, smoothing it out with your hands.
- Roll up the dough tightly, pinching the seams on the ends as you roll to keep the cinnamon sugar mixture inside. Place your dough log seam-side down in loaf pan. Use a toothpick to pop any bubbles on the surface of the dough.
- Second rise: Cover with plastic wrap and let rise in your warm spot until very puffy and the dough is even with the height of the pan rim (approximately 3-5 hours).

- Bake: Preheat oven to 350°F (175°C). Bake uncovered 45-50 minutes until internal temperature reaches 200-205°F (93-96°C). See Notes for different loaf pan size bake times. If the top of the loaf is getting too dark, cover with foil. Once done, immediately brush hot loaf with 1 tbsp butter. Cool in pan 5-10 minutes, then turn out onto rack. Cool completely before slicing (1-2 hours).
Video
Notes
- Bread flour: Ballerina Farms (14% protein), Central Milling High Mountain (13.5% protein) or King Arthur unbleached (12.7% protein) – no adjustments needed
- All-purpose: Costco AP flour – add ~25g extra flour to main dough
- Canadian options: Arva Mills Daisy flour or Boreal Organic All Purpose (Costco) work perfectly (thanks to follower Amanda Steele for this tip)
- Mini loaf pan: 25-30 minutes
- Regular loaf pan (around 8.5×4.5): 30-35 minutes
- Sandwich bread loaf pan (around 13×4): 40-45 minutes
Conclusion
Will the Pepperidge Farms cinnamon raisin swirl bread sourdough? Yes, yes it will!!
If you make this recipe, please share your experience in the comment section below. As always, your feedback means the world to me, and if you have any issues, I’m always happy to troubleshoot alongside you.
Happy baking!!
Other recipes you might like:




A favorite recipe in our house! It’s so forgiving. I got a bit distracted by some things that came up in the day and overproofed my dough. Shaped it, let it rise to the top of the bread pan and baked it anyway. My pan is an inch wider than the recipe calls for so I knew it wouldn’t get the same height, but the results were amazing… soft, delicious bread! Photo is of one cinnamon raisin and one plain loaf. (The plain bread went fast when my teen son and my husband decided sandwiches were a must for dinner!)
Looks great Jane!! So happy you all loved it!
Love,love,love this!!!.. so do my grand babies!!.. I was too tired for the second rise so I just popped it in the refrigerator till morning, took it out and let it finish its rise and baked.
AMAZING!!!♥️
Awesome, so happy to hear you enjoyed it!
My favorite bread I’ve ever made!! My first loaf was perfect!! I’m soo excited to have found this recipe. My 2nd loaf is proofing right now. I’m about to really impress my mother in law! 😉
Woohoo!! Thanks for sharing Lisa!
I made this bread yesterday. Everything seems fine, but it is taking forever for it to rise in the pan? I left it out for about five hours last night and finally put it in the fridge and pulled it back out this morning. I have it in the oven now with the light on. It is rising but very slow. Did I do something wrong? I still have my fingers crossed that it will be OK after I am able to bake it. Thanks for such a detailed recipe!
I’m eager to hear how it turns out. A super slow rise is often traced back to using a weak or premature starter (one that hadn’t fully peaked yet).
It turned out great! My starter was strong, but not sure my bulk fermentation was long enough. We love it though! Thanks for another great recipe!
Can you use regular fed starter instead of making the sweet starter? If so, how much should I use?I don’t mind the sour taste in the bread.
Thank you
Yes, use 240g of liquid starter.
Adjust the Main Dough:
Water: 195g → 150g (reduce by 45g)
Flour: 515g → 530g (add 15g)
Sugar: 40g → 70g (add 30g) OR add 30g honey alongside the 40g sugar
Everything else stays the same
Hi! Thanks for the lovely recipe. I was wondering if it would work to do the second rise over night in the fridge to bake the following morning? My stiff start wasn’t tripled in size this morning and is taking a bit. Also I usually do a cold overnight long ferment with my other breads and I kind of like it to keep the sour flavor down. Thanks!
Hey! The dough would still need to rise on the counter – the fridge is too cool for the yeast to raise the dough. You can “pause” things in the fridge for scheduling reasons, but you will still want to bring it out and let it rise on the counter fully before baking. It will also taste a little more sour due to the extra fridge time.
Thank you for the response. I tried it and am now waiting for the rise. It’s taking its sweet time. Perhaps my starter wasn’t tripled when I started. Thanks again!
I baked this bread today with a few differences. I used the spices and flavors and filling of your Artisan Cinnamon Apple Swirl Sourdough Bread rather than the cinnamon raisin filling. I also used 30gm of boiled cider from King Arthur as part of the water in the recipe. My dough was pretty sticky, but it looks and tastes wonderful! Thank you for these terrific recipes!
This bread is so good! I’m loving the shortened timeline too. Another 5 star recipe from Rebekah!
So glad to hear that!!
Why only 30% rise? If it is same day without cold proofing I would expect that you would want the bf to go till the dough doubles, isn’t that correct?
If you let the dough rise too much in the first proof, it will not have enough steam to rise properly in the second one. You can give it a try, but I suspect your final loaf will be overproofed.
This bread was amazing – super soft and delicious! The recipe was well written with all steps thoroughly explained.
This is the first time ever I’ve made a bread with a nearly perfect swirl which was, in my opinion, due to the steps Rebekah had us take.
The bread tasted sooooo good, it was perfectly soft and the balanced swirl gave a lovely taste of cinnamon in every bite! Normally I’m not a fan of raisins in my bread, but soaking them in vanilla and incorporating into the dough early made them soft, yummy and not at all chewy!
I’ve also gifted this bread and gotten rave reviews. It’s going to stay on my “Make This” list permanently!
Wow you just made my day!!
Thank you, thank you, thank you! My daughter who has GI issues and picky about textures loves this bread! Not only does she say it’s good, but is requesting it on repeat that I keep a loaf frozen for when we run low. I made a loaf for my mom and raves about it too! (Tells me she’ll have to fight her grandchildren for another loaf). I’ve been following you for a while and just started testing out your recipes! I appreciate the hard work you put into it. I can’t wait to be a tester on future recipes! Thank you from the bottom of my heart for making easy to follow recipes and sharing your tips!
Aw yay, I’m so happy to hear this Melissa!!
Absolutely amazing recipe!
I just had to come here and say THANK YOU for this incredible bread recipe. The step-by-step directions were so clear and easy to follow, and the pictures were super helpful — especially for a visual learner like me. My bread turned out perfectly — golden, fluffy, and delicious. I’ve already decided this is going to be my go-to recipe from now on. You’ve made baking bread feel fun and doable, even for someone who isn’t an expert. Keep sharing your magic — you’ve gained a loyal follower!
Aw thank you so much!! What a beautiful swirl!
Could this rolling method work for the cinnamon swirl.? And I imagine then the egg wash would not be needed because of the butter vs the tangzhong?
I love all that you present and thank you. ❤️
Hey! I tried this method for my artisan cinnamon swirl bread recipe and it did not work well. I cannot explain why it wouldn’t work well in an artisan loaf vs an enriched one like this, but that’s why the methods are different.
I just finished this cinnamon raisin loaf, and it was so enjoyable to make. I made the regular size loaf in the usa pullman pan that I purchased off your site. It fell out flawlessly. The loaf rose beautifully, has such a pretty swirl, is soft as a cloud, and so yummy! I used king arthurs Vietnamese cinnamon, which has amazing flavor. I used bourbon vanilla soaked raisins. The cooking time went quite a bit longer than the recipe showed for this size pan, but I took it out of the oven when it reached 205 temp. and it was perfect. The recipe was so easy to follow and fun to make. Thank you ❤️
Stunning! So happy you enjoyed the recipe Laurie! Soaking the raisins in bourbon vanilla is such a great idea!
This was fun to make and watch the progression. I think I know what went wrong but would love your feedback. I made it all in one loaf and it was a regular pan size (8.5x4whatever). I feel like I had to stuff it in there and it really was too much dough for one loaf. It took over 2 hours to come to temp
Hey! Yes, you need a larger loaf pan or scale the ingredients down to fit. The crumb looks underhydrated though – I think there is too much flour in this dough.
Easy to follow recipe with clear instructions and amazing results! Thank you for another fantastic recipe.
Thanks for sharing CJ!
Oh my goodness! Just finished slicing this! Love the swirl!!! Hubby couldn’t wait and toasted a piece tonight before bed!!! He also wanted me to add pecans. So, I toasted them and added with the cinnamon.
It is soooo good! Award winning recipe! Thank you so much for sharing your recipes and processes! So much better than a different one I tried! Look forward to making this one for my 101 yr young aunt! She loves cinnamon raisin bread!
What a perfect looking loaf!! Thanks so much for sharing Sue
Hi, greetings from Brazil 😃
I haven’t made this yet, but I’m eager to do so. I have one question … can I prepare the dough, and keep it in the fridge 12-24 hours and then bake ???
Note: weather here hot & humid.
Yes you can. Just make sure the dough has reached the top of your loaf pan before baking.
I love this recipe. I’ve made it twice. My third time I have put it in fridge to pause for the night. Question….. Do I need the loaves to come to room temperature before I bake or can I bake them while they’re cold? They have doubled in size and come to the top of the pan, but they’re still quite cold.
You can bake them cold! As long as they’ve risen all the way, baking from the fridge is just fine.
Thank you 😊
Love your recipes and videos
Such a great recipe! I used the base of it but put banana in my tangzhong and soaked my raisins in rum instead of vanilla! My cinnamon swirl turned out so good!! I will 100% be making this as a staple from now on.
Yum!! That sounds so good!!
I think I need to make flash cards of each step so I don’t lose track. It’s just me, I know. 🤣 I was 100% sure this was going to fail. My timing was all off and by 11 pm I was ready for bed and it was not done proofing yet, sooooooo I stuck it in the fridge and crossed my fingers. I took it out in the morning. Let it finish proofing. Rolled it out. Almost messed up by mixing the egg wash with the filling….hence I need flash cards! 🤪 OK, made a new batch. Put it all together, finished all the steps, baked and waited patiently. ⏰️ Delicious! I think it’s a tad bit gummy but my husband says it’s perfect! 👌
Flash cards aren’t a bad idea, haha! Looks beautiful!!
Can I substitute another kind of oil. I have 2 huge jugs of vegetable oil in the house.
Yes absolutely