
Easy Patriotic Sourdough Bread Recipe (Beginner-Friendly)
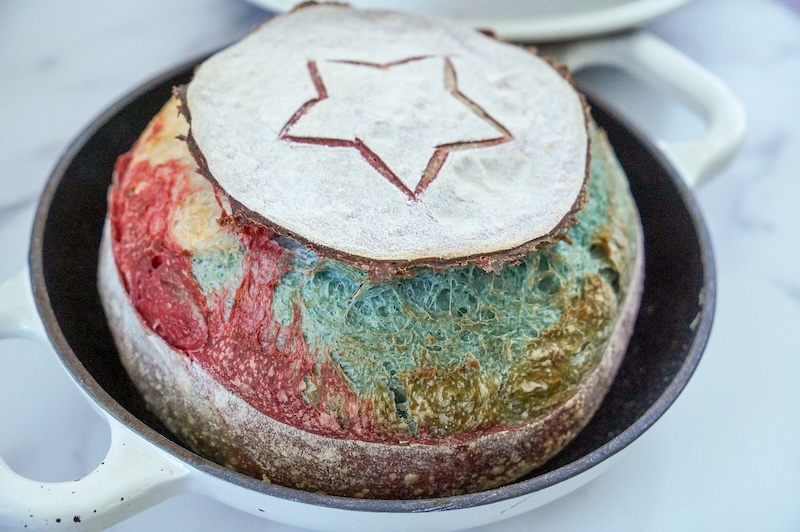
This easy patriotic sourdough bread is a red, white, and blue artisan loaf made with natural food powders, simple shaping, and beginner-friendly scoring. It’s a great recipe for Memorial Day, Independence Day, Veterans Day, or any time you want a red, white, and blue sourdough loaf without complicated techniques.
I’m not good at fancy scoring or colored bread, so if I can make this patriotic sourdough loaf, you can, too.
It took five attempts, but I finally nailed down the process — and the right natural food powders — for a beautiful red, white, and blue loaf of artisan sourdough bread.
Disclaimer: Some of the products I recommend in this post are affiliate links. If you choose to purchase through one of my links, I may earn a small commission, which helps fund this website, recipe development, and monthly giveaways. I sincerely appreciate your support.
Baker’s Timeline
Here’s the sample timeline I used for this loaf. Your timing may vary depending on your starter strength, dough temperature, room temperature, and how quickly your dough moves through bulk fermentation.
| Day 1 | |
| 9 PM | Feed starter using a 1:5:5 feeding ratio |
| Day 2 | |
| 8:45 AM | Mix dough (bulk fermentation begins) |
| 9:30 AM | Stretch and fold #1 |
| 10 AM | Stretch and fold #2 |
| 10: 30 AM | Stretch and fold #3 |
| 11 AM | Coil fold |
| 2:30 PM | Pre-shape when dough is ready (bulk fermentation ends here) |
| 2:50 PM | Final shape and refrigerate overnight |
| Day 3 | |
| Any time the next day | Score and bake |
The Best Natural Food Dyes for Red and Blue Sourdough
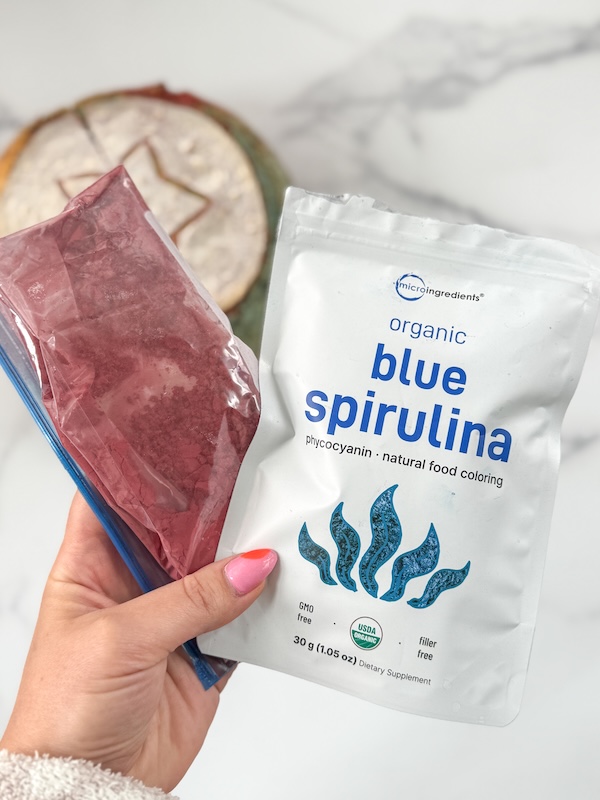
I tried several food dye options and found that red yeast rice powder and blue spirulina gave my loaf the bright red and blue colors I was looking for.
Here’s a quick recap of the other natural color options I tried:
- Natural food coloring drops (Watkins brand): It took a lot of drops to get any color, and even then, the color was not very vibrant. I added freeze-dried strawberries and blueberries to enhance the colors, which helped. But my family didn’t love the fruit in the bread, and without extra sweeteners in the dough to embrace the fruit theme, it just didn’t taste right.
- Dragon fruit powder: This one turned out baby-shower pink, not red.
- Beet powder: The red color baked out completely, leaving behind a dull brown color. Also, it stinks.
After all five tests, red yeast rice powder was the only red option that stayed vibrant after baking, and blue spirulina was the clear winner for the blue dough.
The Recipe Testing Journey
I filmed all five attempts, and each one taught me something about color, flavor, shaping, or scoring. Here’s what worked — and what definitely didn’t.
Attempt 1: Natural Dye Drops and Freeze-Dried Fruit
The freeze-dried fruit looked really pretty, but the taste was a little strange in artisan sourdough bread. It needed more sweetness to make the fruit flavor feel intentional.
The natural dye drops were too muted, and adding them during stretch and folds wasn’t ideal because the colors didn’t fully disperse.
Also, freehand cutting a star on top was kind of a disaster — this first attempt convinced me I needed a stencil!

Attempt 2: Natural Dye Drops Mixed at the Beginning
Mixing the dye drops with the water helped create an even color throughout the dough, but the colors were still very muted — even after adding what felt like a ton of drops.
The blue also completely disappeared during baking, and the color layering during shaping still needed work. On the bright side, using a star-shaped cookie cutter as a stencil was really helpful!

Attempt 3: Dragon fruit Powder & Blue Spirulina
The last loaf lost the blue color, and this one lost the red! The dragon fruit powder baked out completely, but the blue spirulina held its color and became the clear winner for the blue dough.

Attempt 4: Beet Powder and New Layering Process
The beet powder wasn’t much better. The red color baked away and left behind a dull brown color.
I did like the new layering process, but it was more work, and I wasn’t totally sold on the extra complexity. It wasn’t hard — it just took more time. That attempt helped me simplify the process for the final loaf.

Attempt 5: Red Yeast Rice Powder and New Shaping Process
Finally, we got a winner! The red yeast rice powder stayed red through baking, and the new shaping process gave the loaf better structure.
I pre-shaped the dough, let it rest for 20 minutes, and then did a final shape. The extra shaping step made a big difference in oven spring because my earlier loaves were baking up too flat.
How to Make Patriotic Sourdough Bread
Here’s the step-by-step process for making this red, white, and blue sourdough loaf, from feeding your starter to shaping, scoring, and baking.
Step 1: Feed Your Starter
Feed your starter the night before using a 1:5:5 ratio: 13g starter, 65g flour, and 65g water. This gives you active starter for the morning with a little extra to ensure you have enough left over to maintain your starter.
Want to adjust the timing? Use my sourdough starter feeding ratio calculator to customize your feeding schedule so your starter is active and ready when you need it.
Step 2: Mix the Doughs
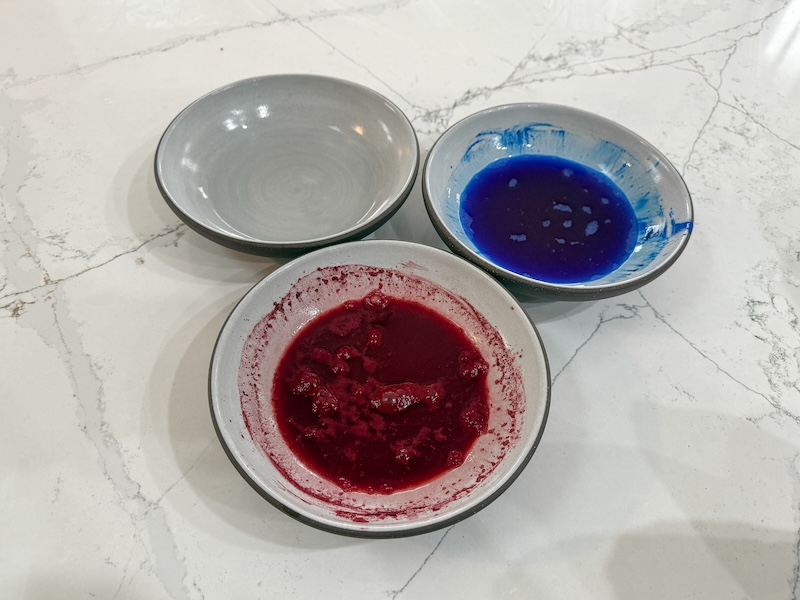
Set up three medium-sized bowls and add 116g water to each. For the red dough, whisk 2 tsp red yeast rice powder into one bowl of water. For the blue dough, whisk 1 tsp blue spirulina into a second bowl. Leave the third bowl plain for the white dough.
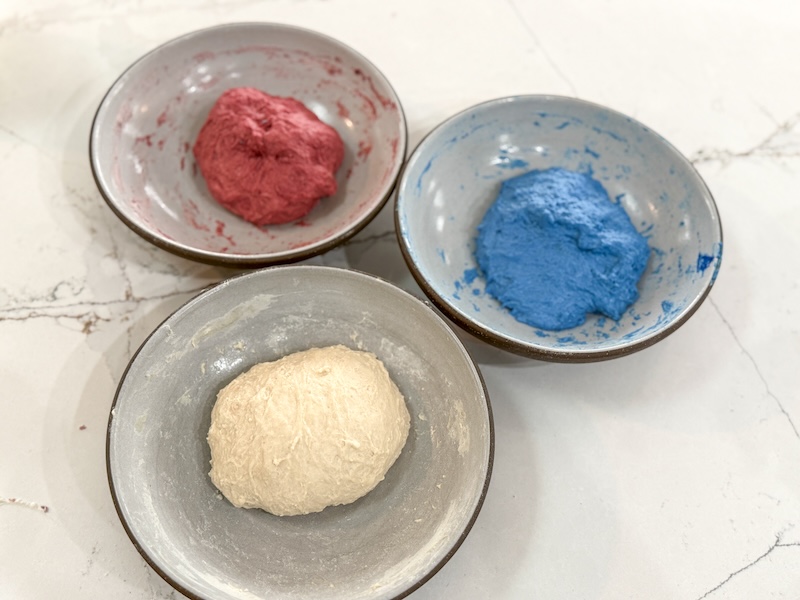
Add 40g active starter, 166g bread flour, and 3g salt to each bowl. Knead each dough until no dry flour remains, washing your hands between colors.
Cover and rest 30 minutes. I like to cover these bowls with an inverted plate or an upside-down sheet tray. When I used plastic wrap, it often stuck to the dough because these bowls are on the smaller side.
Step 3: Stretch and Folds Through Bulk Fermentation
Perform four sets of stretch and folds, 30 minutes apart. Repeat each set of folds with all three doughs, washing your hands between colors as needed. You can switch to coil folds for the third and/or fourth round — they’re gentler on the dough and help preserve those bubbles!
Then, continue bulk fermentation until the dough has increased in volume, appears puffy and bubbly, and jiggles when shaken. For me, this took about 5.5 hours total at 74°F (23°C).
It’s worth pointing out that this timing was a lot faster than usual — another reminder to watch your dough, not the clock. If I had let the dough go as long as I typically do, it would have overproofed.
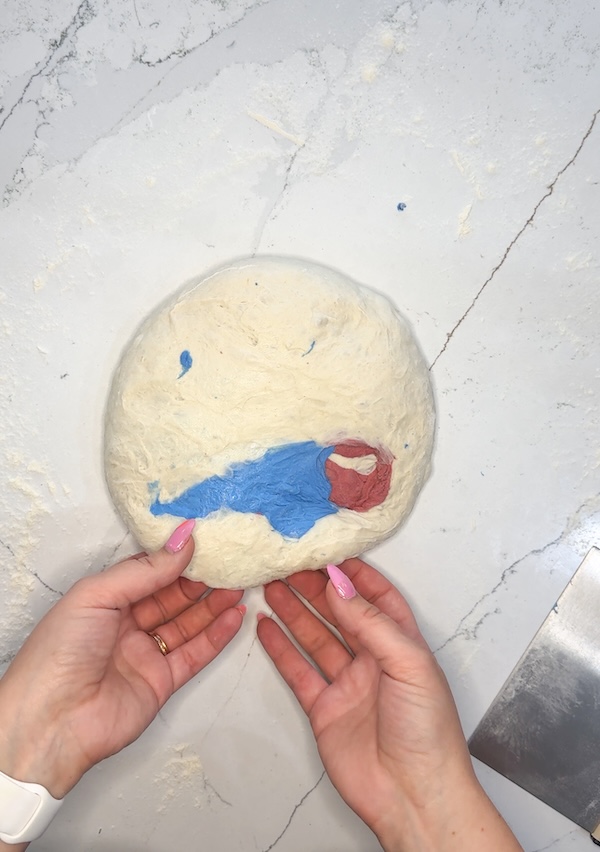
Step 4: Shape and Cold Retard
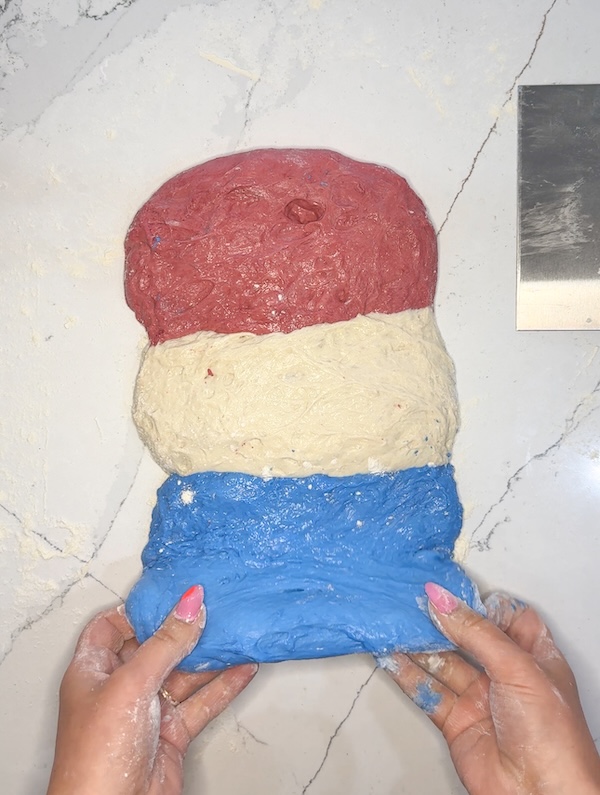
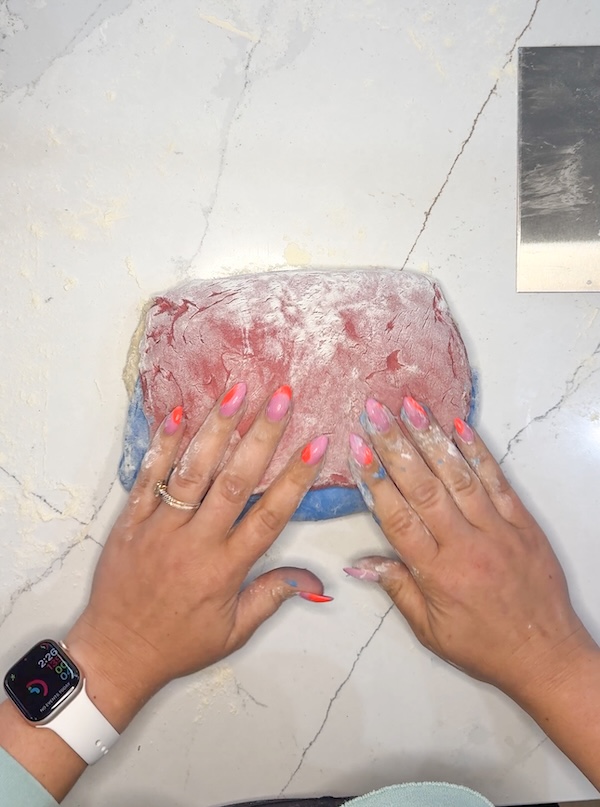
Lightly flour your work surface to prevent sticking. Turn out each bowl of dough and arrange the three doughs into a rectangle with the red dough on top, white in the middle, and blue on the bottom. Pinch the seams together.
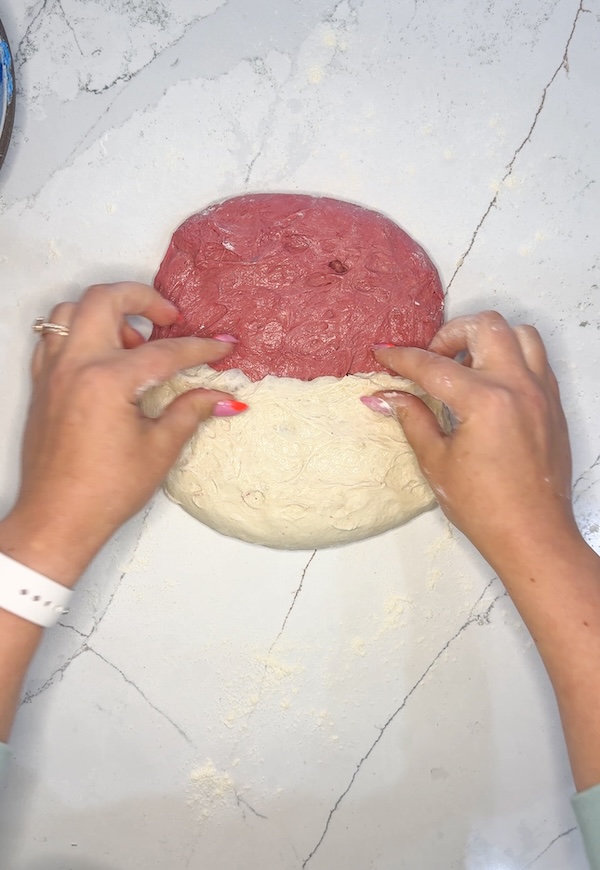
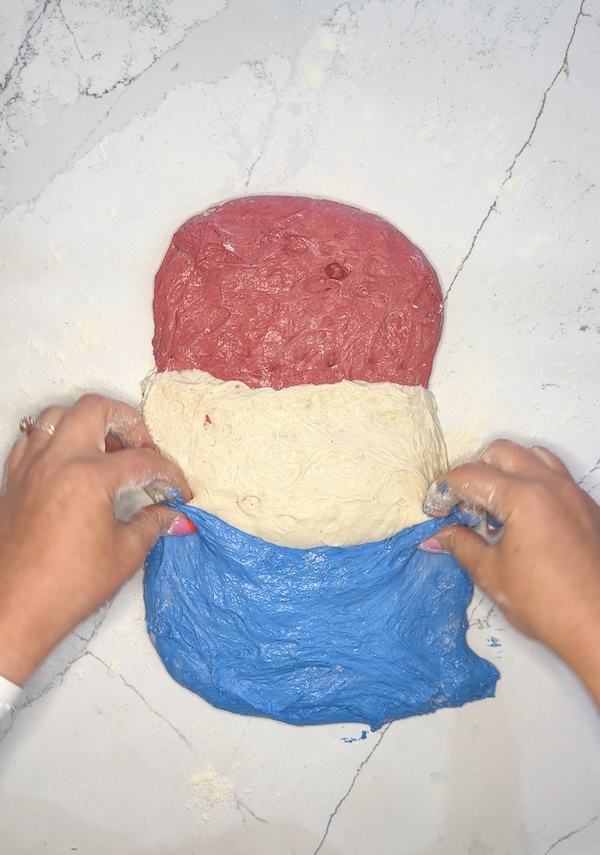
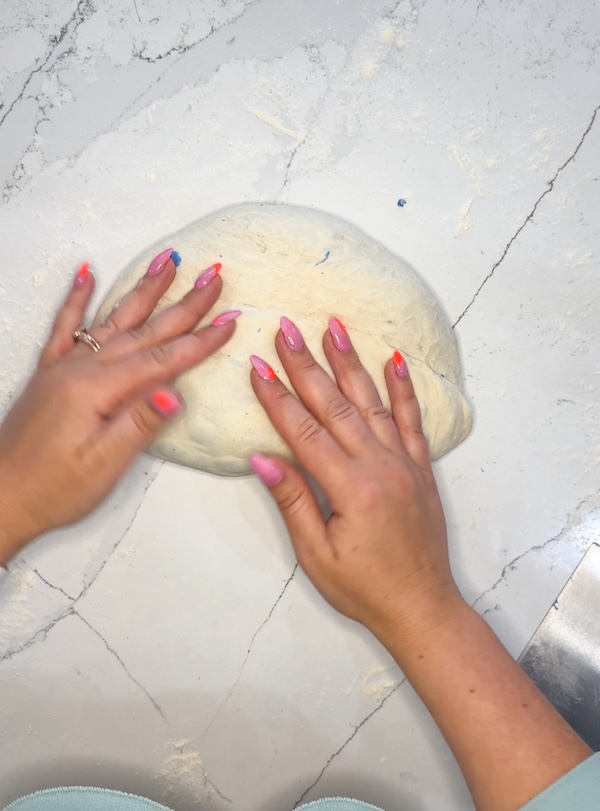
Fold the bottom third (blue dough) up, fold the top third (red dough) down, turn the dough 90°, and roll it into a log.
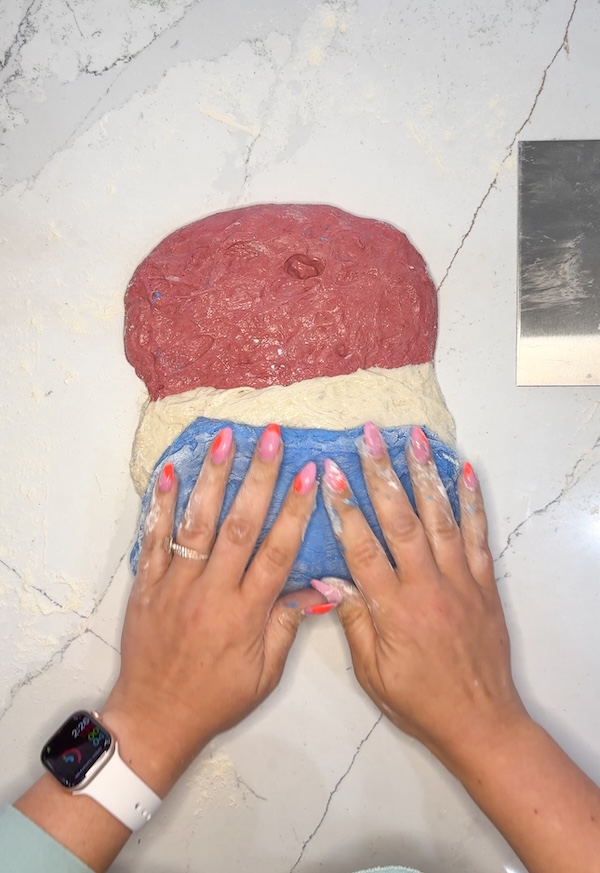
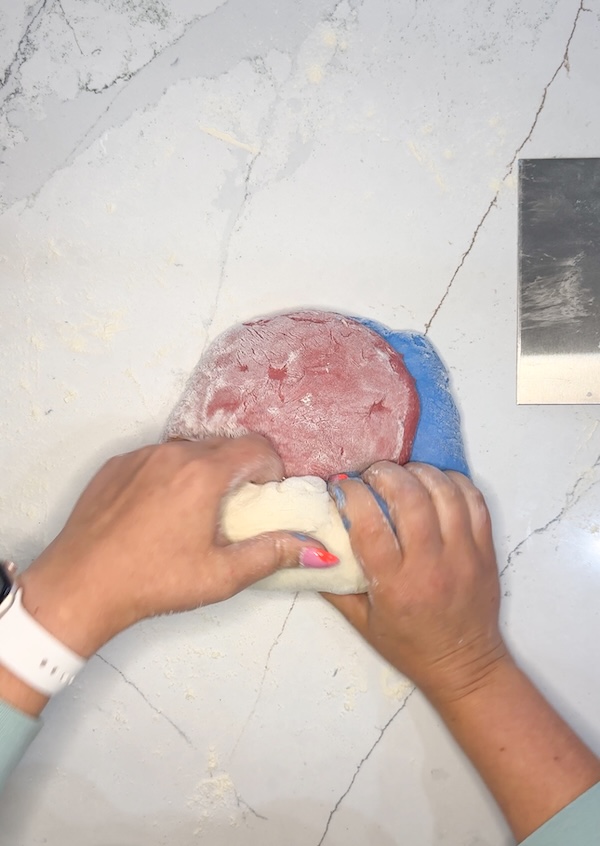
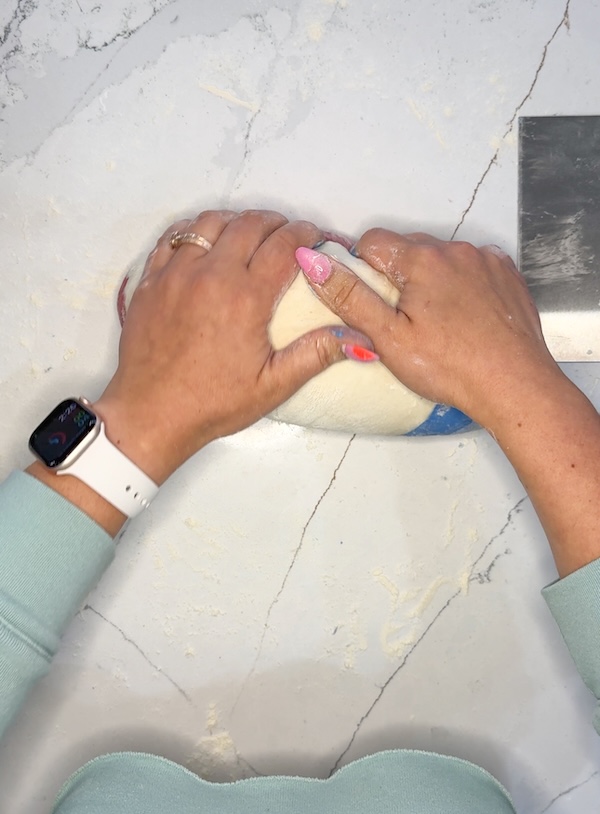
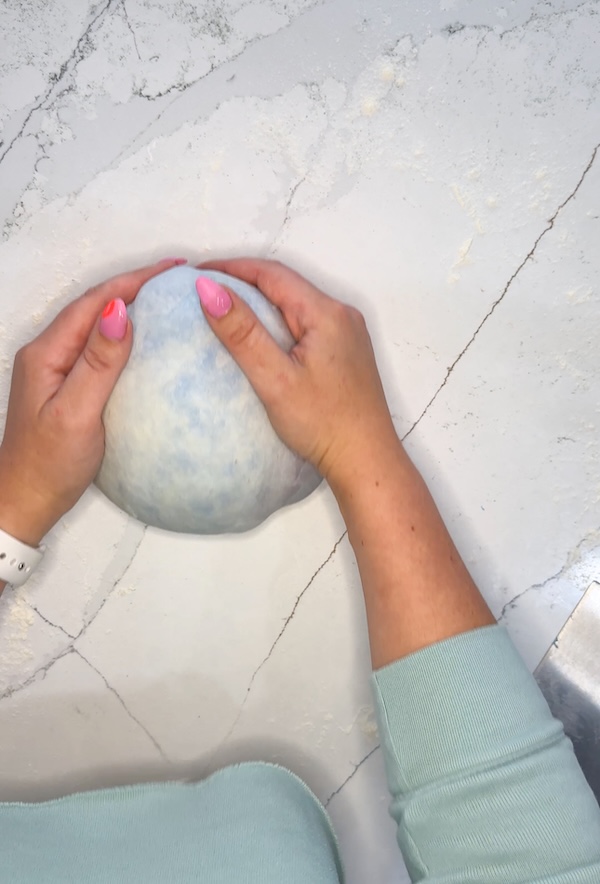
Use a bench scraper or your hands to shape the dough into a round ball.
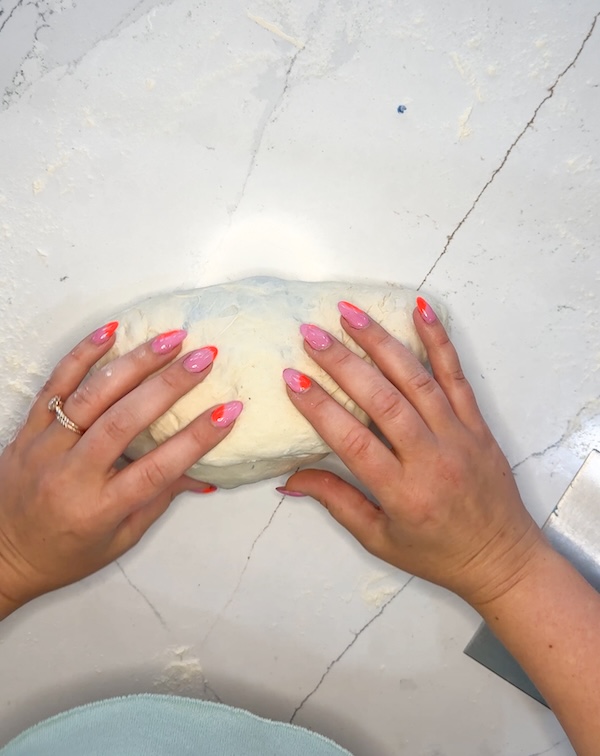
Let the dough ball rest for 20 minutes uncovered.
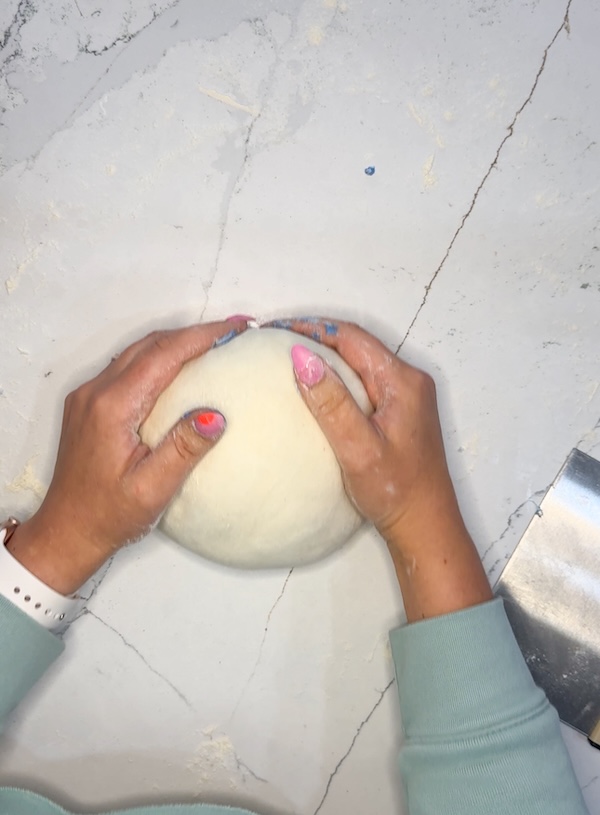
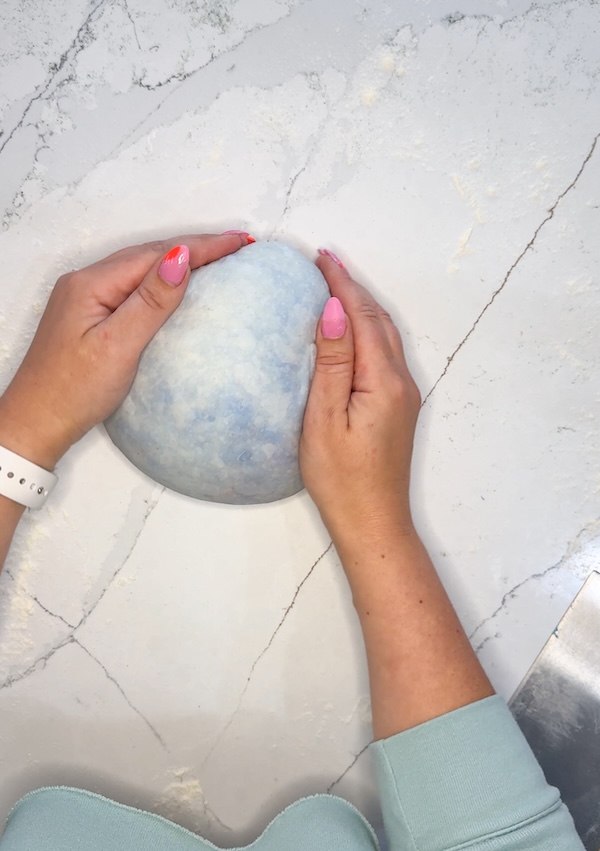
For the final shaping, repeat the same folding, rolling, and shaping process.
Flip the dough ball upside down, fold in thirds like before, roll it up, and coax it into a tight round.
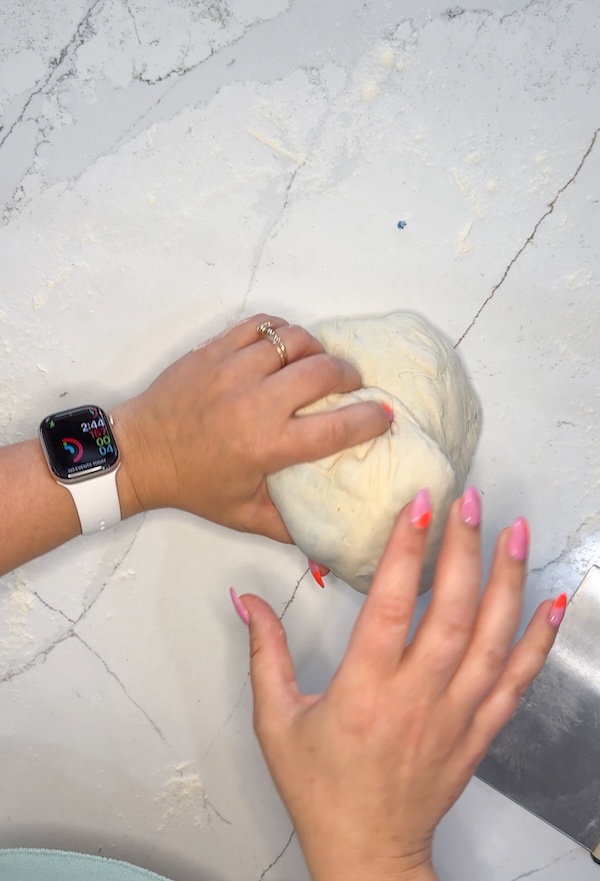
Place shaped dough seam-side up in a lined banneton and stitch any open seams back together.
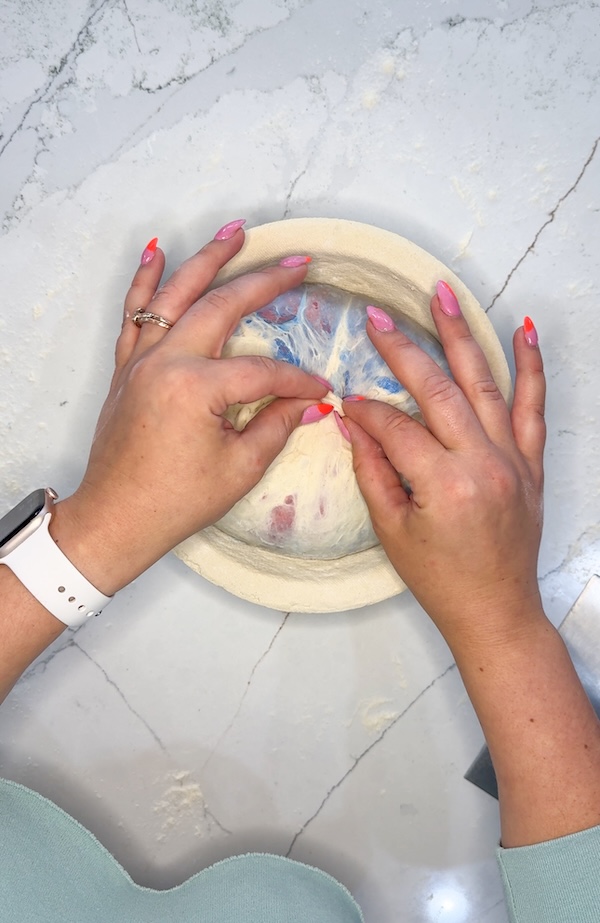
Dust the top with rice flour to prevent sticking, then cover with plastic wrap or a flour sack towel.
Refrigerate overnight.
Step 5: Prepare for Baking and Score
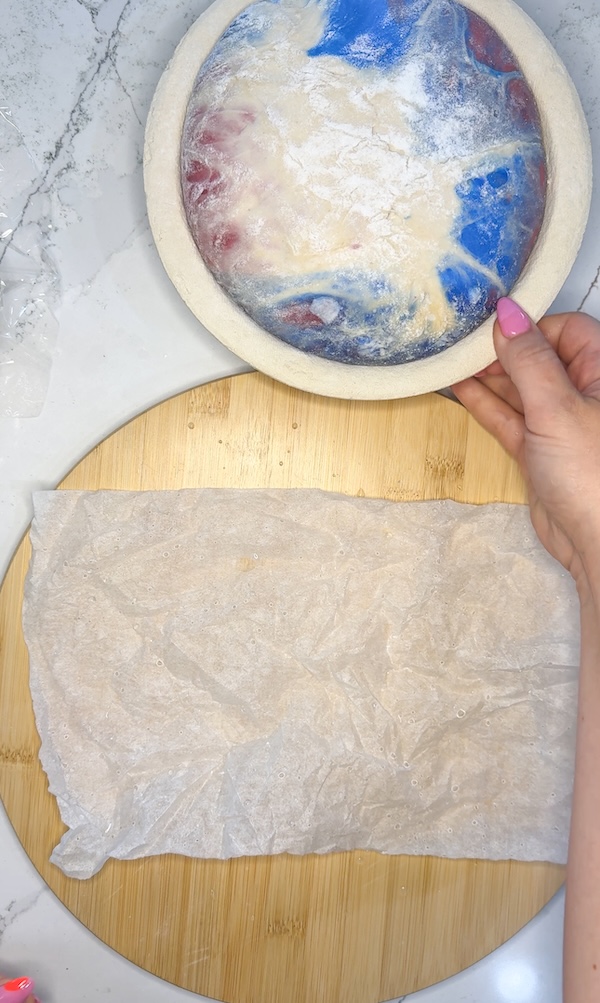
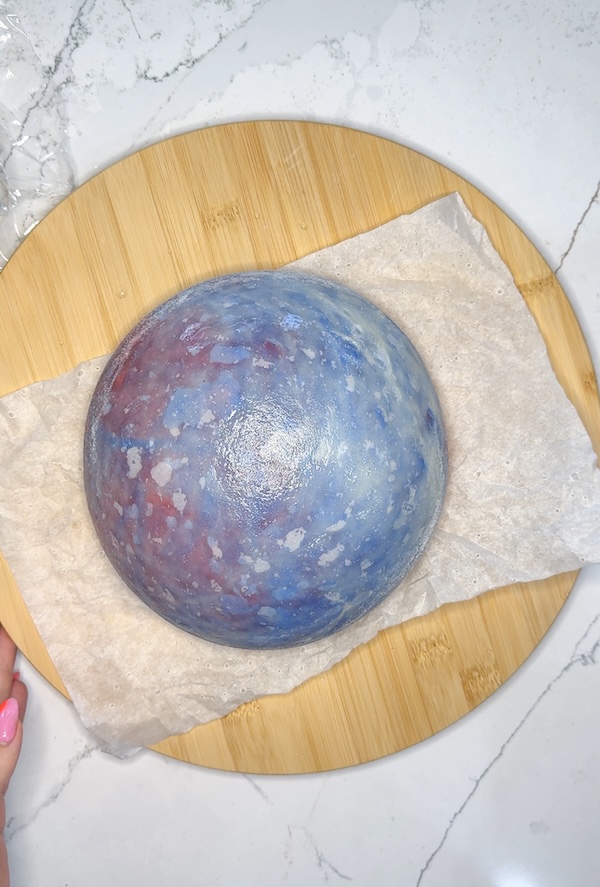
Preheat your oven to 450°F (230°C) with a Dutch oven inside. Turn the dough out onto parchment paper, seam-side down.
If you have a lazy Susan, place the parchment and dough on top — this makes scoring the circle much easier!
Tip: I recently started crumpling my parchment paper and running it under the faucet for a few seconds, then wringing it out. This helps prevent the parchment from creasing the dough and adds extra steam to the Dutch oven during baking, creating more blisters on the crust.
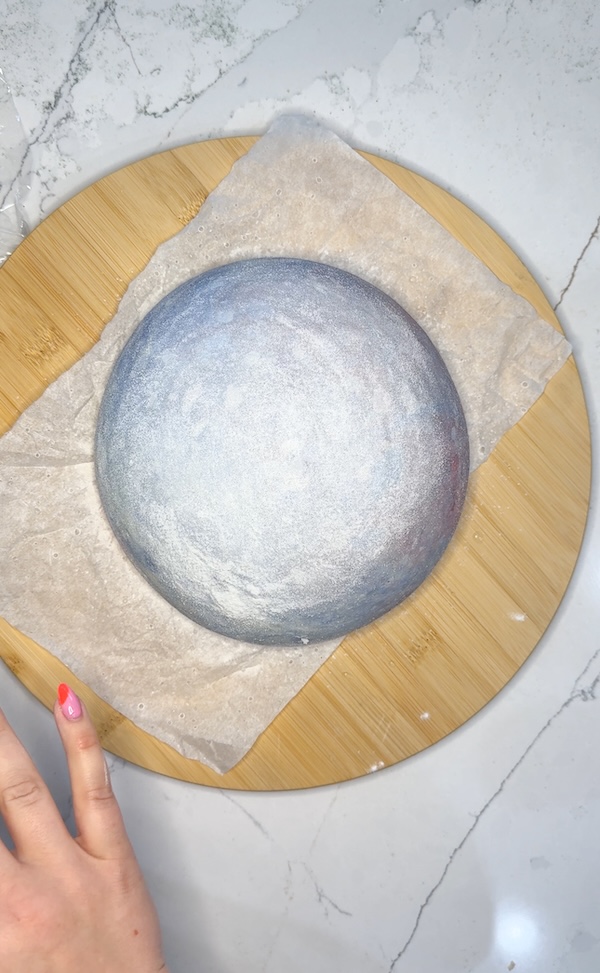
Lightly mist the surface of the dough with water. This helps the rice flour adhere and makes scoring easier. Dust the wet surface with rice flour, gently smooth it out, and brush off any excess.
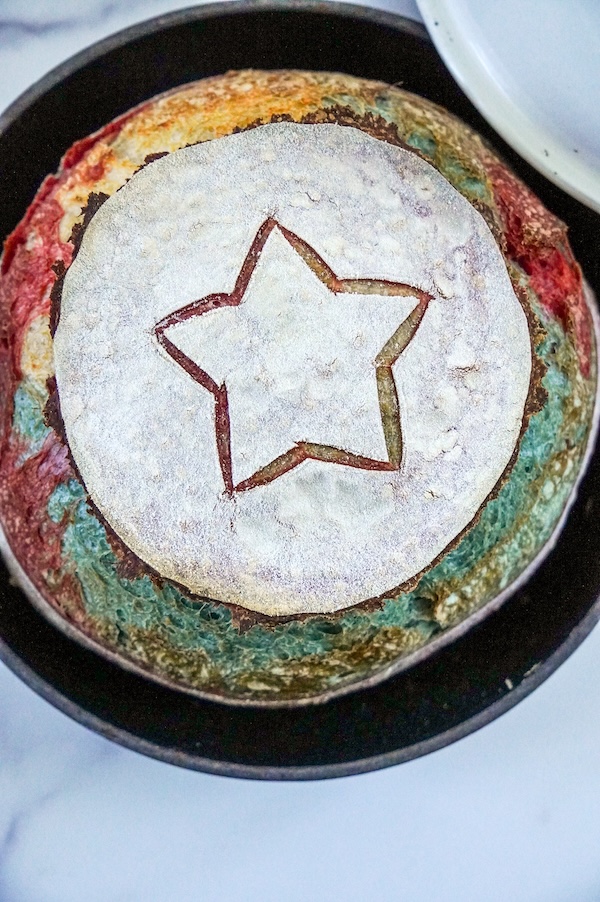
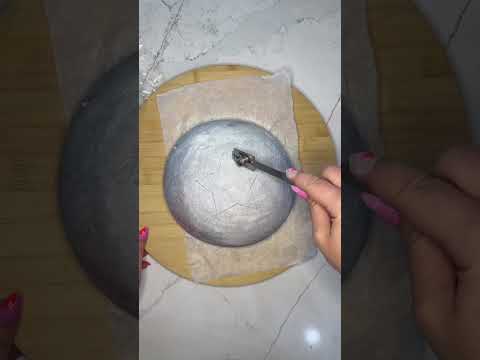
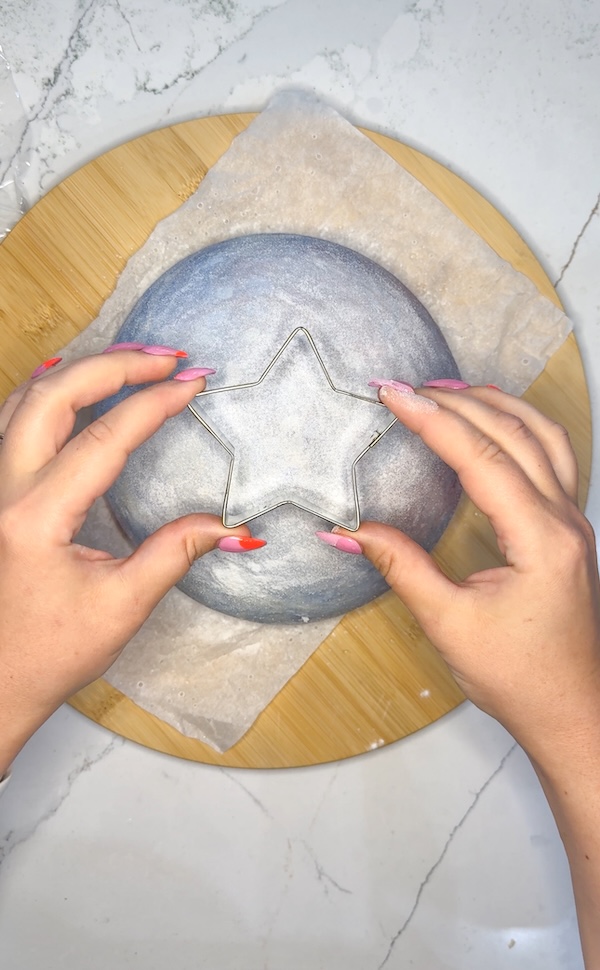
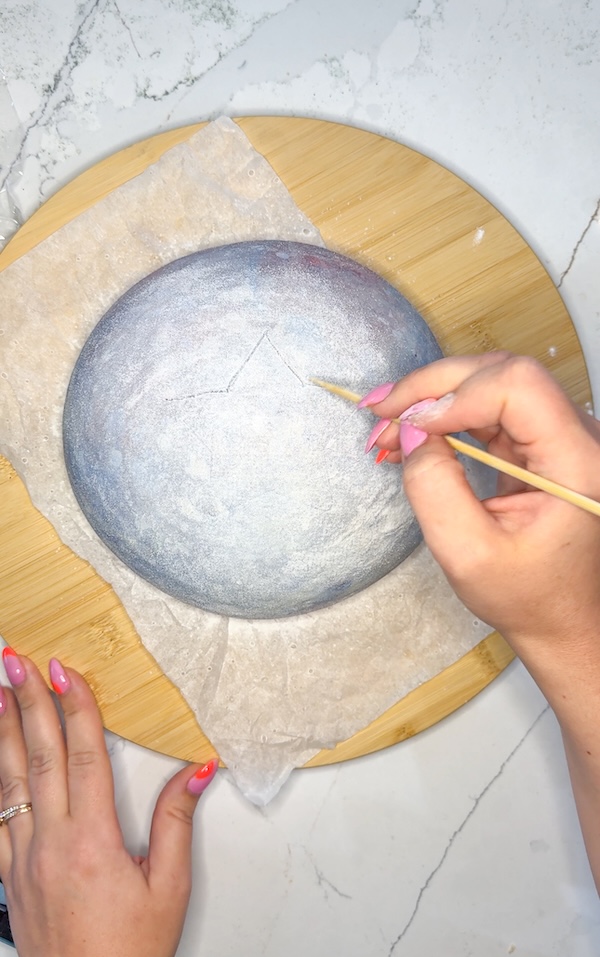
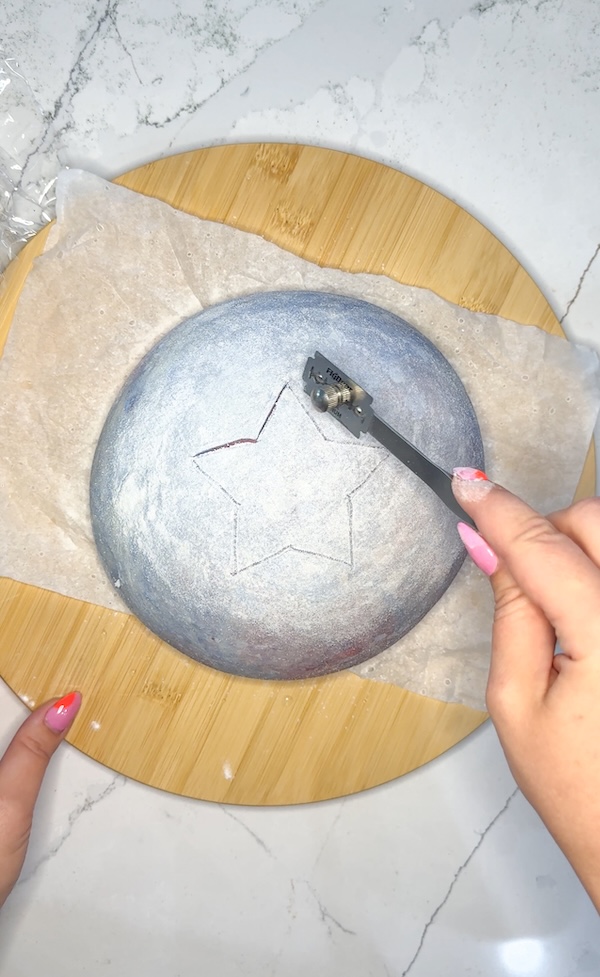
For the decorative scoring, lightly press a star-shaped cookie cutter on top to create a guide outline. Use a wooden skewer or toothpick to trace over the star shape, making it more visible for scoring.
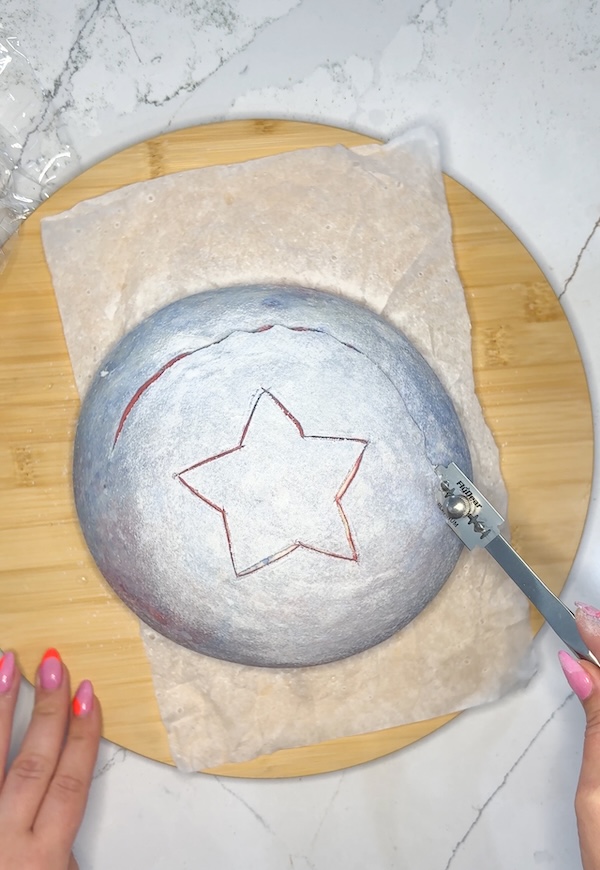
With your bread lame held at a slight angle, score along the star pattern about 1/8″ deep — just enough to allow the bread to open slightly during baking.
Finally, score a continuous circle around the entire loaf, rotating the dough as you go to maintain consistent depth and create an even border. This can be a deeper score because it is the expansion score, which helps the bread rise evenly without splitting in an odd place.
Step 6: Bake
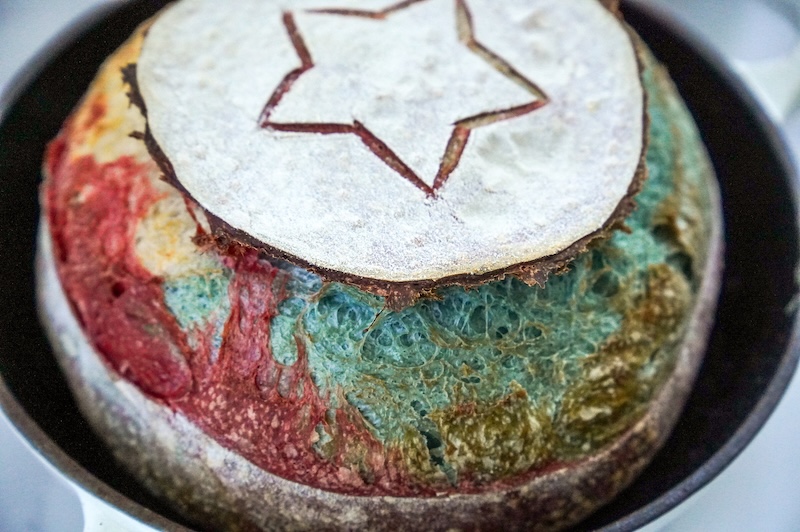
Bake covered for 25 minutes, then uncovered for 10–15 minutes, until golden brown and internal temperature reaches 205–210°F (96–99°C) in the center of the loaf.
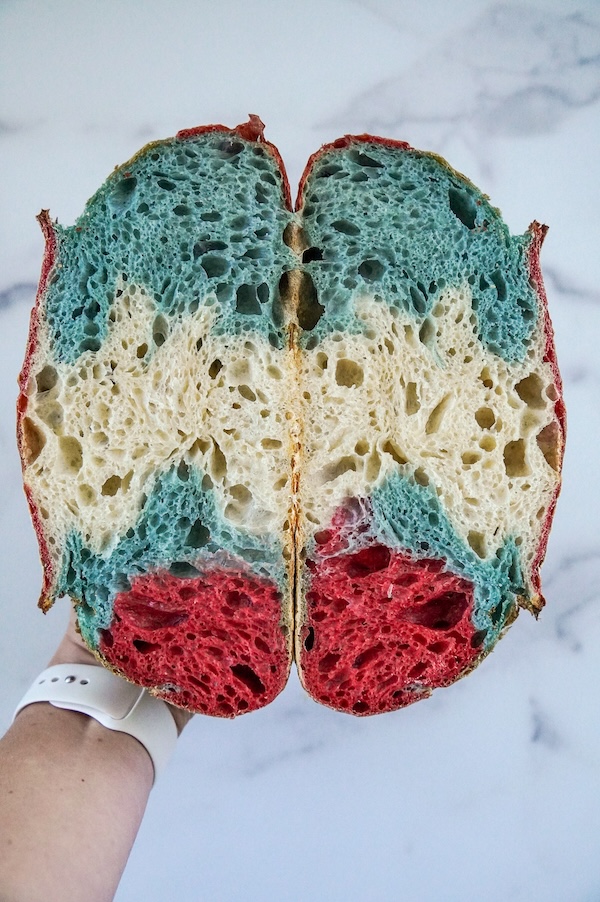
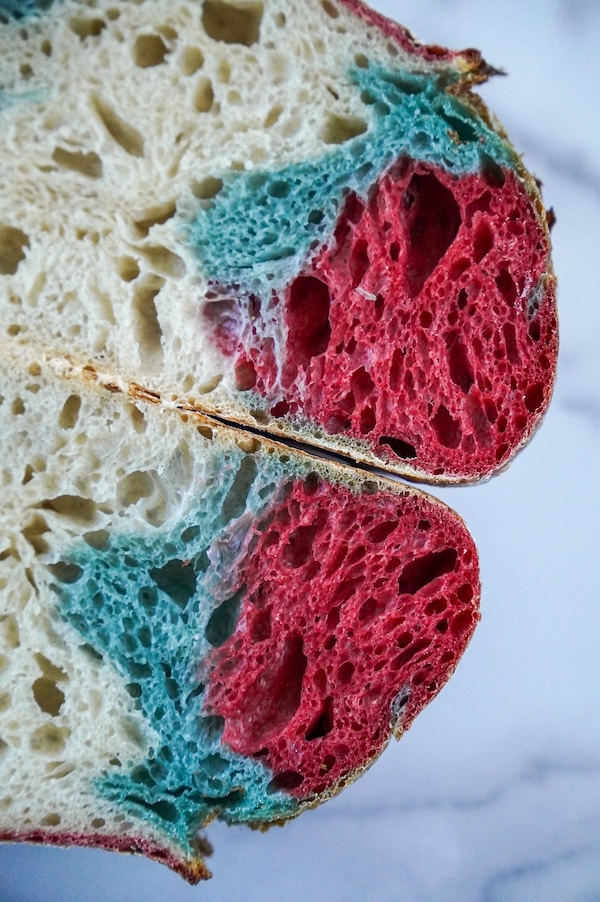
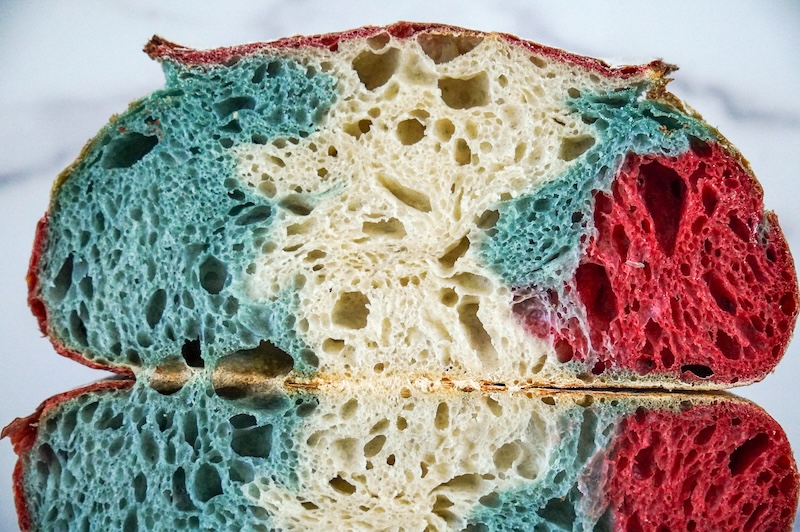
Cool on a wire rack for 90 minutes before slicing to reveal the red, white, and blue interior!
FAQs
No, I don’t think so! I couldn’t taste any difference, and my three kids tried it and didn’t notice anything either. They were 3, 5, and 6 at the time, and my 6-year-old can be pretty picky, so hopefully that reassures you that the powders don’t add any off-flavors.
I don’t recommend it. The red beet powder baked out during testing and left behind a dull brown color instead of red.

Patriotic Artisan Sourdough Bread
Equipment
- Star cookie cutter (for outlining the star score)
- Wooden skewer (or toothpick, for tracing the star score)
- Round Dutch oven ($15 off with code REBEKAH15)
- Round banneton (5% off with code TSG5) | Size I'm Using: Round – Smooth MD
Ingredients
Red Dough
- 116 g water
- 2 tsp red yeast rice powder
- 40 g active sourdough starter
- 166 g bread flour
- 3 g sea salt (about 1/2 tsp)
White Dough
- 116 g water
- 40 g active sourdough starter
- 166 g bread flour
- 3 g sea salt (about 1/2 tsp)
Blue Dough
- 116 g water
- 1 tsp blue spirulina powder
- 40 g active sourdough starter
- 166 g bread flour
- 3 g sea salt (about 1/2 tsp)
Misc.
- Rice flour (for dusting)
Instructions
Feed Your Starter
- To make this bread, you need 120g total active sourdough starter. If you want to mix the dough in the morning, feed your starter before bed using a 1:5:5 ratio: 13g starter, 65g flour, and 65g water. This gives you active starter for the morning with a little extra left over to maintain your starter.
Mix Your Dough
- Get three medium-sized bowls. • In the first bowl, whisk 116 g water with 2 tsp red yeast rice powder. Add 40 g active sourdough starter, 166 g bread flour, and 3 g sea salt. • In the second bowl, whisk 116 g water with 1 tsp blue spirulina powder. Add 40 g active sourdough starter, 166 g bread flour, and 3 g sea salt. • In the third bowl, whisk 116 g water with 40 g active sourdough starter. Add 166 g bread flour and 3 g sea salt.

- Mix the ingredients in each bowl until a shaggy dough forms, then knead each dough until no dry bits of flour remain, washing any color off your hands between bowls. Cover each bowl — I used an upside-down plate and sheet tray — and let rest for 30 minutes.

Stretch and Folds
- Perform four sets of stretch and folds, 30 minutes apart, with all three doughs. Wash your hands between colors as needed. For the final sets, you can switch to coil folds, which are gentler on the dough and help preserve the bubbles.
Bulk Fermentation
- Continue bulk fermentation until the doughs have increased in volume and appear puffy and bubbly. When shaken, they should jiggle. For reference, mine took about 5.5 hours total at 74°F (23°C). This was faster than my usual timing, so watch your dough, not the clock.
Pre-Shape & Final Shape
- Lightly flour your work surface. Arrange the three doughs into a rectangle with red on top, white in the middle, and blue on the bottom. Gently pinch the seams together.
- Fold the bottom third (blue dough) up to the center, then fold the top third (red dough) down over it. Turn the dough 90° and roll it into a log. Using a bench scraper, shape the dough into a round with circular motions to create surface tension. Let the dough rest uncovered for 20 minutes.
- For final shaping, repeat the same folding and rolling process, this time focusing on creating a tight, smooth surface.


Cold Retard
- Place the shaped dough seam-side up in a lined banneton and stitch any open seams back together. Dust with rice flour to prevent sticking, then cover with plastic wrap, a bowl cover, or a flour sack towel. Refrigerate overnight. The ideal cold retard is 12–36 hours. Do not exceed 96 hours.
Score and Bake
- Preheat the oven to 450°F (230°C) with the Dutch oven inside. Transfer the dough to parchment paper, seam-side down. Mist the surface with water, then dust lightly with rice flour.
- Lightly press a star-shaped cookie cutter on top to create an outline, then trace it with a toothpick to make the outline more visible. Score the star pattern about 1/8" deep with your lame.
- Score a circle around the entire loaf, rotating the dough as you go to maintain consistent depth. This circle can be deeper than the star because it is the expansion score, which helps the bread rise evenly without splitting in an odd place.
- Place the dough in the Dutch oven and bake with the lid on for 25 minutes. Remove the lid and bake for 10–15 minutes more, or until golden brown and the internal temperature reaches 205–210°F (96–99°C).
- Cool on a wire rack for 90 minutes before slicing to reveal the red, white, and blue interior!

Video
Conclusion
This patriotic sourdough bread is completely beginner-friendly! While there are more bowls to manage, there’s nothing fancy or complicated about the technique.
The best part? You’ll get maximum impact with minimal extra effort — it’s just your normal sourdough process with colorful doughs.
This showstopper is perfect for impressing guests at parties, creating a gorgeous centerpiece for your Fourth of July table, or just having fun with a creative twist on classic sourdough.
The “wow factor” far exceeds the actual effort required, so have fun with it.
If you’re making a patriotic loaf, you might also want to make some hamburger buns (these are soft as storebought), hot dog buns (same dough as the hamburger buns!), or these simpler sourdough discard slider buns. Gotta love a patriotic cookout!
Happy baking!
Other bread recipes to try:


I’m making it and my dough for the blue is very wet and sticky. I’m on my third s&f. Is there anything I can do next time to help it not be so sticky and wet?
The texture of my blue dough was also a bit looser than the others, but it’s fine. If you want to add a tbsp more flour to help, you can, but it’ll come together in the end! Bench flour during shaping will take care of any lingering stickiness.
Okay, thank you! I’ll be shaping it soon.
I have not made this loaf yet. But as I read through it, I totally appreciate how detailed every step is. Thank you for breaking down this process & sharing it with us!
You’re welcome!!
Love this recipe, not just for its patriotism qualities but the dough was fantastic and proofed in just a few hours. Need to step up my game on the food dyes because I used what I had on hand.
Beautiful! Thanks for sharing!!