
Sourdough Wonder Bread Copycat Recipe – So Soft!

When my husband came home with a loaf of cheap white bread from the grocery store, I’m pretty sure smoke came out of my ears.
I did remind him that I’m That Sourdough Gal (hello?!), but he had a fair point. He needed cheap white bread from the store to make authentic pimento cheese sandwiches for The Masters. Regular artisan sourdough bread wouldn’t do.
Challenge accepted.
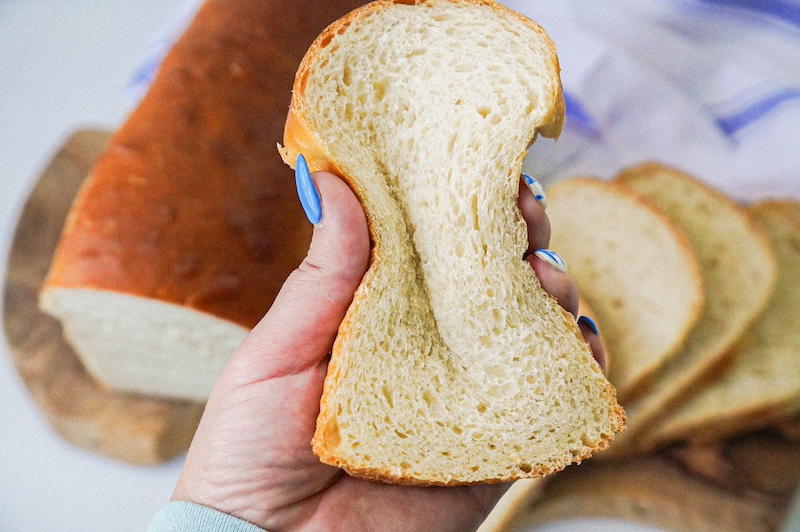
With the help of over 65 recipe testers and countless kitchen experiments, I set out to develop a sourdough sandwich bread that’s as soft and squishy as Wonder Bread but infinitely better (and gut healthy!).
Prefer a faster, less tangy version of this recipe? Check out the same-day variation here: Same-Day Sourdough Wonder Bread Copycat Recipe (No Tang)
The final result? A perfect 100% “I’ll make this again” score from testers and bread so good your kids won’t even ask you to cut off the crust.
“This bread is incredible. This is the second time I’ve made the second version of this recipe. My husband and 3-year-old literally ate this loaf in less than 36 hours.” –Recipe tester from Pike Creek, Delaware
Affiliate disclosure: To cover the cost of running my platforms, I do sometimes link to products. Please assume these links are affiliate links. If you choose to buy through my links then THANK YOU – it will make it possible for me to keep doing this.
Why You’ll Love This Recipe
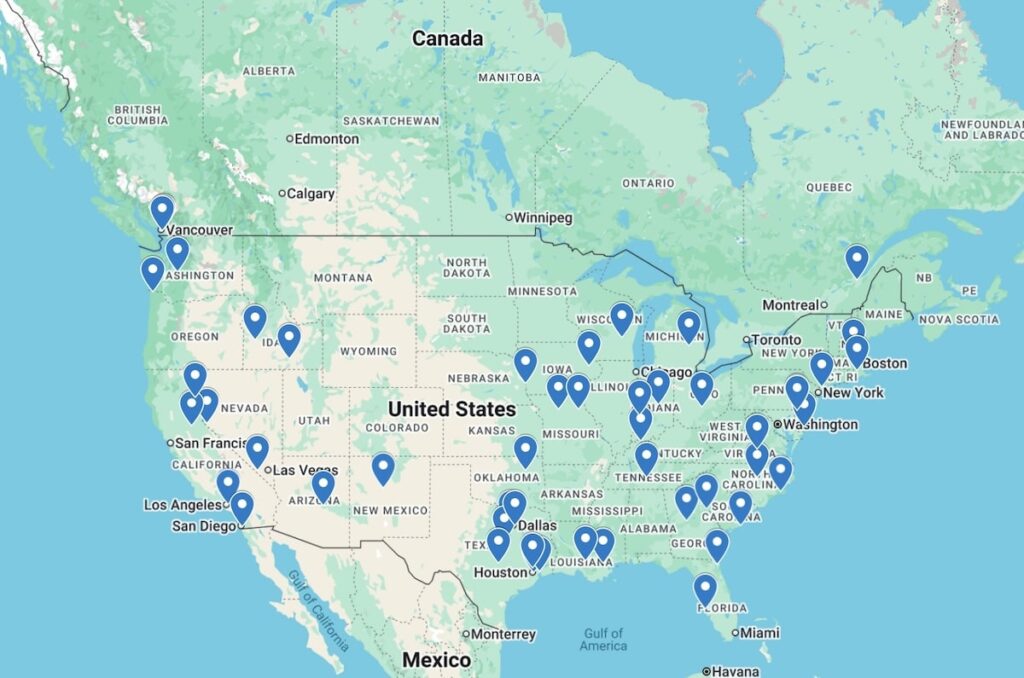
- Recipe tested TO DEATH until we achieved perfection: Over 65 recipe testers from all over the world helped refine this recipe through two rounds of testing, achieving a 100% “would make again” rating.

- Easy to make: The tangzhong might sound intimidating, but it’s literally just 2-3 minutes of microwaving flour and milk until thick – that’s it! No complicated techniques or hard-to-find ingredients; just mix, rise, shape, rise again, and bake.
“It was easy, timeline was great, looks perfect, tastes awesome! Thank you for a wonderful recipe!” –Recipe tester from Merrimack, New Hampshire
- Not too sour: The stiff sweet starter technique reduces tanginess while keeping that subtle sourdough flavor that makes it taste way better than storebought.
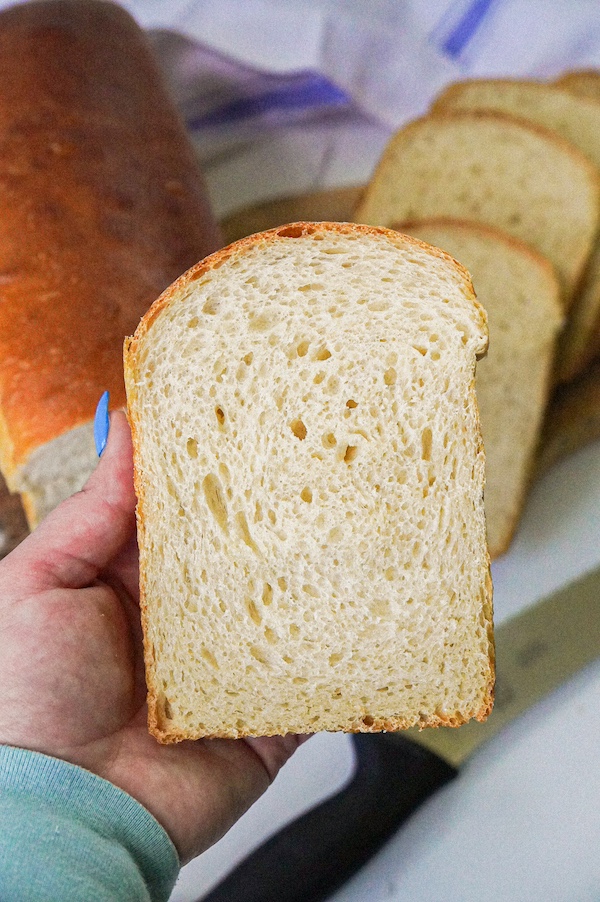
- Soft and squishy, just like storebought white bread: The tangzhong method creates that pillowy, Wonder Bread texture that’s perfect for soft sandwiches and DIY uncrustables. My kids don’t even ask me to cut off the crust (shocker!).
Read more: Tangzhong: The 3-Minute Secret to Softer Sourdough
- Doesn’t stale as quickly as other sourdough sandwich breads: Thanks to the tangzhong, this bread stays soft and fresh for up to 5 days at room temperature.
- Extremely forgiving dough that doesn’t require “nailing” every step: The timeline is flexible, the dough handles temperature variations well, and it’s super beginner-friendly.
“Great, perfect thickness, soft and squishy, easy to cut through and oh so tasty!!” –Recipe tester from Quebec, Canada

Baker’s Timeline
Here’s a baker’s timeline to help you plan your bake:
| Day 1 | |
| 9am | Make stiff sweet starter & tangzhong |
| 8pm | Mix dough, begin bulk fermentation |
| Day 2 | |
| 7am | Shape dough, place in pan for second rise |
| 6:30pm | Bake bread |
Note: Timeline based on 73°F (23°C) kitchen. For warmer homes, everything happens faster. For cooler homes, allow more time. The dough is very forgiving – focus on visual/texture cues rather than exact timing.
If your home is too warm for an overnight bulk fermentation – or you’ve made this recipe and the loaf was overproofed by morning – I suggest flipping the timeline:
| Day 1 | |
| 8pm | Make stiff sweet starter & tangzhong |
| Day 2 | |
| 7am | Mix dough, begin bulk fermentation |
| Mid-day (monitor the dough) | Shape dough, place in pan for second rise |
| Evening | Bake bread |
The Recipe Testing Journey
This recipe testing journey was definitely a journey. It took many attempts before I got to a recipe draft worth sharing. Feedback from over 65 recipe testers guided me to a second draft that was out of this world.
I could not do it without all of you – you truly are the reason this recipe exists!
Watch the entire recipe testing journey here.
Initial Recipe Testing
Before I sent any recipe drafts to the testers, I needed to have a recipe worth testing. And it took a few attempts to get to that point.
I knew I wanted a tangzhong in the dough to help get that squishy, soft texture. So to start, I adapted my hot dog bun recipe, developed with Samantha from Healing Slice, to land on an initial attempt.
The first loaf was too dense and way too sour, so I went back to the drawing board and adjusted many of the measurements.
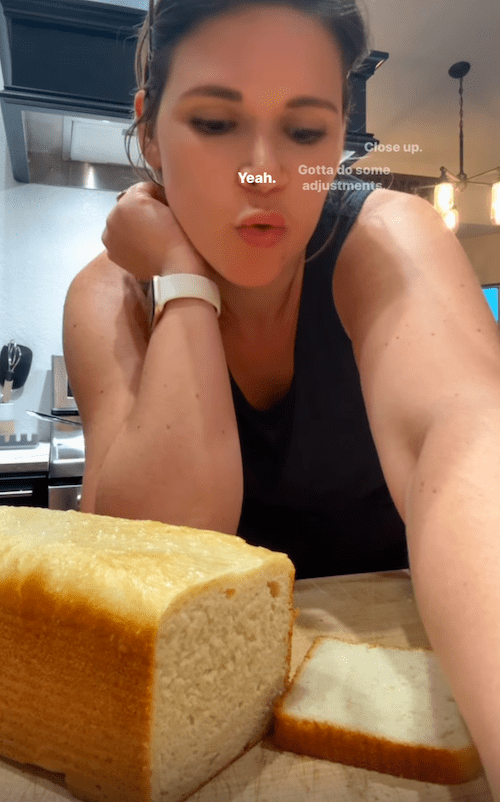
The second loaf stuck to the Pullman pan’s lid, which was a huge bummer. But the loaf was not dense and super squishy, so I felt we were moving in the right direction. Still too sour, though.
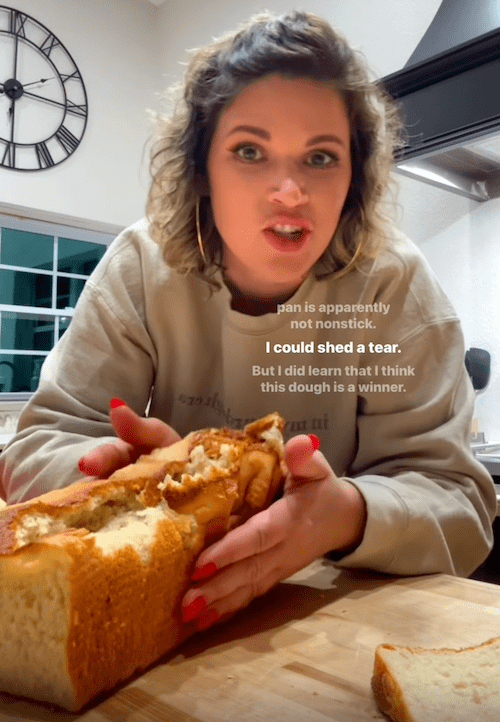
The third loaf incorporated a stiff sweet starter to hopefully solve the sour issue. I also made a few other tweaks to the ingredient amounts, like a little more honey and less oil.
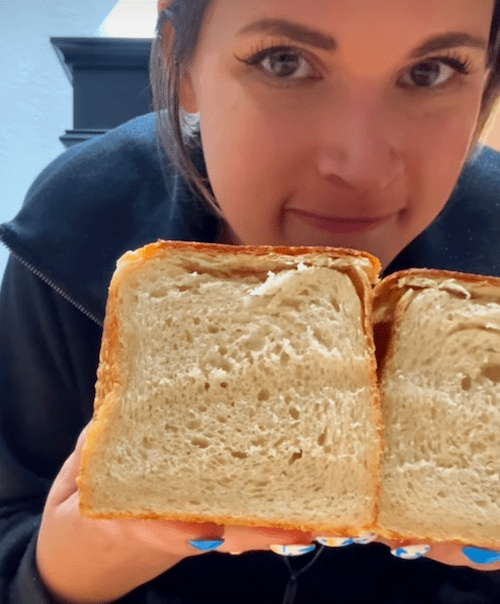
This one also stuck to the Pullman pan’s lid, though not as badly. It was still light and squishy, and the sourness was cut way back. But I wasn’t happy with the lid consistently messing up the final result!
The fourth attempt looked the best when it came out of the oven; it was fluffy as can be, and the flavor was amazing. I sent this version to the recipe testers!
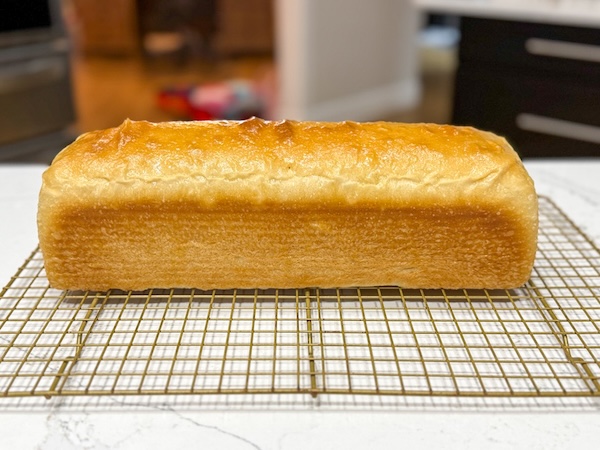
Recipe Tester Feedback: Version 1
When I sent out the first version of my sourdough Wonder Bread recipe to over 65 dedicated testers, the enthusiasm was immediate.
With an average satisfaction rating of 4.42 out of 5 and 95.5% saying they’d make it again, I knew the core concept was solid. One tester raved, “My husband can’t stop eating it!” while another shared, “Cannot wait to make this recipe again.”
A few photos from recipe testers:
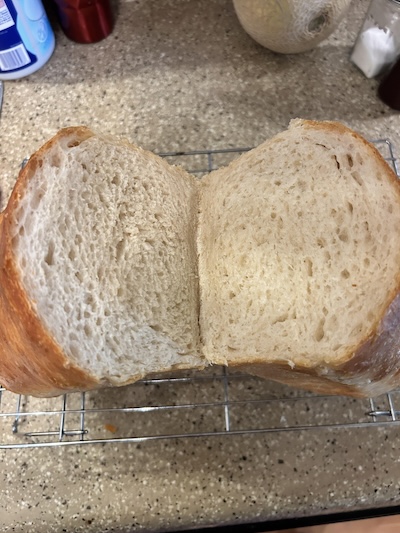
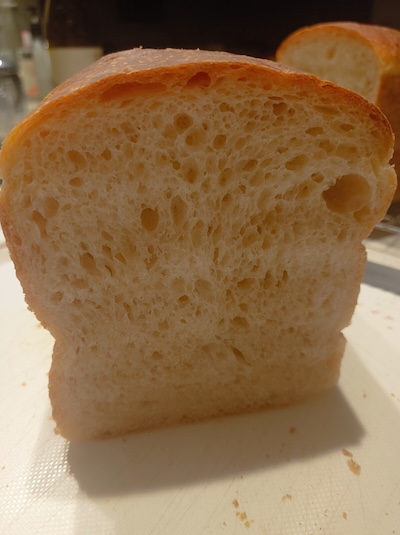
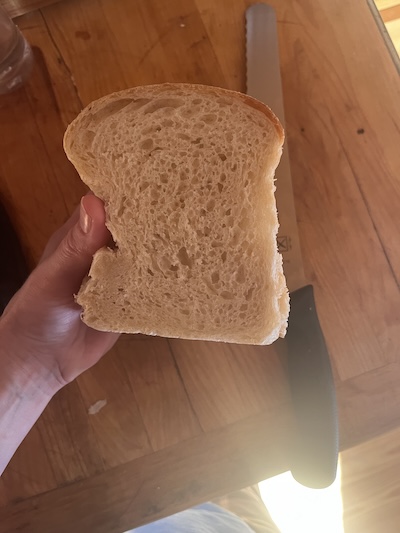
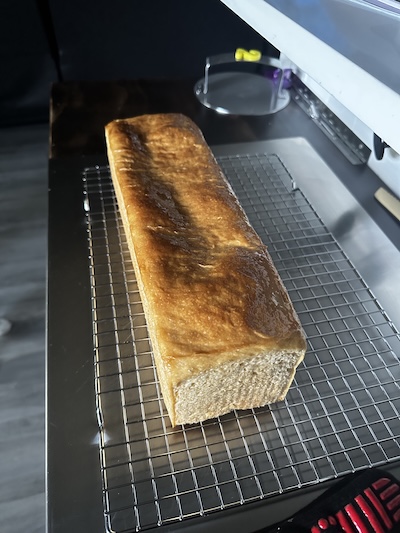
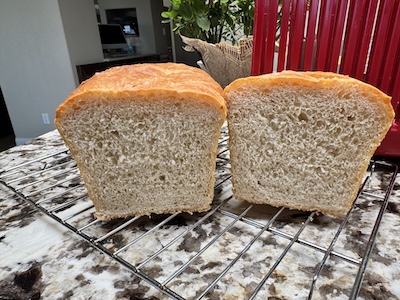
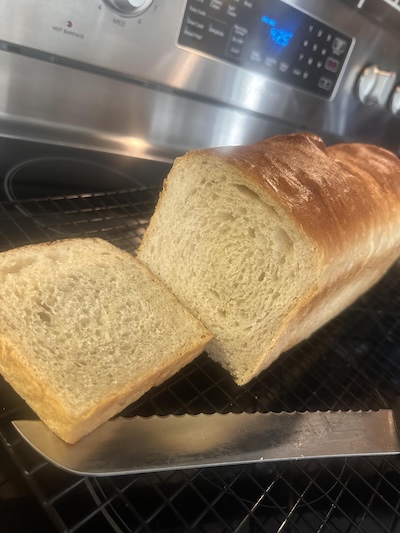
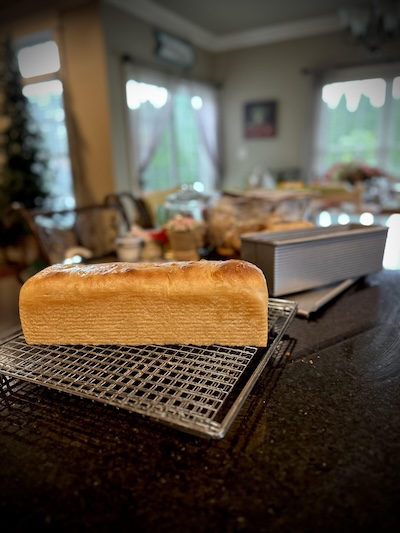
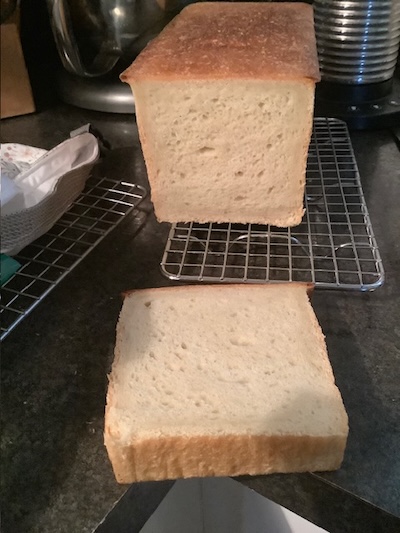
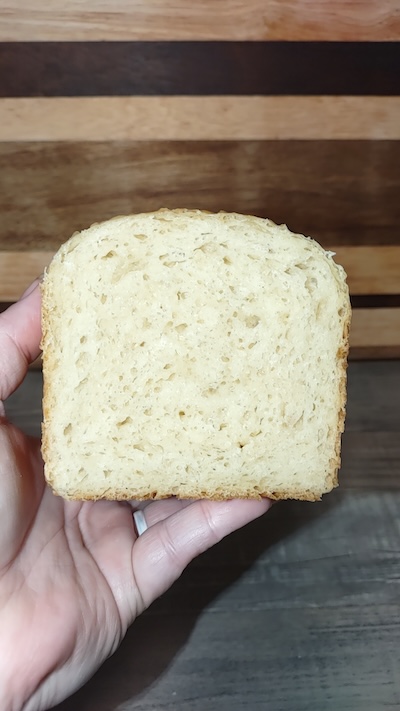
However, the feedback revealed several key areas for improvement beyond just flavor.
The most significant issue was hydration – 38% of testers found themselves adding flour because the dough was “extremely wet and sticky.”
Also, nearly half the testers had to adjust timing because fermentation moved faster than expected, and 64% found the flavor too tangy for authentic Wonder Bread taste.
Despite these issues, the texture consistently impressed, with responses like “bouncy and airy” and “perfect” appearing throughout the feedback. I was on the right track, but needed to fine-tune.
Recipe Tester Feedback: Version 2
The second round of testing blew my socks off!!
The recipe got 4.69 out of 5 stars, and we achieved the ultimate goal: 100% of testers said they would make this recipe again! I almost cried when I saw that!
More importantly, we solved multiple technical issues simultaneously. The hydration problems decreased, sourness complaints dropped, and timing issues were largely resolved.
“I feel like this is the winning recipe.” –Recipe tester from Susanville, CA
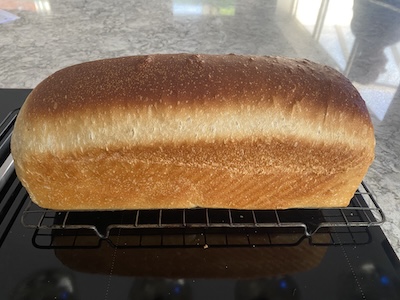
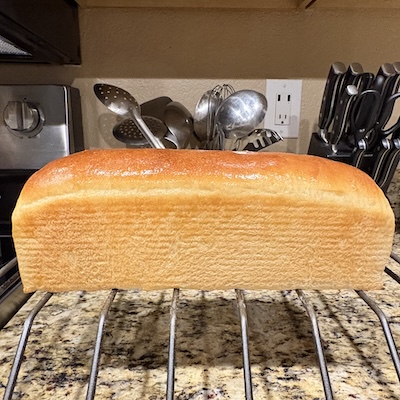
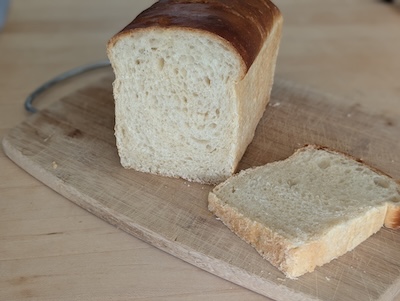
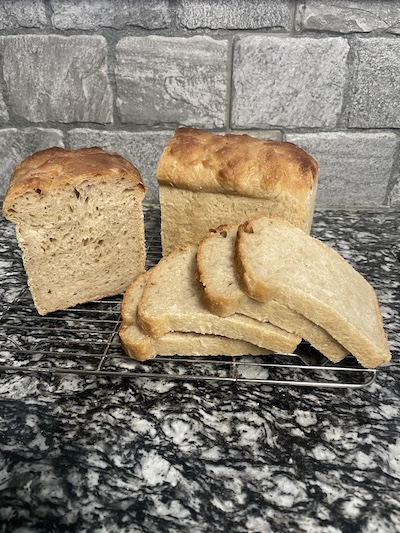
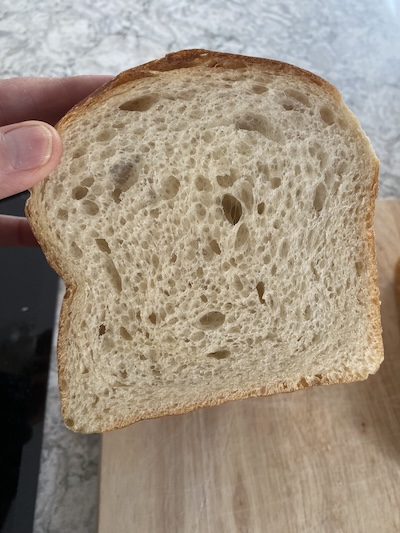
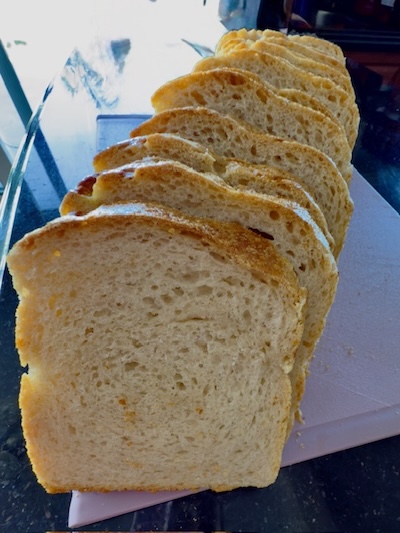
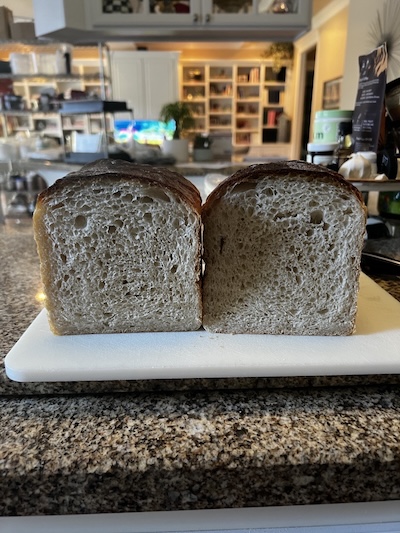
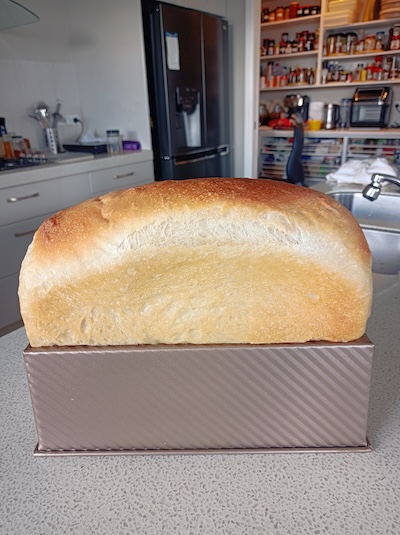
A few small issues popped up, like those using Costco AP flour still needing to add more flour, but that’s an easy tip to add to the recipe notes. A few also noticed their loaf tops getting too dark, but tenting with foil toward the end is an easy remedy.
I also got feedback on exactly which process photos would be a huge help in the recipe card itself.
The journey through two comprehensive testing rounds, guided by incredibly detailed feedback about everything from dough hydration to fermentation timing, led us to a recipe that truly delivers on the promise of sourdough Wonder Bread.
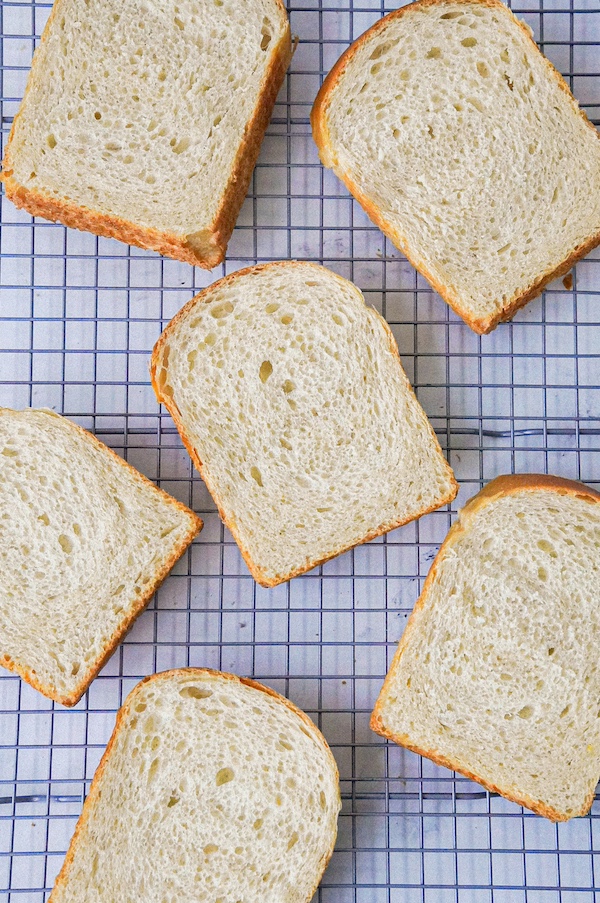
“Flavor is good and this is probably my favorite sandwich loaf that I have made thus far.” –Recipe Tester from San Diego, CA
Ingredients In the Sourdough Wonder Bread Copycat Recipe
Here’s a quick look at the winning ingredients:
- Stiff sweet starter: essential for cutting down the sour, tangy flavor of sourdough. My initial tests used regular, liquid starter (equal parts flour and water), and the bread was way too sour.
- Honey: Acts as a natural sweetener and helps create that soft, tender crumb. The honey also feeds the yeast and helps with browning. You can substitute with granulated sugar, but you may need to add 1-2 tablespoons more liquid.
- High-protein bread flour: I’ve tested this with Ballerina Farm bread flour (14% protein) and King Arthur bread flour (12.7% protein) with excellent results. The higher protein content helps create structure while staying soft. If using Costco all-purpose flour, add about 25g more flour to the main dough.
- Milk: Creates the tangzhong (flour paste) that makes this bread incredibly soft and helps it stay fresh longer. Any dairy or non-dairy milk works – testers had success with cashew milk and almond milk, too.
- Avocado oil: Adds richness and helps keep the crumb tender. You can easily substitute with olive oil, sunflower oil, or any neutral oil you have on hand.
- Water: Regular tap water works perfectly. The hydration level creates a slightly tacky dough that bakes into that perfect Wonder Bread texture.
- Salt: Essential for flavor and dough structure. I use sea salt, but any salt without anti-caking agents will work great.
- Butter: Just for brushing the hot loaf after baking – this creates that soft, glossy crust that mimics storebought Wonder Bread perfectly.

How to Make Sourdough Wonder Bread (Step by Step)
This recipe spans three days, but don’t let that intimidate you! Most of the time is hands-off fermentation.
Once you make it the first time, you won’t even need the recipe card other than to reference the ingredient list. It’s that simple.
Here’s exactly how to make the softest sourdough sandwich bread.
Day 1 (Evening): Prep Work
Make the Stiff Sweet Starter
The stiff sweet starter is the secret to reducing sourness.
In a small jar, combine 15g sourdough starter, 15g honey, 30g water, and 60g bread flour.
Mix until it comes together, then turn it out and knead it briefly until it forms a smooth ball.
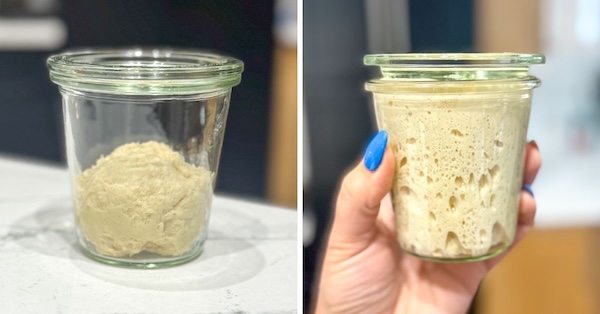
Place it back in the jar, cover loosely, and let it ferment at room temperature overnight. By morning, it should have doubled (or tripled) in size and smell sweet and yeasty.
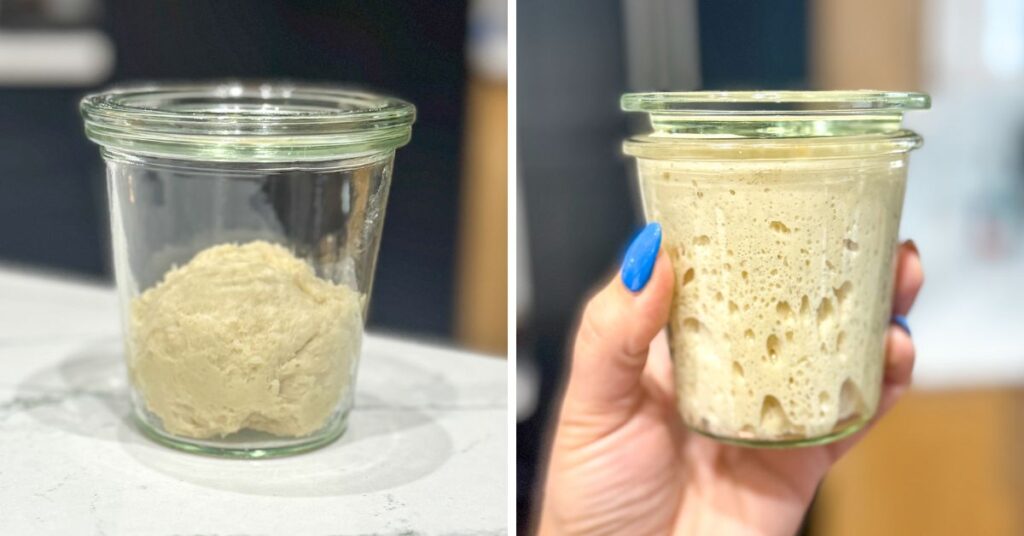
If you use a bigger jar than mine, it’ll also have a domed shape.

Make the Tangzhong
The tangzhong is a cooked flour paste that creates incredibly soft, pillowy bread that stays fresh for days.
In a microwave-safe bowl, whisk together 35g bread flour and 175g milk until completely smooth.
Microwave in 30-second intervals, stirring vigorously with a whisk between each round. For me, this usually takes 3-5 rounds.
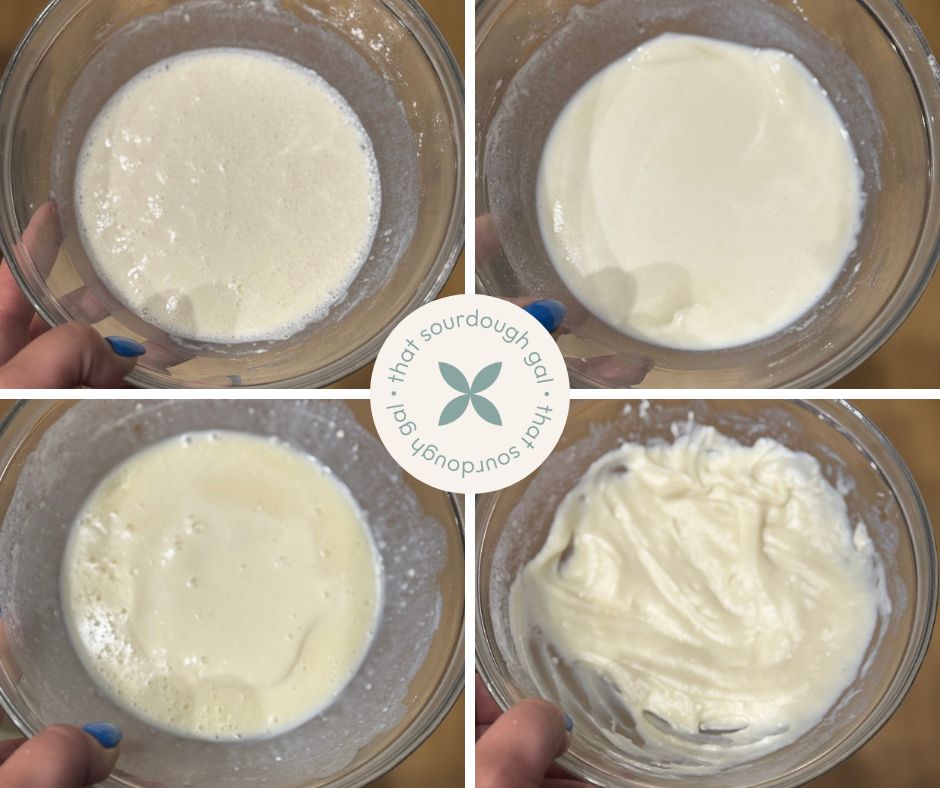
You’re looking for it to thicken to a pudding-like consistency and reach 150°F (65°C).

If you prefer, you can make this on the stovetop over medium heat, whisking constantly. Don’t walk away or it will overcook!
Cover and refrigerate overnight. The tangzhong can be made up to 2 days ahead.
You could also make it in the morning when you’re putting your dough together, but you have to wait for it to cool fully. That’s why I prefer doing it when I’m feeding my starter the night before.
Day 2 (Morning): Mix and First Rise
Mix the Dough
In the morning, it’s time to mix our dough!
In your stand mixer bowl, combine all of the stiff sweet starter, all of the tangzhong (straight from the fridge), 225g cold water, 75g honey, 25g avocado oil, 575g high-protein bread flour, and 12g salt.
Note: one of the recipe testers suggested mixing all of the liquids in the stand mixer before adding the dry ingredients. I didn’t find this necessary for my stand mixer, but it could help if your mixer isn’t as powerful.
Related: Ooni vs Bosch vs KitchenAid vs Ankarsrum: Best Stand Mixer for Sourdough
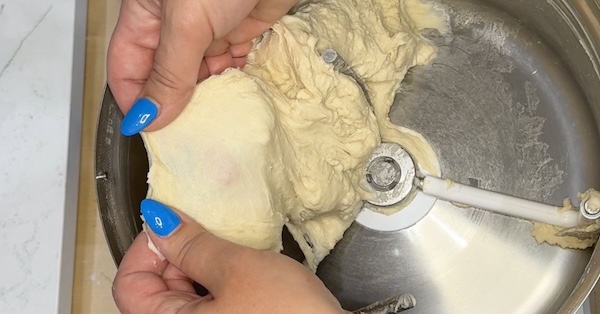
Start mixing on speed 1 (the lowest setting) for 1-2 minutes just to bring everything together. It will look shaggy and rough at first – that’s normal!

Once the ingredients are incorporated, increase the speed to 2 and mix for 10-15 minutes.
The dough is ready when it passes the windowpane test – you should be able to stretch a small piece thin enough to see light through without it tearing immediately. In a Bosch mixer, this took me about 10 minutes; in a KitchenAid, it took me 33 minutes.
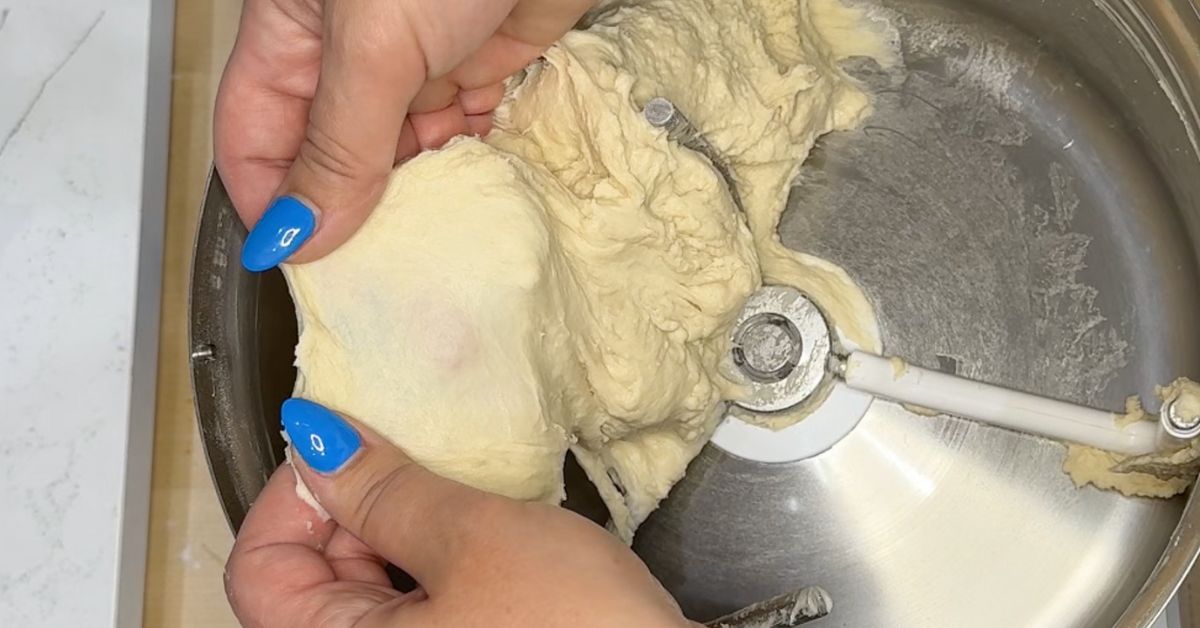
The finished dough will feel slightly sticky or tacky, but not overly so. It should hold its shape and pull away from the sides of the bowl.
If your dough is extremely wet, sloppy, or won’t come together after several minutes, add flour 1 tablespoon at a time. About 38% of the recipe testers needed to add a little extra flour due to humidity or flour brand differences.
No Stand Mixer? You can absolutely make this by hand! Mix initially for 3-4 minutes, then cover and rest for 30 minutes. Do a round of stretch and folds every 30 minutes until you achieve a smooth, elastic dough with at least a weak windowpane.
Bulk Fermentation (First Rise)
Transfer the dough to a lightly oiled 2-quart bowl. I do a super quick spritz of avocado oil spray. You don’t have to oil the bowl if you don’t want to – it just helps the dough come out more easily later on.
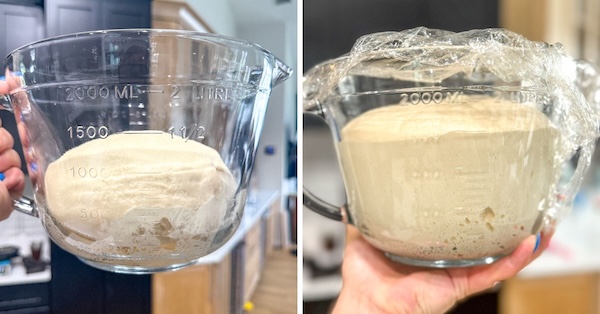
Cover and let rise on the counter for 8-12 hours. The timing depends on your kitchen temperature – in my 73°F (23°C) kitchen, it took exactly 11 hours.
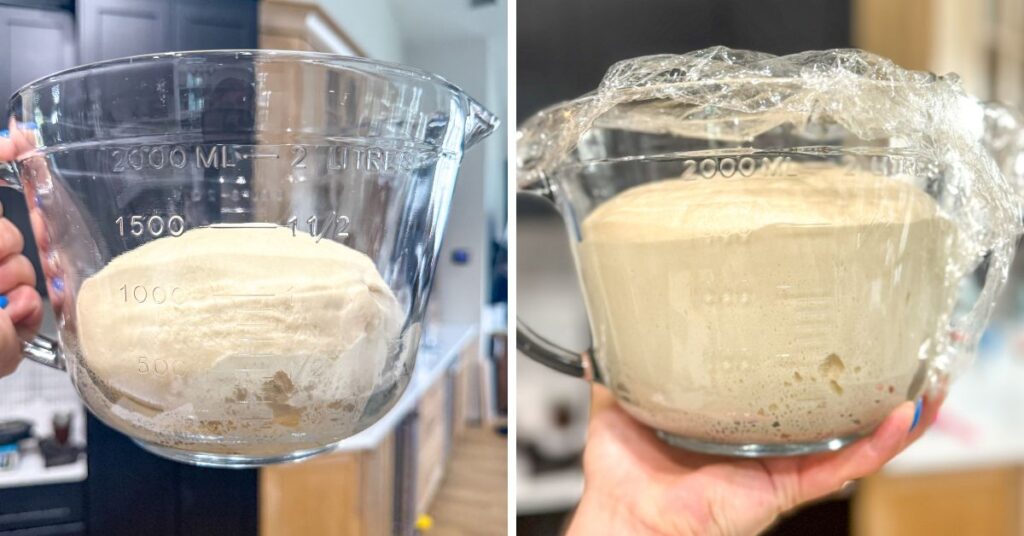
You’ll know bulk fermentation is complete when the dough has noticeably increased in size (about 40% larger), feels puffy when gently poked, and has visible bubbles around the edges and underneath.
Once it reaches this point, pop the bowl in the refrigerator until bedtime. This slows down fermentation and makes the dough easier to handle for shaping.
Note: if the dough is perfectly ready right before bedtime, skip the refrigeration step!
Day 2 (Evening): Shape the Dough
Prepare Your Pan
If you’re not using a nonstick pan, lightly oil your 13×4 inch loaf pan.
I love the USA Pan 13×4 pan for its great results and the nonstick surface (it doesn’t use Teflon!). Even though it’s nonstick, I still do a super quick spritz of my avocado oil spray, just in case. It’s probably not needed, but it feels like a little insurance!
Shape the Loaf
Remove the dough from the fridge and turn it onto your work surface. I don’t need any flour to assist with shaping, but if you want, you can do a light dusting of bench flour.
Note: Bench flour is the flour scattered on a bench or counter during shaping to keep the dough from sticking. You can use all-purpose or bread flour for this. I don’t recommend rice flour as it’s so nonstick that it’ll prevent your dough from sticking to itself as you roll it up.
Using a rolling pin, gently roll the dough into a rectangle about 10 inches wide by 14 inches long. You want it slightly narrower than your pan width.
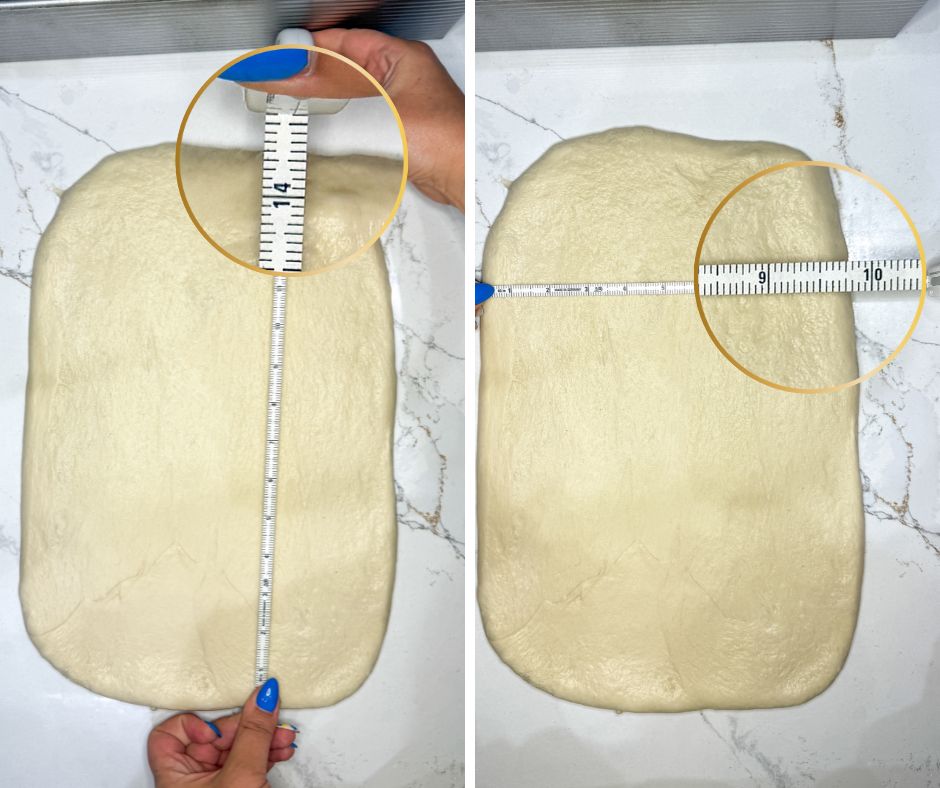
Don’t worry about measuring the rectangle by any means – I’m just providing this as a general guideline.
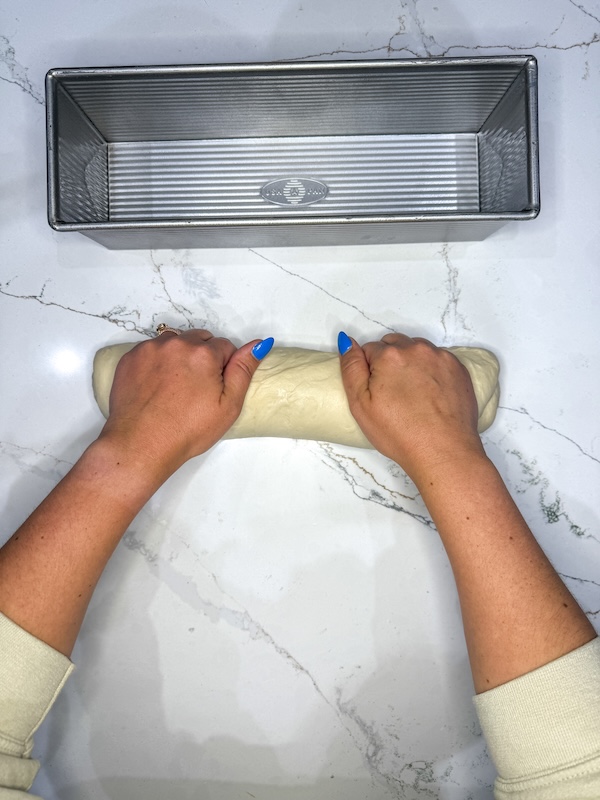
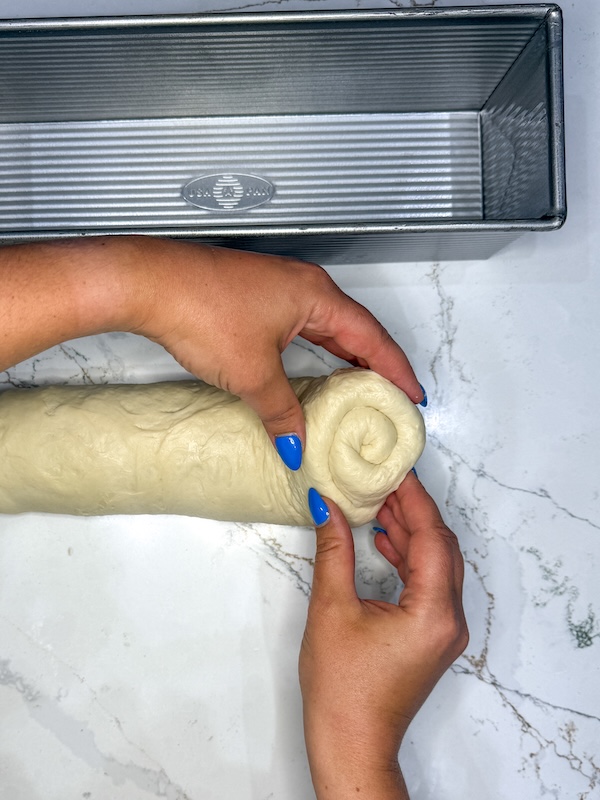
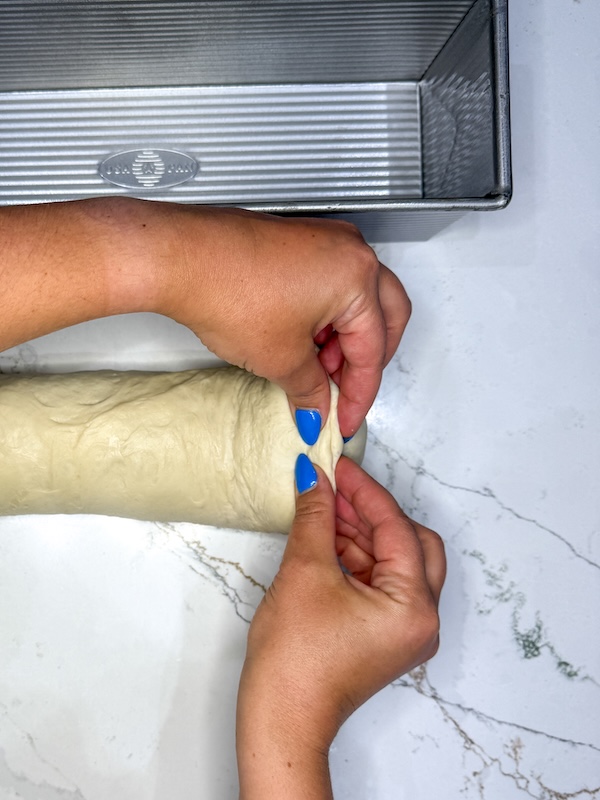
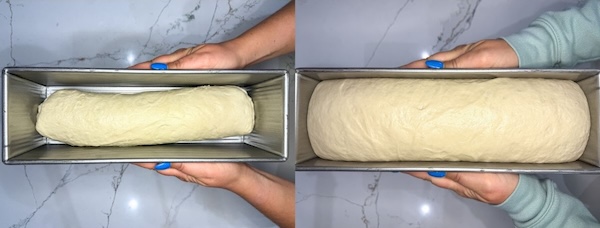
Roll the dough up tightly like a jelly roll. Pinch the seam closed and roll your log a few times to even it out. Place the dough log seam-side down in your prepared pan.

Second Rise
Cover the pan and let rise on the counter overnight (8-12 hours). This is the final rise, so you want the dough to become very puffy and reach the height of the pan rim.
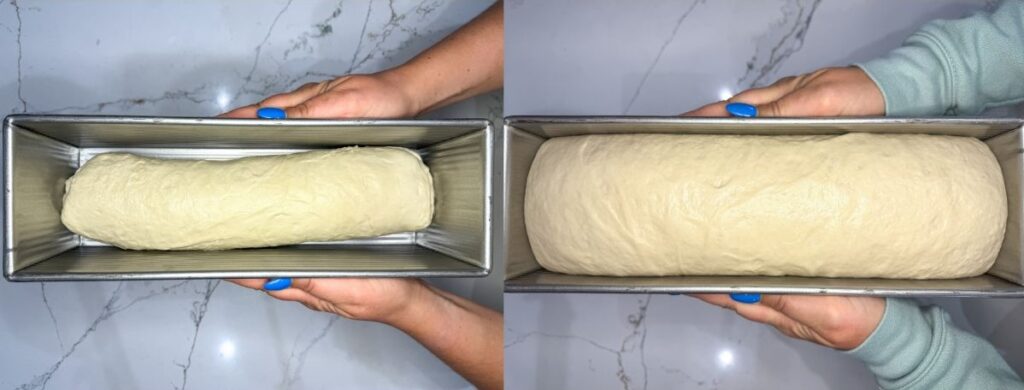
In my 73°F (23°C) kitchen, this took 11.5 hours. The dough should feel light and airy.
Day 3 (Morning): Bake Your Sourdough Sandwich Loaf!
Bake the Bread
Once your dough has reached the height of the pan, preheat your oven to 350°F (175°C).

Once preheated, bake the loaf uncovered for 40-45 minutes, until the internal temperature reaches 200-205°F (93-96°C).
The top should be golden brown – if it’s getting too dark before the internal temperature is reached, tent it loosely with foil for the remaining baking time.
The Finishing Touch
As soon as you remove the bread from the oven, brush the top with 1 tablespoon of butter. This creates that soft crust that’s signature to Wonder Bread-style loaves.
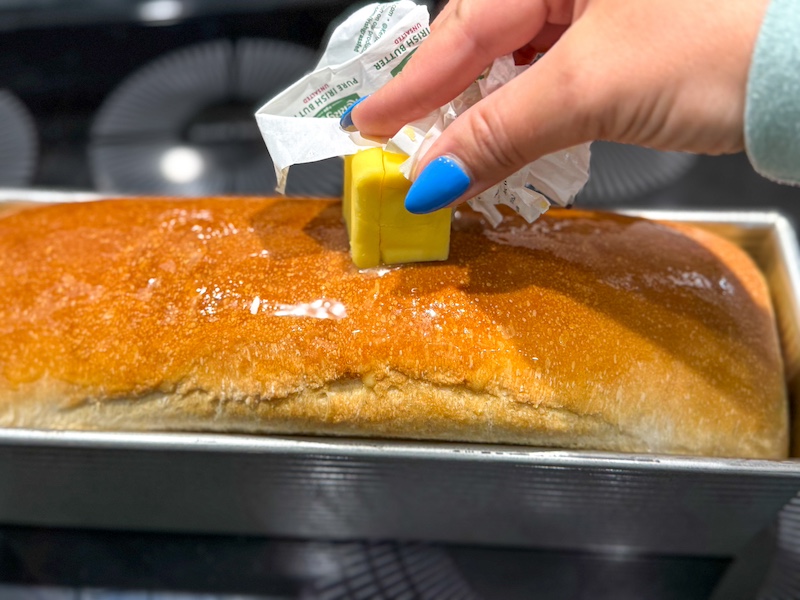
Let the bread cool in the pan for 5-10 minutes, then turn it out onto a wire rack.
Resist the urge to slice immediately! Let it cool completely (1-2 hours) for the best texture and easiest slicing.
Note: If you slice too early, you may get gummy areas, and the bread will then dry out and feel stale once it fully cools.

How to Store Sourdough Sandwich Bread
- Room Temperature Storage: This sandwich loaf stays remarkably fresh thanks to the tangzhong technique. I love storing mine in a glass cake stand where it’s beautifully displayed, while the dome helps keep it fresh. Many bakers swear by adding a celery stick to the container – it helps maintain moisture and extend freshness even longer.
- Freshness Timeline: The bread is absolutely perfect on days 1-2, still delicious on day 3, and starts to show signs of staling on days 4-5. The texture remains softer than most homemade breads throughout this time.
- Alternative Storage: My favorite brown paper bread bags from Sis & Co Collective work wonderfully for storage. They’re also great for gifting!
- Freezing for Longer Storage: If you don’t plan to finish the loaf within 4-5 days, slice it up and freeze the individual slices in a freezer bag. This way, you can grab exactly what you need without thawing the whole loaf.
- Reheating Frozen Slices: For soft, fresh-tasting slices, microwave frozen pieces for 10-15 seconds. For toast, pop the frozen slices directly into the toaster – no thawing needed!
DO NOT REFRIGERATE! The fridge will actually make your bread stale faster. Refrigeration accelerates retrogradation – the process where starch molecules reorganize and become firm, creating that stale texture. Room temperature storage keeps the starches in their soft, fresh state much longer.
Ingredient Substitutions
- Honey: Can be substituted with an equal weight of granulated sugar. If using granulated sugar, add 1-2 tablespoons extra liquid to compensate for moisture loss.
- Avocado oil: Easily swap with olive oil, sunflower oil, melted coconut oil, or any neutral-tasting oil. Multiple testers successfully used olive oil with great results.
- Milk (for tangzhong): Any dairy or non-dairy milk works beautifully. Testers had success with cashew milk, almond milk, and regular dairy milk. Just make sure it’s unsweetened and unflavored.
- High-protein bread flour: King Arthur and Ballerina Farm bread flour both work as written (I tested both). If using all-purpose flour (like Costco brand), add an extra 25g flour to the main dough for proper structure.
- Water: one tester used milk in the main dough instead of the water. This works fine, but the final loaf will be more sour. If you want more milk in the main dough, I’d try half milk, half water.

FAQs
Yes! I created a calculator on this recipe post (right above the recipe card)! Just select your loaf pan size, how many loaves you want to make, and copy the new ingredient list.
Yes, you can! Just note that the resulting bread will be more tangy since you’re skipping the sweet stiff starter. Instead of making the sweet stiff starter, use 100g of your regular active sourdough starter (fed at 100% hydration – equal parts flour and water).
Then adjust the main dough: reduce cold water from 225g to 212g, and increase bread flour from 575g to 593g. These adjustments account for the different hydration levels between the stiff sweet starter and regular liquid starter, keeping the overall dough hydration the same.
Yes! Several testers successfully used olive oil, sunflower oil, and extra virgin olive oil in place of avocado oil with great results. Any neutral-tasting oil will work.
While honey provides both sweetness and helps with texture/moisture, you can substitute with an equal weight of granulated sugar. However, you may need to add 1-2 tablespoons of additional liquid to compensate for the moisture loss.
Absolutely! Testers successfully used cashew milk and almond milk in the tangzhong. Any non-dairy milk should work fine – just make sure it’s unsweetened and unflavored.
One tester added an egg and had success, though it will change the texture slightly, making it richer and more tender. If adding an egg, reduce the water by at least 25g to maintain proper hydration.
The dough is meant to be slightly sticky/tacky after mixing. However, some recipe testers needed to add between 1 tbsp and 1/4 cup extra flour due to humidity, flour brand differences, or kitchen conditions. Add flour gradually (1 tablespoon at a time) until the dough comes together.
For warmer kitchens [76°F+ (24.5°C+)]: Reduce fermentation times and check dough earlier. The overnight rise on the counter will likely overproof your dough, so pop it in the fridge overnight. Bring it out in the morning and proceed with the second rise. For cooler kitchens (under 70°F or 21°C): Add 1-3 hours to each fermentation stage. Always go by visual cues – refer to the photos in the recipe card for help!
Yes! You can refrigerate the dough at any stage to slow fermentation. This is especially helpful after bulk fermentation or during the second rise if your timing gets off.
The timeline is a guide based on a 73°F (23°C) kitchen. Many testers had to adjust timing by several hours. Focus on the dough’s appearance and feel rather than strict timing. I’ve provided photos in this recipe post to help you compare your dough to mine!
Yes, but it requires more effort. Mix initially for 3-4 minutes by hand, then rest 30 minutes. Repeat with stretch and folds every 30 minutes until you achieve a smooth, elastic dough. The goal is still a weak windowpane.
Yes! Several testers successfully doubled or scaled up the recipe. Just ensure your mixer can handle the larger dough volume, and you may need to extend mixing time slightly.
The final recipe is for no lid, because it always stuck when I tested. But some testers used the lid and loved it. Many have suggested my particular lid may be faulty, but in any case, you don’t need the lid!
My first suggestion would be to baby your starter for 1-2 days before starting this recipe. Feed it from peak to peak, meaning you never let it deflate before refreshing it with a new feeding. That will cut down on any lingering acidity. My second suggestion would be to try flipping the timeline to shorten the rise times. Feed your starter in the morning, mix your dough before bed, shape the next morning, and watch it closely; bake it as soon as the dough reaches the lip of the pan. Perhaps that’ll shorten the second rise a little, leading to less tangy flavors.
Try flipping the timeline for better control: feed starter in the morning, mix dough before bed, shape the next morning, and watch closely. Bake as soon as dough reaches the pan’s lip.
Prevention tips: Use cold ingredients (ice water, cold tangzhong) to prevent overheating during mixing. Remember: warm dough ferments faster.

Calculate Ingredients for Different Pan Sizes

Sourdough Wonder Bread Copycat Recipe
Equipment
- 13×4 long loaf pan USA Pan is my favorite
- Stand mixer with dough hook
- 2-quart bowl for first rise
- Long bread bag code THATSOURDOUGHGAL for 15% off
Ingredients
Stiff Sweet Starter
- 15 g sourdough starter
- 15 g honey
- 30 g water
- 60 g bread flour
Tangzhong
- 35 g bread flour
- 175 g whole milk
Main Dough
- All of the stiff sweet starter from above
- All of the tangzhong from above
- 225 g cold water
- 75 g honey or sugar
- 25 g avocado oil
- 575 g high-protein bread flour see Notes
- 12 g salt
- 1 tbsp butter for buttering the baked loaf
Instructions
Day 1 (Evening)
- Make the stiff sweet starter: In a small jar, mix 15 g sourdough starter, 15 g honey, 30 g water, and 60 g bread flour until it forms a ball. Knead outside of the jar to fully incorporate the ingredients. Cover loosely and let ferment at room temperature until morning.

- Make the tangzhong: Mix 35 g bread flour and 175 g whole milk in a microwave-safe bowl. Microwave in 30-second intervals, stirring between each, until thickened and reaches 150°F (65°C). For me, it usually takes 3-5 rounds to finish. Cover and refrigerate until morning.

Day 2 (Morning)
- Mix the dough: In stand mixer bowl, combine All of the stiff sweet starter, All of the tangzhong, 225 g cold water, 75 g honey, 25 g avocado oil, 575 g high-protein bread flour, and 12 g salt. Mix on speed 1 (lowest speed) for 1-2 minutes until ingredients come together, then increase to speed 2 (a tiny bit faster) and mix for 10-15 minutes, or until dough reaches a weak windowpane. It takes about 10 minutes in a Bosch and upwards of 30 minutes in a KitchenAid, for reference.The dough will feel slightly sticky or tacky after mixing, but it should hold its shape. If the dough doesn't fully come together after a few minutes in the stand mixer, add additional flour in 1 tbsp increments.
- Bulk fermentation: Transfer to lightly oiled bowl, cover, and let rise on counter until evening (8-12 hours). At the end of bulk fermentation, the dough should have risen by about 40%, have lots of bubbles, and should be puffy when you tap the surface. (My BF took 11 hours; my home was 73°F/23°C and my dough was 75°F/24°C.) Once it reaches this point, put the bowl in the refrigerator until bedtime to slow down fermentation.
Day 2 (Evening)
- Shape the dough: If not using a nonstick bread pan, lightly oil it. Bring dough out of the fridge and turn it onto work surface (use a light dusting of flour to prevent sticking, if needed). Using a rolling pin, roll dough into rectangle slightly narrower than pan width (about 10" wide by 14" long).
- Roll up the dough tightly, pinch the seams on each end, and place your dough log seam-side down in bread pan.
- Second rise: Cover and let rise on the counter, overnight, until very puffy and the dough is even with the height of the pan rim (approximately 8-12 hours). (My dough was ready after 11.5 hours in a 73°F/23°C environment.)Note: If your home is warmer than about 75°F (24°C), the dough will likely overproof by morning. I advise putting it in the fridge overnight and resuming with the second rise in the morning.


Day 3 (Morning)
- Bake: Preheat oven to 350°F (175°C). Bake uncovered 40-45 minutes until internal temperature reaches 200-205°F (93-96°C). If the top of the loaf is getting too dark, cover with foil. Once done, immediately brush hot loaf with 1 tbsp butter. Cool in pan 5-10 minutes, then turn out onto rack. Cool completely before slicing (1-2 hours).
Video

Notes
- Bread flour: Ballerina Farm (14% protein) or King Arthur unbleached (12.7% protein) – no adjustments needed
- All-purpose: Costco AP flour – add 25g extra flour to main dough
- Canadian options: Arva Mills Daisy flour or Boreal Organic All Purpose (Costco) work perfectly (thanks to follower Amanda Steele for this tip)
Conclusion
And there you have it – a sourdough Wonder Bread copycat loaf that’s so soft and squishy, it’ll make you question everything you thought you knew about sourdough.
Whether you’re making pimento cheese sandwiches for the Masters, PB&Js for the kids, or just want to blow everyone’s minds with the softest homemade bread they’ve ever tasted (that’s also gut-healthy), this recipe is the one.
I can’t wait to see your beautiful loaves! Please share your feedback and photos in the comments below, and be sure to tag me in your Instagram stories @thatsourdoughgal – I love seeing your baking wins.
Another super soft bread (with a tangzhong!) to try next: Fluffy, Soft Sourdough Dinner Rolls Recipe



Hi!
Thank you so much for this recipe! I tried it last weekend (along with your Cheddar-Jalapeño and regular white sourdough and those were both AMAZING!), and I was pretty happy with the results, however I had to make some adjustments: I mixed the dough by hand and did stretch and folds because I don’t have a stand mixer. I did not put the dough in the fridge because by the time bulk fermentation was done it was around 11pm so I shaped it and put it on the pan for the second rise. I extended the second rise to 13 hours (my kitchen was around 78-80F/26-27C), because my pan was slightly bigger and I was waiting for the dough to rise to the top of the pan (at 13 hours I noticed it was not going to rise anymore because the pan was larger so the dough extended more) and baked it. I think the texture was great but it did taste a little too sour for white sandwich bread (almost vinegary). Do you have any suggestions to reduce the sourness? Would it make sense that it turned out more sour because I left the second rise go longer on higher temperature (I live in Costa Rica 🙂 so I’m on the warmer side regarding temperature), or do you think any of the other adjustments I made could have affected it (hand mixing + stretch and folds / not putting the dough on the fridge)?
Thank you so much for sharing your knowledge, you are amazing!
The longer rise time definitely contributed to the tangy flavor. I’m thinking though it and wonder if I could try a revised recipe where a lot more starter is used so rise times are much shorter and it reduces any chance for tangy flavors to develop. That would be a different recipe entirely but I will add it to my recipe testing list.
Great! Thank you so much I will reduce the second rise time next time I try this. And will be looking forward to the revised recipe! 🙂
Please help! I did not adjust amounts of ingredients and made original amounts. I only have regular loaf pans and some mini loaf pans! Please advise on amount of dough and time to bake for each pan or how you would proceed after bulk! Thank you!
Do one regular size loaf pan and one mini. Split your dough 75% and 25%. Larger mass goes in regular loaf pan, smaller mass goes in mini. Same oven temp but pull the mini at 30 minutes. Full bake length for the regular!
You areTHE BEST! You are always willing to solve my problems! So kind and helpful! Thank you!
Can I use the two pan method for this loaf?
I don’t see why not!
After I was done bulk fermenting I went to roll it and some of the liquid separated from the dough. What did I do wrong?
I’ve never experienced anything like that before! The only thing I can think of is the ingredients weren’t fully mixed, but with such a long initial dough mix, I don’t see how that’s possible.
I’ve had this happen with the type of shower cap i used to cover the dough. it seemed to condensate more that plastic wrap
I’m wondering if it was bulk-proofed in a sealed container and caused condensation. Just a thought
Delicious
It’s soft great flavor. My house is cold so took several hours to double in size. I made two loaves. Changes I did was used olive oil, less salt.
Hi Rebekah- I really hope you see this. I made this yesterday and boy did I enjoy the process.
I’ve had some issues though and it’s not the recipes fault.
I am located in the Caribbean and the flour we get isn’t that great, label says 12% protein (have my doubts). The temps are similar to Florida most days, though not as humid.
The bread was fully baked 200degrees internal, yet it tasted raw and gummy. The honey I used was Kirkland’s from Costco, and it changed the colour of the flour (no big deal there).
Can you offer any advice for me? I just made the sweet stiff starter, using agave (my moms allergic to honey) and I am about to make the tangzhong so I can mix my dough this evening and bake one loaf same day and the other tomorrow.
What other adjustments will I need to make accounting for the agave substitute and also using 40% less sweetener? Thank you for your time and effort as always. I am a mostly silent follower of yours.
I’m not sure on the sweetener adjustment, but if it was fully baked and yet tasted raw and gummy, I’m wondering if there could be an overhydration issue. If your flour isn’t as high in protein as you might think, it can’t absorb as much liquid, so the amounts in the recipe card may be too high for you. Try decreasing the liquid in the main dough during mixing until it reaches the texture that matches my photos. I do have a video coming soon to give more visuals. Also, if your home temperature is higher than mine, proofing will happen a lot faster so the overnight second rise may not work in your situation. Keep an eye on the dough and let me know how things go the second time around.
So easy and super delicious. Made the 10×5 loaf and 3 days later, bread is still delicious for toast or grilled cheese.
Woohooo!!
Rebekah,
I know you are using Caputo flour in some of your recipes. Can I use Glutn Free Caputo flour in this recipe!
I was also wondering about King Arthur Bread Flour? It suggests adding 2-3 tbs of water per cup.
Thank you!
Suzanne
I’m not well versed on gluten free, so I really don’t know. I don’t think gluten free flour is a good replacement for bread flour in this recipe! I tested this recipe with both KA bread flour and Ballerina Farms bread flour and no hydration adjustments were needed.
Baked my first loaf this morning! So good. Thanks for all your great recipes….
All I can say is WOW and thanks for creating the best sourdough sandwich bread ever !!! ❤️😋
Hi Rebekah,
I am wondering, if after bulk fermenting (my dough doubled in 9 hours), can you shape the dough, put in the loaf pan, and then refrigerate until the morning, at which time you would take out of the refrigerator and continue the final rise before baking?
Yes absolutely! That is a perfect tactic especially if your home is on the warm side.
Legit the best sourdough recipe I have made to date! Taste is amazing and sooo soft! My kids have been asking for “normal” bread out of sourdough and you have nailed this, only bread I am making from now on! Thanks for all your hard work!
I am so happy to hear that!!
I made the Wonderbread this week. I can’t wait to eat it, but saving for when my family comes this weekend! I think they are beautiful. Thank you for this amazing recipe, Rebekah. ♥️💕
Looks awesome!!
Hi Rebekah,
I live in the UK and its currently 31 degrees C (and we’re idiots and don’t know what air conditioning is)… do you think i’ll be ok to leave my dough overnight or will I verge on overproofing? I’m starting the process tonight by making the sweet stiff starter and Tanzghong.
Thanks in advance
Rebekah (another one) x
No it’ll overproof! I’d stick the dough in the fridge overnight and proceed with the second proof the next day.
Last evening I made the stiff sweet starter, and the tangzhong.
This morning I mixed the dough in my Bosch. All of my measurements we perfectly exact, I made sure of it. After mixing to fully incorporate for 2 minutes, I turned the speed to #2 and mixed for another 5 minutes – the dough was very dry. I continued mixing a few more minutes and I had a very tough looking gob of dough.
I didn’t know what else to do, so I added a couple dribbles of water and mixed until the water was incorporated. The dough was handleable, and passed the window pane, but still wasn’t as soft and smooth as I think it should have been.
I put it in my covered bowl to bulk ferment, but now I’m wondering what went wrong?
I know I measured everything correctly, but it seems there wasn’t enough liquid to bring it all together.
I’ll let it bulk ferment and finish the process, but wonder if you have any ideas or suggestions.
I’m not sure! I think what you did by adding more liquid until the texture felt right was a good call.
Amazing recipe! So easy to follow and the taste and texture are spot on! Just sliced this one and I’ve already started a second.
Looks awesome!!
What have I done wrong? I followed the recipe precisely and had such high hopes for a beautiful sandwich. Bread loaf. The starter did not seem to rise up as much as I thought it should the box fermentation seem to not rise as much as it should either. Last night at midnight, I decided to go ahead and shake the loaf and see what happened overnight. I put the loaf pan in the oven with a light on because my kitchen is chilly….not much rice again overnight. I ran a couple errands and when I came back home it’s like the loaf had risen and fallen! I went ahead and baked it, but it did not rise up anymore and it looks awful! What did I do wrong?
It’s hard to tell but if nothing was rising, I’m guessing it was a starter issue.
Can you make a recommendation on the grams if you wanted to use maybe one- third whole wheat flour and two- thirds white flour. Or just any amount that would include some whole wheat. We’re not fans of white bread except hot dog or hamburger buns.
I can’t really make a recommendation without recipe testing it. If I were to give it a go, I’d start by swapping 10% of the flour for whole wheat. I’d pay close attention to the hydration as it may need more water. And the proofing times will be faster.
Thanks for the calculator for smaller loaf pans! I’m using the 8 1/2 by 4 1/2. Does the baking time need to be reduced. It’s currently in the oven.
I tested it and didn’t find any adjustments were needed except for a mini loaf pan, which was done in 30 minutes.
Thank you so much for this recipe! It has been so easy to follow, I have it in the oven now and cannot wait to try it later today! I do have one question, I woke up this morning and my dough had risen over the height of the loaf pan and had a couple of large air bubbles… does this mean it is overproofed? I tried to pop the bubbles and baked it anyways so fingers crossed it still comes out okay!
Probably a little overproofed, but if it wasn’t deflating and caving in on the surface, I’m sure it’ll still be great.