
Fast & Easy Banana Nut Sourdough Discard Waffles
Got some overripe bananas and sourdough discard to use up? This banana nut sourdough discard waffle recipe will take care of it all in one go.
While the recipe is written to use 1,000g of sourdough discard and 4 overripe bananas, you can easily scale it to use, say, 250g of discard and 1 overripe banana. I wrote this recipe so that all ingredients are easily divisible by 4 for simple scaling.
Bonus: these are just as delicious as they are practical. Plus, we don’t add any fresh flour, so all the flour in this waffle battle is pre-fermented, making it easy on the gut. Let’s get into it!
Disclaimer: Some of the products I recommend in this post are affiliate links – if you choose to purchase after clicking one of my links, I may earn a small commission, which helps fund this website, recipe development, and monthly giveaways. I sincerely appreciate your support.
Why You’ll Love These Banana Nut Sourdough Discard Waffles
- Uses up those spotty bananas: Bunch of overripe bananas sitting on the counter begging to be used? These waffles are the perfect way to give them new life.
- No sourdough waste: Discard is just the extra starter you’d normally toss before feeding. This recipe gives it a purpose and turns what might’ve gone in the trash into breakfast for the week.
- Super practical recipe: Quick to mix, easy to cook, and even easier to reheat. Pop them in the toaster straight from the freezer and they crisp right back up.
- Kid-approved: My kids go crazy for waffles. Waffles are on repeat at least once a week in our house and I love that this changes up the flavor a bit for us.
- Scalable recipe: Only have a little discard? Great! Have a full container? Even better. Every ingredient scales up or down in 250-gram increments so you can make exactly what you need.
- Endless add-ins: These are a riff on my original sourdough discard waffles. The classic banana-nut here is a win, but chocolate chips are always welcome. You can even do both. (Looking for a fall version? Try these pumpkin spice discard waffles — so good.)
- Make-ahead friendly: One batch can mean breakfast for the whole week. Freeze, toast, done.
Ingredients
- Unsalted butter (melted): I like to use a high-quality butter for flavor. European-style is my go-to, but any unsalted butter will work.
- Overripe bananas (mashed): The more spots, the better! Overripe bananas add natural sweetness and keep these waffles extra soft inside.
- Sourdough discard: Best if your discard is between 1–10 days old. Using discard means no waste and gives the waffles that light, tangy flavor. And cold from the fridge is great. If you don’t usually keep discard on hand, you can also use an active starter that you’ve fed and is now at its peak.
- Eggs: Help bind everything together and give the waffles their lift. See substitutions below for an egg-free option.
- Vanilla extract: A must for banana recipes. It brings out the sweetness and ties all the flavors together. You can sub for vanilla paste in a pinch!
- Brown sugar: Adds a touch of caramelly flavor and slightly lifts the sweetness.
- Cinnamon: I never skip cinnamon. It’s cozy, warm, and adds to the banana flavor so nicely.
- Pinch of salt: Always needed. Balances the sweetness and rounds out the flavor. (I usually use Redmond’s Real Salt, my favorite!) You can get 15% off with my affiliate link and code TSG15.
- Baking soda: This reacts with the sourdough discard and gives these waffles their rise and fluffy texture.
- Walnuts or pecans (or chocolate chips): Classic banana-nut is hard to beat, but you can swap in chocolate chips, do both, or skip the nuts altogether. Totally up to you.

Substitutions
- Eggs: One of my test bakers for the original discard waffles used flax eggs because of an allergy, and said they turned out amazing. To make one flax egg, mix 1 tbsp ground golden flaxseeds with 3 tbsp warm water and let it sit until it gels.
- Nuts: You can use whatever you have on hand… walnuts, pecans, even hazelnuts work. Just chop them up first. If you’ve got a nut allergy, skip them altogether (or make your kids very happy and double up on the chocolate chips instead).
- Sourdough discard: No discard? No problem. You can use an active starter that’s been fed and is now at its peak.
- Brown sugar: Maple syrup, regular sugar, or honey can be swapped in.
- Cinnamon: I think I’m cinnamon’s #1 fan, but you can easily swap in another spice you love. Nutmeg, allspice, clove, ginger, or cardamom would all be fun to try. Or you can leave the spice out altogether.
Equipment
- Waffle maker: I recently downgraded to this Cuisinart waffle maker, and I absolutely love it. And yes, you read that right – we previously had the All-Clad, which is about 3x the price. But the Cuisinart’s plates are removable and dishwasher-safe, which makes all the difference for me. It also cooks faster.
- Mixing bowl: this large bowl fits the waffle batter perfectly. It’s also the perfect size for a double batch of sourdough bread.
- Whisk: my favorite whisk from OXO.
- Half sheet tray: perfect for freezing your waffles. These sheet trays from USA Pan are amazing.
- Parchment paper: I love these sheets of parchment that are pre-cut to fit half-sheet trays. You only need these if you plan to freeze your waffles. The parchment goes between each layer so they don’t freeze together.
- Freezer bags: for your frozen waffles! I typically flash-freeze them for 1-2 hours on that sheet tray, then transfer them to freezer bags.
How to Make Banana Nut Sourdough Discard Waffles
This is one of my favorite ways to use up sourdough discard and those overripe bananas sitting on the counter.
These banana nut sourdough discard waffles come together fast, freeze so well, and can handle breakfast for the whole week.
Step 1: Preheat Your Waffle Iron
Turn your waffle iron on now so it’s hot when the batter’s ready.
If your iron has multiple settings, go medium–high for crisp edges and a soft center. Wait for the ready light (or one full preheat cycle) before you start.
Step 2: Mix the Batter
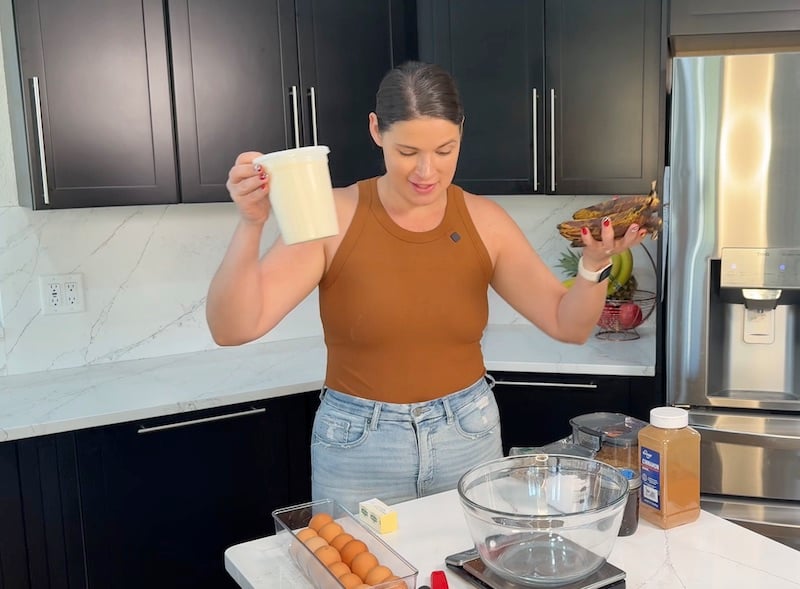
In a large bowl, melt 113 g butter and let it cool slightly. Add 340 g mashed overripe bananas (about 4 medium bananas) and whisk together until smooth.
Then, whisk in 2 tsp vanilla extract, 80 g brown sugar, 2 tsp cinnamon, and a pinch of salt.
Add 1,000 g sourdough discard (cold from the fridge is fine) and whisk until smooth and no streaks of banana remain.
Finally, add 4 eggs and whisk until everything comes together.
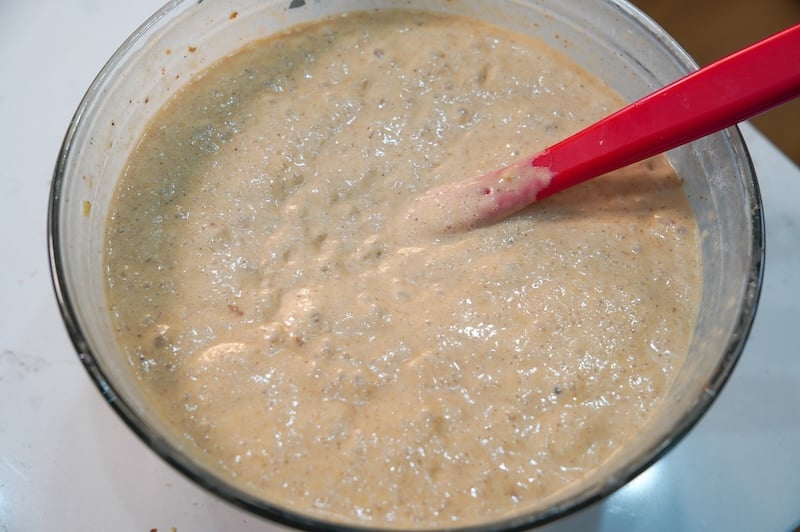
Step 3: Add the Baking Soda to Activate the Batter
Sprinkle in 2 tsp baking soda and whisk vigorously. After about 10 seconds, you’ll see the batter turn lighter and fluffier. That’s the baking soda reacting with the acid in the sourdough discard to create little air bubbles.
From this point on, be a bit gentler when mixing or folding so you keep all that lift in the batter.
Step 4: Fold in the Add-Ins
Switch to a spatula and gently fold in 200 g chopped walnuts (or pecans, or chocolate chips, or nuts + chocolate if you’re feeling it).

Try not to overmix here; you still want to keep all that air you just created in the batter.
If you like a lot of texture or sweetness, you can double the add-ins. The nuts give structure and crunch. And the chocolate? Well, it melts just enough to make each bite a little indulgent.
If you skip one add-in, just double up on the other. And if you decide not to add anything at all, the waffles are still really delicious on their own.
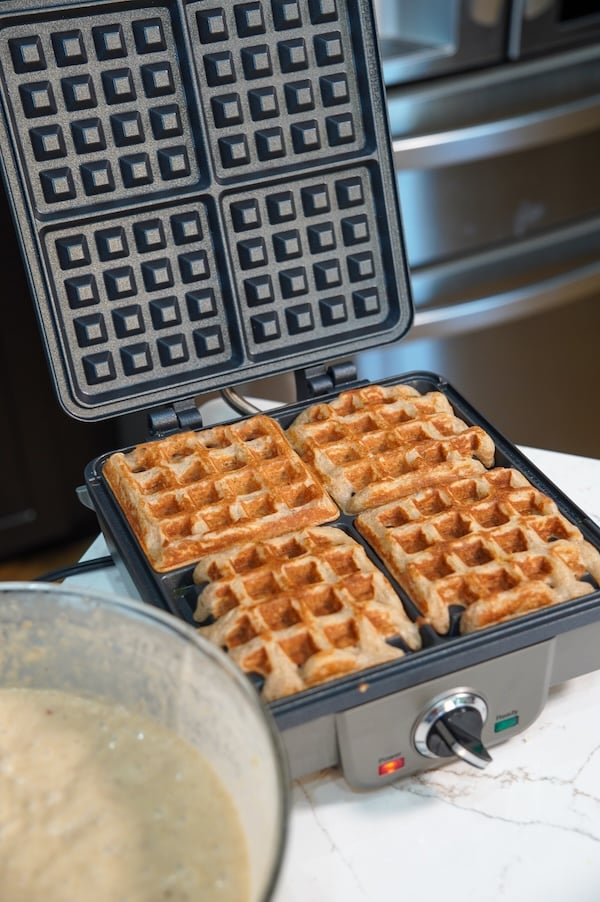
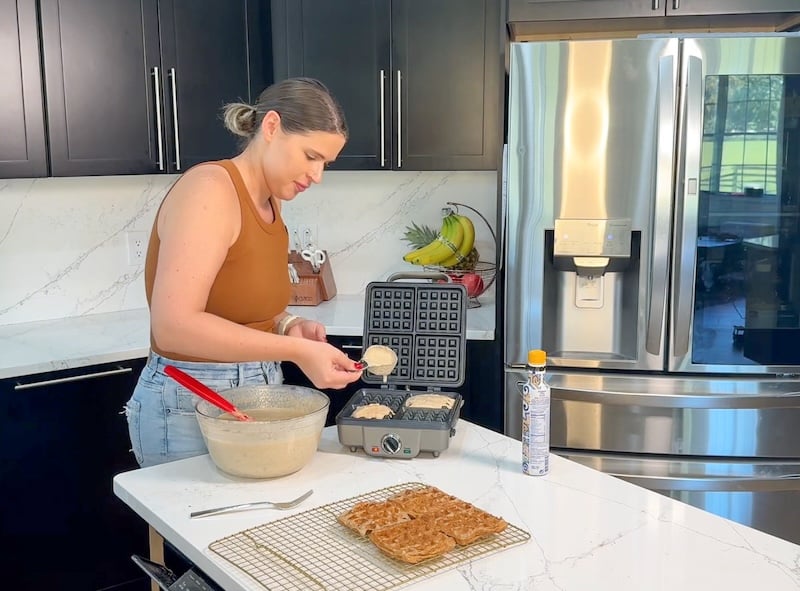
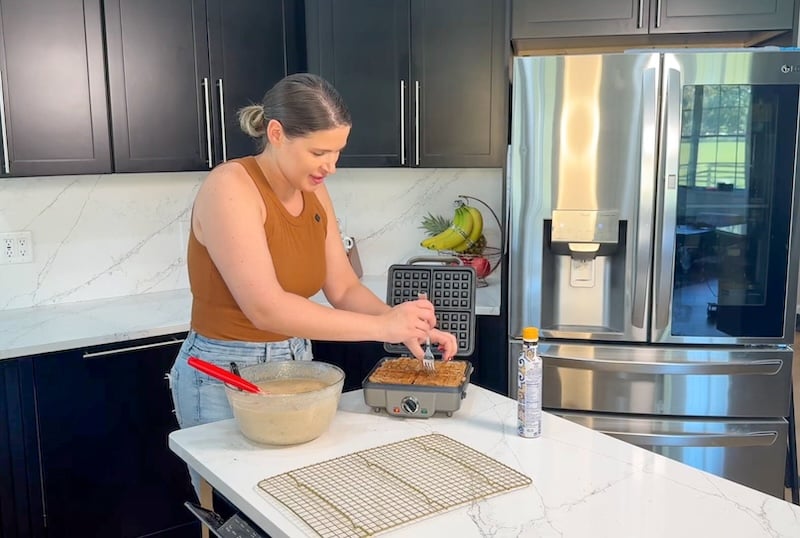
Step 5: Cook the Waffles
If your waffle iron gets sticky, give it a light brush of neutral oil or melted butter first.
Add enough batter to cover the grid without overflowing (about ⅓ cup per waffle), close the lid, and cook according to your waffle maker’s instructions.

I usually let these cook a little longer than normal to get that golden, crisp exterior and soft inside. Every waffle maker runs a little differently, so test one first to find your perfect timing.
Step 6: Serve & Enjoy
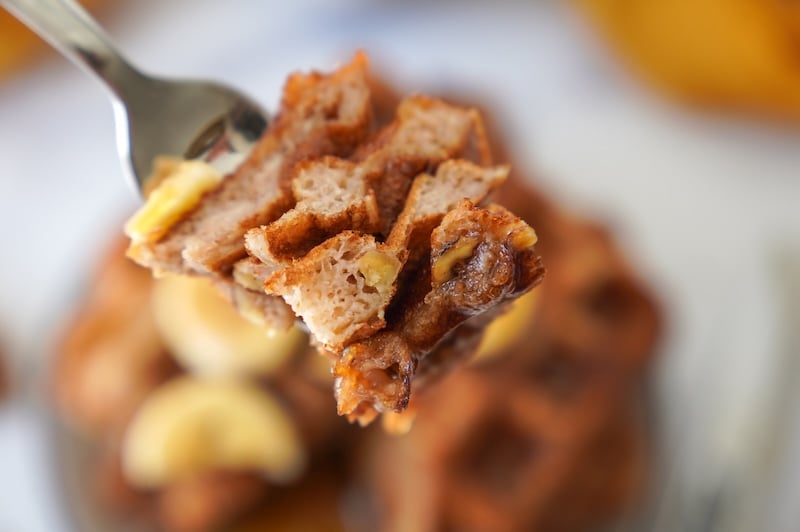
Carefully remove each waffle and let them rest on a cooling rack for a few minutes before serving.
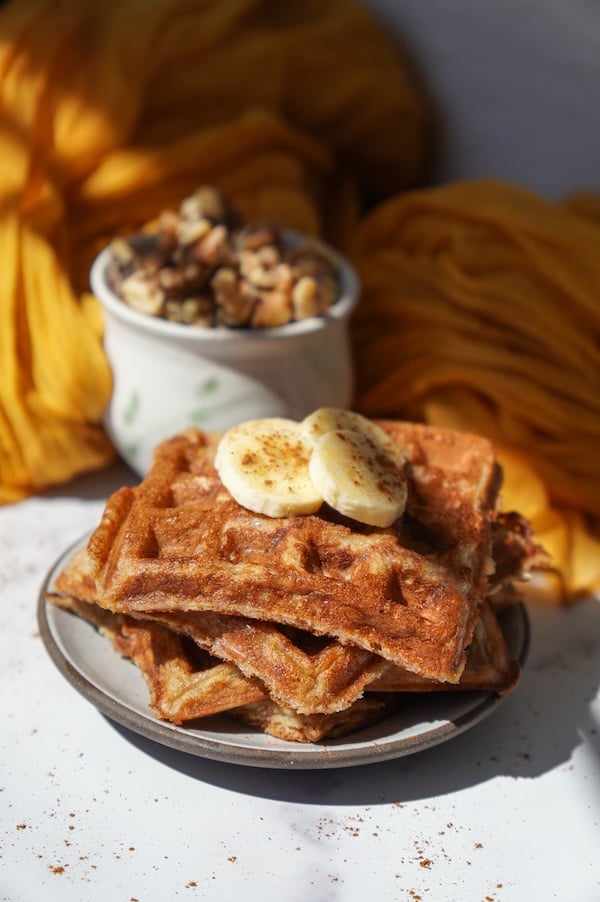
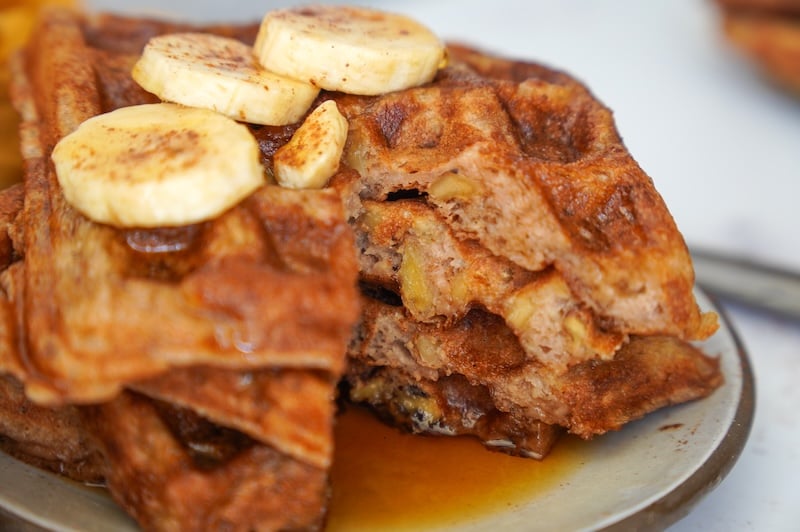
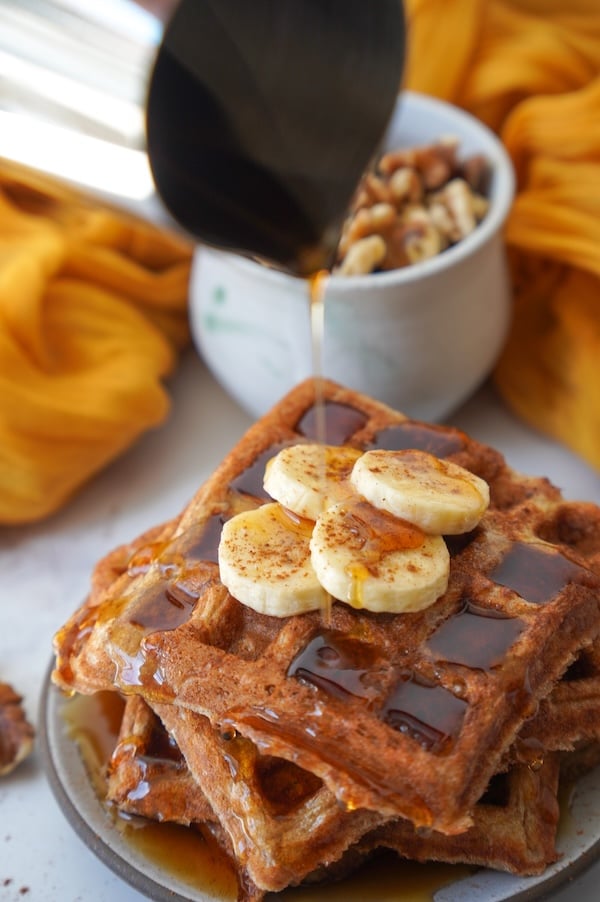
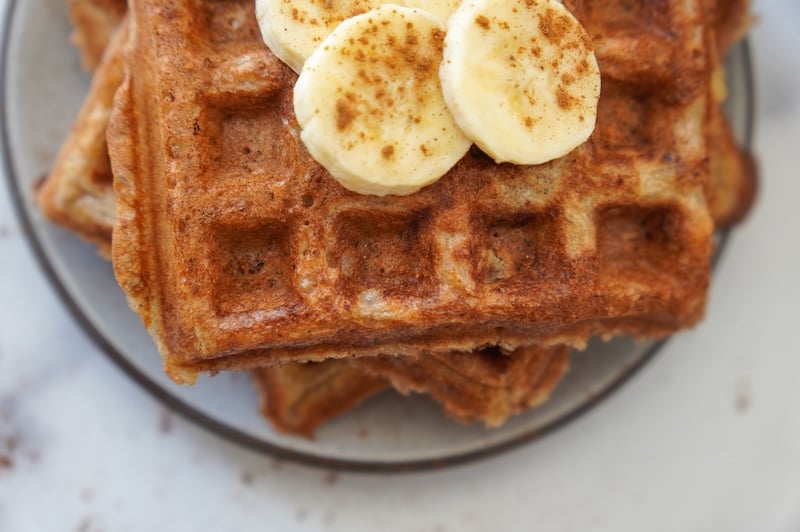
If you’re eating right away, add a pat of butter, drizzle with warm maple syrup, and maybe sprinkle a few extra chopped nuts or chocolate chips on top.
Some fresh slices of banana on top with a little cinnamon sprinkled on is also so pretty!
Tips for Better Waffles
- Scaling the recipe: If you’re scaling the recipe up or down: for every 250 g of discard, you’ll use 1 banana. It’s designed to be easy to divide, so no major math headaches required.
- Age of discard: Use discard that’s about 10 days old or fresher. Anything older can taste a bit bitter once cooked.
Deep-dive on sourdough discard age: I’m often asked: how old can my sourdough discard be before I shouldn’t use it in recipes?
The answer depends on what state your starter was in when it went into the fridge.
I feed my starter when it’s at peak – before it fully deflates and gets acidic. That means the “discard” going into my fridge is actually an active, healthy starter. This extends how long I can use it in recipes (usually up to 3 weeks for me).
However, if you’re putting deflated, acidic-smelling starter into your discard jar, that timeline is much shorter – typically 10 days or less.
The best test? Your nose. If your discard smells bitter, overly acidic, or just plain unappetizing, skip using it in recipes.
- Mix that baking soda well: Make sure it’s fully whisked in. Any pockets left behind can give a chemical or bitter taste.
- Smell check: If your discard smells harsh or unpleasant, skip it. Fresh discard should smell tangy and slightly sweet.
- Crunch check: Lost a little crunch and crispiness? Pop your waffles in the toaster for a quick refresh, and they’ll crisp right back up.
Note: I recently switched from my All-Clad waffle maker to a Cuisinart, and I’m honestly shocked by how much I love it. It heats faster, cooks more evenly, and gives those crisp edges every time. All at about a third of the price!

How to Store Your Banana Nut Sourdough Discard Waffles
The only way to store these waffles, in my opinion, is in the freezer!
I like to make a big batch of these so breakfasts are ready for the week. They’re such an easy grab-and-go option, especially for busy mornings.
Here’s how to freeze them:
- Arrange your cooked waffles in a single layer on a parchment-lined baking sheet.
- Place another sheet of parchment on top, then add another layer of waffles.
- Keep layering until they’re all stacked.
- Slide the tray into the freezer and flash-freeze for about an hour.
- Once frozen, transfer the waffles to a freezer bag or an airtight container.
These will keep well for several months. When you’re ready to eat, pop one straight from the freezer into your toaster. No thawing needed!!
FAQs
Yes! Active starter works for this recipe. I use discard here to cut down on waste, but active starter will give you the same result and probably better flavor.
I wouldn’t recommend it. The baking soda reacts with the sourdough right away, creating all those bubbles that make the waffles light and fluffy. If the batter sits too long, it’ll lose that lift. It’s best to cook the waffles right after mixing, then freeze them if you want to prep ahead.
Absolutely. The banana flavor still shines on its own, or you can swap in chocolate chips instead. Each version is delicious!
Not at all. The sourdough adds a subtle tang that balances the sweetness from the bananas. It’s not overpowering, just a really nice flavor combo.
Definitely overripe ones. We’re talking the browner, the better. They add natural sweetness and moisture, which makes these waffles soft on the inside and perfectly golden on the outside.
It usually comes down to the waffle maker’s heat or seasoning. Make sure your iron is fully preheated before adding batter, and lightly brush it with melted butter or neutral oil between batches.
Yes. Actually, when I filmed the YouTube video for this, I messed up and used 6 tbsp of butter instead of the 8 tbsp the recipe calls for. You’d never know.
Yes. This component is entirely flexible – adjust to taste. The amount the recipe calls for does not lead to a super sweet waffle, in my opinion – it’s well balanced and can handle the addition of maple syrup later on. If you like sweeter waffles or don’t plan to add maple syrup, you might consider increasing the brown sugar by half. If you are watching calories/sugar, you can leave out the brown sugar altogether.
Other waffle variations to try:
- Fast & Easy Pumpkin Spice Sourdough Discard Waffles
- Fast & Easy Sourdough Discard Waffles
- Double Chocolate Sourdough Discard Waffles (Fast & Easy)

Banana Nut Sourdough Discard Waffles
Equipment
- Waffle maker (this one is fantastic!!)
Ingredients
- 113 g unsalted butter melted
- 340 g mashed overripe bananas see Notes for quantity
- 1,000 g sourdough discard best if you use discard 1-10 days old
- 4 eggs see Notes for egg allergies
- 2 tsp vanilla extract
- 80 g brown sugar
- 2 tsp cinnamon
- Pinch of salt
- 2 tsp baking soda
- 200 g chopped walnuts or pecans or chocolate chips
Instructions
- Preheat your waffle iron.Note: if you want a deeper nutty flavor, consider toasting your nuts in a saucepan over medium heat until fragrant (about 4-5 minutes). Let cool and proceed.
- In a large bowl, whisk together 113 g unsalted butter and 340 g mashed overripe bananas. Then, add 1,000 g sourdough discard and whisk again. Finally, add 4 eggs, 2 tsp vanilla extract, 80 g brown sugar, 2 tsp cinnamon, and a Pinch of salt, whisking well.
- Add 2 tsp baking soda and whisk vigorously. Within about 10 seconds, the batter will become aerated and fluffy—watch the magic happen! Quickly fold in 200 g chopped walnuts or pecans (or chocolate chips).

- Pour the waffle batter into your waffle iron. Cook the waffles in your waffle iron according to the device's instructions.

- Add any toppings you like, such as a pat of butter, a drizzle of warm maple syrup, sliced banana, extra chopped nuts, or a sprinkling of cinnamon. Enjoy!
- These store best in the freezer. Layer the waffles on a sheet tray, each layer separated by a sheet of parchment paper. Flash freeze for 1 hour. Then, place the frozen waffles in a freezer bag. These keep well for months. To reheat, pop in the toaster!


Video

Notes
- 340g of mashed overripe bananas is about 3-4 medium bananas. Do not panic about getting the grams exact. My bananas were on the larger side once, and I ended up with 485g of mashed banana – the waffles still turned out perfect. This is very flexible.
- Adjust the Recipe: Scale the recipe up or down in 250g increments depending on how much discard you have.
- Egg Substitute: Another baker has an egg allergy and substituted flax eggs for the eggs and said they turned out amazing! A flax egg is 1 tbsp ground golden flaxseeds mixed with 3 tbsp warm water.

Conclusion
These banana nut sourdough discard waffles have quickly become a favorite around here.
I love that they use up both extra bananas and discard in the most delicious, practical way. And my kids would exist on waffles if I let them, so this gives a little variety to my original sourdough discard waffle recipe!
If you make them, let me know how they turn out in the comments below, or tag me on Instagram. I love seeing your bakes!
Also, drop any new flavor variation ideas below – I’d love to keep adding ideas to the sourdough discard waffle collection.
More sourdough breakfast recipe ideas:


Can’t wait to try these. I made some banana butter from serious eats.
https://www.seriouseats.com/bananas-foster-banana-bread-butter-recipe-11820572.
It’s going to take these over the top! Thanks for all your great recipes!
Made these for dinner tonight because I had 2 overripe bananas, pecans approaching the use by date, and a ton of discard. Big hit! Daughter said they were the best waffles I’ve ever made, and granddaughter ate it and loved it despite her dislike for nuts. Definitely gonna make them again!
That is amazing, so glad to hear it!!
Out of the waffle iron, the taste was great but they were kind of limp. I froze them and just reheated two in my air fryer (4 minutes at 350 degrees). Fabulous! Light and crisp. Will make again.
So glad you loved them Carol!
OMG DELICIOUS! This could be rated 10 stars. I made half recipe with 500 g discard and 2 over ripe bananas. I added the cinnamon and vanilla but used pecans because that’s what I had. I’m in love with this recipe. I ate this plain but my husband drowned his with real maple syrup. He loved them too. We ate them for lunch. I’m freezing the rest for later. You have a winning recipe, Rebekah!
Yay, so happy to hear that!!
I’ve made these 2 weekends in a row now. My daughter requested them the second time & my husband said they are the best waffles he’s ever had.
Thanks for sharing Valerie!
I made the pumpkin waffles, big hit! And we regularly make the ‘plain’ waffles… always have a stocked freezer so we have a fancy & healthy breakfast ready in a couple of minutes on school mornings!
I was looking for an apple version… maybe instead of the pumpkinpuree apple butter?
I might try it out, if you figure it out before that, let us all know please 😇🙏🏻
And thanks for all your hard work and inspiring & accesible content!
So happy you’re loving the waffles! I haven’t tried the apple butter yet but sounds delicious! Let us know if you give it a try!
These were so yummy! I split the batter in half and put pecans in one half for the grownups and chocolate chips in the other half for the kids. Everyone thought that they were delicious! Thank you for the recipe.
Great idea, thanks for sharing!!
so tasty, i was skeptical of using only starter since it can be so sour but the banans and brown sugar round it out perfectly. thanks for the recipe!
You’re welcome!
I made these today. So delicious! Crunchy on the outside, fluffy on the inside. I split the batter into two bowls, one bowl walnuts, one bowl chocolate chips. I also didn’t put the baking soda
(one teaspoon in each bowl) into the second bowl until I was ready to cook from it so it didn’t loose its pizazz. Made 21 waffles, ate one, froze 20. So easy! I’ll definitely make them again.
Ohh great idea! So glad you enjoyed them!
These were soooo good! I couldn’t stop eating them! I will definitely be keeping this recipe and making them again!
So glad to hear it!!
Delicious! I think I will add more cinnamon next time. So good!
I love that this uses no extra flour, making it even easier & I can use up ripe bananas. I quartered the recipe to use my discard on hand.
I just made these waffles for the second time so I felt I needed to let you know how wonderful they are. I’ve been making waffles for decades, using many different recipes, flours, etc. This is the first recipe I used sourdough discard for and they are SO light and fluffy! I toasted pecans for this second batch and my husband LOVES them. Thanks TSDG, for putting out such great recipes for us to try out and fall in love with. Chef’s kiss…
P.S. – I now use a chaffle maker because I gave my Belgian waffle maker and my ‘regular’ waffle maker away to my girls when they got married.
Yay, so happy to hear how much you’re enjoying the waffles!
I don’t have any discard, but do have refrigerated starter that needs feeding! Can I feed the starter first and then use it when it is ripe?
Yes absolutely