
Cozy Pumpkin Spice & Maple Sourdough Cinnamon Rolls
Cozy Pumpkin Spice & Maple Sourdough Cinnamon Rolls
The idea of pumpkin cinnamon rolls didn’t initially excite me, to be honest (I’m ducking behind my couch in anticipation of the outrage). But once I got to the final stages of recipe testing and really made this one my own… OMG.
These are so ridiculously delicious, and that’s coming from someone who’s not a huge pumpkin lover, aside from a good pumpkin cream cold brew. My husband said the same – he loathes pumpkin sweets like pumpkin pie, but he prefers this version of cinnamon rolls for the flavor complexity.
Over 150 bakers from around the world tested this recipe for me, and I’m thrilled that it required virtually no revisions – it received an incredible average rating of 4.70/5.
“While I love cinnamon rolls, this one wins hands down over plain cinnamon rolls.” –Recipe tester from Star, ID
“The rolls were so soft and fluffy, the softest rolls from a recipe I’ve ever tried. 10/10!” –Recipe tester from Edmond, OK
This recipe takes everything that works from my winning soft sourdough cinnamon roll recipe and weaves in pumpkin, plus supporting flavors like nutmeg, vanilla, and most importantly, maple.
Ready to dive in?

Disclaimer: Some of the products I recommend in this post are affiliate links – if you choose to purchase after clicking one of my links, I may earn a small commission, which helps fund this website, recipe development, and monthly giveaways. I sincerely appreciate your support.
Why You’ll Love These Pumpkin & Maple Sourdough Cinnamon Rolls
- Recipe tested by real bakers like you: This pumpkin spice variation was tested by 156 home bakers across 6 countries and 31 US states, earning an impressive 4.70 out of 5 stars. From cool kitchens in Canada to humid Florida days, bakers everywhere achieved soft, fluffy rolls that their families devoured—proving this recipe works across different climates, skill levels, and kitchen conditions.
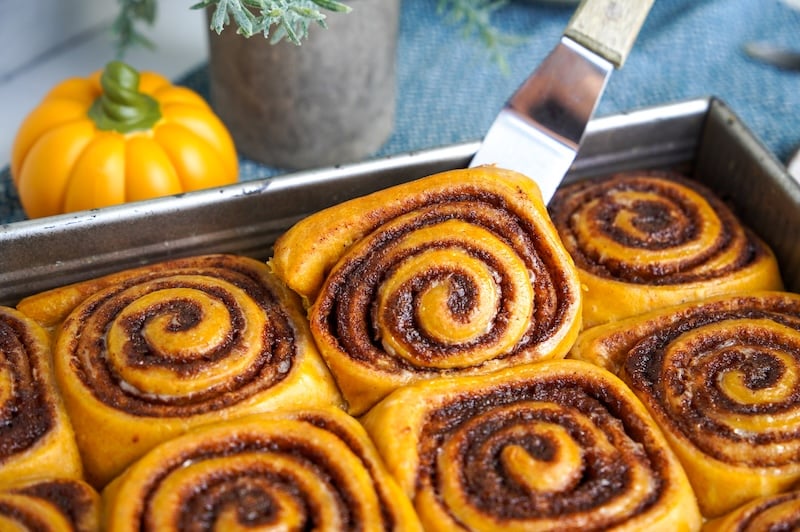
- Pumpkin spice in every bite: These aren’t just regular cinnamon rolls with a dusting of spice. The pumpkin puree and spice blend are mixed right into the dough and the filling. Maple extract takes these to the next level. Bonus: your whole kitchen will smell like an autumn day while they’re in the oven.
“Oh my heavens yes and yes…I absolutely love anything pumpkin flavored and these were divine.” –Recipe tester from Erie, PA
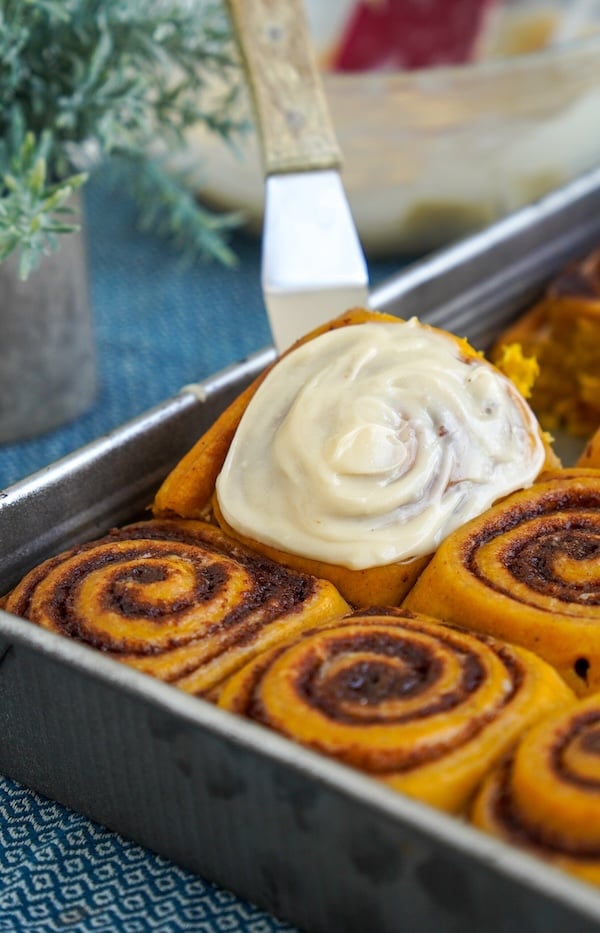
- Maple cream cheese icing: Classic cream cheese frosting gets the fall-inspired upgrade it deserves with the addition of maple. Maple syrup is good, but adding maple extract is great. It brings just the right balance of sweet and tangy, and it’s the perfect finishing touch for pumpkin rolls. Fair warning: you’ll probably want to lick the icing bowl.
- Bake-ready in the morning: This recipe does an overnight second rise, so these are bake-ready first thing in the morning. Cinnamon rolls for breakfast, anyone?!
“I really like being able to roll up and place in pan and let proof overnight. I was able to stick in oven first thing this morning and breakfast was ready.” –Recipe tester from Fairhope, Alabama
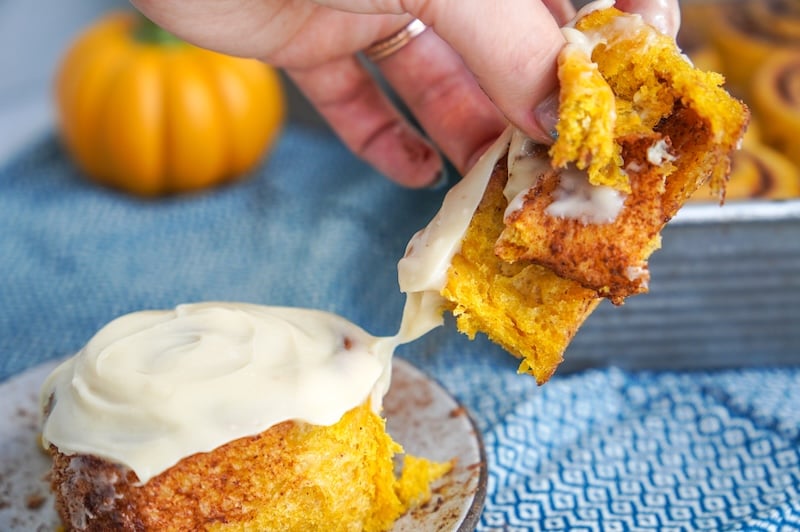
- Stays soft for days: Thanks to the tangzhong in the dough, these rolls stay pillowy even after a couple of days. If they happen to last that long without being devoured, you’ll still be enjoying soft rolls on days 2 and 3.
- Same base, seasonal twist: If you’ve baked my original Sourdough Cinnamon Rolls before, you’ll recognize the same soft, foolproof dough — but this time, it’s all dressed up for fall.
“I am normally not a fan of pumpkin, but this was DELICIOUS! They are soft and decadent.” –Recipe tester from Leesburg, GA
Ingredients
Sweet Starter
- 25 g sourdough starter: Ideally fed within the last day so it’s strong and healthy.
- 25 g sugar or honey: A touch of sweetness tames the tangy flavors of sourdough.
- 65 g warm water
- 85 g bread flour
Tangzhong
- 35 g bread flour + 175 g whole milk: Cooked together into a smooth paste (you’ll make this in the microwave or on the stovetop in just a few minutes — full directions below). This step is the secret to rolls that stay pillowy-soft for days. The tangzhong also helps prevent staling!
Read more: Tangzhong: The 3-Minute Secret to Softer Sourdough
Main Dough
- All of the sweet starter and tangzhong: This is your foundation for success.
- 25 g cool water: Just enough extra hydration to bring the dough together.
- 1 egg: Adds richness, softness, and structure.
- 1 tsp vanilla extract: Rounds out the flavor profile. I make my own! Here’s the recipe.
- 1 tsp maple extract (optional): This right here is your secret weapon. Without it, these cinnamon rolls are very good. With it? People will track you DOWN, asking if you’ll make more.
- 150 g pumpkin purée: Adds subtle flavor and a gorgeous golden color without weighing the dough down. (About half a 15-ounce can. Use the other half to make these waffles.)
- 515 g bread flour: Gives your rolls structure.
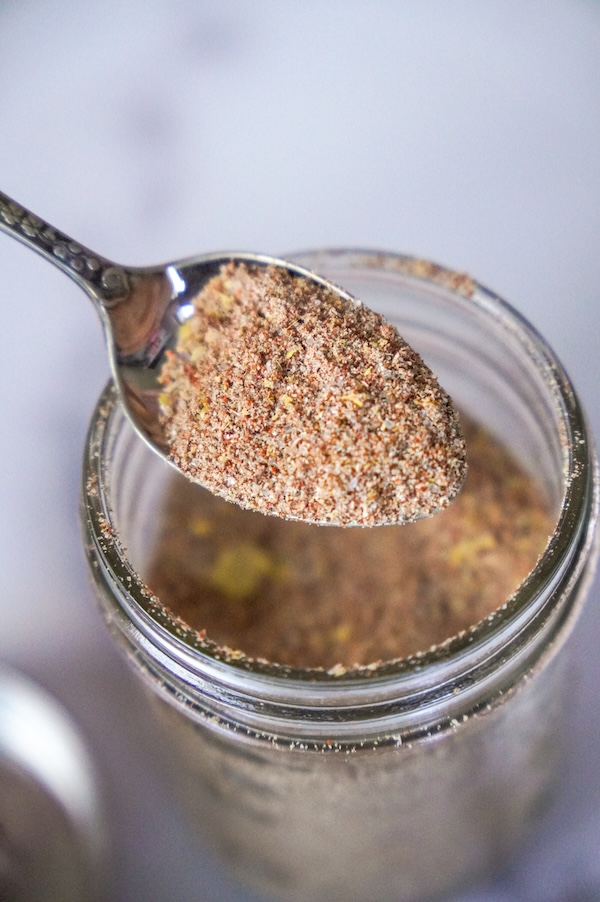
- 1 tsp cinnamon + 1 tsp pumpkin spice blend: Warm fall spices baked right into the dough so the flavor runs through every bite. I make my own pumpkin pie spice (here’s the recipe) but you can also buy it from the store.
- 12 g sea salt: Always needed, balances everything out.
- 84 g unsalted butter, softened: Brings tenderness and richness.
- 85 g half & half: Poured over the shaped rolls before baking for that soft, gooey texture.
Filling
- 142 g unsalted butter: Softened and spreadable.
- 175 g brown sugar: Gives a caramel-like sweetness you’ll want with the pumpkin.
- 8 g cinnamon + 8 g pumpkin spice blend: Double the cozy factor.
- 40 g pumpkin purée: Keeps the filling moist and adds another hit of pumpkin flavor.
Maple Wash
- 20 g melted butter + 20 g maple syrup: Brushed on top for shine, moisture, and a hint of maple sweetness.
- 1 tsp maple extract (optional) + pinch of salt: Amps up the maple and fall vibes and keeps the flavor balanced.
Maple Cream Cheese Icing
- 28 g unsalted butter, softened: Always butter for richness.
- 170 g cream cheese, softened: Tangy and creamy, this is the classic base for cinnamon roll icing.
- 20 g maple syrup + 1 tsp maple extract (optional): Makes this frosting taste like fall. If you aren’t using the maple extract, consider doubling the amount of maple syrup.
- 200 g powdered sugar: For sweetness and structure.
- Pinch of salt: A little balance for the sweetness.
Ingredient Substitutions
- Flour: Bread flour is my top pick for structure and fluffiness, but all-purpose flour works, too! Multiple testers did this and still gave the recipe 5 out of 5 stars.
- Half & half (for pouring over the rolls pre-bake): Testers (and I) have used heavy cream in place of half & half, and there is virtually no difference. One tester swears by using brown butter pumpkin heavy cream (from Target). You can leave this out if you want, but the rolls won’t be as moist.
- Butter: One tester used ghee but noted it became too soft in a warm kitchen. I really suggest sticking to butter, but if you can, buy European-style butter (like Kerrygold, Vital Farms, Plugra, Kirkland Signature, Land O’Lakes European Style, or Finlandia). It makes a huge difference.
- Sweetener: You can use sugar or honey in the sweet starter.
- Pumpkin purée: Canned pumpkin is the easiest (and what I used). If you have homemade purée, make sure it’s thick and not watery — otherwise, you’ll want to strain it a bit. If you live in a country that does not have pumpkin purée, mashed sweet potato would probably work. One tester accidentally used pumpkin pie filling and said the rolls still turned out great.
- Maple extract: Optional, but highly recommended.
- Milk (in tangzhong): Any milk works here! Testers had success with 2%, almond, cashew, soy, and even mixing heavy cream with skim.
- Icing options: If cream cheese frosting isn’t your thing (or if you’re under cottage food laws that don’t allow it), my original cinnamon roll recipe includes a maple pecan glaze option that’s out of this world. One recipe tester also supplied her maple butter frosting recipe if you want to try it: 100g butter, 40g maple butter, 40g maple syrup, 350g powdered sugar, 60g heavy cream.
Equipment
The full equipment list is on the recipe card, and most is self-explanatory.
But there are two things I want to explain:
- Square or rectangle container for the first rise: Since you’ll be rolling this dough into a square later, save yourself the hassle and proof it in a square or rectangle container from the start. A glass casserole dish like this one works great, or I love using this 6L Brod & Taylor container (it fits perfectly in their proofing box).
- Use a 9×13 baking pan: I’ve been testing both a 9×13 and a larger 10×16 pan, and I think the 9×13 is the winner after all. With the smaller baking pan, the rolls nestle together as they rise, creating those soft, pull-apart edges we all love.
Baker’s Timeline
| DAY 1 | |
| 7-9 PM | Make the sweet starter |
| DAY 2 | |
| 8 AM | Cook the tangzhong |
| 9 AM | Mix the dough |
| 9:30 AM – 12:30 PM | First rise in a warm place (timing depends on the temperature) |
| 12:30 PM | Move the dough to the fridge |
| 9 PM (or before bed) | Make the filling, roll and shape the dough, and let it sit out overnight in a cool place Note: you can shape the rolls earlier in the evening if you prefer; just stick them back in the fridge until bedtime |
| DAY 3 | |
| 7 AM | Bake the rolls, coat with the maple wash, & make the icing |
| 8:30 AM | Ice and enjoy |
Regarding the baker’s timeline, a few testers made adjustments based on their home temperature.
For those with cooler homes, they simply had to wait longer:
“Worked great for me, just knew I could have a final counter rise that was longer as my house is cool” –Recipe tester from Cork, Ireland
“Due to the coolness in my kitchen it took a little longer to rise but over all just fine in the time” –Recipe tester from Muscle Shoals, Alabama
And for those with warmer homes, some actually skipped the fridge chill and baked these same day:
“I adjusted the timeline as my starter was very active and I wanted the rolls the same day” –Recipe tester from Central Florida
“I made adjustments, making it a one day bake” –Recipe tester from Akron, Ohio
“The suggested timeline works great, but honestly I could have made these same day! They were done fermenting in 6 hours at 75 degrees.” –Recipe tester from Ohio
Recipe Testing Process (Behind the Scenes)
This recipe testing journey isn’t quite as rocky as all the others on my website, and that’s because it’s a variation of an existing winner.
If you follow along with my recipe testing on social media, you know that it often takes fail after fail after fail to get to something decent… then fail after fail after fail to get to the winner.
Then, I send the recipe off to a group of over 2,500 sourdough recipe testers (y’all deserve a special seat in heaven), tweak and improve some more, and that’s the recipe you see on my website.
Whew. It’s a process.
With this one, I had the jumpstart of a cinnamon roll recipe that’s already perfected. My job now is to adjust it to accommodate pumpkin and all the flavors that come with it.
But I found that came with its own unique issues.
Recipe Test 1: Adding Pumpkin Puree
For my first recipe test, I did the obvious – added pumpkin puree to the main dough, threw in some pumpkin pie spice, and called it a day.
The cinnamon rolls were delicious. (Can you have a bad one, to be honest?!)

But… they were expected. Nothing new or fun. Just boring. Good, but boring.
That just wouldn’t do. So, unlike usual testing journeys, I was faced with a dilemma: this is a great recipe, but it doesn’t stand out. How can I improve it to be a true showstopper? Something you cannot wait to gift to friends, coworkers, and family?
If I can’t make the flavor profile more exciting, perhaps there’s something unique I can do here that others haven’t.
Perhaps I can create a recipe that uses an entire can of pumpkin puree, reducing food waste.
Recipe Test 2: Reimagining Pumpkin Cinnamon Rolls
I mulled over the ingredient list so much that I literally started dreaming of pumpkin cinnamon rolls.
No matter how I moved the ingredients around, added, removed, anything – I could not fit an entire can of pumpkin into a 12 cinnamon roll recipe. The only way to even get close – and even then, it’d be a gamble – is to take out all the moisture as I could, but that introduced new issues.
So, I went back to the drawing board, set on using half a can of pumpkin puree. That way, you can freeze the other half for another batch later, double the batch altogether, or make another recipe that uses the other half of the can (that’s why I developed these pumpkin waffles!).
And here I am faced again with the question: how can I make these pumpkin cinnamon rolls unique?
I started thinking about flavor combinations, and pumpkin/maple seemed like a great fit.
After my first test with an amped up maple flavor profile, I knew this was it. Another test with some maple extract added blew my socks off, and I sent it off to recipe testers.
Recipe Tester Feedback
This Pumpkin Spice & Maple Sourdough Cinnamon Roll recipe was put through its paces by 156 dedicated home bakers from around the world—and the results speak for themselves with an average rating of 4.70 out of 5 stars. An impressive 74.2% of testers gave it a perfect 5-star rating, and 84.8% said they’d highly recommend it to a friend (giving it a 5/5 on the recommendation scale).
Testers represented 6 countries including the USA, Canada, Australia, United Kingdom, Ireland, and Greece, spanning 31 US states from California to New York.
Whether you’re just starting your sourdough journey or you’ve been baking for years, this recipe delivers consistently soft, flavorful rolls that earn rave reviews. One tester summed it up perfectly: “The dough is a dream!”
The recipe is also very beginner-friendly. It has flexibility and margin for error.
“This recipe is so forgiving, so even though I wasn’t able to do the first rise as long, I stuck them in the fridge before the second rise and was able to do everything else as the recipe stated and they were perfect.” –Recipe tester from Phoenix, AZ
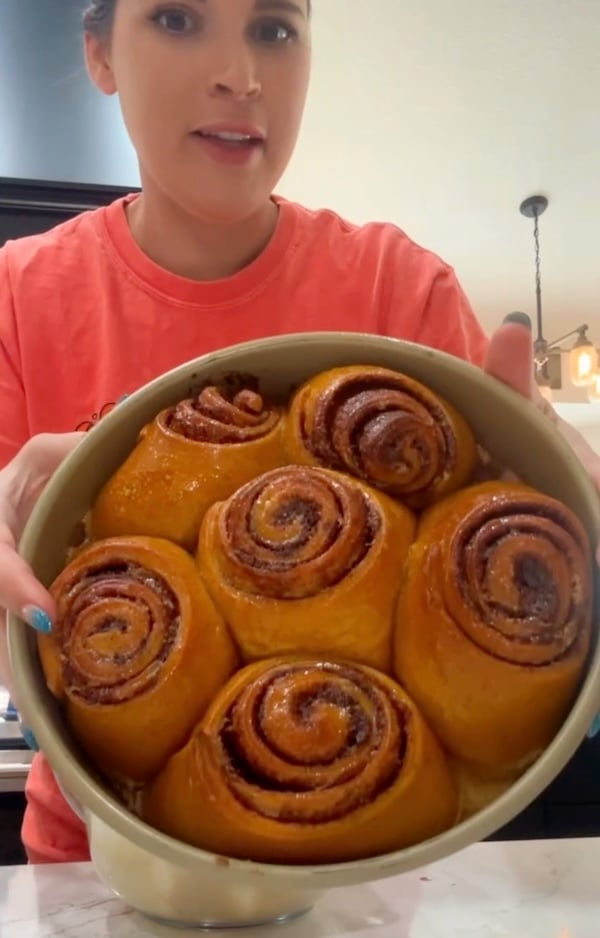
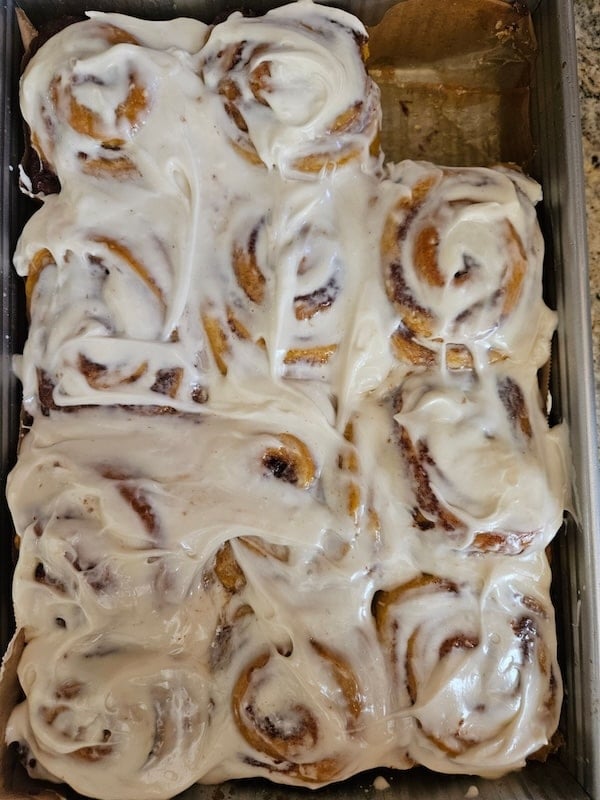
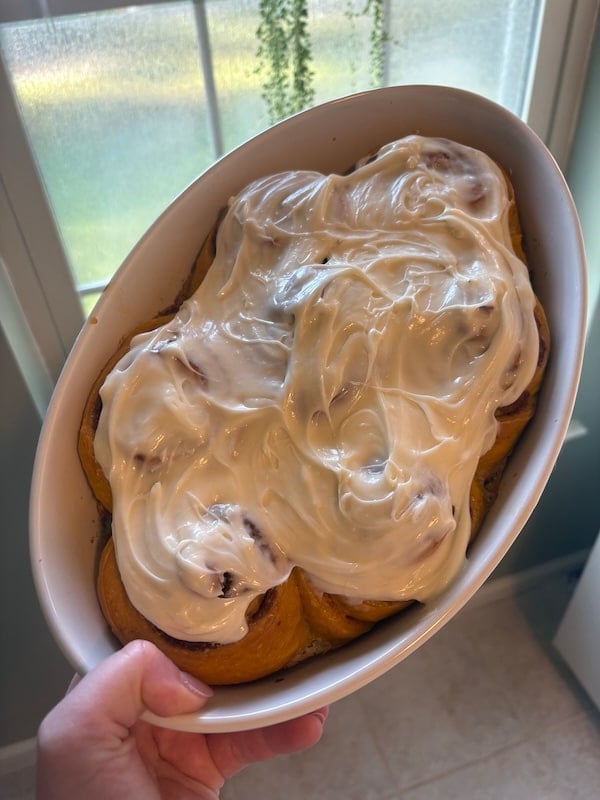
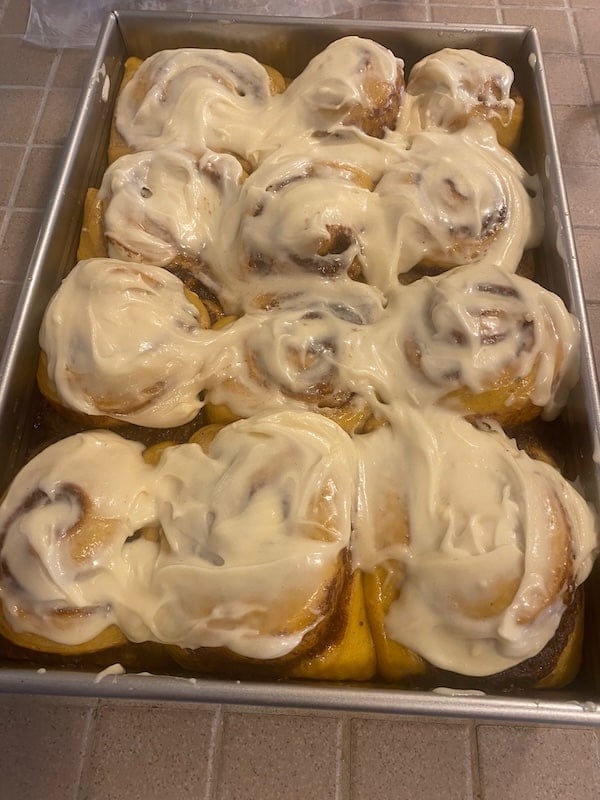
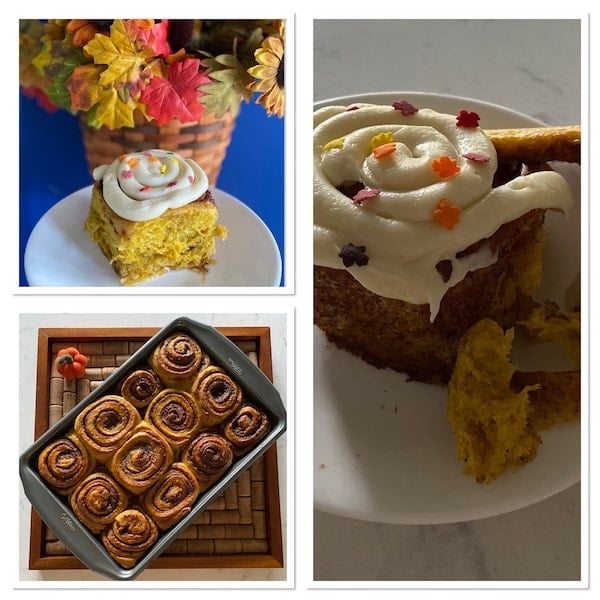
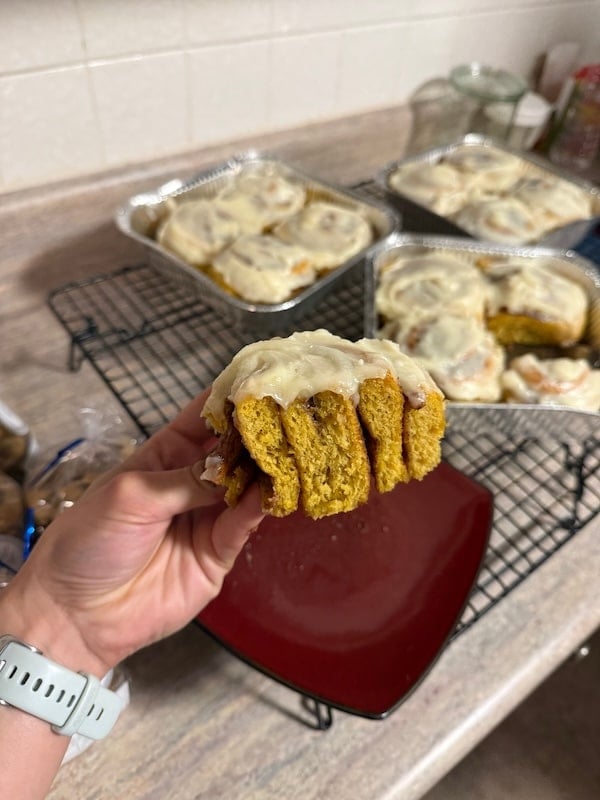
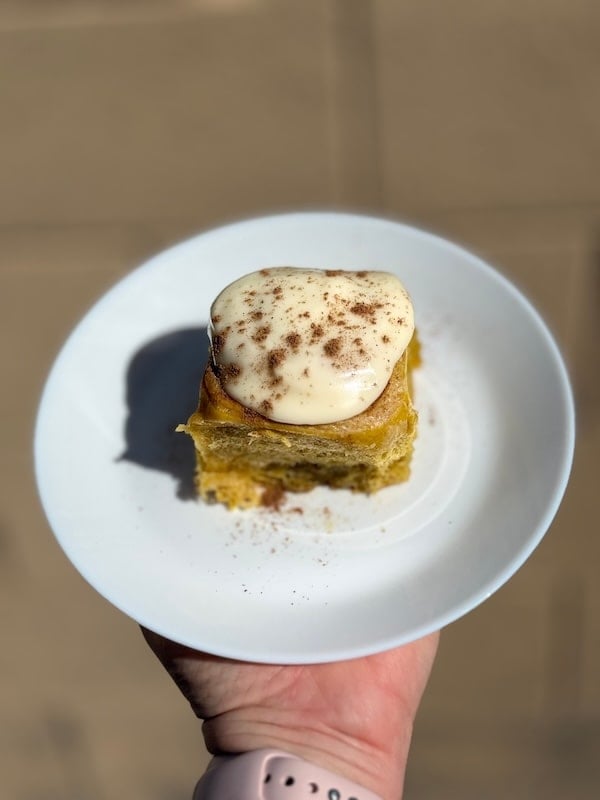
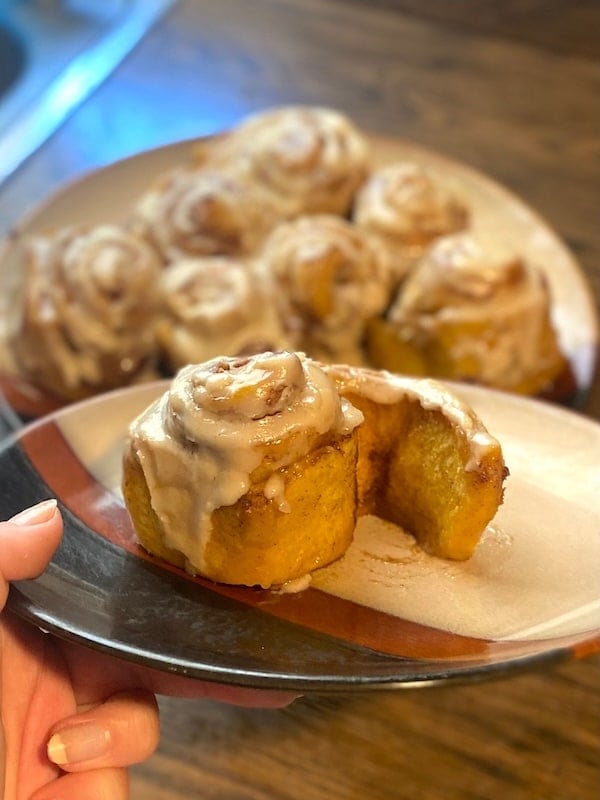
Here’s a look at just a few of the recipe testers’ photos:


How to Make Pumpkin Spice & Maple Sourdough Cinnamon Rolls
If you’re new to sourdough cinnamon rolls, or you just want to be sure this cozy pumpkin spice and maple version turns out amazing, this is the section to dig into.
I know it’s tempting to scroll straight to the recipe card, but this step-by-step guide is where you’ll find super detailed photos and tips.
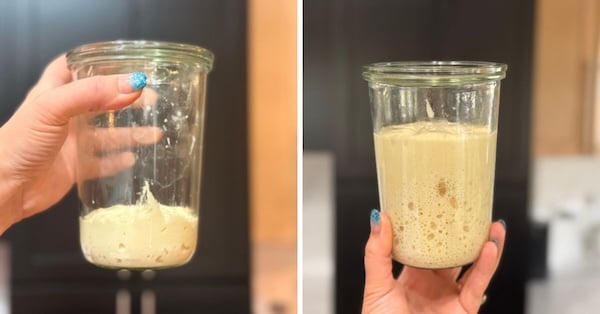
Step 1: Make the Sweet Starter (7-9pm)
In the evening, combine in a jar:
- 25 g sourdough starter (fed within the last 24 hours and bubbly)
- 25 g sugar (or honey)
- 65 g warm water
- 85 g bread flour
Cover loosely, and let it rest overnight at room temperature.

Why is this ratio different from other sweet, stiff starter recipes on your website? One of the main troubleshooting issues I help bakers with on recipes like these is the stiff, sweet starter. Bakers have trouble knowing when it’s at peak. I decided to increase the hydration a little bit, and it’s much easier to tell now when it’s ready to bake with. When it flattens out on top (and is about triple in size), you’re good to go.
By morning, the sweet starter should be tripled in size, be full of bubbles, and smell lightly sweet. This process takes 10-12 hours, depending on your kitchen temperature and the strength of your starter.
If it’s not there yet when you check it in the morning, give it extra time; it’s better to let it go a little past peak than to use it prematurely.
Tip: Set out your butter (84 g or 6 tbsp) so it’s softened when it’s time to mix your dough tomorrow.
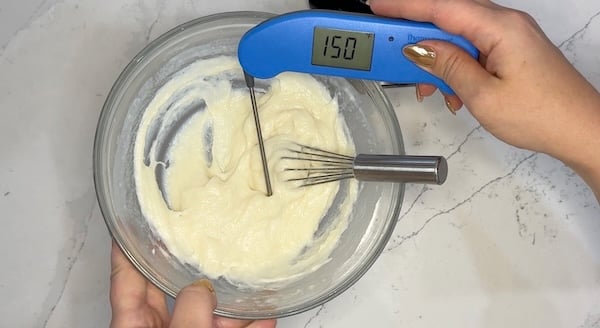
Step 2: Make the Tangzhong (morning)
In the morning, whisk together 35 g bread flour and 175 g whole milk in a microwave-safe bowl until smooth.
Note: you can make the tangzhong up to 2 days in advance. Hold in the fridge until you need it.
Microwave in 30-second bursts, whisking after each round, until it thickens into a glossy, pudding-like paste and hits about 150°F / 65°C. This usually takes me 4 rounds.
Set the tangzhong aside to cool until it’s below 80°F / 26°C before adding it to your dough. (If it’s too warm, it can kill your starter or scramble the egg.)
I recommend popping your tangzhong in the fridge for about 20 minutes. It’ll cool down while you measure out your other dough ingredients.
Tip: No microwave? Use the stovetop, whisking constantly over medium heat until the mixture thickens and reaches 150°F/65°C. Don’t walk away—this part comes together fast!
Want to know more? Check out my full tangzhong post for all the geeky details on why this method keeps your rolls soft for days.
Step 3: Mix the Dough
If you’re mixing by hand, scroll down slightly! There’s a whole section (with the beige background) dedicated to it.
In the bowl of your stand mixer (fitted with a dough hook), add the following:
- All of your stiff sweet starter — make sure it’s peaked before starting
- All of the tangzhong (cooled below 80°F / 26°C)
- 25 g cool water
- 1 egg
- 1 tsp cinnamon
- 1 tsp pumpkin spice blend
- 1 tsp vanilla extract
- 1 tsp maple extract optional
- 150 g pumpkin purée
- 515 g bread flour
- 12 g sea salt
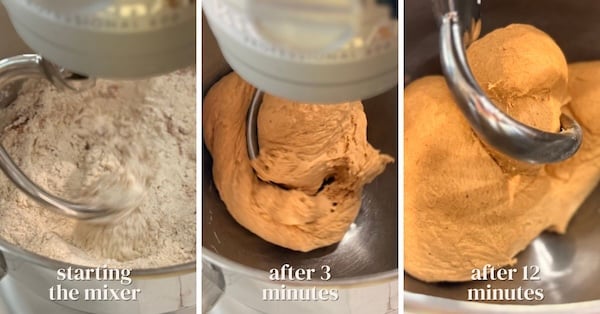
Mix on low speed for 2–3 minutes until all the ingredients come together and you have a very shaggy dough.
Related: Ooni vs Bosch vs KitchenAid vs Ankarsrum: Best Stand Mixer for Sourdough
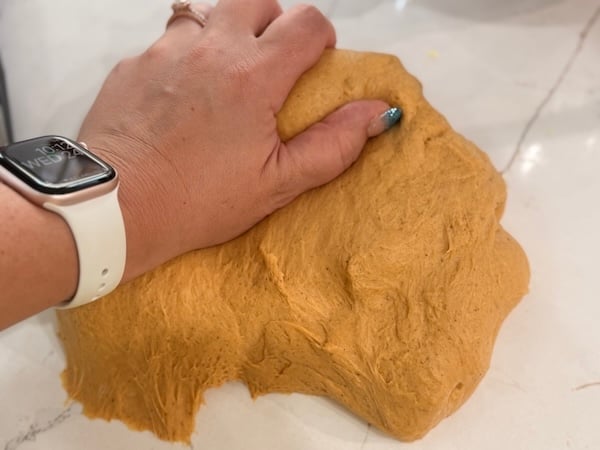
Knead and build strength: Turn the mixer up to medium-low (KitchenAid Speed 2) and knead for 7–15 minutes.

The exact time depends on your mixer, so go by visual cues:
- The dough will shift from bumpy and rough to smooth and almost silky
- It will feel elastic and supple instead of tearing easily
That change in texture is your cue that it’s strong enough for butter. Butter inhibits gluten development, which is why we are doing that work upfront before adding it.
If mixing by hand:
In a glass mixing bowl, combine all of your main dough ingredients, except for the butter and half & half. Knead the dough, switching to slap and folds for faster incorporation if desired. Cover and let rest for 30 minutes.
Spread all of your softened butter on top of the dough. Pinch and squeeze the butter into the dough (think of lobster hands!) until it’s mostly incorporated. Switch to slap and folds on your counter until the dough smooths out. This process takes 4-5 minutes. Cover and let rest for 30 minutes.
Finally, strengthen the dough for 2-3 minutes via stretch and folds, kneading, or slap and folds. Cover and resume at the First Rise step, understanding that you’re already 1 hour into the fermentation since we had two rest periods!
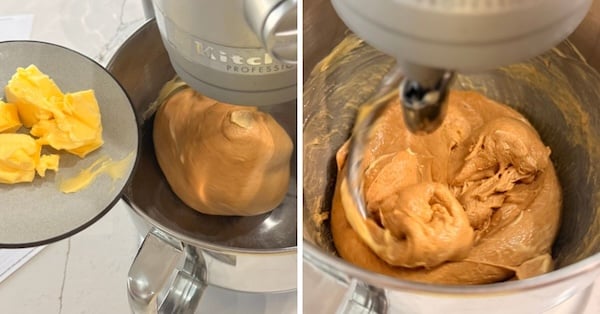
Incorporate the butter: Drop the speed to low and add 84 g softened butter one pat at a time. Wait until each piece is mostly absorbed before adding the next.
If the butter looks like it’s smearing around instead of mixing in, pause, scrape down the bowl, rotate the dough, and keep going.
You can also briefly increase the mixer speed to medium or medium-high to slap things around; then go back to low or medium-low.

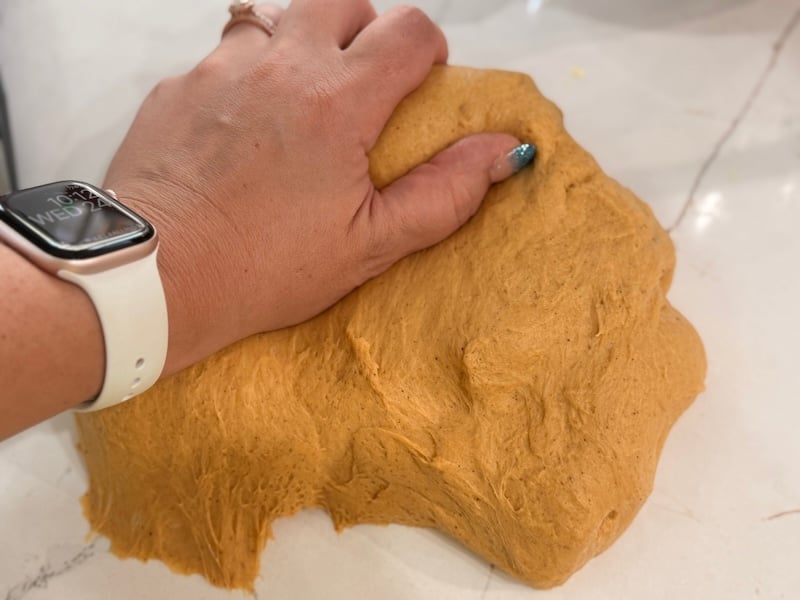
Once all the butter is added, continue mixing for 2–3 minutes until the dough looks super smooth, soft, and slightly tacky (but not sticky). It should clean the sides of the bowl and feel pillowy when you touch it.
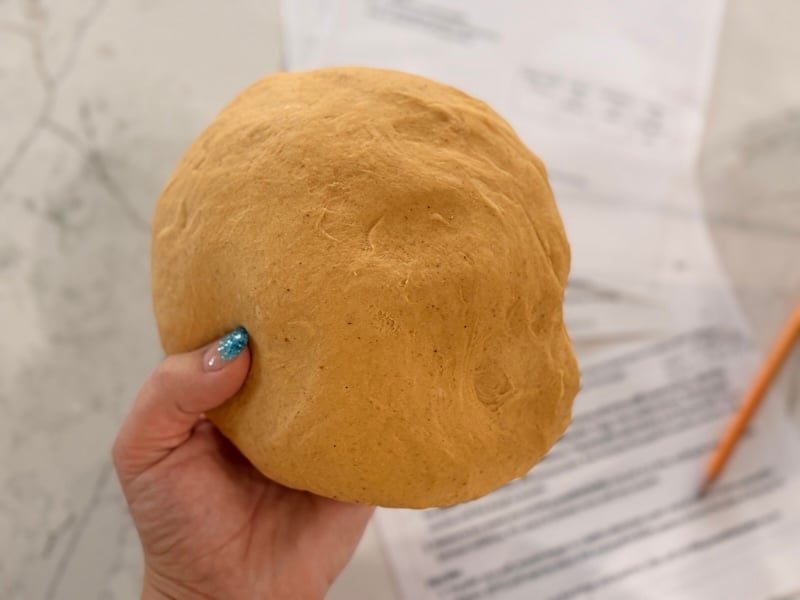
Give the dough a few kneads if needed to help smooth it into a cohesive ball.
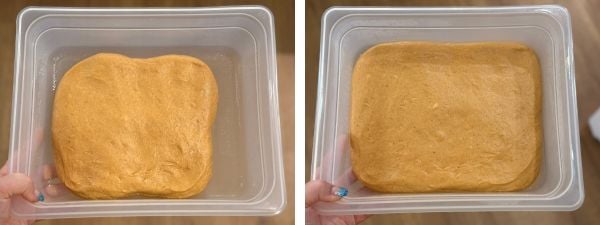
Step 4: First Rise
Transfer the dough into a lightly oiled rectangular tub (or mixing bowl), cover, and let it rest in a warm spot (75–85°F / 24–29°C).
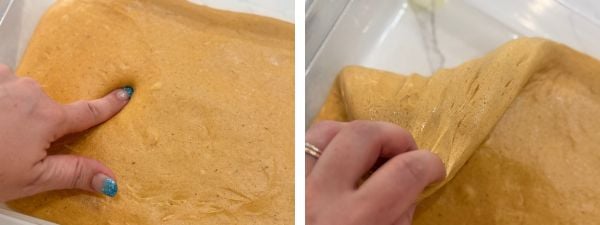
What you’re looking for: About a 30% increase in size, not a full double. The dough should feel puffier and show tiny bubbles around the edges and surface.

This rise usually takes 3–5 hours, depending on the strength of your starter and your kitchen temperature. In my 80°F (26°C) Brod & Taylor proofing box, this step typically takes about 3-3.5 hours.

Once you see those signs of fermentation, move the container to the fridge until evening. While it chills, set out 10 tbsp (142 g) of butter to soften for your filling later.
Step 5: Make the Filling
Timing note: once the dough has chilled (approximately 2-3 hours), you can make the filling and shape the rolls at any time. I don’t always have the energy to do this at bedtime, so I’ll shape the rolls around dinnertime when the kitchen is already a mess. Then, I’ll just pop the pan in the fridge until later. Be sure to set a timer so you don’t forget to bring them back out onto the counter for the overnight second proof!
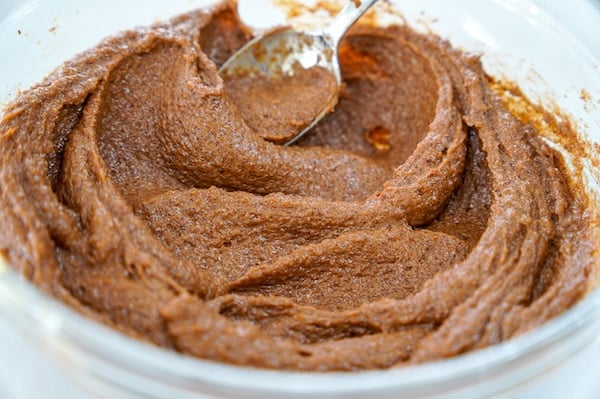
Before bed, pull your chilled dough out of the fridge. In a medium bowl, whisk together:
- 142 g softened butter
- 175 g brown sugar
- 8 g cinnamon + 8 g pumpkin spice blend
- 40 g pumpkin purée
Mix until it forms a soft, spreadable paste.

If your mixture isn’t spreadable (this is typically due to using American butter), you may find that microwaving the mixture for 5-10 seconds helps.
Step 6: Roll and Shape the Dough
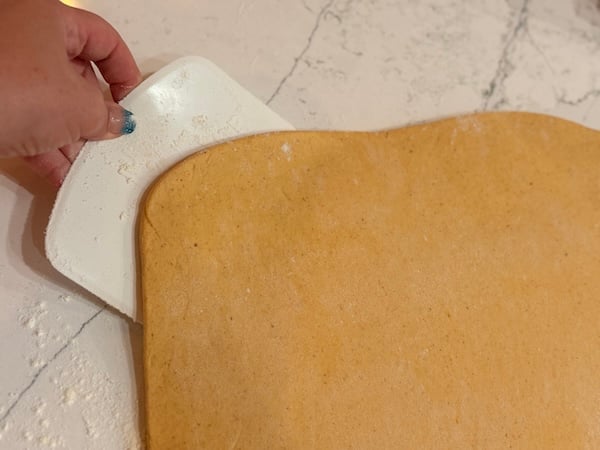
Generously flour your counter and turn out the chilled dough. Flour the top of the dough and your rolling pin as well.
Roll into a large square, about ¼″ thick and 19.5″x19.5″.
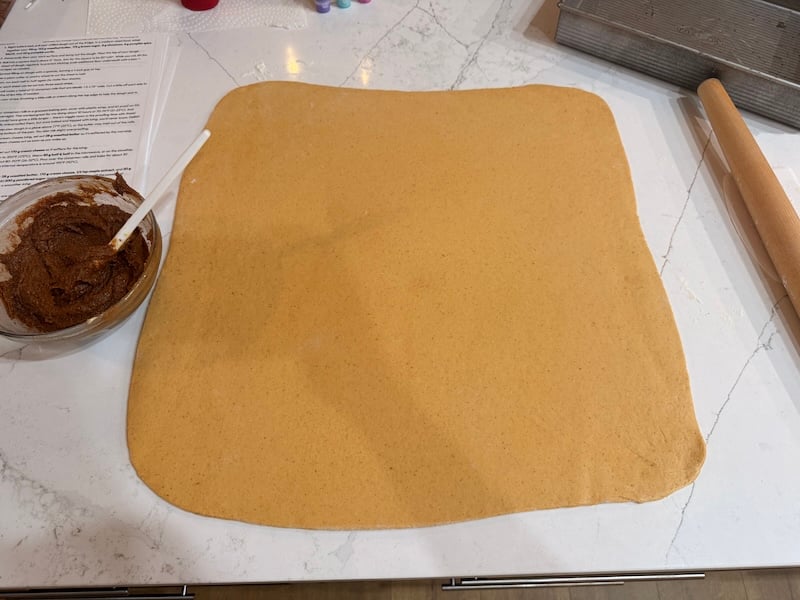
Why a square and not a rectangle? The more I make cinnamon rolls and experiment with the height and width of the dough sheet, the more I’m convinced a square is the way to go! This allows the cinnamon rolls to be wider and shorter in the pan, ensuring they maintain their shape and don’t tip over due to being too tall and skinny.
As you roll, lift the sheet with a bench scraper now and then to be sure it’s not sticking, dusting a little more flour underneath if needed.
If you want, you can trim off the uneven edges around the square.
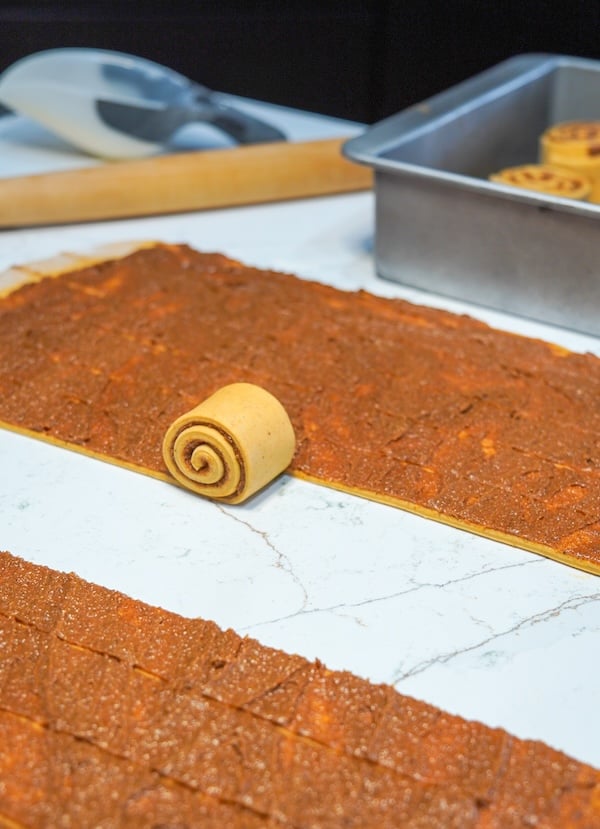
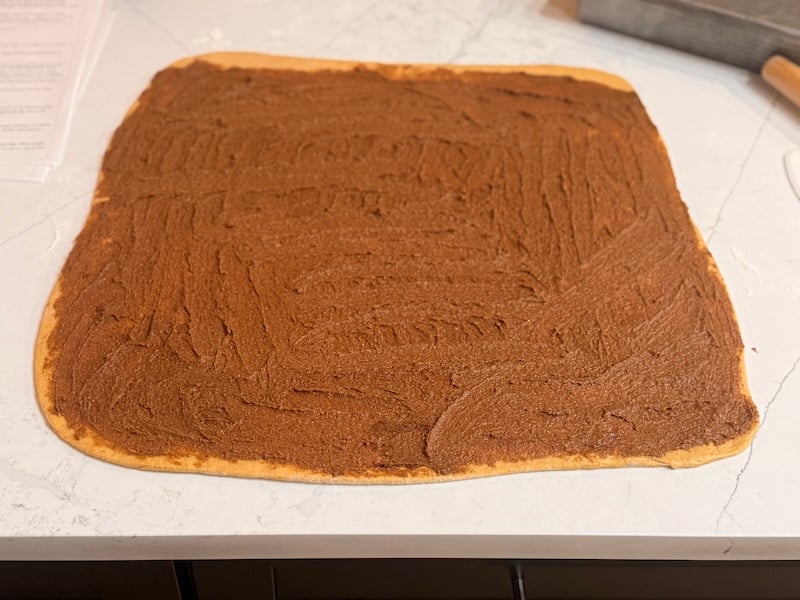
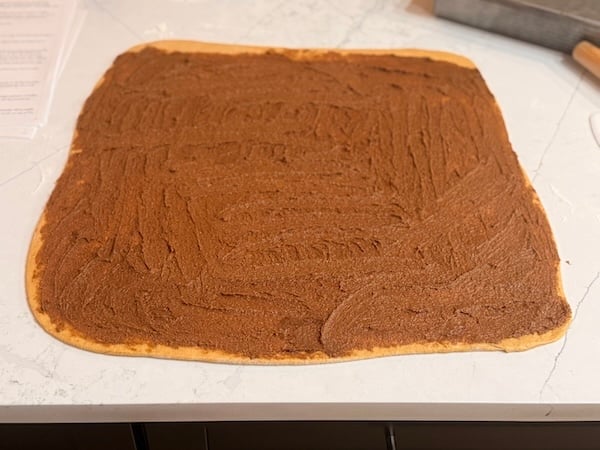
Spread the filling: Take your pumpkin-spice filling and spread it evenly over the dough. Go all the way to the bottom edge (this will be the center of the rolls) and out to the sides, but leave about a 1-inch gap along the top edge so you can seal the rolls shut.
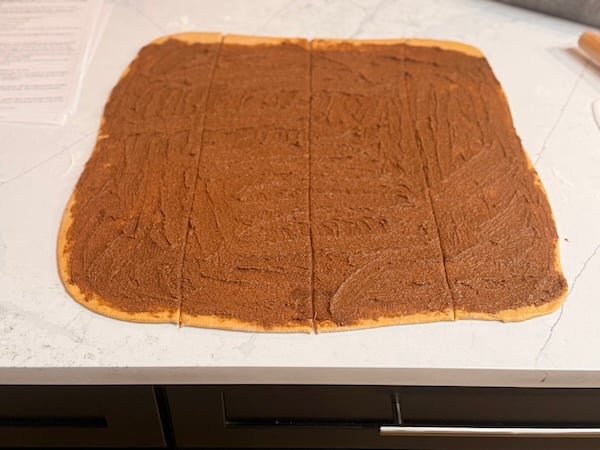
Use a pizza cutter or pastry wheel to cut the sheet in half. If you rolled your dough sheet to the suggested dimensions of 19.5″x19.5″, you’d cut at the 9¾ mark.
Then cut each half in half again – at 4⅞ and 14⅝ – giving you four equal sheets.

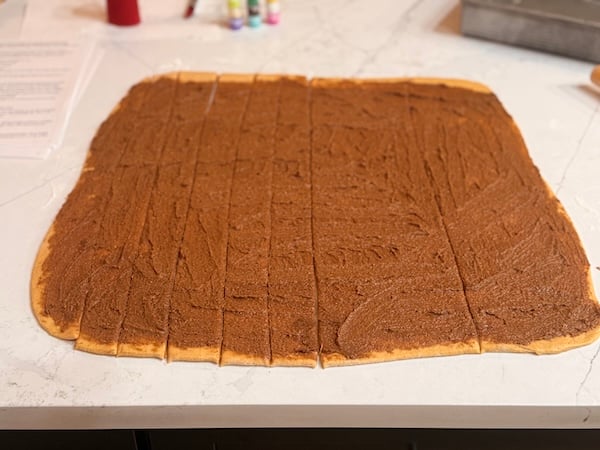
Cut each of those four sections into three equal strips (1.5–2″ wide):
- 1⅝”
- 3¼”
- 4⅞” (already cut)
- 6½”
- 8⅛”
- 9¾” (already cut)
- 11⅜”
- 13″
- 14⅝” (already cut)
- 16¼”
- 17⅞”

This makes 12 strips total. Trim the edges if needed so the strips are tidy.

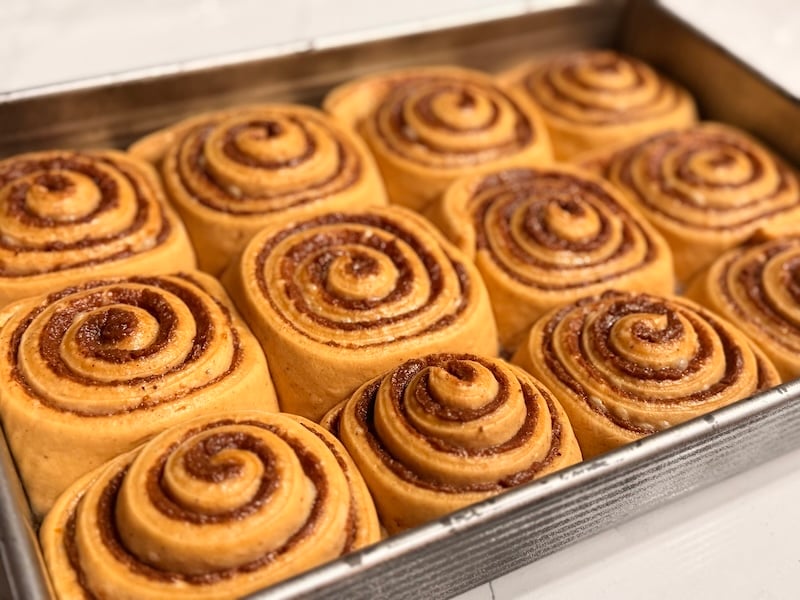
Starting from the bottom edge, roll up each strip into a spiral. Brush a little milk or cream along the top edge to help it seal, if you’d like. You’ll end up with 12 cinnamon rolls.

Alternate shaping method: If you don’t love the strip method, you can go traditional—roll the whole sheet into one big log, then cut 12 even rolls with a bench scraper or dental floss. Both ways work, but the strip method gives a beautiful, even spiral. It’s also more fun 🙂
Place your rolls in a greased baking pan. I usually use avocado oil spray or just rub in whatever butter’s left on a wrapper.

For pan size, a 9″ × 13″ is perfect. I also sometimes use the USA Pan that’s 10″ × 16″ (internal dimensions 13.75″ × 10″). But I’m finding that I’m preferring the slightly smaller 9″ x 13″ pan.
Tip: If making the cream cheese icing, set out 28 g unsalted butter so it’s softened by the morning. We’ll set the cream cheese out as soon as you wake up.
Step 7: Overnight Proof
Cover the pan tightly with plastic wrap and let the pumpkin cinnamon rolls rise on the counter overnight.
This works great for me, doing about 10 hours at 70-74°F (21-23°C). And honestly, I could have gone a little longer – there’s wiggle room in the proofing time with these! Once, I really overproofed them, but once baked and topped with icing, you’d never know. Delish!
Home temperature note: Try not to keep your dough in a place above 77°F (25°C), or the butter may melt out of the rolls, puddling in the bottom of the pan. You also risk slight overproofing. I probably would not proof these on the counter overnight if my home were any warmer than 75°F (24°C).
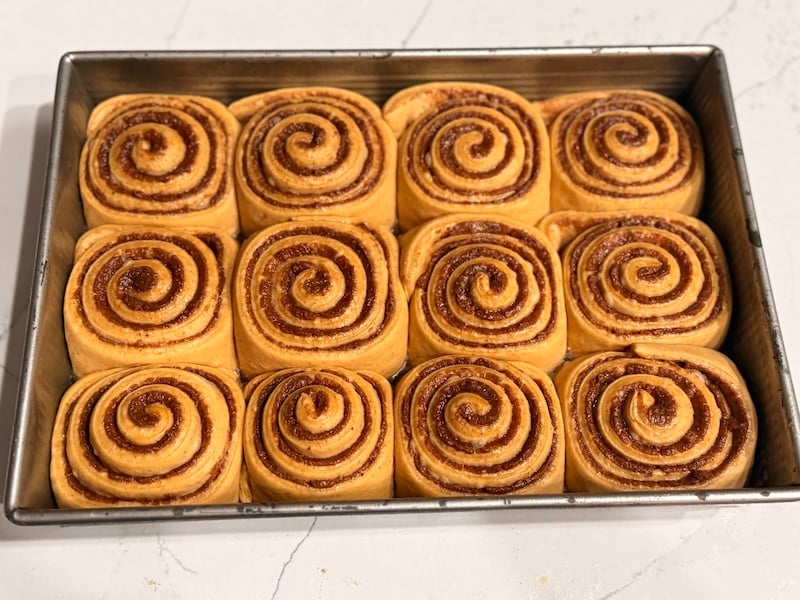
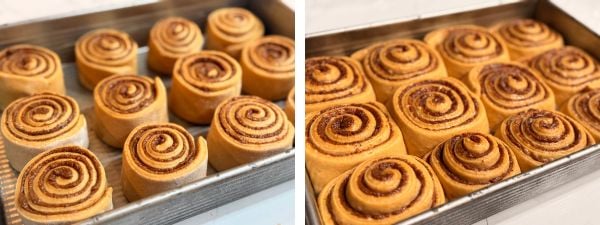
By morning, the rolls should look noticeably puffier, fill most of the pan, and be touching each other.
Under/overproofing tips:
- If your home is cool and the rolls don’t look fully puffed up, move the pan somewhere warmer and let them keep rising until they do.
- If they look overproofed (deflating, breaking apart, or starting to collapse), bake right away.
- For next time: keep them in a cooler spot overnight, or do the second rise during the day when you can check in more often.
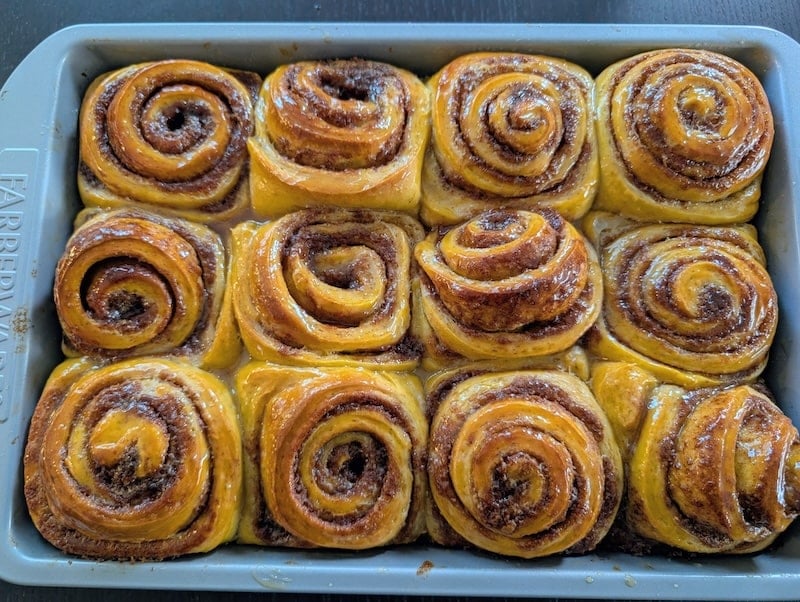
Step 8: Bake
Preheat your oven to 350°F (175°C) conventional.
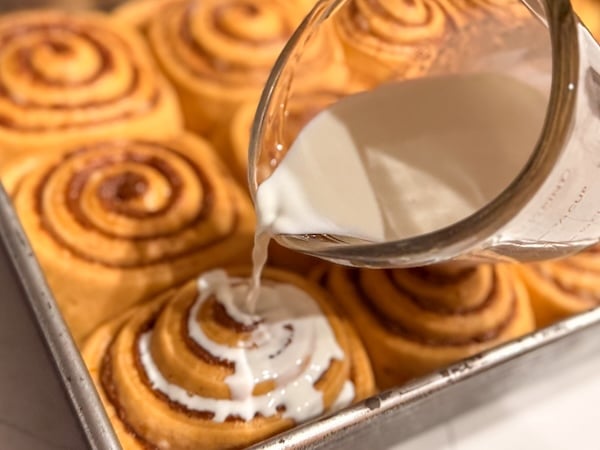
Warm 85 g half & half (or heavy cream) in the microwave for 10-15 seconds, or until it reaches about 80-90°F (26-32°C). Pour over the cinnamon rolls.
Half and half is a US dairy product that’s half milk, half cream (10-12% fat). Substitute with single cream, or mix equal parts whole milk and heavy cream.
This soaks into the dough and makes the bottoms wonderfully gooey, almost caramel-like. The pumpkin purée in the dough already adds extra moisture, so this step takes the gooey factor up another notch. If you prefer a slightly less sticky-bottomed roll, you can skip it.
Bake for 25–30 minutes, or until the tops are golden brown and the centers register around 195°F (90°C).
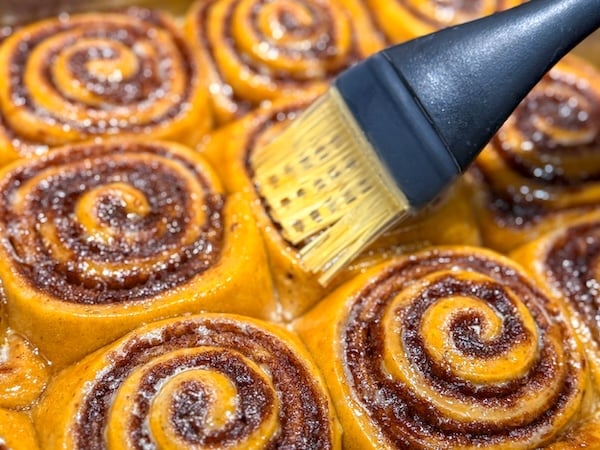
Step 9: Make the Maple Wash
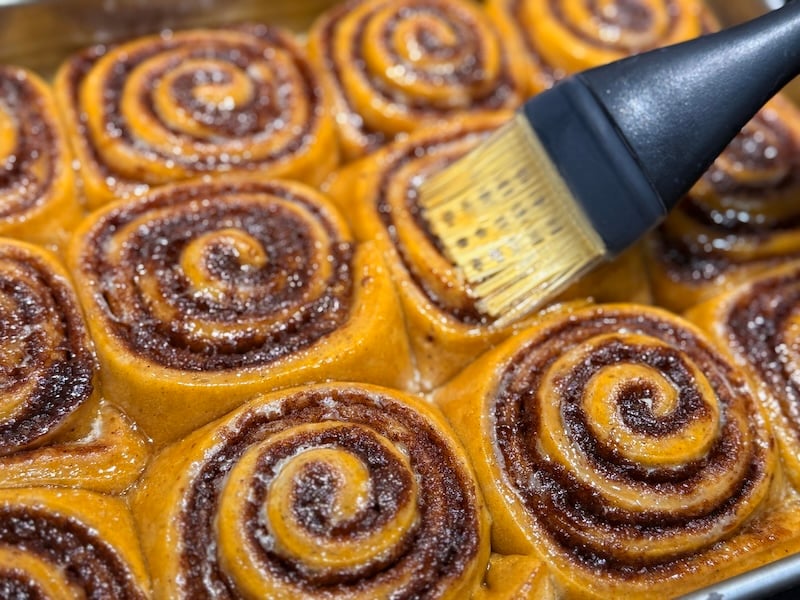
When the cinnamon rolls are almost done baking, whisk together 20 g melted butter, 20 g maple syrup, 1 tsp maple extract, and a Pinch of salt in a small bowl.
Immediately brush on top of the hot cinnamon rolls when they come out of the oven.
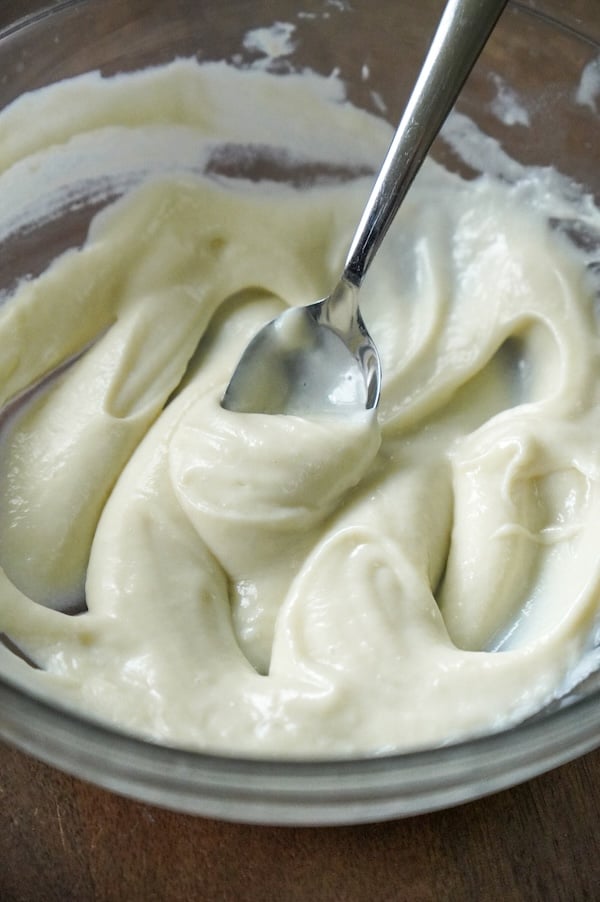
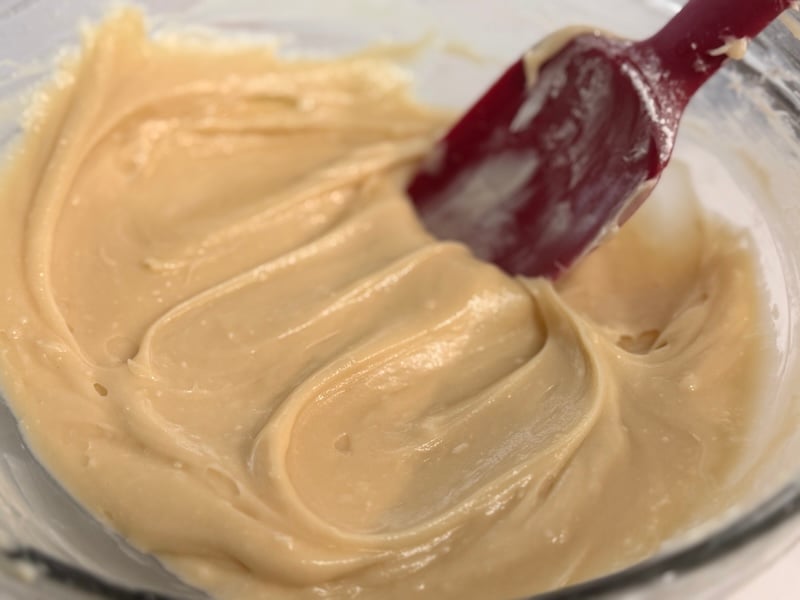
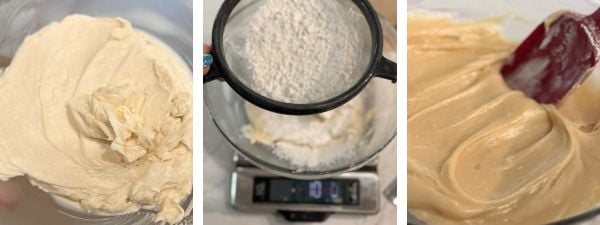
Step 10: Make the Maple Cream Cheese Icing
In a bowl, whisk together 28 g softened unsalted butter, 170 g softened cream cheese, 20 g maple syrup, and 1 tsp maple extract (optional) until smooth. (A hand mixer works great if a whisk isn’t cutting it.)

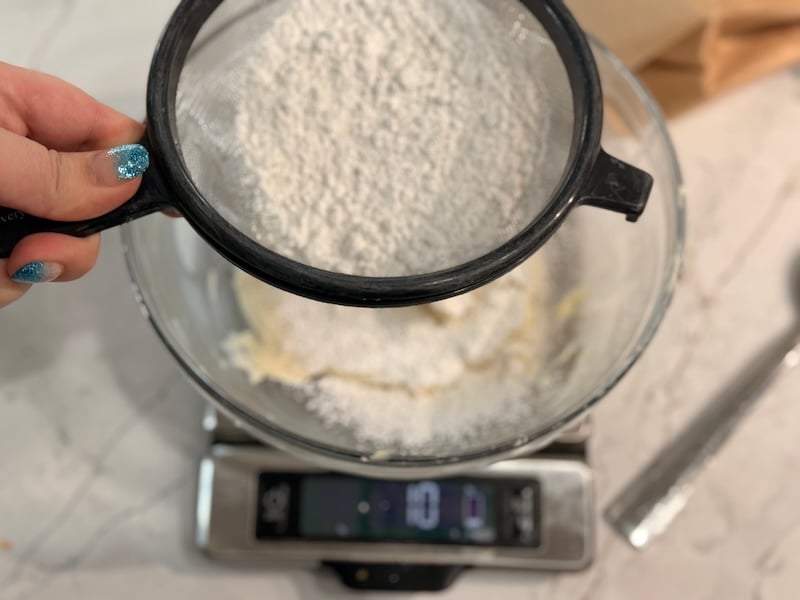
Sift in 200 g powdered sugar + a pinch of salt and continue whisking until silky smooth.
It should be spreadable, but still soft enough to spoon over the rolls.
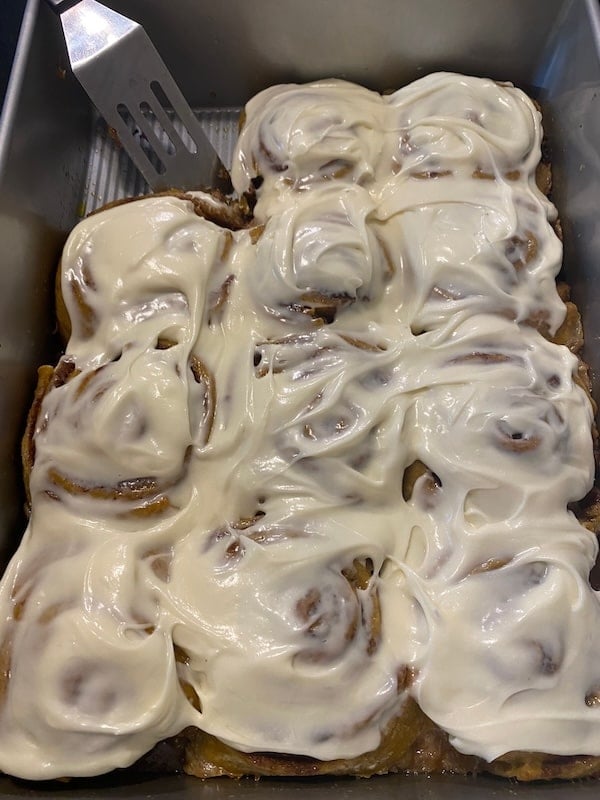
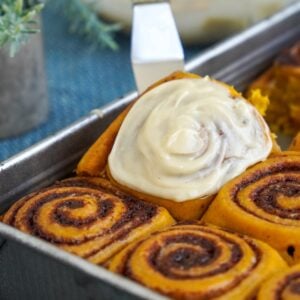
Step 11: Ice and Enjoy
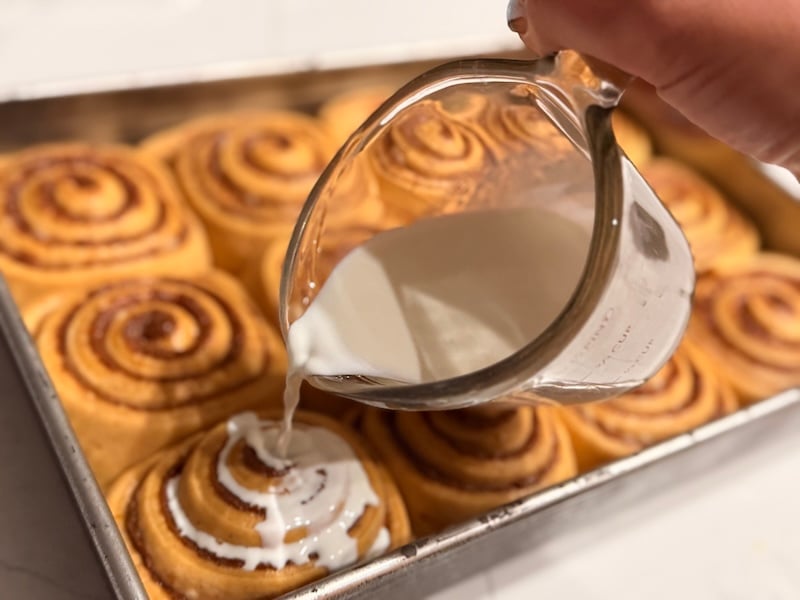
Let the rolls cool in the pan for about 10 minutes before icing. This keeps the topping from melting straight off while still letting it sink into the warm spirals.
Spread your maple cream cheese icing generously over the tops. Dig in while they’re still warm and gooey.
Storage Instructions
Because these rolls are usually topped with cream cheese icing, they technically should be refrigerated. That gives you two main storage options:
Option 1: Store rolls and icing separately
Keep the rolls tightly covered at room temperature for up to 3 days (thanks to the tangzhong, they stay soft and fluffy). Store the icing in the fridge, and add it when you’re serving. This way, you avoid the fridge drying out your rolls, while still keeping the icing food-safe.
Option 2: Store them iced in the fridge
Cover the pan tightly and refrigerate for up to 5 days. The rolls will firm up a bit in the cold, so warm them gently before serving to bring back that pillowy texture.
My honest take: Growing up, leftover cinnamon rolls never made it to the fridge at my house, even with cream cheese frosting on top. If your kitchen is cool and you know you’ll eat them within a day or two, keeping them tightly covered on the counter works just fine. (Not the official food-safety line, but it’s what many of us do.)
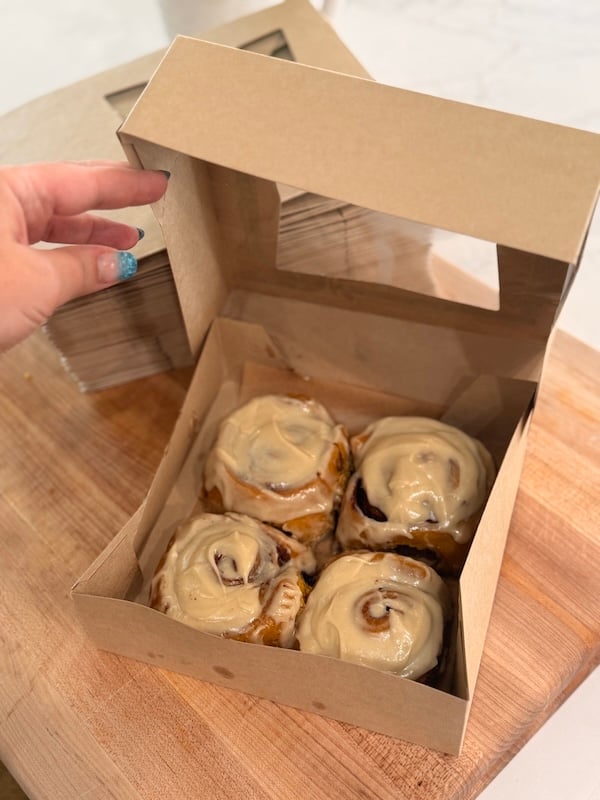
If you’re planning to share your cinnamon rolls, here are some of my favorite boxes. These boxes fit 4 cinnamon rolls, and these boxes fit a single cinnamon roll.
Reheating Tip
A quick 10–15 seconds in the microwave or a few minutes in a warm oven will bring back that soft, gooey just-baked texture (works if stored at room temp or fridge).
How to Freeze These Cinnamon Rolls
Who doesn’t want pumpkin spice sourdough cinnamon rolls ready to pull from the freezer on a random chilly morning? Here’s how to make that happen:
Option 1: Freeze after baking
Let the rolls cool completely, then wrap the pan in two layers of plastic wrap and a layer of foil. They’ll keep well for 2–3 months. When you’re ready, thaw overnight in the fridge and warm (covered with foil) at 350 °F (175 °C) for 15–20 minutes. You can freeze them with icing or without.
Option 2: Freeze unbaked
Instead of the overnight proof, cover the shaped rolls tightly and pop the pan straight into the freezer. Make the icing and freeze it in a zip-top bag.
When you’re ready to bake, pull the frozen pan out the night before and let the rolls thaw and rise on the counter. By mid-morning, they should be puffed and ready for the oven. If they need more time, just let them hang out in a warm spot until they catch up. Snip the corner of the icing bag and pipe it right on once they’re baked.
My honest take: I’ve tested this second method, and the rolls came out so good you’d never know they were frozen. But for ease and zero stress, freezing fully baked rolls is still my preference. It’s unclear just how long the wild yeast will survive in the freezer.
FAQs
No! The tangzhong is what helps these rolls feel pillowy soft, and it prevents staling for days. If for some reason you skip it, expect a firmer texture.
Tent the pan with foil midway through baking.
Absolutely. Many testers used 2% milk, almond milk, cashew milk, soy milk, and even cream/skim blends with success. (See “Substitutions” above.)
Yes! There are alternate options. Check the “Substitutions” section earlier in this post for two alternate icing ideas.
Yep! See the “Freezing” section above. You can freeze fully baked or partially baked rolls. For freezing raw dough, thaw and let it finish rising before baking.
This is not a sticky dough, so if yours feels that way, you need more flour. Add flour in 1 tbsp increments until the texture matches mine (compare your dough with my photos).
Absolutely! Many testers didn’t have maple extract and still gave the recipe 5 stars. However, those who used it were blown away by the flavor difference. If skipping it, consider doubling the maple syrup in both the wash and icing to boost that maple flavor.
Yes! We’re only looking for about a 30% rise, not a full double. As long as you see some bubbles and the dough feels puffier, you’re good to move on. Several testers noted their first rise seemed slow, but the rolls still turned out perfectly.
One tester accidentally used pumpkin pie filling and reported the rolls still turned out great, though the flavor was slightly different due to the added spices and sugar in pie filling.
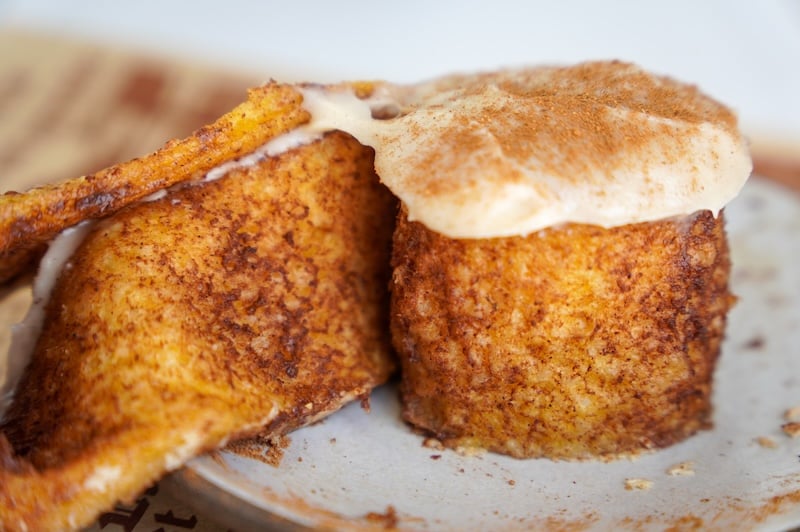
Yes! One of the recipe testers did just that: “I had a church mom’s event and decided to make ‘minis’ so they were more bite-sized. I cut each strip in half and ended up with 24 ‘mini cinnys’ lol I used the USA pan originally, but then opted for two standard muffin pans for the second batch. They turned out phenomenal!!! The flavor is out of this world. The amount of butter in these is 🤌🏼😂Thank you for a wonderful recipe!” –Recipe tester from Austin, TX
Absolutely. One tester said: “Definitely. They are so good. I just did the maple wash, no icing, and they are just perfect like this.” –Recipe tester from Houston, TX
There is so much sweetness in every other component of this recipe that leaving it out of the dough really helps with balance. The majority of recipe testers thought the sweetness was just right, but you are welcome to add some sugar to the main dough if you like.
Yes, it would be lovely to sprinkle chopped pecans on the cinnamon roll filling before rolling these up! Refer to the Recipe Notes at the end of the recipe card for a maple pecan glaze option that would pair perfectly.
Yes, it is likely just butter that has melted out of the filling. This is no cause for alarm. It will absorb into the cinnamon rolls as they bake!
This happens to me on occasion, too. I’ve found the two best things to help prevent this clumping issue are 1) slightly warming the half & half before pouring it onto the rolls, and 2) using a 9×13 pan and ensuring the rolls are fully filling it up before baking – that way, there aren’t crevices for the half & half to puddle in. The intention is for the rolls to absorb the mixture as they bake, helping to prevent dryness.
Absolutely. There is a scaling button on the recipe card where you can select 0.5x to scale the ingredients down. I suggest a round cake pan, as it fits 6 cinnamon rolls well.

Tips from Recipe Testers
After testing with 156 bakers, here are the top tips that kept coming up:
- Don’t stress about perfect proofing. Multiple testers accidentally overproofed their rolls (including me in one test bake) and reported they still turned out delicious once baked and iced. The recipe is forgiving!
- Adjust the icing quantity to suit you: 66% of recipe testers said the amount of icing is perfect. 19% said they’d reduce the amount by 25%, and 11% said they’d reduce the amount by half. Only 4% said they’d want more icing.
- Adjust the amount of pumpkin spice to suit you: same story with the pumpkin spice flavor – 67% of testers said the recipe as written has the perfect amount of pumpkin flavor. However, 33% of testers said they’d like more. While we can’t squeeze any more pumpkin purée into this recipe, you can definitely double up on the pumpkin spice blend.
- Use a thermometer. Several bakers mentioned their rolls needed a few extra minutes in the oven. Check that internal temperature—you’re looking for 195°F (90°C) in the center. I overbaked mine to 210°F (99°C) once and they still tasted great.
- The maple extract is worth it. This came up repeatedly. Testers who skipped it wished they hadn’t, while those who used it raved about the flavor boost.
- Butter leaking during overnight proof: A few testers woke up to melted butter pooled in the bottom of their pan. This isn’t a huge deal, so don’t worry about it! It will absorb back into the rolls during baking.
“My youngest son doesn’t care for pumpkin, and he DEVOURED 3 of them… he is very picky, so that is saying something!” –Recipe tester from Southwest Louisiana
Pumpkin Spice & Maple Sourdough Cinnamon Rolls
Equipment
- 3/4 L Weck jar (for your starter)
- Tovolo spatula (to feed your starter)
- Stand mixer (with dough hook)
- Rectangular tub (for proofing – a bowl is also fine)
- Pizza Cutter (or pastry wheel)
- 9" x 13" baking pan (or two round cake pans)
Ingredients
Sweet Starter
- 25 g sourdough starter ideally, fed within the last day – needs to be healthy!
- 25 g sugar or honey
- 65 g warm water
- 85 g bread flour
Tangzhong
- 35 g bread flour
- 175 g whole milk
Main Dough
- All of the sweet starter
- All of the tangzhong
- 25 g cool water
- 1 egg
- 1 tsp cinnamon
- 1 tsp pumpkin spice blend
- 1 tsp vanilla extract
- 1 tsp maple extract optional
- 150 g pumpkin purée
- 515 g bread flour
- 12 g sea salt
- 84 g unsalted butter softened and added after the initial mix
- 85 g half & half for pouring over the rolls
Filling
- 142 g unsalted butter softened
- 175 g brown sugar
- 8 g cinnamon
- 8 g pumpkin spice blend
- 40 g pumpkin purée
Maple Wash
- 20 g melted butter
- 20 g maple syrup
- 1 tsp maple extract optional
- Pinch of salt
Maple Cream Cheese Icing
- 28 g unsalted butter softened
- 170 g cream cheese softened
- 20 g maple syrup (double if not using maple extract)
- 1 tsp maple extract optional
- 200 g powdered sugar
- Pinch of salt
Before You Begin

Instructions
Make the Sweet Starter
- In the evening (7-9pm), mix together 25 g sourdough starter, 25 g sugar, 65 g warm water, and 85 g bread flour. Cover the jar loosely and let ferment on the counter until morning.

- Set out 84 g unsalted butter for the main dough so it's softened by morning.
- Note: You can make the tangzhong (see next step) right now and refrigerate it overnight, if preferred.
Make the Tangzhong
- In the morning, mix 35 g bread flour and 175 g whole milk in a microwave-safe bowl. Microwave in 30-second intervals, stirring between each, until thickened and reaches 150°F (65°C). For me, it usually takes 3-5 rounds to finish.

- Let rest on the counter (or in the fridge) until the mixture has cooled down to below 80°F (26°C). If it's too hot, it can kill your starter or scramble the egg in the dough.
Make the Dough
- If mixing by hand, refer to the Notes at the end of this recipe card.
- In a stand mixer bowl fitted with a dough hook, combine All of the sweet starter, All of the tangzhong, 150 g pumpkin purée, 25 g cool water, 1 egg, 1 tsp cinnamon, 1 tsp pumpkin spice blend, 1 tsp vanilla extract, 1 tsp maple extract, 515 g bread flour, and 12 g sea salt. Mix on the lowest speed for about 3 minutes, or until ingredients are fully incorporated. Then, increase the speed slightly (Speed 2 for KitchenAid owners) for 7-15 minutes, or until the dough's surface is smooth.
- If your stand mixer is hot and needs a break, cover the bowl and come back to this step in 10-15 minutes. At a low speed, add 84 g unsalted butter one pat at a time, waiting for incorporation between additions. You might need to stop the machine occasionally to rotate the dough – some mixers tend to spin the dough on top of the butter versus mixing it into the dough. If needed, increase to a medium speed (Speed 4 on a KitchenAid) for about 15 seconds to move things along. Once the butter is fully incorporated, continue mixing at a low speed for about 2 minutes more, or until very smooth.
- Bring the dough out onto your counter and give it a quick knead.

First Rise
- Transfer your soft, smooth dough to a lightly oiled container (a square or rectangle shape is preferred over a bowl!), cover, and let rise in a warm place (75-85°F/24-29°C) for 3-5 hours. In my proofing box set to 80°F (26.5°C), this took 3 hours and 15 minutes.

- We want the dough to rise by about 30% with small bubbles appearing just under the surface of the dough. It should feel soft and pillowy.
- Place the container of dough in the fridge until bedtime. Also, set out 142 g unsalted butter so it's softened to make your filling later!
Shape the Rolls
- Right before bed, pull your chilled dough out of the fridge. Grease a 9×13 baking pan (or two round cake pans if you want to split them 6 and 6).Timing note: You don't have to wait until just before bed to shape the cinnamon rolls. You can shape them anytime in the evening—just put the shaped rolls back in the fridge until bedtime. This reduces the risk of overproofing by minimizing counter time. Set a timer so you don't forget to pull them out before bed!
- In a medium-sized bowl, whisk together your filling: 142 g unsalted butter, 175 g brown sugar, 8 g cinnamon, 8 g pumpkin spice blend, and 40 g pumpkin purée.

- Generously flour your work surface and dump out the dough. Flour the top of your dough.
- With a rolling pin, roll into a square that’s about 19.5"x19.5". While you roll, lift the sheet of dough regularly to prevent sticking; push additional flour underneath with a bench scraper as needed.
- Spread filling on dough with a spatula, leaving a 1-inch gap at top.
- Use a pizza cutter or pastry wheel to cut the sheet in half. Then, cut each half in half again (to make four sheets).
- Now, each sheet can be cut into three equal strips. If you've used a ruler and aren't comfortable eyeballing the cuts, here are all your cut marks: 1⅝", 3¼", 4⅞", 6½", 8⅛", 9¾", 11⅜", 13", 14⅝", 16¼", 17⅞"
- This will make a total of 12 cinnamon rolls that are ideally 1.5-1.75" wide. Cut a little off each side to keep the strips tidy, if needed.
- Roll up your strips, brushing a little milk or cream along the top edge to help the dough seal to itself. Place the shaped rolls in your baking pan.

Second Rise
- Cover your pan with plastic wrap, and let proof on the counter overnight. This worked great for me doing about 10 hours at 70-74°F (21-23°C). And honestly, I could have gone a little longer – there's wiggle room in the proofing time with these! Once, I really overproofed them, but once baked and topped with icing, you'd never know. Delish!
- Try not to keep your dough in a place above 77°F (25°C), or the butter may melt out of the rolls, puddling in the bottom of the pan. You also risk slight overproofing.
- If making the cream cheese icing, set out 28 g unsalted butter so it's softened by the morning. We'll set the cream cheese out as soon as you wake up.
Bake
- In the morning, set out 170 g cream cheese so it softens for the icing.
- Preheat your oven to 350°F (175°C) conventional. Warm 85 g half & half in the microwave for 15 seconds, or until it reaches about 80-90°F (26-32°C). Pour over the cinnamon rolls and bake for about 25-30 minutes, or until the internal temperature is around 195°F (90°C).
Maple Wash
- When the cinnamon rolls are done baking, whisk together 20 g melted butter 20 g maple syrup, 1 tsp maple extract, and a Pinch of salt in a small bowl. Brush the wash on top of the hot cinnamon rolls when they come out of the oven. This helps with added moisture and another hint of maple flavor.
Icing
- Icing: Whisk together 28 g unsalted butter, 170 g cream cheese, 1 tsp maple extract, and 20 g maple syrup. Then, add 200 g powdered sugar and a Pinch of salt. Note: sift the powdered sugar when adding for a smoother icing. Also note: some test bakers required a stand mixer or hand beaters – if you're using room temperature ingredients and European-style butter, this is very easy to whisk by hand.
- Let the rolls cool for about 5-10 minutes before adding your icing. Enjoy!
Storage
- Store un-iced rolls covered at room temperature for up to 3 days (store cream cheese icing separately in fridge), or refrigerate iced rolls for up to 5 days.
- For longer storage, freeze baked rolls (wrapped well) for up to 3 months—thaw in fridge overnight and reheat at 350°F (175°C) for 15-20 minutes. You can also freeze unbaked shaped rolls and let them thaw/rise overnight on the counter before baking. Reheat any stored rolls briefly in the microwave or warm oven to restore softness.
Video

Notes
- In a glass mixing bowl, combine all of your main dough ingredients, except for the butter and half & half. Knead the dough, switching to slap and folds for faster incorporation if desired. Cover and let rest for 30 minutes.
- Spread all of your softened butter on top of the dough. Pinch and squeeze the butter into the dough (think of lobster hands!) until it’s mostly incorporated. Switch to slap and folds on your counter until the dough smooths out. This process takes 4-5 minutes. Cover and let rest for 30 minutes.
- Finally, strengthen the dough for 2-3 minutes via stretch and folds, kneading, or slap and folds. Cover and resume at the First Rise step, understanding that you’re already 1 hour into the fermentation since we had two rest periods!
“The rolls taste delicious. They are soft and fluffy and stay moist, which is a common issue with cinnamon roll recipes and the reason I’ve been testing hundreds of them over the years. This one is a definite keeper, alongside the original.” –Recipe tester from Ontario, Canada

Conclusion
I know fall just started, but these are the gooey, pumpkin-spiced, wildly soft sourdough cinnamon rolls I’ve been dreaming of. The maple icing on top? Pure fall magic.
I can’t wait to hear what you think! Drop your tips or questions in the comments below, and if you bake these, snap a photo and tag me on Instagram. I LOVE seeing your bakes.
Happy fall baking, friends!
Similar recipes:


I have made these 3 times and everyone loves them. I followed it exact and the maple extract is a step you don’t want to skip. These are amazing.
Thanks for sharing!!
Delicious easy to follow recipe my grandson loved these
Why is this important?
” (a square or rectangle shape is preferred over a bowl!)”
Since you’ll be rolling this dough into a square later, you can save yourself the hassle and proof it in a square or rectangle container from the start. That way, when you dump it onto the counter, it’s already in the square/rectangle shape. Not absolutely needed but I do find it to be easier!
My husband and in-laws raved about That Sourdough Gal’s original cinnamon roll recipe when I made them, saying they were the best they’d ever had. So, when I saw all the buzz about this new fall pumpkin maple recipe, I knew I had to try it! My kids think cinnamon is “spicy,” so they wouldn’t eat them—although they thoroughly enjoyed licking the icing off the beater and spatula. My husband said they were delicious, and I have to agree—they’re the best cinnamon rolls I’ve had.
TSG always takes the time to thoroughly detail the process, with plenty of recipe testing in advance, so I can attest that if your starter is healthy and you follow her instructions, these are foolproof. I will say, I definitely recommend using a mixer for the icing. I used butter from my butter bell and cream cheese that had been sitting on the counter for a couple of hours, and it just wasn’t coming together easily by hand.
I ended up with ten monstrous cinnamon rolls because I don’t have a rolling pizza cutter or pastry wheel, so I used my long rocking-style pizza cutter and just eyeballed my cuts. No matter—it worked! I didn’t need them to be perfectly even since these were just for family enjoyment. If I were selling them, I would definitely follow the instructions with the recommended cuts.
I think the original recipe rolled the entire dough before cutting, and honestly, having made both recipes, that’s the easier method and produces more consistently sized and shaped rolls. She detailed both methods in this recipe, and I’m glad I tried both so I know what works best for me.
I enjoyed mine with a latte I stirred using the teaspoon I had used to measure the maple extract—yum! If you’re a cinnamon roll enthusiast, these are a must-try. They’d be even better with chopped pecans.
Wow, thanks so much Lisa! So glad you and your family enjoyed the cinnamon rolls. Beautiful pictures!!
Simply delicious!
Beautiful!!
Question, you say if mixing by hand to leave out the butter and the half n half, then you say when to add the butter in, but not the half n half…so are we just leaving out the half and half then? Thanks 🙂
You’ll add the half and half before baking the cinnamon rolls!
I made these, and I baked them today, getting to enjoy the yummy, pillowy goodness of these cinnamon rolls! I was awestruck to say the least! I am a foodie, and these did not disappoint. I truly thought they would be good, but wasn’t totally sold that they would be great. I love to bake and figured I would give it a try. This recipe is a labor of love, and I for sure tasted the love in every bite! It was ooey and gooey, pillowy soft, rich and delicious without being too much. The hints of maple are to die for good. I had thoughts of maple bar donuts while I was preparing everything, and while they were cooking. I am not sure how anyone wouldn’t enjoy these! GREAT job Sourdough Gal, these are amazing!
Aw thanks for the raving review Julie!!
What happens if I use starter that was fed 4-5 days prior but usually very responsive when feeding for the stiff sweet starter?
If you know your starter, I’d go for it. Mine would not do well but I spoil her and she’s not used to being neglected LOL
Do you have any make ahead tips? I want to have these for the day after Christmas (because I have made them twice and absolutely love them!). But, will be tied up on the 24th and 25th.
Do you want to bake them and freeze or hold the dough in the fridge to bake fresh?
Per my family of bakers, these are the best cinnamon rolls they’ve ever had. 10/10 recommend! Just need a chocolate version now!!
Wow that is so awesome to hear!! Chocolate cinnamon rolls, oohhhh…