
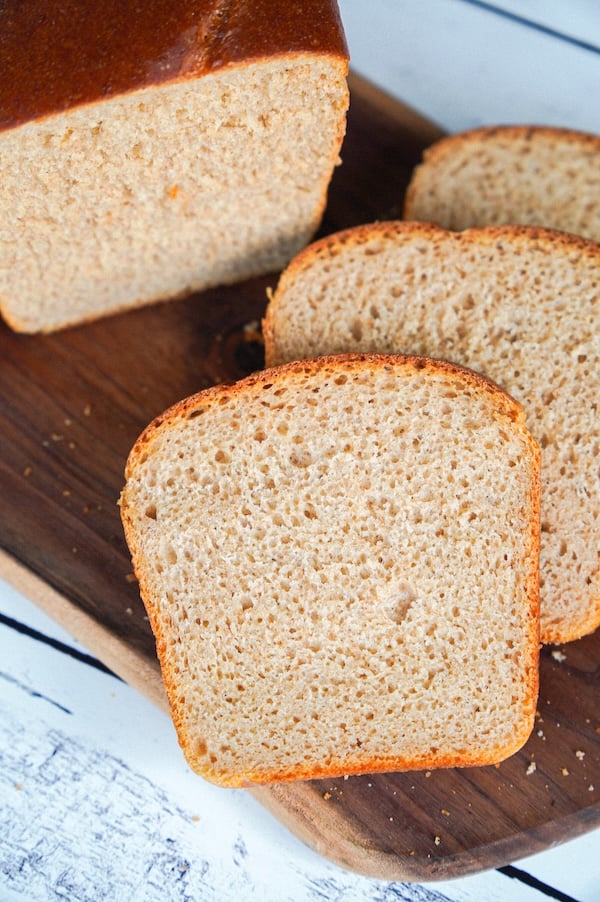
Super Soft Honey Whole Wheat Sourdough Sandwich Bread

This soft, honey whole-wheat bread recipe was highly requested, and I’m thrilled to say we’ve done it!
The dough is based on my viral sourdough Wonder Bread copycat recipe, but we made some key adjustments.
We’ve swapped in 50% whole wheat flour, increased the hydration to account for it, shortened the proofing times (whole wheat ferments faster), and amped up the honey to balance the flavor.
The taste of this bread is incredible – my husband’s eyes lit up when he took his first bite!
It’s a same-day recipe, so instead of a sour-forward flavor profile, you get more of the roasty wheat flavors. And don’t worry – you can do a longer fermentation if you need to! Let’s get into it.

Some of the products I recommend in this post are affiliate links – if you choose to purchase after clicking one of my links, I may earn a small commission, which helps fund this website, recipe development, and monthly giveaways. I sincerely appreciate your support.
Why You’ll Love This Soft Honey Whole Wheat Sourdough Sandwich Bread
- Incredible flavor: The 50/50 mix of whole wheat and bread flour with a hint of honey gives you a balanced flavor — hearty, but still light and delicious. It really tastes absolutely amazing – so much more flavor than an all-bread-flour loaf.
- Mellow tang: The stiff sweet starter softens the sourness, so you get a wholesome whole wheat taste without too much tang (don’t worry – if you like it more sour, you can add in a cold retard!).
- Soft crust: This crust is like a typical sandwich bread, not an artisan loaf. If you need a break from the chewy, thicker crusts, you’ll love this one!
- Super simple process: This recipe skips a lot of the usual sourdough steps — no slap-and-folds, no second rise. Just mix, shape, let it rise once, and bake.
- Soft, squishy texture: Thanks to the tangzhong, this bread stays soft and fresh for a couple of days instead of drying out after the first 24 hours. It doesn’t stay as soft as the all-bread-flour version, but for a 50% whole wheat loaf, I was pretty impressed.
- Slices like a dream: This loaf is fluffy enough for PB&Js but sturdy enough to hold up to a loaded sandwich without falling apart.
- Freezer-friendly: Slice, freeze, and pull out what you need — the bread reheats beautifully and tastes just-baked every time. Also, freezing bread gives you additional health benefits!

Ingredients
- Stiff sweet sourdough starter: This is key for keeping the flavor mild instead of overly tangy.
- Tangzhong: The secret to a soft, squishy loaf that resists staling. Don’t skip this step — without it, the bread won’t turn out the same.
- Cool water: Using cool (not warm) water helps prevent the dough from overheating during mixing (stand mixers create friction). If you mix by hand, feel free to use warm water.
- Honey (or sugar): You can use sugar or honey as the sweetener, though I find honey gives slightly better results. There’s definitely something to the honey wheat combo!
- Whole wheat flour: This is your chance to try new flours from small or local grain mills! Heritage Whole Wheat Bread Blend from Sunrise Flour Mills (20% off when clicking my affiliate link), Organic Whole Grain Expresso Bread Flour from Cairnspring Mills (affiliate code TSG15 for a discount), or just the classic King Arthur whole wheat are all great choices.
- High-protein bread flour: I’ve had great results with Central Milling High Mountain bread flour (13.5% protein), Ballerina Farms farm flour (affiliate link; 14% protein), and King Arthur unbleached bread flour at 12.7%.
- Avocado oil: Adds softness and keeps the crumb extra tender. You can also use this to grease your loaf pan.
- Salt: Go with one that doesn’t have anti-caking agents. I use Redmond’s salt (you can get 15% off on their site with affiliate code TSG15).
- Butter: Just a swipe across the hot loaf at the end for that shiny, soft crust.
Ingredient Substitutions
- Flour mix: If you’re using all-purpose flour instead of bread flour, just know it absorbs water a little differently, so you may need to add about 25 g extra flour to the main dough to keep the structure strong. You can also consider adding in 1-2 tbsp of vital wheat gluten to compensate for the protein loss. Finally, many bakers have told me they’ve used freshly milled flour in place of the whole wheat flour with great success.
- Sweetener: You can use sugar or honey in the stiff sweet starter. I prefer honey here as it stays on theme with the honey wheat flavor profile.
- Oil/Fat: Avocado oil is my go-to, but melted butter, olive oil, or even coconut oil will work. Each adds its own subtle flavor, whereas avocado is pretty neutral.
- Milk: Whole milk is my preference for the tangzhong, but 2% works too. For dairy-free, you can swap with any unsweetened nut milk. Technically, water also works, but that would be a last resort in my opinion.
- Whole wheat percentage: This dough is made with 50% high-protein bread flour and 50% whole wheat (when I polled my Instagram followers, the 50/50 split won). If 50% feels like too much, you can scale it back to 25–30% whole wheat and use more bread flour. You’ll still get that nutty flavor, but with a lighter texture. I wouldn’t advise going over 50% whole wheat with this recipe. Beyond that, I really need to do separate recipe testing to ensure the final loaf isn’t super dense.

Another 50% whole grains recipe you might like: 50% Einkorn Sourdough Bread Recipe
Equipment You’ll Need
- Scale: Accuracy matters in bread baking and a good, quick scale makes things easy. I tested 20 scales if you want to check out all of my top picks.
- 3/4 L Weck jar: The size I use for mixing and fermenting the stiff sweet starter overnight.
- Stand mixer: Saves your arms and makes it easier to get that strong gluten network this loaf needs. (Hand mixing works, too!) I tested this recipe in the Ooni, Bosch, and KitchenAid, and all worked just fine! (If you want to read my review, check out Ooni vs Bosch vs KitchenAid vs Ankarsrum: Best Stand Mixer for Sourdough)
- Long loaf pan:
- USA Pan 13×4 long loaf pan: The ideal size for this recipe. I love the USA Pan brand because nothing sticks, but it doesn’t use Teflon.
- Kuha cast iron loaf pan (11×5.5): I also tested this recipe in this cast iron loaf pan and loved it!! Honestly, maybe even a little more than the USA Pan loaf pan (don’t hate me, USA Pan!!). I love the shape of the loaf, how durable and sturdy the loaf pan is, and how great the crust looks when it’s done. It takes longer to bake in the oven, and you need to remove your bread from it quickly so it doesn’t keep baking (it will burn from the retained heat in the cast iron). But I’m excited to keep trying this one.
- Proofing box (totally optional): I’m a die-hard fan of the Brod & Taylor proofing box – I can set it to a specific temperature and get repeatable results every time. I now know that for me, this loaf takes about 7.5 hours set to 80°F (26.5°C). If you don’t have a proofing box, any warm place is fine – I have tons of suggestions in the step-by-step instructions section.
- Thermometer: Important for making sure your loaf bakes all the way through! My loaf baked in the cast iron loaf pan would have been underdone if not for my thermometer. It needed an extra 20 minutes to bake.
- The Thermapen One is my favorite for its speed and reliability. But it’s expensive, so I also wanted to offer a budget option.
- This one from Atogou is surprisingly good. It’s nowhere near as fast as the Thermapen One, but it gets the job done well on a budget.
- Bread knife: Finally, I wanted to link my favorite Mercer bread knife. It’s super sharp and lasts forever! The kicker is it’s less than $20. Can’t beat it.
Baker’s Timeline
| DAY 1 | Task |
| 8:00 PM | Mix the stiff sweet starter and let ferment overnight. (My starters took 10-12 hours to peak at 74°F/23°C) |
| DAY 2 | |
| 8:00 AM | Make the tangzhong and let it cool. |
| 8:30 AM | Mix the dough. |
| 8:45 AM | Shape it, put it in a loaf pan, & let it ferment in a warm place. |
| 4:00 PM | Bake at 350°F (175°C) for 40–45 minutes, or until internal temp is 200–205°F (93–96°C). Brush with butter while hot. |
| 4:45 PM | Brush with butter while hot and let cool in the pan for 5–10 minutes. |
| 4:50 PM | Transfer to a wire rack. |
| 6:00 PM (Or dinnertime) | Enjoy soft, fluffy slices for dinner, lunchboxes, or a warm snack. |
Recipe Testing Process
I knew I wanted to base this whole wheat variation on my sourdough Wonder Bread copycat recipe, which is so soft.
Whole wheat tends to weigh down the loaf, so I want to do everything I can to counteract that and still get good lift and texture.
Test 1
In my first test, I did the bulk fermentation overnight, which was a big mistake!

The loaf was overproofed by morning, and the second rise in the loaf pan was a struggle – texture plagued the surface, and it just ran out of steam. However, the bread tasted amazing and was actually soft on the inside, so I knew we were on the right track.
Test 2
For my second test, I shortened the first rise and increased the honey a little – the whole wheat adds a lovely depth of flavor but also amps up the sourness. Adding some honey can balance it, and who doesn’t love a honey wheat sandwich bread?!
The result was absolutely incredible, but still ever so slightly overproofed.

I thought… what if I skipped the first rise altogether since this loaf proofs so fast? We could better avoid overproofing AND cut out a step!
Test 3
For the final test, I made two loaves using all the improvements I made. However, I wanted to try different whole wheat flours side by side to showcase how they behave differently. I also tested a few minor adjustments to see how they’d impact the final loaf.
- Mixed one in the Bosch and the other in my KitchenAid stand mixers
- Different loaf pans (one USA Pan, and the other a cast-iron loaf pan)
- Scored one and did not score the other
The different whole wheat flours fermented at different rates, which surprised me! The starter made with Cairnspring Mills flour peaked in about 10 hours, whereas the one made with Sunrise Flour Mills flour took closer to 12 hours.
I found both stand mixers worked great. I actually think I prefer the cast-iron loaf pan result, but it took about 20 minutes longer to bake through (around 1 hour instead of 40 minutes).
And scoring the loaf made no difference, so other than aesthetics, there is no need to fuss with it.

How to Make Soft Honey Whole Wheat Sourdough Sandwich Bread (Step-by-Step Instructions)
Step 1: Make the Stiff Sweet Starter
This stiff sweet starter helps balance the tangy flavor.
In a small jar, combine:
- 30 g sourdough starter (active + healthy)
- 30 g honey (or sugar)
- 60 g water
- 60 g whole wheat flour
- 60 g bread flour
Q: What do you mean by active and healthy starter?
A: When making your stiff sweet starter for this recipe, you want to use 30g of a starter that is well-maintained and strong. An acidic, weak, or neglected starter will lead to super slow growth and a lackluster result.
This comes down to how well you maintain your starter on a regular basis. As a general rule of thumb, make sure you’ve fed your starter within the last 24 hours. You can use a peaked starter or one that has recently deflated, but I don’t advise using discard from your fridge.
Mix all the ingredients together in the jar until a rough ball forms. Then, give it a quick knead outside the jar until it smooths out and no dry flour bits remain (1-2 minutes).
Put it back in the jar, cover loosely, and let it ferment overnight on the counter. By morning – or around 10-12 hours later at 74°F (23°C) – it should be at least doubled in size and smell sweet and yeasty.

If you’ve made an all-bread-flour sweet stiff starter before, don’t be surprised if this whole wheat version doesn’t rise quite as much.
While an all-bread-flour starter often triples in size, this one typically doubles or reaches just slightly beyond doubling at its peak.
This is completely normal behavior for whole wheat starters!
Step 2: Make the Tangzhong
Tangzhong is a cooked flour paste that locks in moisture, so even though we’re using 50% whole wheat (which can sometimes feel heavy or dry), the loaf stays soft.
In a microwave-safe bowl, whisk together:
- 35 g whole wheat flour
- 175 g milk
Microwave in 20–30 second bursts, whisking vigorously between each round, until the mixture thickens to a pudding-like paste and reaches about 150°F (65°C). This usually takes about 3-5 rounds.
If you prefer, you can make this on the stovetop over medium heat, whisking constantly. Don’t walk away, or it will overcook!
Set aside to cool for about 30 minutes, or until the temperature is below 100°F (38°C). I like to stick mine in the fridge while I’m gathering my other ingredients – it’s usually cooled down by the time I’m ready to turn on the stand mixer!
Note: Hot tangzhong can kill the microbes in your starter, so please make sure it cools down.
You can make the tangzhong up to 2 days ahead and keep it in the fridge.
Read more about tangzhong: Tangzhong: The 3-Minute Secret to Softer Sourdough
Step 3: Mix the Dough
If you’re using a stand mixer, add:
- All of the stiff sweet starter
- All of the cooled tangzhong
- 240 g cool water (you may need to adjust depending on the flours you use)
- 50 g honey
- 50 g avocado oil
- 258 g bread flour
- 257 g whole wheat flour
- 12 g salt
All of the mixing for this dough happens right at the beginning, so the goal is to build enough strength in the dough upfront.
Start the mixer on low for a couple of minutes, just until the dough comes together.
Low Speed: Stand Mixer Guide
- KitchenAid: Stir or Speed 1
- Bosch: Speed 1
- Ooni: Speed 20-25
- Ankarsrum (with the dough roller): barely turn the speed dial (this machine takes longer to initially mix the ingredients, FYI!)
Then increase to a medium/medium-low speed and mix for about 7-20 minutes (varies by machine), or until you hit a weak windowpane (meaning you can stretch the dough thin enough to let light shine through without immediate tearing).
Medium/Medium-Low Speed: Stand Mixer Guide
- KitchenAid: Speed 2 (KitchenAid advises not going above speed 2 when mixing dough to protect the motor) for about 17 minutes
- Bosch: Speed 2-3 for about 10 minutes
- Ooni: Speed 40-45 for about 7 minutes
- Ankarsrum: turn the speed dial about halfway – I did not test this exact dough yet in this machine, but similar doughs in the past took around 20 minutes
Here’s the progression of the dough in my KitchenAid:

And here’s what it looked like in the Bosch:

The brand and type of whole wheat flour (and bread flour) that you use in this dough can impact how much water it’s able to absorb.
For me, I needed 240g of water to achieve the right texture.
Compare your dough to mine – if yours is looser and wetter, add additional flour 1 tbsp at a time (bread or whole wheat!). If it’s super stiff, add water 1 tbsp at a time.
Step 4: Shape the Loaf
After mixing, spray your loaf pan with a non-stick oil spray (I do a quick spritz of avocado oil), lightly mist your counter and your hands with water to prevent sticking, and turn the dough out.
I just use my hands to stretch and press the dough into a rectangle. We want the width to be a little narrower than our loaf pan. I thin the top edge to help that seam blend in a bit better.

Starting from the side of the dough nearest to you, tightly roll it up into a log, turning in the edges as you roll to prevent side seams. You can also pinch any seams closed once your log is rolled up.
Place the log seam-side down in your lightly greased 13×4 loaf pan.
Step 5: Bulk Fermentation
Cover the loaf pan with plastic wrap and let it rise in a warm spot (78–85°F / 25–29°C) until the dough rises to be even with (or even slightly above) the rim of the loaf pan (about 6-9 hours).

If you gently tap the surface of the dough, it should feel super pillowy, aerated, and almost bouncy!
Mine took 7.5 hours in an 80°F (26.5°C) proofing box.

Here are some options for keeping your dough warm:
- Brod & Taylor proofing box (affiliate link) – I set mine to 80°F (26.5°C)
- Oven with the light on
- Oven with a cup of boiling water in the corner (if the light doesn’t produce any warmth)
- Preheat your oven for a couple of minutes; then, turn it off
- Warming mat
- A warm spot in your home – perhaps a sunny area, near a heater, or in an area that doesn’t get good A/C
- The garage
- Outside on a warm day (make sure to cover your bowl with plastic wrap so bugs don’t fly in)
If you don’t have a warm place for your dough, that’s OK! Just know it’ll take longer to finish fermenting.
Optional Step: Cold Retard
This recipe is written primarily for same-day bakes. But if you have gluten sensitivity or want to bring out some of those tangy sourdough flavors, you can pop your loaf pan in the fridge overnight and bake the next day.
Just ensure your dough rises most or all of the way before refrigerating it.
You don’t need to bring the loaf pan to room temperature before baking – unless you feel it needs to rise more.
Step 6: Bake
Preheat your oven to 350°F (175°C) conventional. Bake uncovered until the loaf reaches 200–205°F (93–96°C) in the center.
If the top is browning too quickly, cover loosely with foil.
Note: I tested scoring the top of the loaf and even throwing some ice cubes into the oven to create extra steam, but neither impacted the final result. This loaf doesn’t rise much more in the oven, so ensure it has risen completely before baking.
Here are suggested bake times for different-sized loaves:
- Mini loaf pan: 25-30 minutes
- Regular loaf pan (around 8.5×4.5): 30-35 minutes
- Sandwich bread loaf pan (around 13×4): 40-45 minutes
- Cast iron loaf pan: Up to an hour
As soon as it comes out, brush the top with 1 tbsp of butter or simply swipe a stick across the top (that’s what I prefer to do!).
Let the loaf cool in the pan for 5–10 minutes, then transfer to a wire rack. Wait at least an hour before slicing.
Note: if you bake in cast iron, it’s important to remove your baked loaf from it as quickly as possible (within about 5 minutes). The longer it stays in the loaf pan, the longer it will continue to bake. It will burn if left in there too long.

Storage & Reheating
Whole wheat breads do dry out faster, but thanks to the tangzhong, this loaf holds on to moisture really well for the first 2 days.
On the third day, I do see it starting to dry out, but a 10-second burst in the microwave softens it right back up.
You can store it:
- On the counter: Keep it in a bread bag (this one was developed just for these long sandwich loaves!! Use code THATSOURDOUGHGAL for 15% off), plastic wrap, or a bread box for 3–4 days.
- Freezer: Slice it first, then freeze in a freezer bag. That way, you can pull out just what you need. It’ll keep well for up to 3 months.
Check out my post on why freezing, thawing, and then toasting makes sourdough even healthier.
To reheat:
- Microwave for softness: Room temp slices are perfect for sandwiches, but if you want that just-baked softness, wrap a slice in a damp paper towel and microwave for 8–10 seconds. It’ll taste like it just came out of the oven.
- Toaster or oven for a little crisp: Whole frozen slices can be thawed and then toasted, or go straight into the oven or toaster.
Troubleshooting Tips
Sometimes, little things can throw this loaf off, but the fix is usually simple. Here’s what to look out for.
- Pan size matters. This recipe is written for a 13×4 long loaf pan. If you’re using something different, adjust the portions with the loaf pan calculator above the recipe card.
- Watch the dough, not the clock. The real signal that it’s ready for the oven is when the dough rises to be even with (or even slightly above) the rim of the loaf pan.
- Adjust bake times. Different pans bake at different speeds — see the recipe card notes for specifics.
- Different flours soak up water differently. Don’t be surprised if you need to tweak the water amount depending on what flours you’re using. Higher-protein flours will require more water, while lower-protein flours will require less.
- Other common mistakes: A dense loaf usually means you under-proofed it, and a collapsed loaf often means it was over-proofed. Adjust your timeline accordingly and always look for visual clues rather than depend on the clock.
Loaf Pan Size Calculator

Soft Honey Whole Wheat Sourdough Sandwich Bread
Equipment
- 3/4 L Weck jar for the stiff sweet starter
- Stand mixer with dough hook can mix by hand – see Notes
- 13×4 long loaf pan USA Pan is a great one
- OR 11×5.5 long loaf pan Kuha's cast iron is awesome
- Proofing box totally optional
- Long bread bag code THATSOURDOUGHGAL for 15% off
Ingredients
Stiff Sweet Starter
- 30 g sourdough starter (ideally, fed within the last 24 hours – needs to be healthy!)
- 30 g honey (or sugar)
- 60 g water
- 60 g whole wheat flour
- 60 g bread flour
Tangzhong
- 35 g whole wheat flour
- 175 g whole milk
Main Dough
- All of the stiff sweet starter (from above)
- All of the tangzhong (from above)
- 240 g cool water
- 50 g honey
- 50 g avocado oil
- 258 g high-protein bread flour (see Notes)
- 257 g whole wheat flour
- 12 g salt
- 1 tbsp butter (for buttering the baked loaf)
Before You Begin

Instructions
Make the Stiff Sweet Starter
- In the early evening (5-8pm), whisk together 30 g sourdough starter, 30 g honey, and 60 g water. Then, add 60 g whole wheat flour and 60 g bread flour until a ball forms. Knead outside of the jar to fully incorporate the ingredients. Cover loosely and let ferment in a warm place until morning. See Notes for timing and tips.

- Note: You can make the tangzhong (see next step) right now and refrigerate it overnight, if preferred.

Make the Tangzhong
- In the morning, mix 35 g whole wheat flour and 175 g whole milk in a microwave-safe bowl. Microwave in 30-second intervals, stirring between each, until thickened and reaches 150°F (65°C). For me, it usually takes 3-5 rounds to finish.
- Let rest on the counter (or in the fridge) until the mixture has cooled down to below 80°F (26°C). If it's too hot, it can kill your starter.
Make the Dough
- In stand mixer bowl fitted with a dough hook, combine All of the stiff sweet starter, All of the tangzhong, 240 g cool water, 50 g honey, 50 g avocado oil, 258 g high-protein bread flour, 257 g whole wheat flour, and 12 g salt. Mix on low speed 2-3 minutes until incorporated, then medium to medium-low for 7-15 minutes, or until smooth. Periodically check the dough strength – we want at least a weak windowpane before moving forward. Hand mixing instructions are in the Recipe Notes.
- I tested this recipe in several stand mixers, including KitchenAid and Bosch, and got a smooth, strong dough within about 15 minutes on all. If the dough heats up over 85°F (30°C), stop the stand mixer and cover the bowl for 20 minutes. Then, resume with mixing on a low speed until the dough has fully strengthened.
- The dough should feel slightly tacky and smooth after mixing. If it's very loose and wet, add additional flour in 1 tbsp increments. If it's very stiff, add additional water in 1 tbsp increments. Small adjustments may be needed depending on the exact flours you use, so don't be afraid to adjust!
Shape
- Spritz your loaf pan with a nonstick oil spray. Line with parchment if desired. Mist your hands and work surface with water. Dump dough onto work surface.
- Using your hands, gently stretch the dough into a rectangle slightly narrower than the pan width. Thin the top edge for a more invisible seam. Roll up the dough tightly, turning the ends in slightly as you roll to minimize end seams. Place your dough log seam-side down in loaf pan.

Proof
- Cover with plastic wrap and let rise in a warm spot (78-85°F/25-29°C) until the dough rises to be even with (or even slightly above) the rim of the loaf pan (about 6-9 hours). It should feel aerated and bouncy when you tap the surface.

- (Optional) Long-fermented option: Once your shaped dough has risen, you can transfer it to the refrigerator for a cold retard (instead of baking now). You can bake it any time within the next 1-3 days. For best results, don't let it cold proof longer than 3 days.
Bake
- Preheat oven to 350°F (175°C). Note: you can score the top of your loaf if desired (for aesthetics), but it will not expand much, so it's not necessary.
- Bake uncovered 40-45 minutes until internal temperature reaches 200-205°F (93-96°C). (See Notes for different loaf pan size baking times.) If the top of the loaf is getting too dark, cover with foil.
- Once done, immediately brush hot loaf with 1 tbsp butter. Cool in pan 5-10 minutes, then turn out onto rack. Cool completely before slicing (1-2 hours).

Video

Notes
- Bread flour: Ballerina Farms (14% protein), Central Milling High Mountain (13.5% protein) or King Arthur unbleached (12.7% protein) – no adjustments needed
- All-purpose: Costco AP flour – add ~25g extra flour to main dough
- Canadian options: Arva Mills Daisy flour or Boreal Organic All Purpose (Costco) work perfectly (thanks to follower Amanda Steele for this tip)
- Heritage Whole Wheat Bread Blend from Sunrise Flour Mills (20% off when clicking my affiliate link)
- Organic Whole Grain Expresso Bread Flour from Cairnspring Mills (affiliate code TSG15 for a discount)
- King Arthur whole wheat flour
- Mini loaf pan: 25-30 minutes
- Regular loaf pan (around 8.5×4.5): 30-35 minutes
- Sandwich bread loaf pan (around 13×4): 40-45 minutes
- Cast iron loaf pan: Up to an hour
You might also like: 20% Whole Wheat Artisan Sourdough Bread Recipe
Conclusion
I can’t wait for you to try this soft, honey-kissed whole wheat sourdough loaf. Once you bake it, you’ll wonder why you ever settled for store-bought.

Let me know in the comments how it turns out for you!
Other sourdough Wonder Bread copycat variations to try:


Going on my third attempt . . . Following the recipe to the tee (at least I think I am). Starter was bubbly, stiff starter rose nicely, using King Arthur bread & golden wheat flour. Can’t seem to get the bread to rise with a nice dome. Cannot seem to figure out what I’m doing wrong. Would it have anything to do with golden wheat? Going to use regular wheat on the third try :-).
Hey Lori!! Yeah, the type of wheat (and ensuring the 50% bread flour is a strong bread flour) will impact things in a huge way. I’m guessing there isn’t enough strength in the gluten network. But also something to consider is bulk fermentation with whole wheat starts out slow and then really takes off about three-quarters of the way through. I wonder if it’s possible that there’s just a short window where the fermentation is going crazy and it’s overproofing before you can get it in the oven. Either way, I want to figure this out with you so please keep updating or feel free to email me hello@thatsourdoughgal.com with more info and we’ll get to the bottom of it!
Love this recipe! I couldn’t believe how soft it was when I first tried it. This will be my go-to recipe for sandwich bread.
So glad to hear it Sharon!!
Hi Rebekah, thanks so much for your wonderful recipes. I just tried the whole wheat bread and I love it. I live in Miami and even with the a/c it is a little more humid. Right now the temperature in my kitchen is is 77 degrees and the humidity 54%. When pre shaping my dough I cannot use water, flour works better for me.
Wow, your loaf is absolutely stunning!!
I thought that I had already left a post last week. Somehow it did not remain posted, so here goes: Your recipes are outstanding! I made the honey whole wheat using white whole wheat and regular whole wheat. I used my Nutrimill Artiste (made by Bosch, same dough hook). On the second one, I allowed the initially mixed dough to set for 30 minutes to “autolyse”. It meant that I didn’t have to add more flour to get a dough that pulled away from the sides of the bowl to form properly. After 10 minutes on setting 2, I achieved a perfect window pane! I now regret that I didn’t take photos. Maybe next time.
Your precision measurements are truly spot-on. Thanks for sharing all your hard work!
Thanks for sharing those details – I may add the autolyse into this recipe. I probably should have from the beginning. I appreciate your kind words so much!
I made this once and it was perfect. This is my second try but life got in the way so I had to keep putting it in the refrigerator and take it out only to put back in the refrigerator. I overproofed it. With all these problems it still was beautiful and delicious. Thank you for all your recipes. They are the best!
Hello! I baked bread from your recipe for the second time today. I have regular loaf pans so had to do some calculations to get the loaf size I wanted. I discovered that doubling the recipe and dividing into three regular loaf pans worked well for me. They need to bake a little longer but with those adaptations it worked great! What a lovely recipe. Thanks so much for sharing!
Awesome, so glad that worked for you! Beautiful!
Our eyes popped when we had the first bite! Delicious, soft, delicious. Thank you Rebecca!
I love to hear this!!
My first try on this recipe yesterday and OMG, you have done it again, another awesome recipe! Loved it so much, I am baking again today to stock the freezer. After reading the comments, I decided to use an autolyse while waited on my stiff starter to peak. The rise was beautiful!
Absolutely stunning! So happy you loved it!
Finally, a sandwich bread that both my hubby and I love. I had to modify it a little as he isn’t a fan of WW, but I love it. To lower the WW a little, I made the stiff starter and the tangzhong both with only bread flour, so the only WW was the amount included in the actual dough. It brought the WW down to about 38%. Delicious and soo soft.
Thanks for sharing Laurie!!
Hi Rebekah
I made the white bread version and it was delicious. Can’t thank you enough for your time and effort ( and patience’s) while developing these recipes!
It’s a lot of hard work!
Thank you!
I really want to try to make the whole wheat version for my 9 month old baby .
But is there a substitute for honey?
Can I use maple syrup?
Yeah or just sugar!
The recipe is so easy to follow. But, I have one question. Mine is proofing now. I used my mixer until it passed the window pane test, but when I tried to shape it, it was still very sticky.(I think it would have helped to have had some flour on the counter) It didn’t look so good when I put it in the pan☹️. I’m hoping it will still turn out well.🙏🙏 It was so easy to make.
It may need more flour next time
My loaves of bread from your recipes are having the hardest time rising properly. Can I put more starter into my Levaine? Also, would that make for a less tangy bread at the end? That’s what I always thought. More starter means less tang as it doesn’t have to rise so long at room temperature. I’ve been making lovely sourdough for years with my starter, but using the levain in your recipes has given me flat, tiny loaves. They taste great and are soft, but not rising well. Help!
Hi there, why don’t you email me with more information so I can help you better. Usually lack of rise/flat loaves are due to using a weak or immature starter. It sounds like your starter is fine for other recipes but not working well when you make it stiff. It’s likely just a matter of using it prematurely.
And you are right, the more starter you have in the recipe and the faster it ferments, the less tangy the end result will be.
Made this again but I realised that the first two times I made it, I used the wrong temperature because I’m in the UK and a lot of us use fan ovens meaning my loaves were overdone beforehand. Today I made this baked at 170 degrees fan oven and what a difference it made to my loaf. Extremely soft almost too delicate but it’s absolutely perfect. Shame I can’t upload a video as a still photo doesn’t show the softness.
Absolutely stunning!!!
I made two loaves & they are delicious. As to their rising, they are both a bit small. I, think my house temp is the problem. It’s set at 68°F & the house stays about 72/73°F. The Flours were King Arthur’s. Any suggestions? I did discover my Air Fryer has a proofing choice too late for this bake. Tom Champion
TGC
It can work at any temp, but the cooler the environment, the longer you’ll want to wait for the dough to rise fully. Perhaps you just need a little more time?
I want to try this recipe using a pampered chef pullman pan. It is 14×5 inches. is there a way to adjust for that? Sorry, still pretty new to this!
I think this recipe would fit in that pan size really well
Made this recipe as is except I swapped all the honey for brown sugar (honey is very very expensive these days). This dough was very tricky to handle and was very wet. I did an autolyse and ended up adding about 60g of white flour to the dough while mixing. I did some S&F to add some strength to the dough after mixing. I was not able to shape it into a log either. I used two loaf pans so the first one was a sloppy roll, whereas the second one I used my bench scraper to keep on preshaping into an oval. This technique worked much better. This loaf also had more oven spring.
I could not believe my eyes when this recipe said to skip the second proof. I have never heard of that before but I followed it and wow, it really works?! The crumb was fabulous and bread rose a fair bit. I sprayed the tops with water though as often I find low temp bakes dry out the top which inhibits oven spring. This loaf is mega tasty and will be a staple in our house. Shockingly, I like this even more than your white wonderbread recipe (albeit the white wonderbread recipe is non negotiable for Bombay style chutney sandwiches, which is what I make with them)
For next time, I plan to try a different brand of ww flour to see if that helps with dough strength.
Two questions for you Rebekah, if you don’t mind:
Would you consider adding Vital Wheat Gluten to strengthen this dough?
Would maple syrup or barley malt syrup work in place of honey? (My family is canadian and we get heaps of maple syrup every time we visit. Honey otoh is too pricey to add to doughs).
Thanks for sharing all those details. I’m glad you followed your gut and made adjustments on the fly!! Yes, I’d totally add like 1 tbsp of vital wheat gluten, and I think maple syrup would be fine. But if you try it, report back!
Any chance this could be mixed and kneaded in my Zojirushi on the dough cycle?
I’ve never used the Zojirushi but don’t see why it wouldn’t work!
Hi! Huge fan! I am interested in making longer loaves. My only long bread pan is a clay pan. How should I adjust this recipe to bake it in a clay pan?
I’ve never done it before with a clay pan but based on my quick research, a slightly longer bake time might be needed but take the internal temp of the loaf at the end of baking to confirm!
I’ve made your wonder bread and whole wheat loaf…. Both just incredible knock your socks off amazing
Thanks Theresa!!
Would King Arthur golden wheat (technically a white wheat) work for this recipe? I know it’s substituted gram for gram with white all-purpose flour, so I want to make sure the liquid modifications and timing modifications of this recipe would work. Or should I use your original white recipe and just sub half the bread flour for this? Any suggestions would be appreciated!
You can absolutely use King Arthur Golden Wheat as the whole wheat component in the Super Soft Honey Whole Wheat Sandwich Bread recipe. Just use the Golden Wheat flour for the specified whole wheat amount in that recipe. When using new flours, I typically observe and make adjustments as needed so just reference to video and photos to check your dough consistency against mine. Don’t be afraid to add a splash of water if it’s too stiff and vice versa. Here’s the link to the youtube video! https://www.youtube.com/watch?v=ESaf8EmZOJ0&t=1018s