
The Ultimate Guide to Getting Started With Sourdough
Are you interested in joining the sourdough bandwagon, but you have no idea where the heck to start?
I’ve written this guide for you.
I’m a busy working mom of three kids (ages 3-7), and if I can do this, I promise you can, too.
My goal is to give you just enough information to get started confidently without feeling overwhelmed.
If I’ve learned anything about sourdough, it’s that there’s always something new to learn. But you don’t have to know it all to get started. Not even close.
My own mother is living proof of this! Let’s get into it.
Disclaimer: Some of the products I recommend in this post are affiliate links – if you choose to purchase after clicking one of my links, I may earn a small commission, which helps fund this website, recipe development, and monthly giveaways. I sincerely appreciate your support.
Part 1: Getting Your Starter
You Need a Sourdough Starter
In order to bake sourdough bread, you need a sourdough starter.
And here is my first piece of advice: don’t try making a starter from scratch if you don’t have to. Get a little bit from another sourdough baker!
Four reasons why:
- The frustration of the unknown/failure: I don’t have any stats on this, but I have seen countless posts online like this: “Is this mold? It’s Day 8 and nothing is happening – what do I do? I’ve been trying for a month and am ready to give up!” There is no doubt that this is really frustrating, and who wants that to be their “mood” for weeks on end?!
- Higher chance of giving up before you even start: The learning curve of sourdough is honestly hard enough (at least it was for me) – throw in the potential for immediate failure, and that’s a great way to kill all your motivation and give up before you even bake your first loaf.
- The cost of starting a starter (and potentially failing): I tried making my own sourdough starter in 2017 and failed. The online resources were nothing like they are today, and looking back, I did it all wrong. I was buying specialty bags of rye flour (that’s what the internet told me to do), and we didn’t have the money to waste on that, especially at that time. I ended up giving up over a month into the process, and I was so upset that I wasted that money on flour because it ended up in the trash.
- I am unaware of any advantage to getting one from another baker vs creating one from scratch: I’ve researched sourdough extensively over the past two years, and nothing I have learned indicates creating your own starter has any leg up on using someone else’s. In fact, after just a few feedings in your environment with your particular flour and water, that borrowed starter will transform into one that is unique to you. Bottom line: why would you go through the time, money, and effort to make one when there’s no distinct advantage to doing so?
So, to me, it’s a no-brainer to get some starter from another baker and hit the ground running.
There are a lot of bakers who disagree with me, and that is completely fine. Everyone has their own opinion and method, and I respect that! This is just mine.
Where to Get Sourdough Starter
I got my starter from a local sourdough baker. I just posted in a Facebook group for moms in my city and asked if anyone had some they’d be willing to share with me.
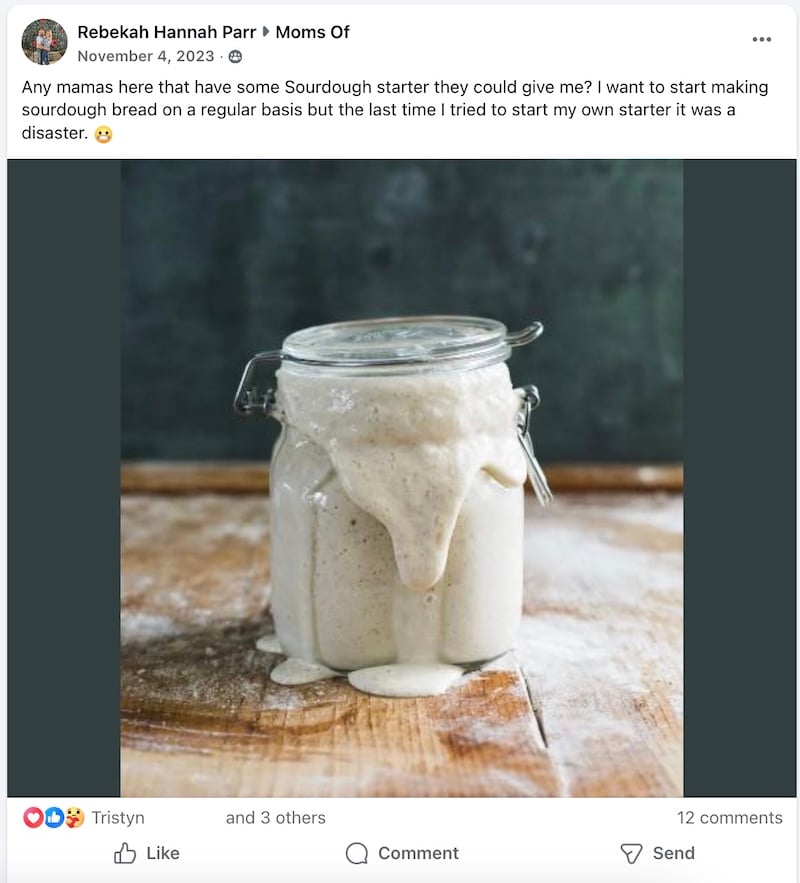
The response was immediate, and I drove about 15 minutes to pick up a jar that afternoon.
You’ll find that most of us in the sourdough community tend to be generous, kind, and caring people – we are more than happy to share our starters with those around us.
In fact, we kinda love it when people ask! Now we have someone new to geek out with. 🤣
However, if you can’t find someone who’s willing to share, you can purchase one online. You may also find some for sale at a local farmer’s market – if there’s a sourdough booth, I’d bet they sell starter.
Dehydrated vs Fresh Starter
If you opt to buy sourdough starter, you can buy it either dehydrated or fresh.
- Dehydrated starter: shelf-stable and can last in the pantry for a long time – but it requires you to rehydrate and “wake” it back up before using it to bake with, which takes a few days (usually about 5).
- Fresh starter: not shelf-stable and needs to be fed as soon as it arrives at your doorstep. But with a fresh starter, you can typically start baking with it after one or two feedings. The first feeding will strengthen it up (since it has likely gone a couple of days since its last feeding), and the second one will hopefully bring it back to full strength.
A quick online search will generate endless purchasing options. The one I endorse is one I’ve personally tried. (I do not sell my own starter at this time.)
Kelly Liston was kind enough to ship me some of hers, named Suzette, and she is a wonderful, happy starter. She comes in liquid form, so you don’t have to mess with rehydrating. You can get 15% off with the affiliate code THATSOURDOUGHGAL.

Your First 24 Hours with a Starter
You now have a sourdough starter in your hands… what do you do with it?!
Choose Your Jar
You’ll want to transfer your starter to a clean jar if it didn’t come in one already. I personally love the 3/4L Weck jars or the Brod & Taylor 1-quart jar, but a regular mason jar works perfectly fine to start.

Whatever jar you use, make sure it’s big enough for your starter to triple in size. You don’t want it overflowing all over your counter.
How to Cover It
Don’t seal your jar tightly. Your starter needs to breathe, or the building pressure inside can cause it to explode.
- With Weck jars: I just set the glass lid on top (no gasket or clips)
- With a mason jar: I set the circular part on top but don’t screw it on
Where to Keep It
When you first get your starter, keep it at room temperature on your counter. Putting it in the fridge is also an option, but we’ll go over that and its implications in a little bit.

If You Got Fresh Starter
Ask whoever gave you the starter when it was last fed. If it was longer than 1 day ago, you’ll want to immediately feed it to perk it back up.
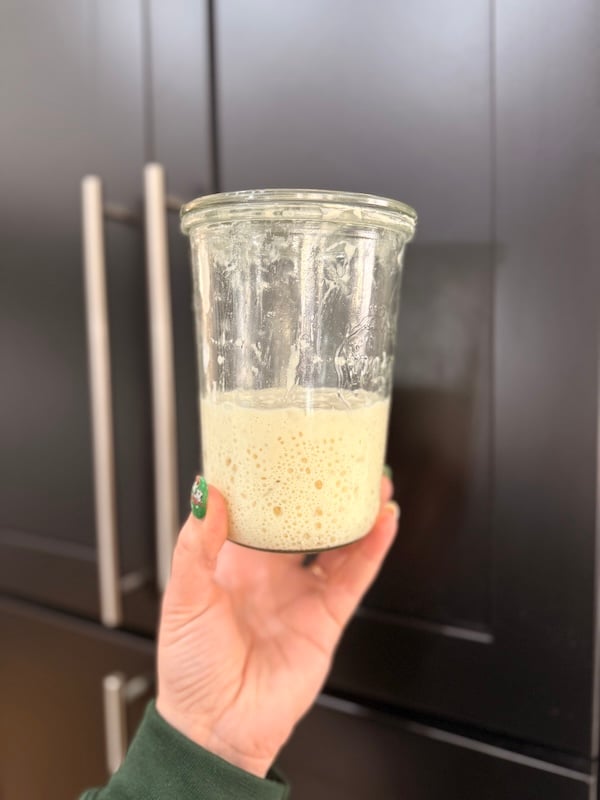
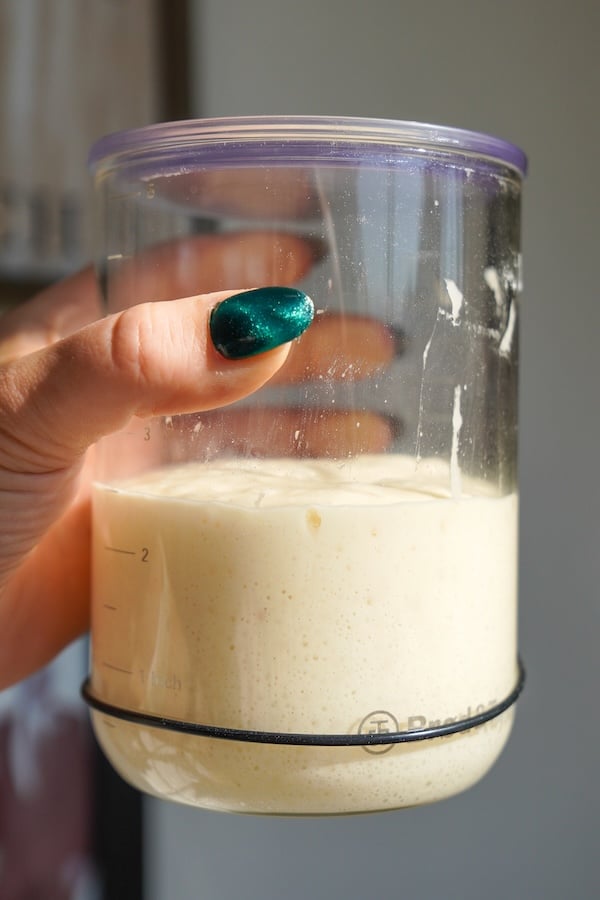
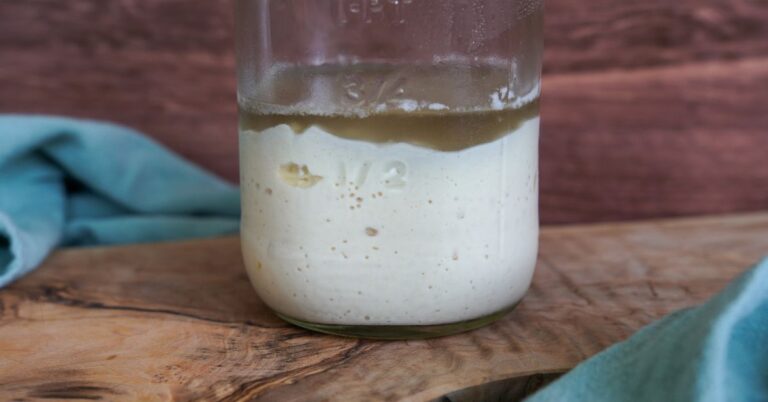
If it was just fed (like a couple of hours ago), let it continue rising in the jar until it peaks and begins to fall. Then, you can give it its first feed.
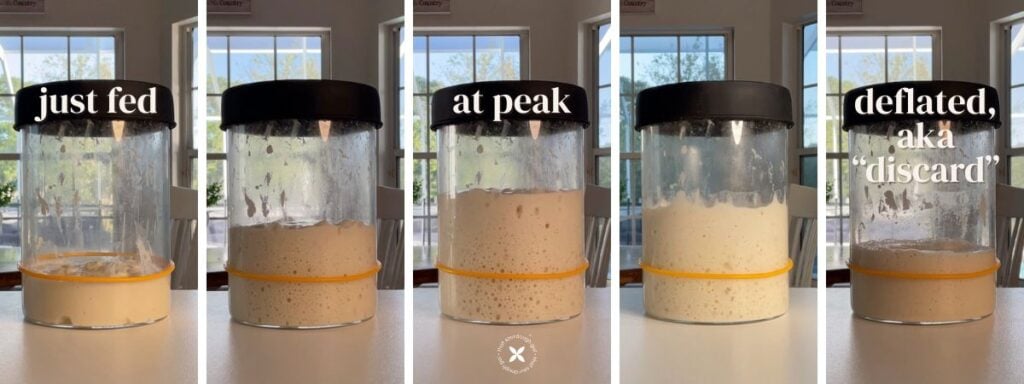
I’ll explain this photo and what’s happening in that jar in Part 3!
Part 2: Basic Tools & The Process Overview
What You’ll Need to Get Started
Before we dive into the process, let’s talk about the essentials. You don’t need a lot of fancy equipment to make great sourdough bread.
Some basic stuff to start:
- A kitchen scale – This is non-negotiable. Sourdough baking requires precision to get consistent results, and measuring by weight is the only way to achieve this. If you only buy one thing, buy this. If you cannot afford one, please email me, and I will send you one (please don’t abuse this offer – only if you truly cannot afford it). (Read about my top picks here: The Best Kitchen Scale for Sourdough Baking – I Tested 20!)
- A mixing bowl – Any medium to large bowl works. I prefer glass so I can monitor the bubbles on the side and bottom of the dough. Ceramic, stainless steel, or plastic also work just fine, but a clear container is really handy, especially when you’re just starting out.
- A banneton (proofing basket) – Flourside’s are great (code TSG5 gets you 5% off), or check out the new ones from Brod & Taylor – they’re also fantastic! OR you can use a bowl lined with a well-floured kitchen towel as a substitute.
- A Dutch oven – For trapping steam during baking. Krustic’s Dutch ovens are fantastic (code REBEKAH15 saves you $15). You can use loaf pans, also – check out this recipe to see how it’s done.
- A bread lame or sharp knife – For scoring your dough before baking.
That’s really it to get started! Everything else is nice to have but not required.
For budget-friendly alternatives and tool swaps, check out my post: Budget Sourdough: 20+ Tool Swaps for Amazing Bread.

My foolproof bread recipe also has a detailed equipment list with everything I use.
8 General Steps for Sourdough Bread Baking
“Learn the rules like a pro, so you can break them like an artist.” –Pablo Picasso
Artisan sourdough bread is more of a process or method than a recipe. Sure, I have recipes on my blog, and you can follow them exactly as written.
But there’s so much room for adjusting, and understanding what’s possible will free you up to make sourdough in your own way.
Here’s the general process:
- Feed starter
- Mix dough
- Strengthen dough
- Finish bulk fermentation
- Pre-shape
- Final shape
- Second proof or cold retard
- Score & bake

Don’t worry if this seems like a lot right now. We’ll break down each step in detail later. For now, just know that this is the general flow every sourdough bread follows.
The beauty of understanding this process is that once you get it, you can apply it to any sourdough recipe you find.
Part 3: Understanding & Feeding Your Starter
As weird as it may sound, you do have to “feed” your starter by giving it fresh water and flour regularly.
Because it’s like feeding a person, some people name their starters – I always liked Audrey 2 after the hungry plant in Little Shop of Horrors. Cracks me up every time! Mine is named Gertie.

So, the real questions we need to answer are:
- How often should you feed your starter?
- How much (quantity) should you feed your starter?
There are many approaches to consider. The multitude of options is why I suspect there is often so much confusion.
What works for you depends on your schedule, your general baking style, and how much you care about having incredible bread (are you willing to settle for decent bread instead, if it means less work?).
Understanding what’s actually going on in that jar will help you so much, so let’s dive into that.
The Science: What’s Happening Inside Your Starter
LIFE Cycle of a Sourdough Starter
Your starter is full of microbes, namely wild yeast and lactic acid bacteria (LAB).
Note: Bacteria are what make sourdough so different from the active dry yeast packets at the store. Those packets contain a single strain of yeast bred for speed, while sourdough starter contains wild yeasts and lactic acid bacteria (LAB).
The LAB does the following:
- Gives sourdough its signature tang
- Naturally preserves the bread (resisting mold and extending shelf life)
- Breaks down gluten and starches for better digestibility
- Reduces phytic acid so your body can absorb more nutrients
In general, wild yeast and LAB have a symbiotic relationship.
The Acidity Problem (Pay Attention Here!)
But… and this is a big but, so pay attention!
If the LAB population is too high (which can happen when you neglect your starter or don’t feed it enough), your starter will become acidic. An acidic starter leads to weak dough that produces sad, gummy bread.
An overly acidic starter is actually the #1 cause of sourdough baking issues people come to me with. Once they fix their feeding schedule, those issues disappear.
Here’s a quick video I made about what it’s like to bake with an acidic starter:

Our goal is to keep the yeast population strong by feeding our starter well, because a neglected starter is an acidic starter.
And trust me, you’ll know – if you have a sense of smell, a quick sniff of an acidic starter will curl your nose hairs. 😂
Understanding the Feeding Cycle
Ideally, the microbes in your starter never run out of food and are in a constant state of reproduction.
Here’s the cycle:
- You feed your starter flour and water
- It rises as the yeast eats the starches and produces CO2
- It peaks – the mixture stops rising and holds steady for a bit
- It falls – the yeast run out of food and go dormant
- You feed it again (and the cycle begins again)
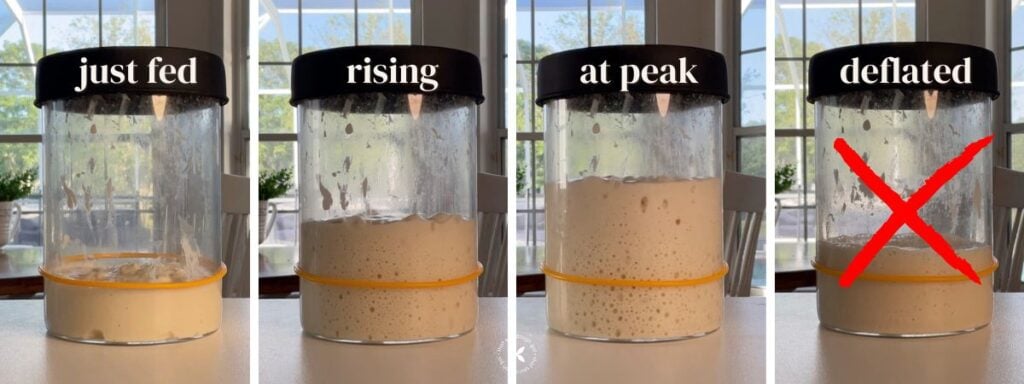
Important: My goal in maintaining my starter is to completely skip number 4, or the falling stage. I try my best to never let my starter fully deflate, which helps ensure it’s always healthy and not becoming too acidic.
Myth busting: The concept of a “hungry” starter is actually a misconception. Many bakers believe that using a deflated starter to make bread is ideal because the yeast is presumably hungrier, therefore it must be more ravenous and will raise bread better. However, yeast doesn’t metabolize food like humans do. When these cells run out of food, they go dormant and/or die. It’s in our best interest to minimize this, as we want our yeast population to be as high as possible!
How to Tell When Your Starter is Ready for Baking
This is probably the most important question for beginners to understand. “Active starter” or “peaked starter” gets thrown around in every recipe, but what does it actually mean?
Here’s what I look for:
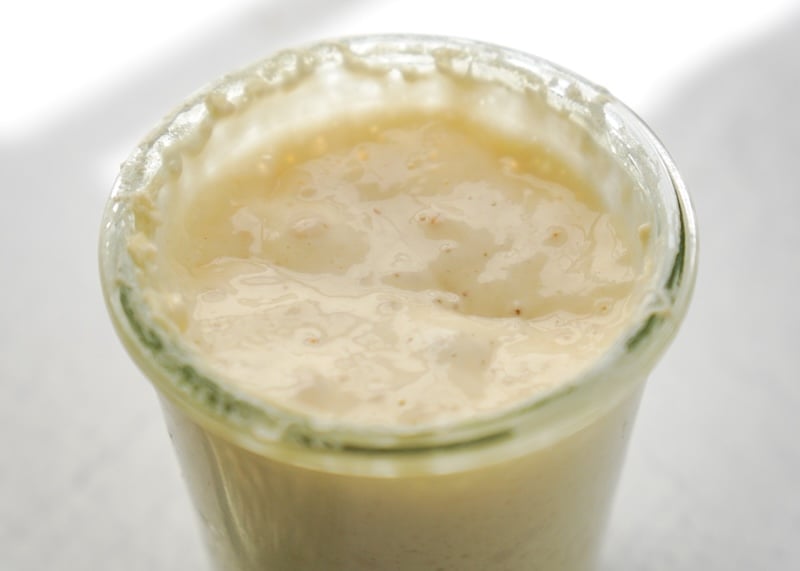
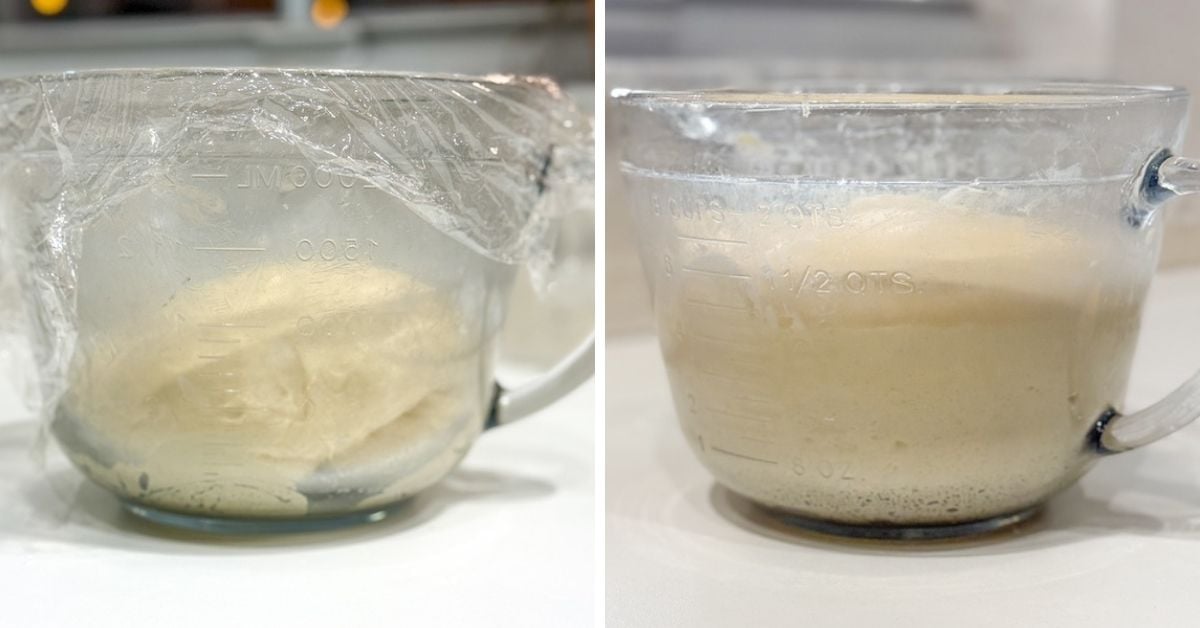
Visual Signs
- About tripled in size from when you fed it
- Flattened top with bubbles dotting the entire surface
- Perhaps starting to cave in slightly at the very top
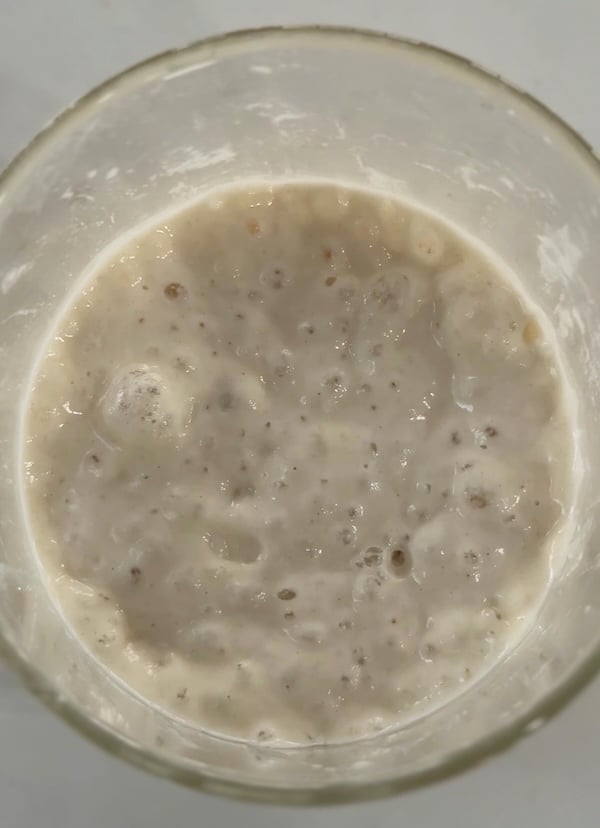
- Bubbly throughout – not just on top, but if you look at the sides of the jar, you should see bubbles all through it

Smell
- Sweet, yeasty, or earthy
- NOT sour, acidic, or vinegary – those smells indicate your starter is past peak or hasn’t been fed enough
The Float Test
I don’t really care about the float test per se… but in general, when your starter is at peak, it’ll float. So if you want to test it, drop a small spoonful into a glass of water. If it floats, you’re good to go.
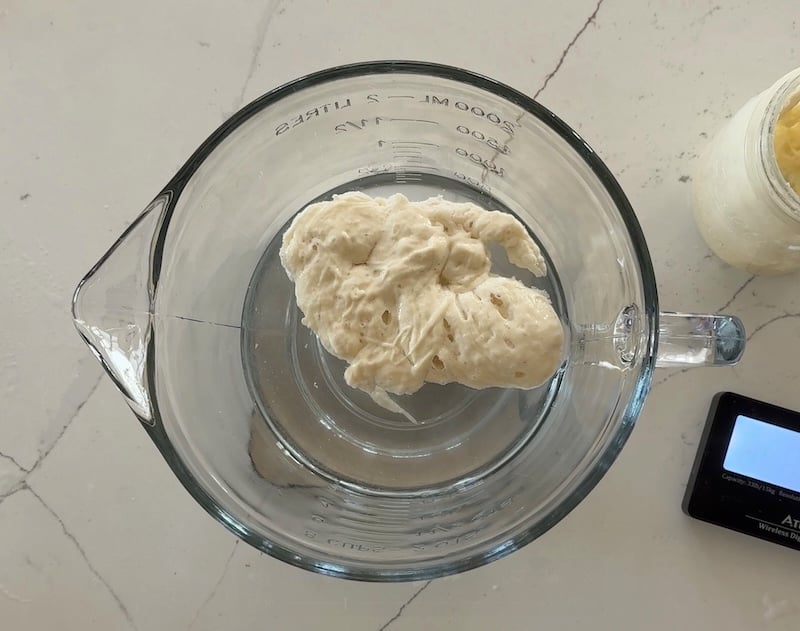
But honestly? Once you learn to recognize the visual signs, you won’t need the float test.
Choosing Your Feeding Strategy
The Ideal Temperature for Your Starter
Before we talk about feeding schedules, let’s talk about temperature.
Wild yeast is like Goldilocks – it wants to be not too hot, and not too cold. I find this chart from Sourhouse to be incredibly helpful. It allows us to see the ideal temperature for wild yeast and lactic acid bacteria.

In a perfect world, your starter would never be below around 50°F (10°C) or above about 85°F (30°C).
However, the yeast can survive at fridge temperatures, and for a time, they can survive in the freezer as well. They will not survive at all if they get too hot.
Option 1: Counter Feeding (For the Best Bread)
I will begin by explaining what I view as ideal: feeding your starter at least once per day with a 1:5:5 or 1:10:10 feeding ratio, and keeping it at room temperature.
If you want the best bread possible, this is a routine to consider.
You can manipulate when your starter peaks by adjusting your feeding ratio. That’s just a fancy way of saying how much flour and water you feed your starter.
The more flour and water you feed your starter, the longer it’ll take to consume it (which translates to a longer feeding cycle).
Here’s how it works:
If we have 10g of starter and feed it 5x as much flour and water (50g flour + 50g water), we have a 1:5:5 feeding ratio. That’s my preferred ratio because it takes about 10-12 hours to peak.
This means if I feed my starter before bed, it’ll be peaked and ready to use when I wake up.
This video breaks down this concept in a lot more detail:

My Typical Feeding Routine
I feed my starter at a 1:5:5 ratio twice a day (morning and night). This minimizes the deflating step in the life cycle – I really want to feed my starter before it has fully deflated.
Now, the actual amounts I use depend on whether I’m planning to bake:
For maintenance only (not baking):
- 2g starter + 10g water + 10g flour = 22g total
- This is still a 1:5:5 ratio, just scaled down
- I’m just keeping it healthy and alive
When I’m planning to bake:
- 12g starter + 60g water + 60g flour = 132g total
- Still a 1:5:5 ratio, but I’m making more
- My recipes use about 120g of starter, so this gives me 12g leftover to feed again
Why this routine works:
Sticking to this feeding schedule greatly reduces the risk of my starter getting acidic. I’m not allowing my starter to fully deflate and go into survival mode. Instead, I’m keeping a steady stream of food coming, which ensures the yeast population stays strong and active.
Option 2: Fridge Storage (For Weekend Bakers)
You have to be fairly committed to sourdough to feed your starter once or twice a day, every day. Sure, it only takes 60 seconds per feeding, but still.
If you don’t care that much and just want some decent homemade sourdough bread, you can put your starter in the fridge. Yeast goes mostly dormant under 40°F (4.4°C), so this is a pretty good way to “pause” your starter’s activity for a time.
If you only want to bake bread on Saturdays, as an example, you might want to refrigerate your starter during the work week.
The tradeoff: The activity in your starter jar doesn’t completely stop. In fact, cold temperatures tend to favor bacteria over yeast, so long stints in the fridge can slowly cause your starter to turn acidic.
Weekend Baker Fridge Routine
If you want to bake once per week, I suggest this routine:
- Thursday night: Bring 5g of your starter out of the fridge. Feed it 25g of flour and 25g of water before bed.
- Friday night: Discard back down to 12g starter. Feed it 60g of flour and 60g of water before bed.
- Saturday morning: Your starter should be peaked and back to better health, ideal for baking. Most bread recipes call for 100-120g of active starter, so you should have just enough!
The Middle Ground: Sourdough Home
If you don’t want to do that extra “perk up” feeding to ensure your starter is the strongest prior to baking, you might consider investing in Brod & Taylor’s sourdough home.
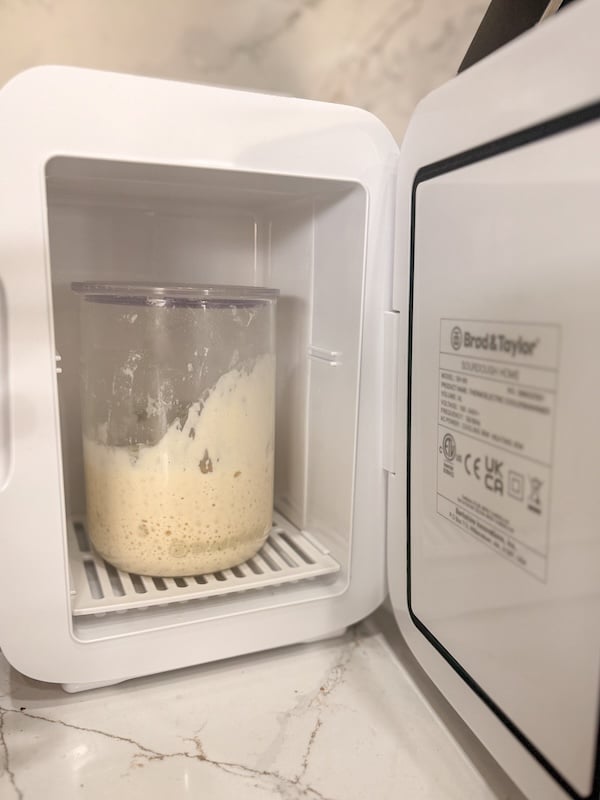
In this contraption, you can keep your starter at cooler temperatures, but not as cold as the fridge.
This eliminates the need for perk-up feedings, in my experience. It’s really great for weekend bakers or anyone who doesn’t want to feed their starter quite so much.
What Is Sourdough Discard?
You’re going to hear the term “discard” thrown around a lot in the sourdough world, and it confuses a lot of beginners.
Here’s the simple explanation: discard is just deflated starter.
Important Nuance: If you’re creating a starter from scratch (rather than getting one from another baker), the term “discard” means something slightly different in the first week or two.
During this initial creation phase, your starter isn’t active yet and the microbial balance hasn’t been established. The mix of microbes inside may not be safe to eat, so you should literally discard it – throw it away.
Once your starter is mature and rising predictably (usually after 7-14 days), then your discard is safe to use in recipes.
How to Use Discard
When you feed your starter, you typically don’t want to keep feeding the entire jar – it would get massive really quickly. So instead, you “discard” some of it before feeding.
That discarded portion can do a few things:
- Be fed again to become active – You can keep it in a separate jar and feed it to create more active starter – but we’re discarding it because we don’t need that much starter on our hands in the first place, so we still have two more options…
- Be used in discard recipes – There are tons of recipes designed specifically for unfed, deflated starter (pancakes, crackers, waffles, etc.).
- Be stored in the fridge as a “backup” – If something happens to your main starter, you can revive this.
Many bakers (including me) keep a “discard jar” in the fridge where they collect all their discard throughout the week.

Then, when we’re ready to make discard pancakes or crackers, we have plenty to work with.
Part 4: The Detailed Baking Process
Now that you understand your starter, let’s break down each step of the baking process in detail.
Step 1: Feed Starter (and Starter vs. Levain)
As we already covered, we have to feed our starter regularly to keep the microbes inside alive and balanced.
Sometimes, we feed our starter just to keep it alive. Other times, we feed our starter with the intention of baking with it. Sometimes, we do both at the same time!
But there is a distinction when it comes to terminology, and I don’t want these words to confuse you, so real quick:
- Feeding your starter: just what it sounds like – you’re feeding your starter to maintain it and keep it alive. You may or may not use it in some dough when it peaks – that’s up to you!
- Making a levain (pronounced ‘luh-vayn’ or ‘luh-vawn’): you pull some starter from your main jar and add it to a separate jar before feeding it – the intention is to use all of it in a specific recipe.
In some cases, feeding your starter and making a levain are the same. The ingredients in the jar are flour, water, and starter. Same difference, right?
But sometimes, a levain is unique. You might want to feed your starter some sugar, which can reduce tangy flavors in recipes – a great technique for something like cinnamon rolls or a sweet bread. Bakers sometimes add cocoa powder, which is fun for chocolate doughs. Or perhaps they feed a different flour, like rye flour for a rye loaf.
You may not want to add these ingredients to your main starter, but you can put some in a separate jar and feed it. Using all of that unique starter in a recipe would be considered using a levain.
In either case, that is our first step.
Step 2: Mix Dough
Once your starter has peaked (fully risen and bubbly), it’s time to mix your dough.
You have three options:
- Autolyse (flour + water only): Mix just your flour and water, then rest for at least 30 minutes before adding starter and salt. This is said to hydrate the flour and create a more elastic dough. However, some sourdough educators, such as Parker from Basil & Bloom, disagree, saying that autolyse reduces the amount of gluten you can develop in your dough.
- Fermentolyse (flour + water + starter): Mix your flour, water, and starter, then rest for at least 30 minutes before adding salt. This jumpstarts fermentation for faster proofing and builds extra dough strength since you’re thoroughly mixing the dough twice.
- Traditional mix (everything at once): Mix all ingredients together at the same time. This is the simplest approach, and it’s what most bakers do. You’ll miss out on the benefits above, but honestly, many experienced bakers don’t think the difference is significant enough to bother with the extra step.
Fun stat: I polled my Instagram followers, asking which mixing method they use most often. Out of 2,867 bakers, the majority (55%) mix everything at the same time. Of those who use a resting period, 26% do a fermentolyse, 15% do an autolyse, and 4% do what I call a “mini fermentolyse” where they only wait 10 minutes or less before adding the salt.
My take: I usually just mix everything at once because it’s easy and the results are consistently great. That said, I really love doing a 1-hour fermentolyse, so if I’m in the mood, I throw that extra step in!
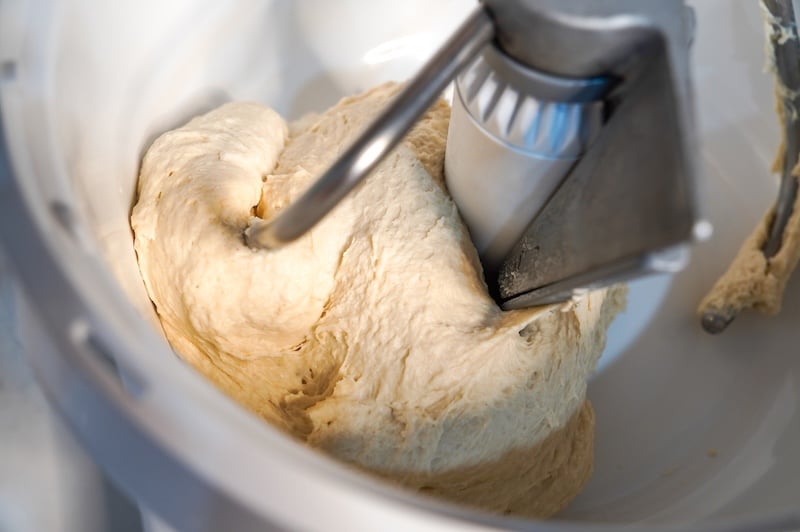
You can mix by hand (typically with a Danish dough whisk, then switch to your hands) or with a stand mixer.
With the stand mixer, you have two main options:
- Use the stand mixer just to incorporate the ingredients. Then, transfer the dough to a bowl and proceed with the next step (stretch and folds or coil folds).
- Develop the dough fully in the mixer (mixing for 10+ minutes), and either minimize or even skip stretch and folds altogether.
Either way, as soon as your starter is mixed into your dough, the bulk fermentation begins.
Step 3: Stretch and Folds/Coil Folds (Dough Strengthening)
Handling our dough periodically via stretch and folds or coil folds is how we build strength and structure in our dough. We are essentially organizing the gluten network, which allows the dough to trap gas within it, inflating it.
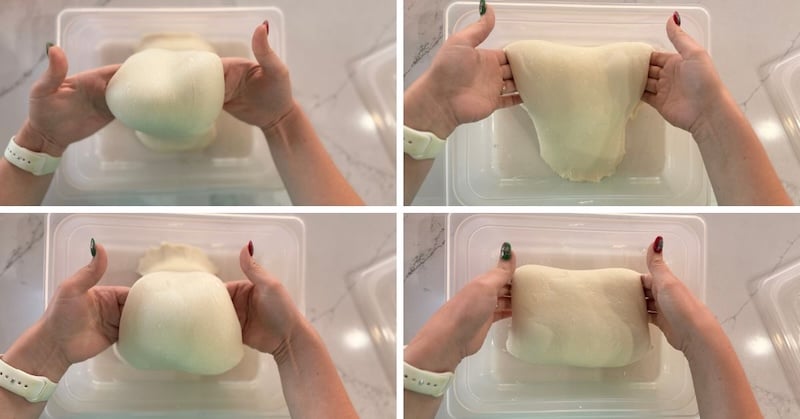
It’s also a good opportunity for you, the baker, to assess the fermentation progress.
These are typically done in rounds, each one 30-60 minutes apart, because the resting time lets the gluten relax, leading to maximum extensibility.
Step 4: Bulk Fermentation
Bulk fermentation has been underway since the first step (it starts as soon as your starter is mixed in), so it’s not really a step, per se.
It’s more of a waiting game as you observe the dough and determine when to move on to shaping.
This is the hardest step in the sourdough process to master, but I will help you!
Toss the Bulk Fermentation Charts and Hacks
First, do not be enticed by hacks or charts. If you watch any of my older videos, you will quickly see that I have recommended this in the past, but I no longer do.
After all of my trial and error, hundreds of recipe tests, and countless hours of research, I will confidently say: there is no one-size-fits-all way to tell when bulk fermentation is done.
The biggest problem? I see bakers relying on a bulk fermentation chart without considering the ingredient mix, method, and other variables:
- What type of flour(s) are in the dough? Whole grains ferment faster.
- How much water is in the dough? Higher hydration doughs ferment faster.
- Did you do a fermentolyse? The fermentation is faster.
- Are there any add-ins, like cinnamon or garlic? Fermentation will be slower.
- How much pre-fermented flour (starter) is in the dough? More starter = faster fermentation.
- Did you replace the liquid (water) with something else (such as beer or jalapeño juice)? Fermentation can be much faster or slower, depending on what you use.
- At what stage did you use your starter? If you used it before it fully peaks, fermentation will take longer.
You can see why it’s nonsense to download one chart and use that as your holy grail for everything.
Learning to Read Your Dough
For me, the only way I truly learned how to gauge bulk fermentation was by failing over and over and over (and over) again.
I’d underproof and overproof my loaves, taking notes with each bake, observing and feeling the dough, and finally developing an intuition for when the dough is ready.
Bakers like to call this “reading the dough.” What exactly you are “reading” depends, again, on the recipe and your process.
For example, dough feels different to me depending on the temperature of my kitchen. I’ve also learned that dough with more whole grains ferments faster, so I don’t wait for it to be quite as jiggly as I would with all white flour – otherwise it’d be overproofed by bake time.
You’ll find these kinds of specific pointers in my recipe cards to help guide you! That said, there’s one trait I look for in every dough, no matter the variables: an aerated, puffed-up feel. The dough should have visibly risen in volume and feel light and pillowy when you poke it.
In my view, learning to read the dough is the best way to assess bulk fermentation. The frustrating part about it is that it takes time and practice to master. It’s a skill – the intersection of science and art.
Many, many bakers disagree with me on this. And that’s OK. I’m simply sharing what I’ve learned after developing so many different recipes and working with lots of different doughs.
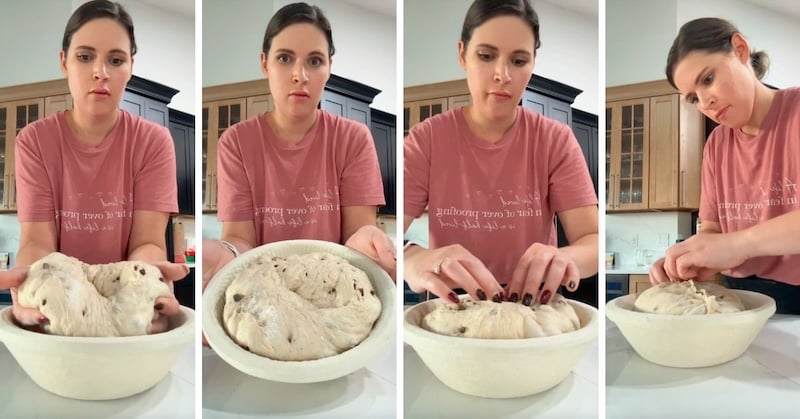
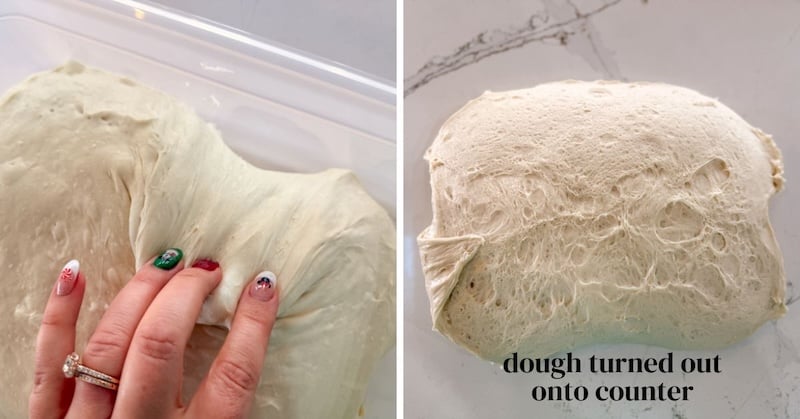
Step 5: Pre-Shaping
Pre-shaping involves dumping out our dough – from the bowl to the counter – and dividing it (if making more than one loaf).
Once divided, we coerce the dough into a round shape, bringing the dough together in preparation for the final shaping.

I then leave my dough on the counter, uncovered (or lightly covered with a flour sack towel), for about 15 minutes. This is called a “bench rest.” I’m just looking for the dough to relax a bit before I finish the shaping.
Lessons learned: When I first started making sourdough, I was quite rough with the dough during the pre-shaping. The little I’d learned came primarily from TikTok videos showing bakers stretching out their dough, folding in the sides, and rolling it up.
Since then, I’ve learned that being gentler here preserves more of the bubbles inside the dough. Those trapped gases are what help us achieve a nice oven spring. In other words, being gentler with the dough here produces a taller, loftier loaf.
Step 6: Final Shaping
The final shaping is when we form the dough into its final shape. Artisan sourdough bread is typically shaped into a batard (oval) or a boule (round).
The exact technique you use depends on:
- The texture of your dough – is it loose and slack (higher hydration) or is it tighter and firmer (lower hydration)?
- How much time you have (microbakers often opt for faster techniques)
- Your personal style
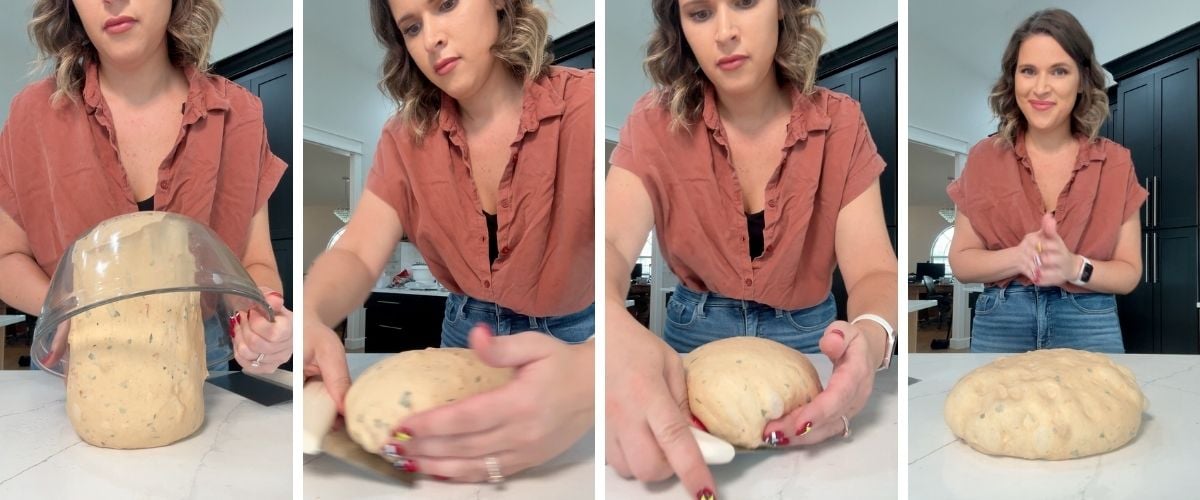
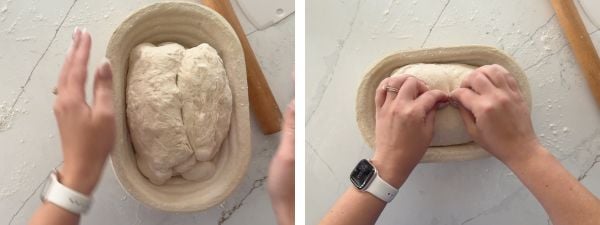
For me, I really like the simple technique called the “caddy clasp.” Popularized by Wayne Caddy, the caddy clasp involves folding your pre-shaped dough like a book and pinching the center seam closed.

A lot of us love it for its simplicity – no fancy maneuvers to remember! It works best on lower-hydration doughs that are firmer.
Looser, slack doughs (typically higher hydration) need more handling to develop surface tension. In that case, most bakers use the “Tartine” method, popularized by Chad Robertson in his 2010 book Tartine Bread.
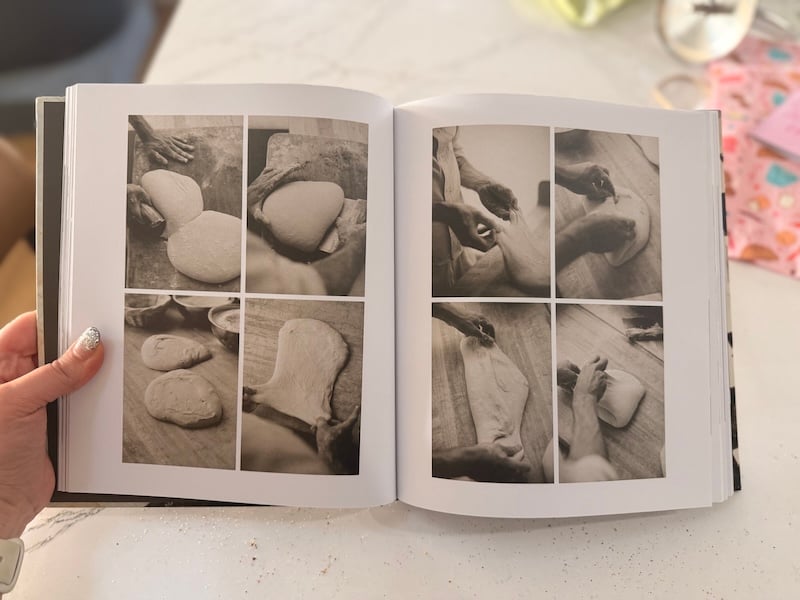

This is a series of folds often referred to as “the envelope fold,” or as my husband lovingly calls it: “the diaper fold.” (Yes, he really said that.)
But there are many other styles out there. Just do a social media search for “sourdough shaping techniques,” and you’ll see a dozen different ways to do it. Try several and land on something that feels right for you.
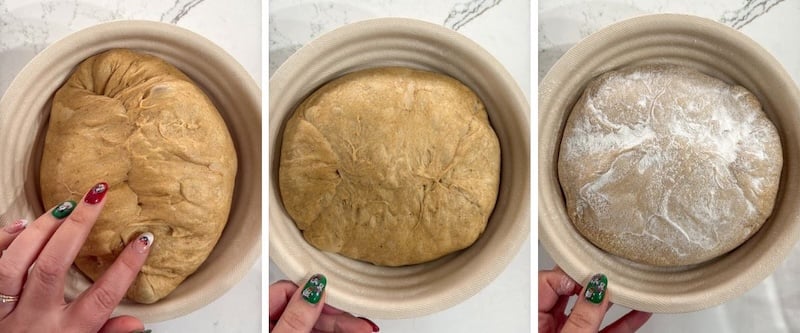
After your dough is in the proper shape with good surface tension, you’ll place it seam-side up in a floured banneton.
Step 7: Second Proof (Fast & Warm or Long & Cold)
Our shaped dough is in the banneton – now what? You have two choices:
- Fast & warm second proof (ambient second proof): put your dough in a warm place and let it puff up more until it passes the poke test; then, bake.
Quick video about the poke test:

- Long & cold second proof (cold retard): put your dough in the fridge for at least 8 hours, ideally overnight, but no more than 4 days max. Bake straight from the fridge.
Benefits of a Cold Retard: Most artisan sourdough bread recipes call for a cold retard, which develops more flavor and breaks down more of the gluten, making it preferable for those sensitive to gluten. Cold dough is also easier to score, and it’s helpful for timing reasons to have dough in your fridge ready to bake when you are.

Benefits of an Ambient Proof: Same-day sourdough bread recipes will call for an ambient second proof, which is great for having bread ready faster. The flavor profile will also be milder, highlighting more of the flour’s flavors than the sour components. Those sensitive to gluten often report stomach issues when they skip the fridge rest, so that’s something to consider.
Step 8: Scoring & Baking
Now that our dough is ready to bake, we will score it.
Scoring our dough allows it to rise in a controlled manner – we’re basically telling the dough where to expand. Unscored dough will likely explode out in random directions, or it won’t fully expand at all, leading to a denser interior.

After scoring, we place the dough in a Dutch oven and cover it. If you’re open baking, you’d place the bread on a bread steel and generate steam using a cast-iron pan filled with boiling water. There are other ways to do this, but I won’t go into the weeds here.
The first part of our bake is covered, because we need steam to help our bread fully expand before the crust sets. Without enough steam at the beginning, your dough’s exterior will set before the interior has fully expanded, and your score lines will fuse to the dough.
Once our dough has fully expanded, we’ll remove the cover or source of steam and continue to bake so the exterior can darken and the loaf can bake through.


Note: It’s a good idea to let your loaf fully cool down before cutting it open. Otherwise, you will let a lot of steam out of the loaf, leading to a gummy texture to the interior, and a loaf that is very dry once it fully cools. Unless you plan to eat the whole thing while it’s hot, definitely give it an hour or two before slicing.
Part 5: Getting Started
Beginner-Friendly Sourdough Recipes
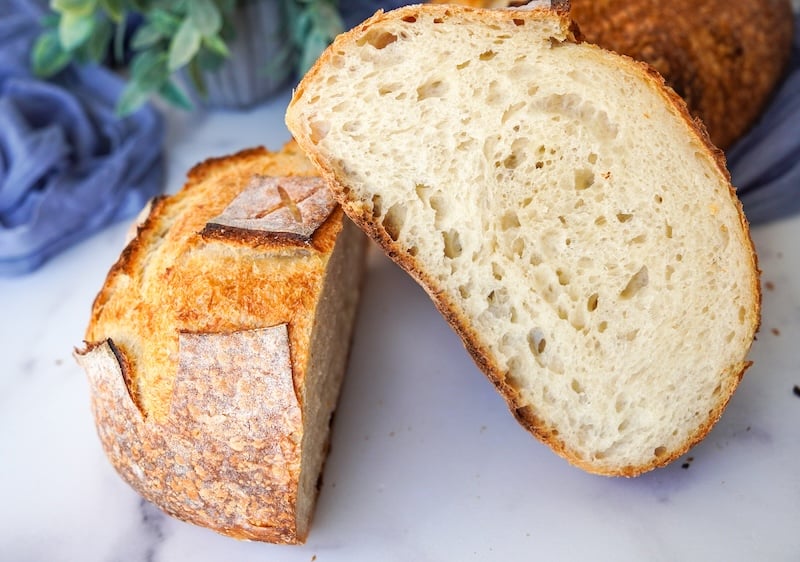
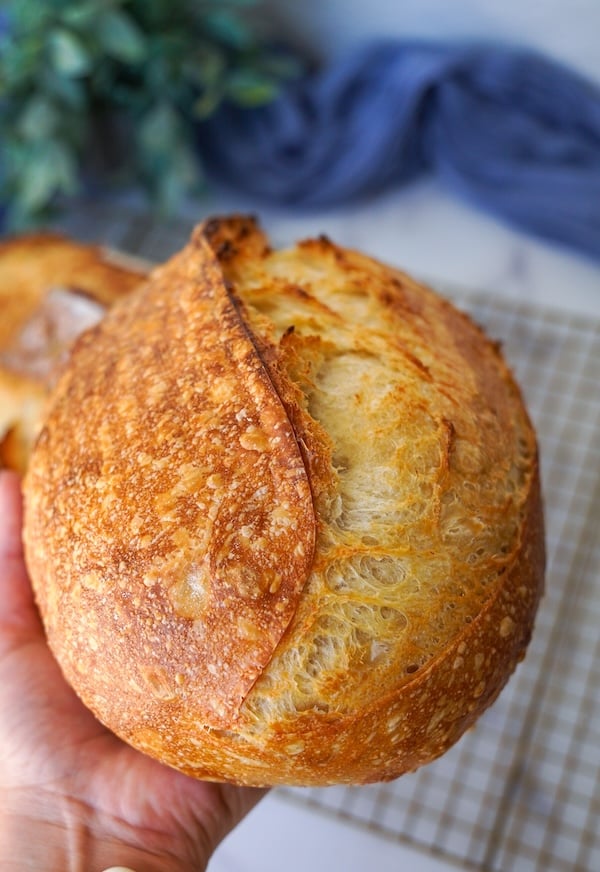
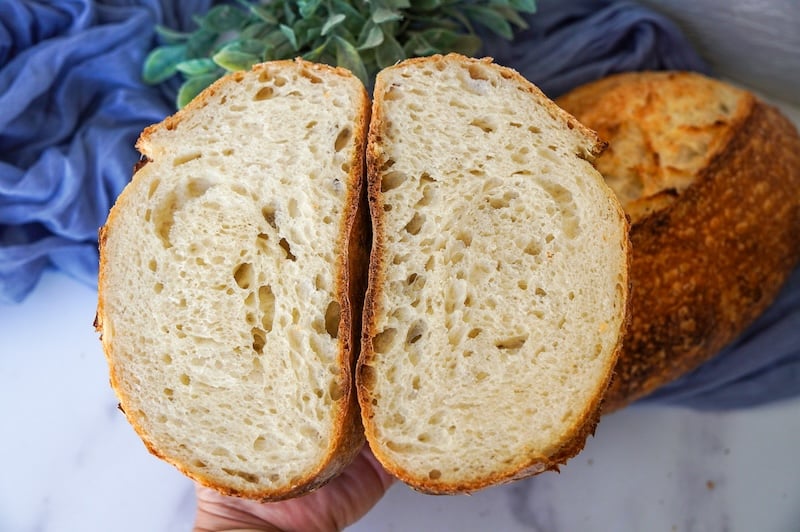
Most beginners start with a classic artisan sourdough loaf. It is the simplest, most pure form of bread: water, flour, and salt. Do this over and over again until you start to get the hang of it.
My “foolproof” sourdough bread recipe is meant for beginners. It’s a lower hydration dough, so it’s a lot easier to work with. And we keep our dough warm, allowing you to stay on a fairly predictable timeline with me.
I’ve done a lot of tutorials of this recipe, which you can find on my YouTube channel or on social media.
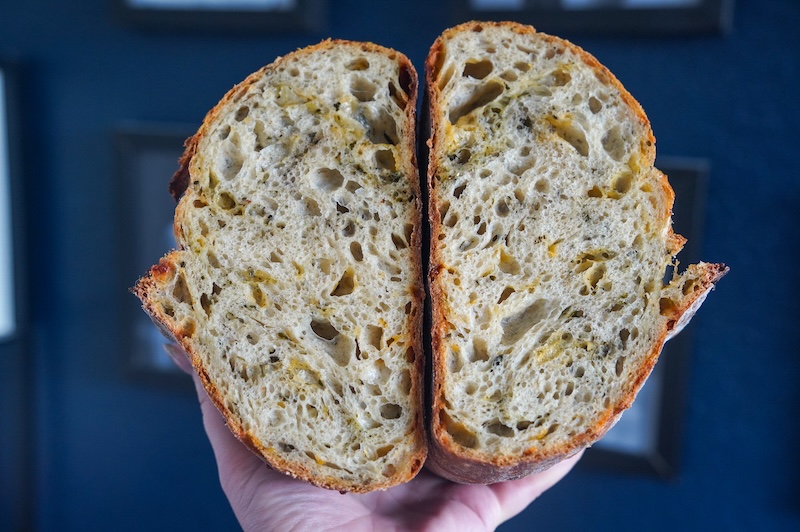
When you’re ready to add some fun inclusions, I suggest starting with my Italian Herbs & Cheese Artisan Sourdough Bread Recipe. It’s very beginner-friendly and will give you a taste for working with add-ins.
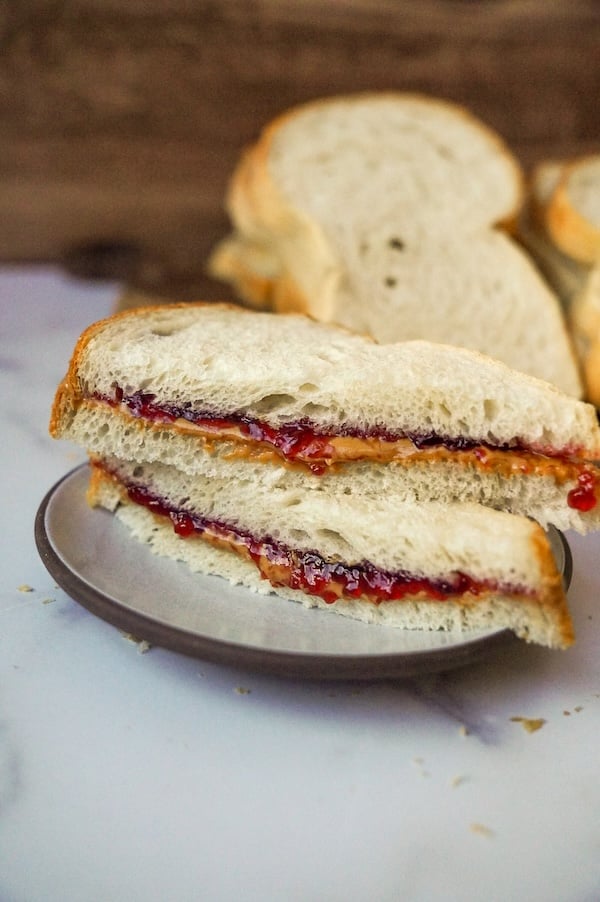
Another fantastic recipe for beginners is my viral sourdough copycat Wonder Bread recipe. It’s a super soft sandwich bread that’s not too sour. I’ve been told so many times that it’s hard to believe you can make something like this with sourdough!
From there, I suggest these sourdough discard recipes to help you use up discard:
- Use up 1,000g of discard: Fast & Easy Sourdough Discard Waffles (I also have banana nut, pumpkin spice, and double chocolate variations)
- Use up 200g: Everything Bagel Sourdough Discard Crackers (3 Ingredients)
- Use up 250g: Soft, Pliable Sourdough Tortillas Recipe (Discard)

You can browse through all of my sourdough recipes here.
Here are other sourdough recipe developers that I admire – they have incredible recipes as well:
- Maurizio at The Perfect Loaf (I think he has every sourdough recipe under the sun)
- Samantha at Healing Slice (incredible staples and easy discard recipes)
- Joselyn at A Friend In Knead (all things sweet and dessert)
- Noelle at H3art of the Home (croissant queen)
- Elaine at Foodbod Sourdough (fuss-free recipes)
- Sourdough Brandon (lots of fun inclusions and staple recipes)
- Leanna at Aberle Home (croissants and other staple recipe)
- Caitlin at The Sourdough Baker (super skilled – lots of breads and other staples)
Basic Troubleshooting
You’re going to run into issues along the way – everyone does. Here are the two most common problems I see from beginners:
Problem #1: Acidic Starter
This is the #1 issue I help people troubleshoot. An acidic starter happens when you’re not feeding your starter enough, or you’re keeping too much starter in your jar between feedings.
How to tell if your starter is acidic:
- Strong sour, vinegary, or acetone-like smell
- Liquid (hooch) on top – this is okay occasionally, but if it’s happening all the time, your feeding schedule needs adjustment
- Your bread turns out dense, gummy, or overly sour

The fix:
- Feed your starter more frequently (switch from once a day to twice a day)
- Use a higher feeding ratio (try 1:5:5 or 1:10:10 instead of 1:1:1)
- Keep less starter in your jar – you don’t need to keep 200g of starter. I typically keep just 10-20g between feedings.
More help here: The Ultimate Guide to Sourdough Starter Feeding Ratios
Problem #2: Trying to Find a Magic Hack for Bulk Fermentation
There isn’t one. I know that’s frustrating to hear, but it’s the truth.
Every single dough is different based on:
- Flour type
- Hydration level
- Room temperature
- Amount of starter
- Add-ins
- And more
The solution: Use my foolproof recipe and follow my specific guidance for that exact recipe. I have tons of pointers in there that’ll help you nail it down. Once you master that recipe, you can branch out and discover how simple adjustments impact things.
Comparison Truly Is the Thief of Joy
For the love of God, please do not get stuck in the trap of comparing your bakes to the perfect loaves on Instagram.
It will wreck your joy and make you feel inadequate. Before you go looking for crumb readings or critiques, just ask yourself: does the bread taste good?
I get so many questions like: Why is my dough so sticky? Why didn’t it dump right out of the bowl like yours? Why did it crack on the side during baking?
And my response is usually something like: OK, but first: how did the bread turn out?
We often get so wrapped up in comparing little details that we ignore the fact that, actually, this bread was delicious, even if it stuck to the bowl or cracked a bit. Don’t sweat that stuff!
Conclusion
My very first loaf of sourdough in 2019 was a hockey puck. Literally. I gave up for years after that.
When I came back to sourdough in 2023, my early loaves were far from perfect. But they tasted good, and that’s what mattered. I learned something from each bake, and slowly but surely, they got better.

You’ll get there, too. Be patient with yourself, and remember: even imperfect sourdough is better than no sourdough at all.


Thank you so much. There is so much information out there, and it all gets overwhelming, which is why I have been nursing “Lucille” for over a year, but no bread yet. Your guidance will help me jump in this week! I will try to remember to post my result!
From overwhelmed to excited!
Yay, so glad this was helpful for you Cheryl! Excited to hear how it goes!
Bookmarking to reference later. I just rehydrated some starter this weekend and am so excited about all the things I can make again. Good to know it’s not a good idea to use the fresh discard because it’s so tempting. I think when I had a starter before I let it get too acidic so I’m looking forward to trying different ratios and hydrations and some of your recipes.
Enjoy, happy baking!
So grateful Rebekah that I happened on your site… in my pre-Rebekah bread baking days, I could have built a garden retaining wall from all the ‘bread rocks’ I made and could not eat. Your tips on temperature of dough and the room, starter health, your simple and easy to understand instructions/photos, recipe/utensils comparisons, explanation of the science and just making bread as fun, have given me confidence to want to delve into more different recipes. Thank you, thank you, thank you… my grandchildren think I am now amazing and look forward to their next loaf/treat.
Aw this means so much to me, thank you for your kinds words. I am so glad you found my site and are making all the delicious things for your family!