
Hint of Rye Artisan Sourdough Bread (Our Family’s Staple Recipe)
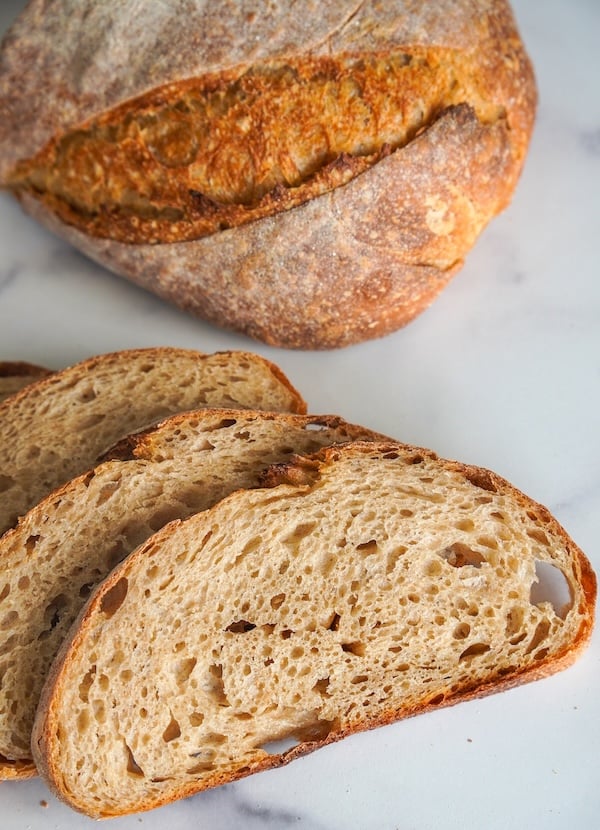
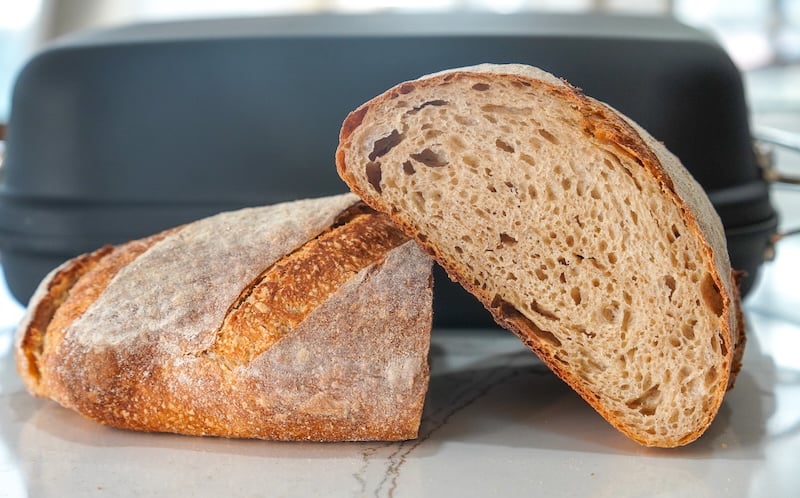
What if you could get the nutrition and nutty flavor of whole grains — with a crumb as soft as your favorite white sourdough?
Enter this Hint of Rye Sourdough Bread Recipe, which has become our official family staple.
“Be still my heart! I think you’ve created the perfect recipe, Rebekah!” —Recipe tester from Tallahassee, FL
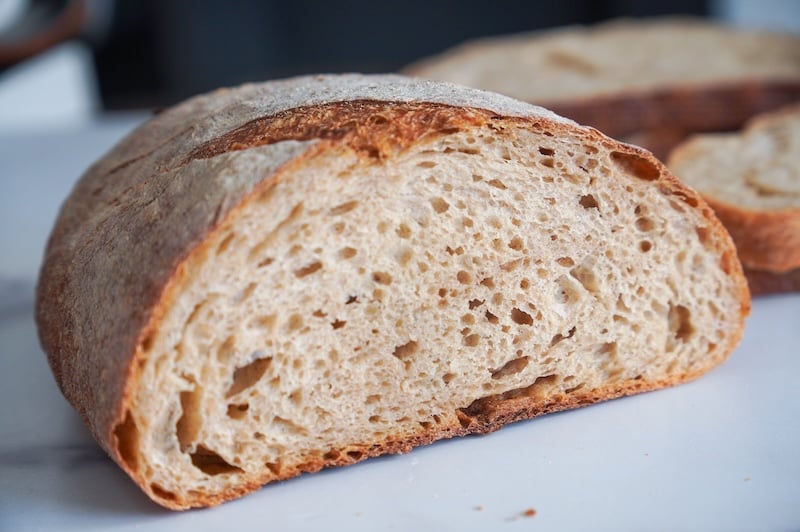
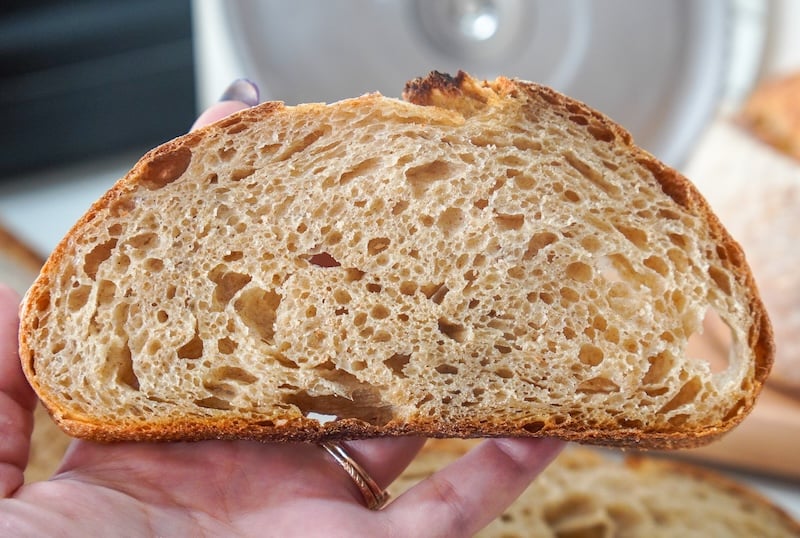
I call it “hint of rye” because there’s just enough rye to add that classic earthy flavor, but not so much that my kids will reject it. And that was really the goal — a forgiving recipe with more whole-grain goodness than an all-white-flour loaf and a soft, squishy interior with a thin crust the whole family can enjoy.
Even though I’ve made this countless times, I still put it through the full recipe testing process. 253 home bakers gave me their feedback, which shaped the tips you’ll find throughout this post.
“This is the best hearty bread I have ever eaten.” —Recipe tester from Chesterfield, VA
Disclaimer: Some of the products I recommend in this post are affiliate links. If you choose to purchase through one of my links, I may earn a small commission, which helps fund this website, recipe development, and monthly giveaways. I sincerely appreciate your support.
Why You’ll Love This Hint of Rye Sourdough Bread
- Tested by 253 home bakers: This is a recipe you can rely on — it earned a 4.73 out of 5-star average, with 96.8% of testers rating it 4 or 5 stars. And that’s before I gathered up their feedback and made additional improvements to the recipe!
“This is a winner: Easy to follow steps—a foolproof recipe.” –Recipe tester from Westmont, IL
- Surprisingly soft for a loaf made with whole-grains: The number one thing testers mentioned was how soft and tender the crumb turned out — not dense or heavy like many whole-grain and rye breads.
“It has incredible flavor and a soft, fluffy crumb…it’s the best rye bread I’ve ever made.” –Recipe tester from Franklin, TN
- A gentle, nutty flavor (not an in-your-face rye): The rye and whole wheat give this loaf an earthy, nutty depth without an overpowering rye flavor. It’s a perfect introduction to baking with whole grains. Speaking of which, you might also want to try my 50% Einkorn Sourdough Bread Recipe and my 20% Whole Wheat Artisan Sourdough Bread Recipe.
“A rye sourdough that you rye haters will love!” –Recipe tester from Oklahoma
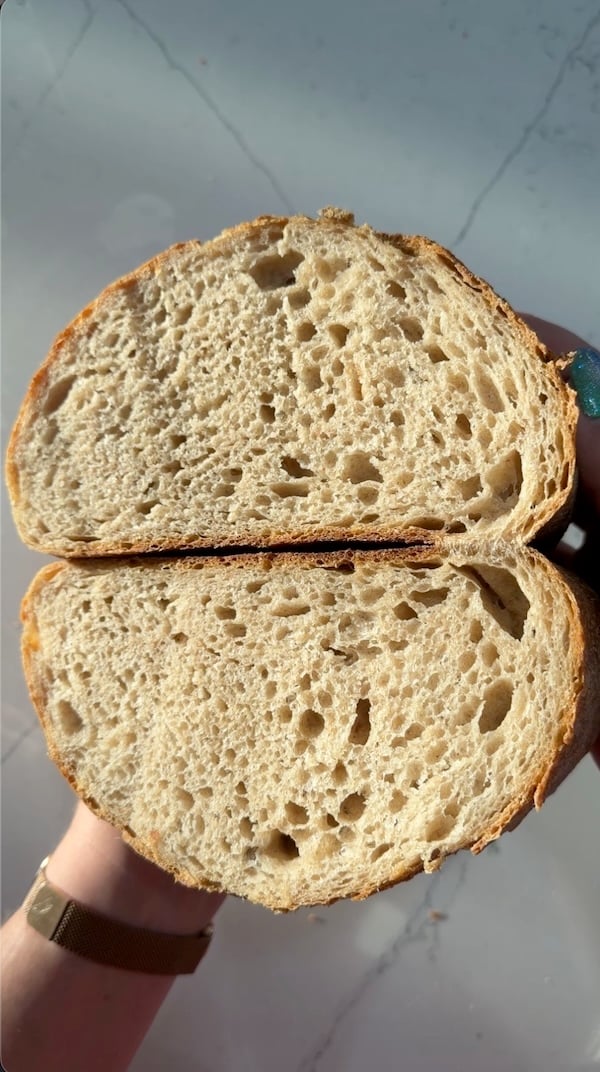
- Very beginner-friendly dough: Over and over, testers raved about how responsive and easy the dough was to handle and shape. 85% of testers needed no hydration adjustments at all — the dough matched the photos right out of the bowl.
“It’s a beginner friendly introduction to rye!” –Recipe tester from San Antonio, TX
- Same-day or overnight — your choice: I often mix this dough mid-morning and bake it for dinner. But if you prefer a longer fermentation, you can throw in an overnight cold proof. Both options are built right into the recipe.
“Came together beautifully and was truly a one day loaf.” –Recipe tester from Jonesborough, TN
- Perfect for sandwiches and toast: Testers loved this loaf for everything from grilled cheese to Reubens to plain buttered toast. At our house, we use it for PB&Js in the kids’ lunches and lunch meat sandwiches my hubby takes to work.
“It makes a really great Reuben sandwich.” –Recipe tester from Muscle Shoals, AL
“These make great tuna melts! My husband said this was one of his favorite flavor combinations.” –Recipe tester from Poulsbo, WA
Recipe Testing Process
This loaf didn’t start as a blog post — it started as the bread I make for my own family, week after week. I made tiny adjustments each time until I landed on what we consider our “daily bread.”
These were the challenges I worked through over time:
- Whole-grain nutrition WITHOUT a heavy, dense loaf: Rye and whole wheat add so much flavor and nutrition, but they can easily produce a tight, heavy crumb. I landed on the ratio of 325g bread flour to 100g whole wheat and just 75g rye — enough whole grain to matter, but with plenty of bread flour to keep the structure light and airy for the kids.
- A soft, thin crust the even the kids would love: Traditional artisan loaves often bake up with a thicker, crackly crust. My kids are notorious for eating the middle of those slices and tossing the entire crust in the trash. To make the crust softer and thinner, I add just 10g of sugar (or honey) and 10g of olive oil. It’s a small tweak that makes a big difference.
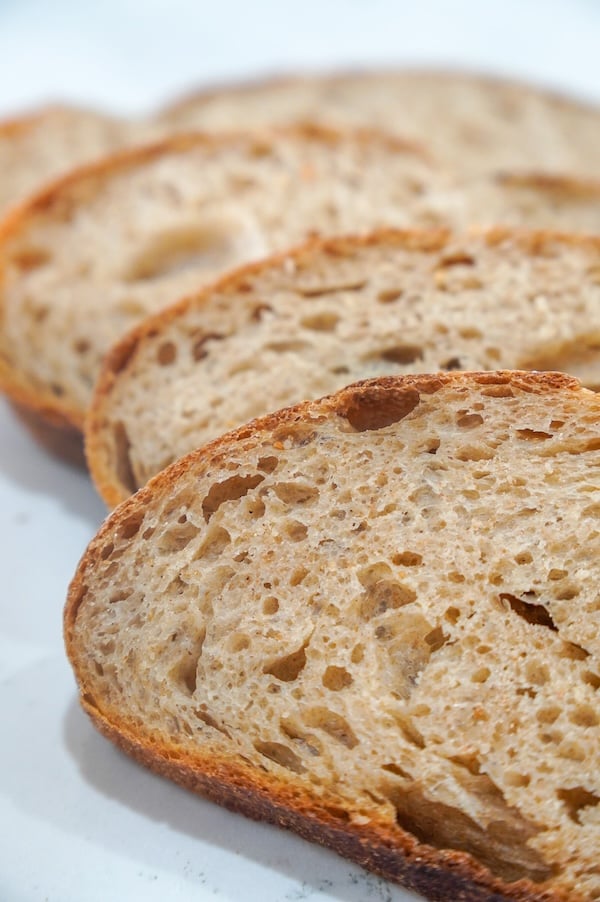
- Dialing in hydration across different flours: Because different flours absorb water differently, I spent time settling on a starting hydration level that works for most bakers while leaving room to adjust. I typically use Central Milling High Mountain Bread Flour, Local Millers Stone Ground Rye, and Local Millers Stone Ground Turkey Red Wheat. That starting point held up in testing: 85% of testers needed no adjustment at all.
- Making it same-day-friendly: I can be a terrible planner, so I wanted a recipe that could be made at the last minute (last-minute in the sourdough world, not the regular world). Whole grains ferment faster than white flour, so I leaned into that — paired with a warm proofing spot, this loaf can go from mixing the dough to cooled slices in about 9½ hours.
I finally sent this family recipe to testers, and their overwhelmingly positive feedback confirmed it was ready to share.
Meet the Recipe Testers
This hint of rye sourdough was put to the test by 253 home bakers, and I’m so grateful to every one of them. Testers came from across the United States and Puerto Rico, as well as Canada, Australia, Greece, the UK, and Switzerland — warm kitchens and cold ones alike.
Here’s how they rated the recipe as a whole:
- Average rating: 4.73 out of 5 stars
- Satisfaction rate: 96.8% (4–5 star ratings)
- 90% said they would make it again
The most common piece of critical feedback wasn’t really a complaint at all — a handful of rye lovers simply wished for more rye flavor.
That’s the tradeoff baked into the name: this loaf is designed to have just a hint of rye while staying soft and approachable. I am definitely rolling up my sleeves to deliver a more rye-heavy variation, so stay tuned!
“I’m amazed how the two grains together make the simple bread so superb!” —Recipe tester from Chippewa Falls, WI
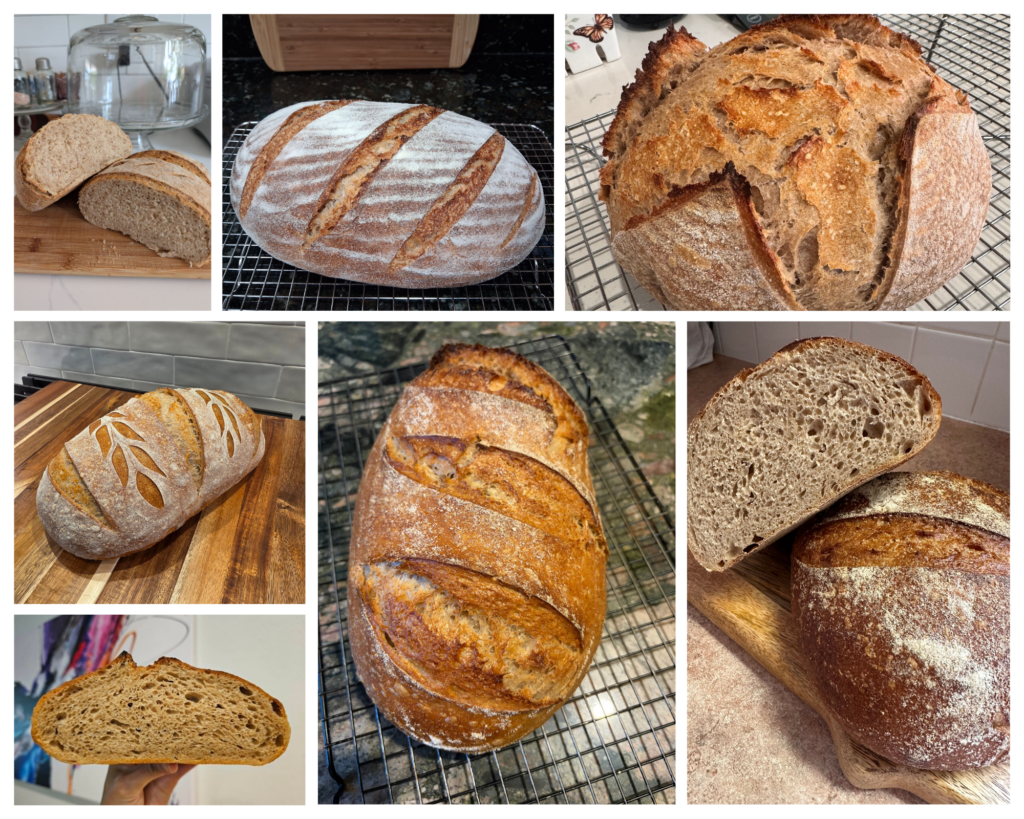
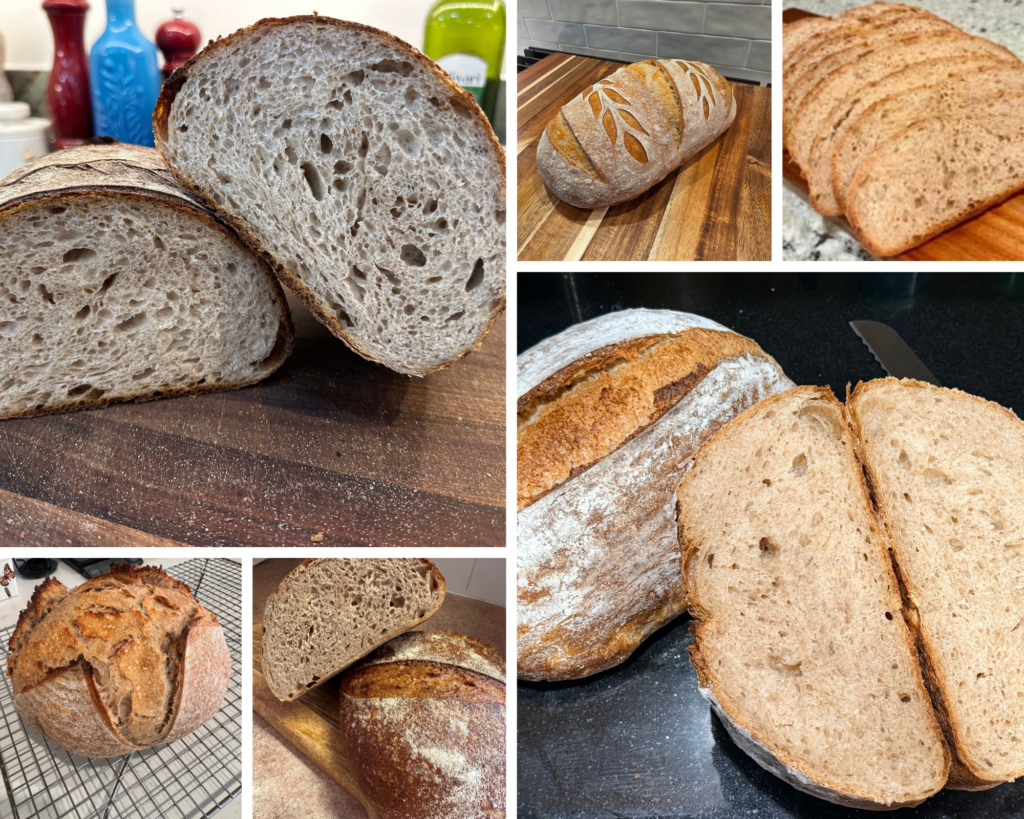
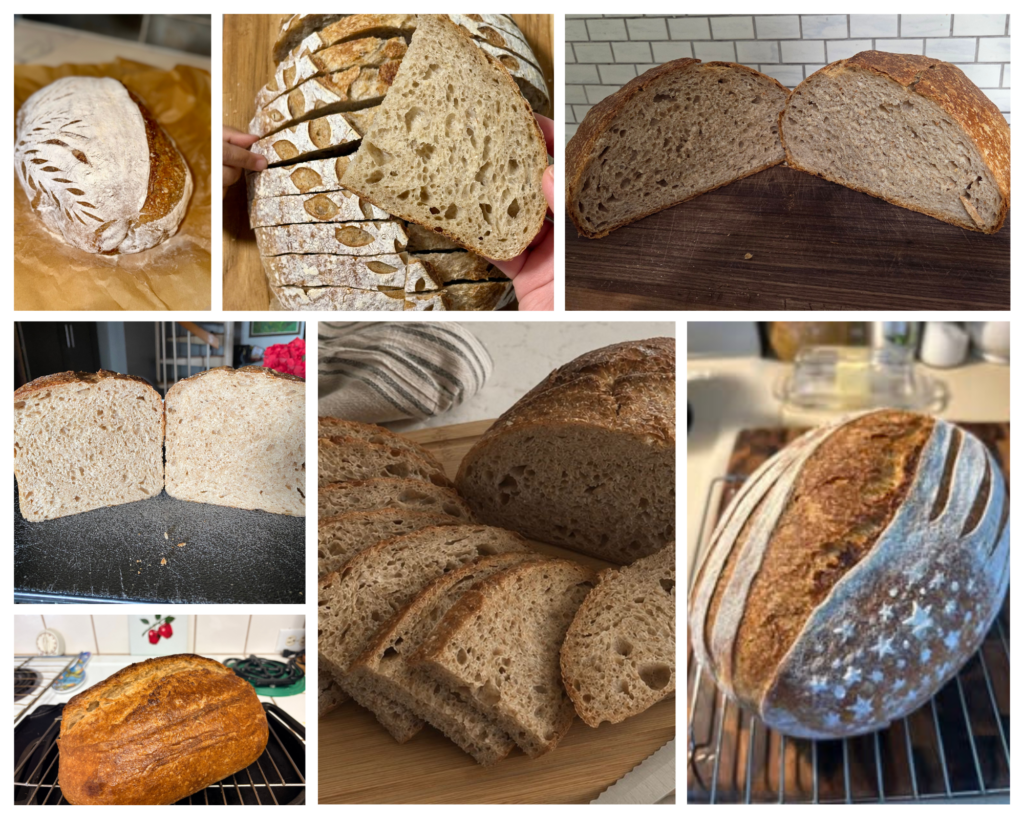
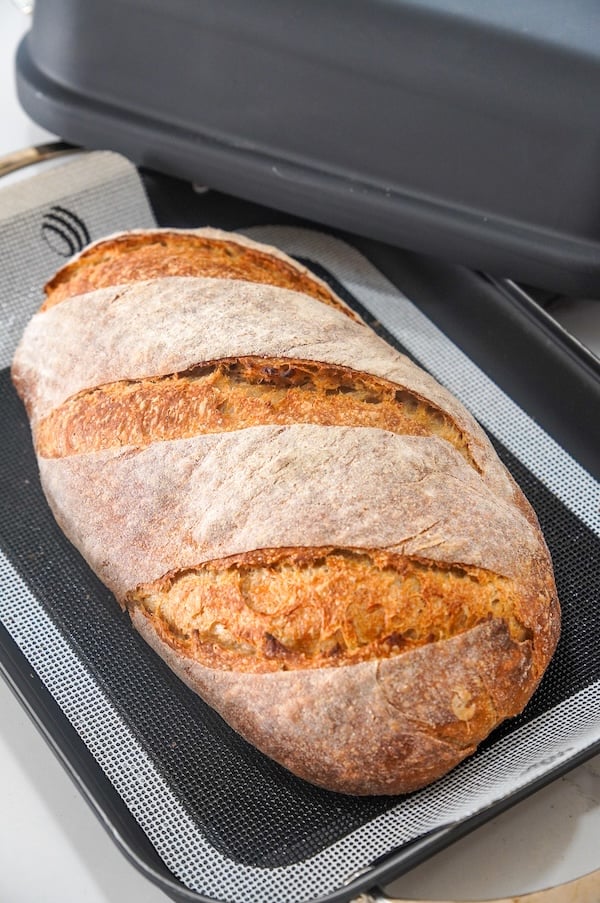
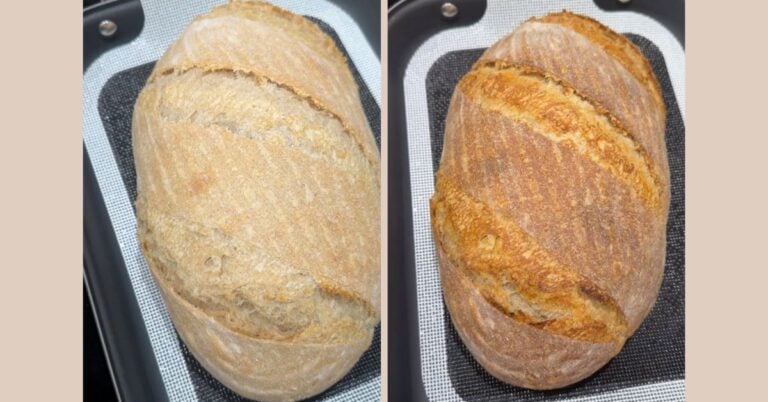
Here are some of the beautiful photo submissions from recipe testers:
Baker’s Timeline – Same-Day and Overnight Options
This recipe’s timing is super flexible, which I love. I typically opt for the same-day timeline, but I’ve also included a 2-day option with an overnight cold proof.
| Same-Day Timeline | |
|---|---|
| Time | Step |
| Before bed (8–9 PM) | Feed your starter |
| 8 AM | Mix the dough (fermentation begins) |
| 8:40 AM | Stretch and fold |
| 9:20 AM | Coil fold #1 |
| 10 AM | Coil fold #2 |
| 10:40 AM | Coil fold #3; let the dough finish bulk fermenting |
| 1:30 PM — this time may vary | Pre-shape, rest for 10 minutes, final shape, then place in a warm spot for the second proof |
| 3 PM — this time may vary | Score and bake; cool for at least 90 minutes |
Prefer an overnight cold proof? After shaping, you can put your dough in the fridge and bake it the following day at any time. 75% of testers chose the overnight cold proof and loved the flexibility (and the slightly tangier flavor it gives).
| 2-Day Timeline | |
|---|---|
| Time | Step |
| Before bed (8–9 PM) | Feed your starter |
| 8 AM | Mix the dough (fermentation begins) |
| 8:40 AM | Stretch and fold |
| 9:20 AM | Coil fold #1 |
| 10 AM | Coil fold #2 |
| 10:40 AM | Coil fold #3; let the dough finish bulk fermenting |
| 1:30 PM — this time may vary | Pre-shape, rest 10 minutes, final shape, then place in the fridge |
| Any time the following day | Score and bake; cool for at least 90 minutes |
Equipment You’ll Need
- Kitchen scale: Essential for accurate measurements, especially with sourdough baking.
- 3/4 L Weck jar (or similar): The perfect size for feeding your starter the night before.
- Large mixing bowl: For mixing and bulk fermentation. This dough comes together so easily that I usually just mix it by hand. While I typically recommend glass bowls, so beginners can more easily watch fermentation, I have to shout out this red Staub bowl — it’s what’s in all the instructional photos, and I’m simply obsessed.
- Bowl cover: I’m a huge fan of these bowl covers from Doe a Deer. They’re amazing quality, and they keep my dough from drying out during bulk fermentation. Use my code THATSOURDOUGHGAL for 15% off!
- Danish dough whisk: Makes the initial mix much easier when working by hand.
- Bowl scraper: For cleaning down the sides of the bowl between folds and turning the dough out cleanly. Definitely optional, but really handy.
- Bench scraper: Used for pre-shaping. If you double the recipe, you can also use the bench scraper to divide the dough into individual loaves.
- Banneton: Wood-pulp bannetons have been my favorite for a long time — Flourside’s are great (use code TSG5 for 5% off). I also love the new bannetons from Brod & Taylor, which have all the same benefits of wood pulp, but are thinner, lighter, and half the price.
- Bread lame: For scoring the loaf. I love this one because it’s entirely stainless steel (and dishwasher-safe). The blade is easy to change, and it comes with a case for safe storage.
- Parchment paper or bread sling: To transfer your dough safely into the hot Dutch oven.
- Dutch oven: My preferred setup for consistent oven spring. Krustic’s Dutch ovens are fantastic (code REBEKAH15 saves you $15) — oval or round. I also recently received the Bulka Carbon Steel Bread Oven (code TSG10 for 10% off), and I loooove it. I highly recommend it, and it works for both boules and batards.
- Cooling rack: For that 90-minute cooldown before slicing.
- Bread knife: A sharp serrated knife is essential for clean slices without squishing that soft crumb. This inexpensive one from Mercer is my all-time favorite (I like it better than Cutco).
Nice-to-haves for this bake:
- Instant-read thermometer: The surest way to know your loaf is done — you’re looking for an internal temperature of 205–210°F (96–99°C).
- Brod & Taylor proofing box: Wonderful if you’re doing the same-day warm proof and want to hold a steady 80°F (26.5°C).
- Stand mixer (optional): You don’t need one for this dough, but it works if you’d rather not mix by hand.
Ingredients for Hint of Rye Sourdough Bread
- Sugar (or honey) + extra virgin olive oil: Just 10g of each. This is the secret to the thin, soft, kid-friendly crust. You’ll barely taste either one, but you’ll notice how much softer and more tender the crust is.
- Bread flour: The backbone of the loaf. At 325g, it provides the structure and strength that help keep the loaf light instead of heavy despite the whole grains. I typically use Central Milling High Mountain Bread Flour, but most recipe testers used King Arthur bread flour with great success.
- Whole wheat flour: Adds nutty flavor, nutrition, and a beautiful speckled crumb. I typically use Local Millers Stone Ground Turkey Red Wheat (use code THATSOURDOUGHGAL for 10% off your first order).
- Rye flour: At just 75g, it’s the “hint” in hint of rye — enough for that classic earthy note without turning the loaf dense. I used Local Millers Stone Ground Rye (use code THATSOURDOUGHGAL for 10% off your first order).
- Salt: Don’t forget it! It’s essential for flavor and dough strength.
“I like having a recipe using different flours. I love adding rye but not too much.” —Recipe tester from Oklahoma
Substitutions
Because this recipe went out to 253 testers, I got to watch a huge range of swaps play out in real kitchens. Here’s what bakers actually used and how it went:
- Sweetener (sugar or honey): Use whichever you have; both soften the crust beautifully. Testers successfully use pure maple syrup, organic cane sugar, and even buckwheat honey — one baker subbed maple syrup (and added caraway) and called the result “absolutely delicious.” A few left the sweetener out entirely for dietary or personal reasons and still got a great loaf; the crust just bakes up a touch firmer.
- Oil: Extra virgin olive oil is my go-to, but a neutral oil works if you’d rather not risk any olive flavor (most testers didn’t detect it anyway). Several testers used avocado oil with great results, and one who ran out simply used melted butter instead.
- Water: A couple of testers swapped in liquid whey (leftover from straining yogurt) for the water. It works well — just know it may lend a little extra tang.
- Bread flour: Bread flour gives the best structure and rise, but plenty of testers used all-purpose flour (Costco’s Kirkland and Great Value AP all showed up) and still got a lovely loaf — just expect a slightly softer, less lofty result. On the other end, high-protein and high-gluten flours (like King Arthur Sir Lancelot or All Trumps) also worked beautifully.
- Whole wheat: Any whole wheat flour works here. Testers happily used einkorn, spelt, kamut, sprouted whole wheat (One Degree), and a range of hard red and hard white wheats. Many used freshly milled whole wheat — if you do, you may need a bit more water, since fresh-milled flour tends to absorb more.
- Rye flour: Dark rye was far and away the most popular choice (Bob’s Red Mill Dark Rye was the overwhelming favorite) and gives the deepest, nuttiest flavor. That said, medium rye, light rye, white rye, and even pumpernickel all worked — lighter ryes give a more subtle result, darker ryes bring more of that classic earthy note. If you’re short on rye, simply make up the difference with a little extra whole wheat.
- Add caraway seeds for a classic deli-rye flavor: This was the single most requested add-in from testers — if you want a more traditional rye taste (think Reuben sandwiches), caraway is the way to go. Bakers used anywhere from about ½ teaspoon up to a couple of tablespoons (~12g), so it’s really to taste. Just stir them into the dough as you mix.
- Want MORE rye flavor overall? Beyond caraway, several rye lovers wished for a bolder rye punch. Because this loaf is designed to be soft and mild, I’d suggest increasing the rye gradually and reducing the bread flour by the same amount, so you don’t sacrifice too much of that signature softness.
“Thank you for this recipe! I was blown away by how much I liked it! I finally know how to use up my rye flour!” —Recipe tester from Calgary, AB, Canada
- Starter: This recipe is built around a liquid (100% hydration) starter, but a couple of testers used a stiff starter and reported nice oven spring. If you’re cold-proofing overnight, you can also scale the starter down from 130g to about 60g to slow fermentation.
- No Dutch oven? No problem. Several testers baked beautifully without one — using an enamel roaster with a lid, a baking steel or Brod & Taylor baking shell with a dome on top, or even a cold-start method in a covered roasting pan. A loaf pan works too (see the loaf-pan FAQ below for a full method). The key with any of these methods is to trap steam during the first part of the bake.
How to Make Hint of Rye Sourdough Bread (Step-by-Step)
This is the detailed version with all the extra tips. The streamlined recipe card is at the end of the post!
Step 1: Feed Your Starter (Night Before)
Before bed, in a 3/4 L Weck jar (or similar-sized glass jar), feed your starter using a 1:5:5 ratio — mix 13 g sourdough starter, 65 g water, and 65 g bread flour or all-purpose flour until smooth. Loosely cover and let it ferment on the counter overnight, about 10–12 hours at 68–75°F (20–24°C).
The dough uses 130 g of active starter, so you’ll have 13g left to maintain your starter for next time.
Step 2: Mix the Dough
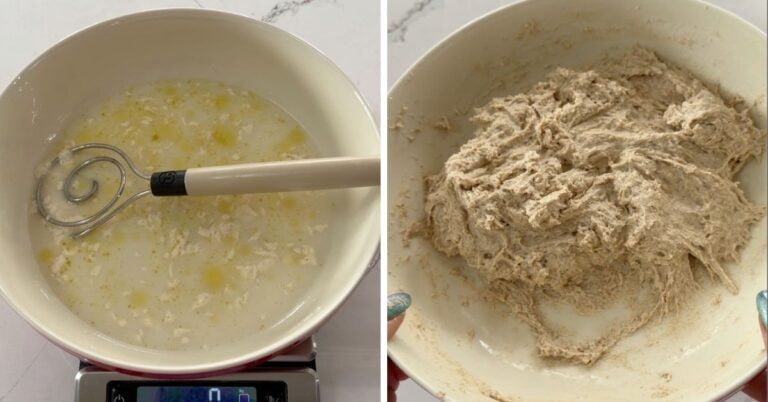
In the morning, combine 350 g water, 10 g sugar, 10 g extra virgin olive oil, and 130 g active sourdough starter in a large mixing bowl.
Add 325 g bread flour, 100 g whole wheat flour, 75 g rye flour, and 10 g salt. Using a Danish dough whisk or your hands, mix until no dry flour remains.

Dialing in your ideal hydration: Different flours absorb different amounts of water. For this recipe, I typically use Central Milling High Mountain Bread Flour, Local Millers Stone Ground Rye, and Local Millers Stone Ground Turkey Red Wheat.
The flour you use may absorb more or less water than mine. The first time you make this loaf, start with 350 g of water and monitor the dough’s texture as it comes together. If it feels too dry or stiff, add water in small increments until the dough feels workable. You may need up to 380 g of water total.
Once you know how much water your flour needs — write it down so you can use that amount in future bakes. Or, just wing it and lean into intuitive baking!
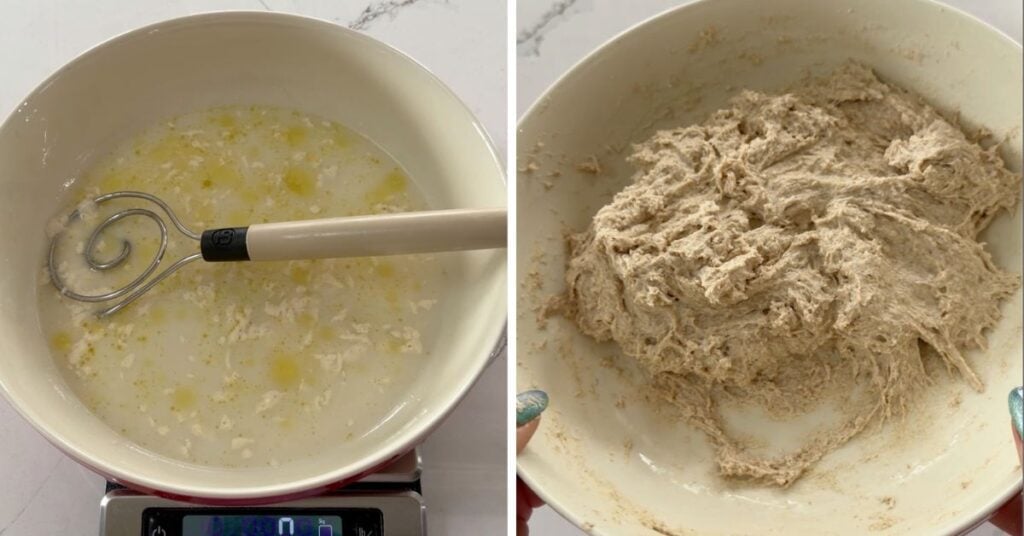
This is the start of bulk fermentation. Cover the bowl and let it rest for 30–40 minutes.
Step 3: Stretch and Fold
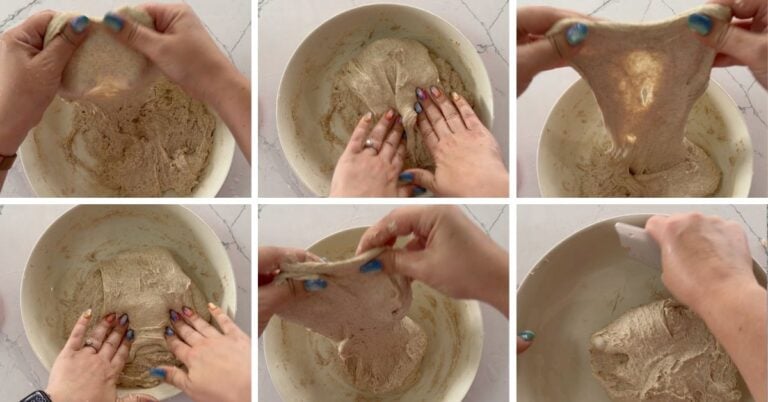
Wet your hands, grab one edge of the dough, and stretch it up before folding it back over the center. Rotate the bowl a quarter turn and repeat. Continue rotating and folding until the dough resists being stretched — usually around 8 folds total.
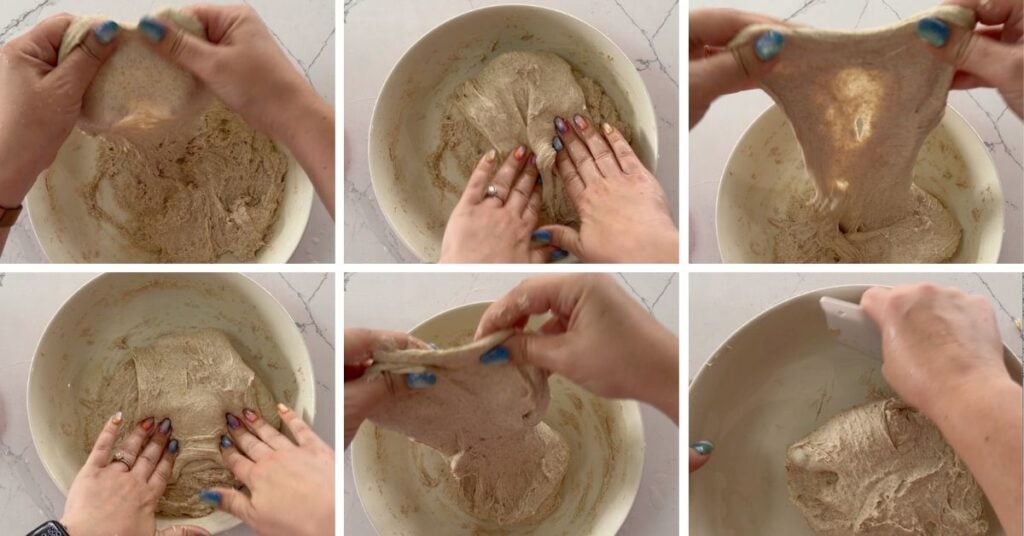
Use a bowl scraper to clean up the sides of the bowl. Cover and let rest for 30–40 minutes.
Note: If your dough feels stiff or doesn’t quite match the texture you see in my photos, don’t be afraid to add a little more water. Just squeeze it into the dough until it’s absorbed — it’ll get stringy and ropey for a second, but don’t worry, it comes right back together. Adding water after the initial mix is a technique called bassinage, and even though true bassinage means holding some water back on purpose, rest assured you can still work it in during bulk fermentation and get beautiful results.
Step 4: Coil Folds (3 rounds)
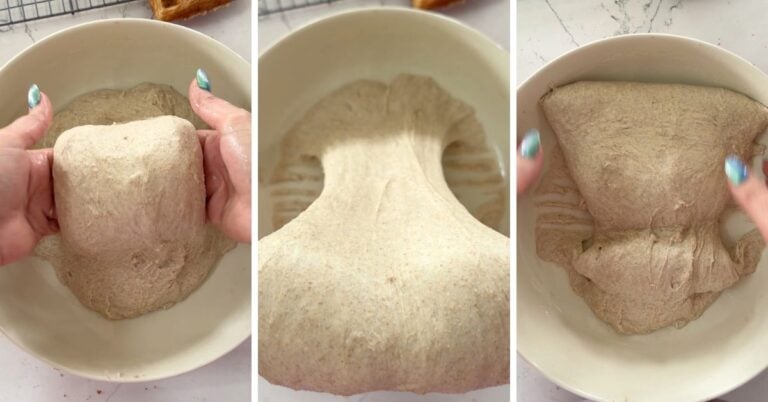
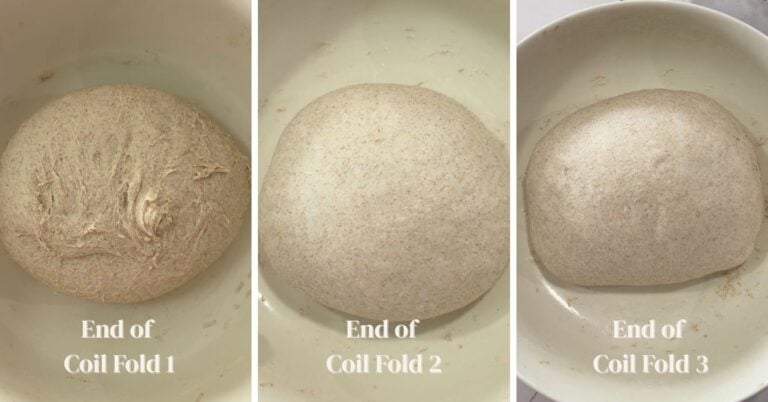
Wet your hands and slide them under the center of the dough. Lift the dough up and let the ends fold underneath, then rotate the bowl 90° and repeat. Rewet your hands as needed.
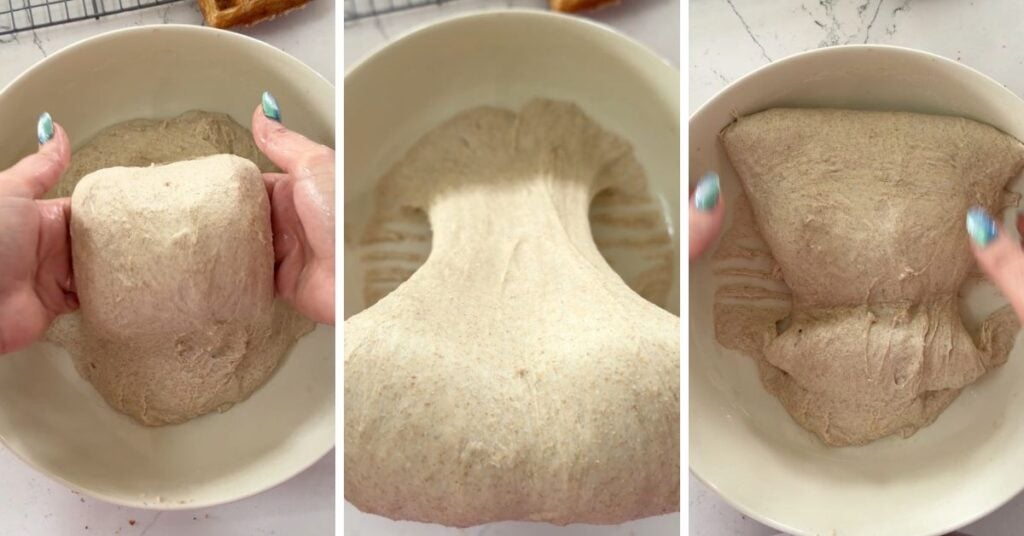
Repeat every 30–40 minutes for a total of 3 rounds, covering and resting the dough between rounds. You should notice the dough smoothing out and getting stronger with each round.
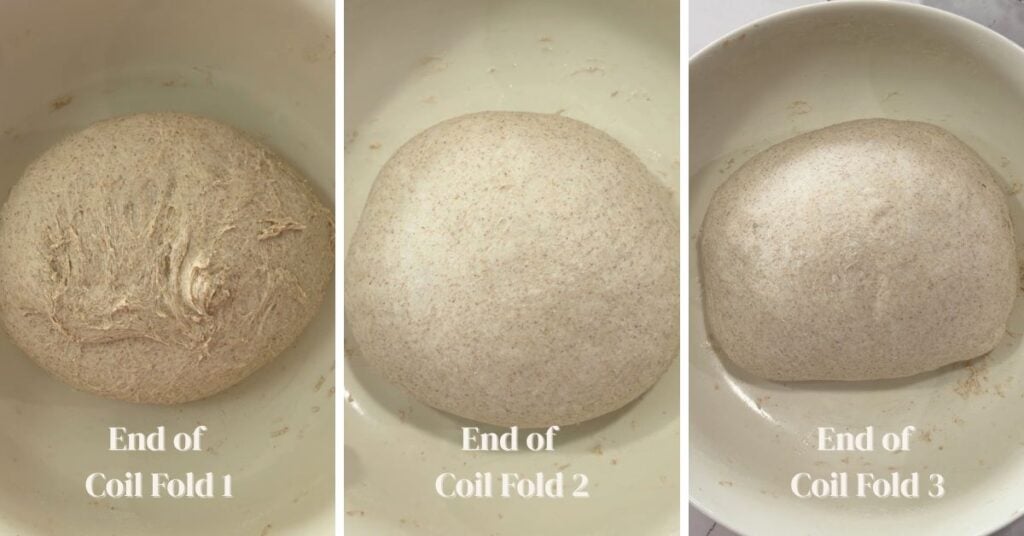
Step 5: Finish Bulk Fermentation
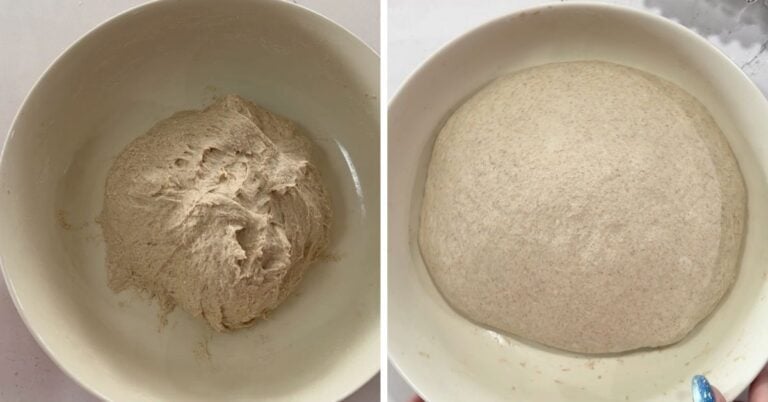
Bulk fermentation began the moment you mixed the dough. It’s ready to shape when it has increased in volume, has lots of visible bubbles, jiggles when you shake the bowl, and shows minor webbing when you gently pull on the edge.
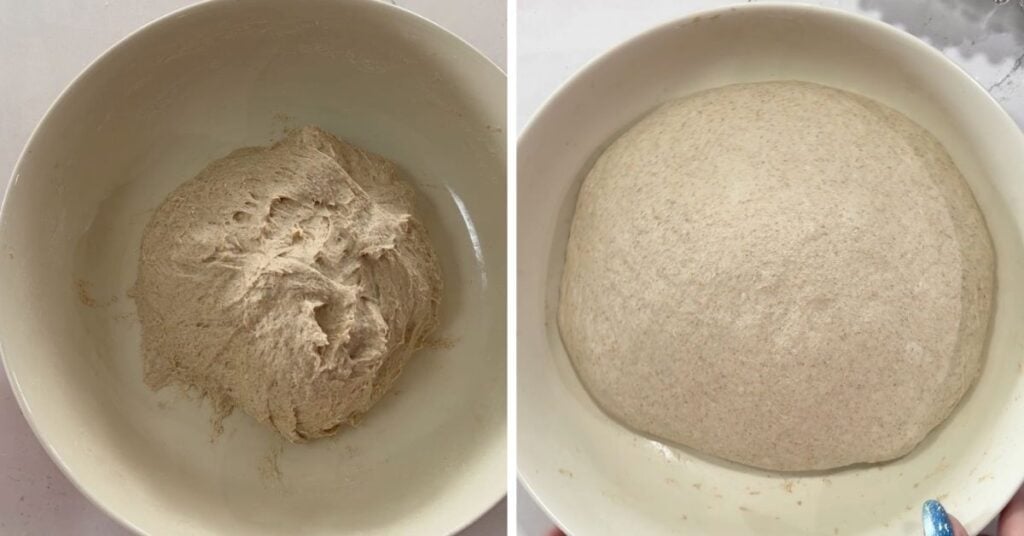
At 77–80°F (25–26.5°C), expect about 5.5–6.5 hours total, but timing varies a lot with temperature — so trust the visual cues over the clock.
Fermentation timing from testers: Use this as a guide, but always trust your dough’s visual cues over the clock:
• Over 80°F (26.5°C): Moves fast — many finished in 3.5–5.5 hours, so start checking early.
• 77–80°F (25–26.5°C) — the target range for this recipe: most testers landed at 5.5–6.5 hours, with plenty done in as little as 4.5.
• 74–76°F (23.5–24.5°C): Around 5.5–7 hours.
• 71–73°F (21.5–22.5°C): Closer to 6–7.5 hours.
• 68–70°F (20–21°C): Cooler kitchens took their time — often 7.5+ hours.
Because rye and whole wheat ferment faster than a plain white loaf, start watching for your signs (volume increase, bubbles, a jiggle when you shake the bowl, and light webbing at the edges) a little sooner than you might expect — especially once you pass the 4-hour mark in a warm kitchen.
Step 6: Pre-Shape
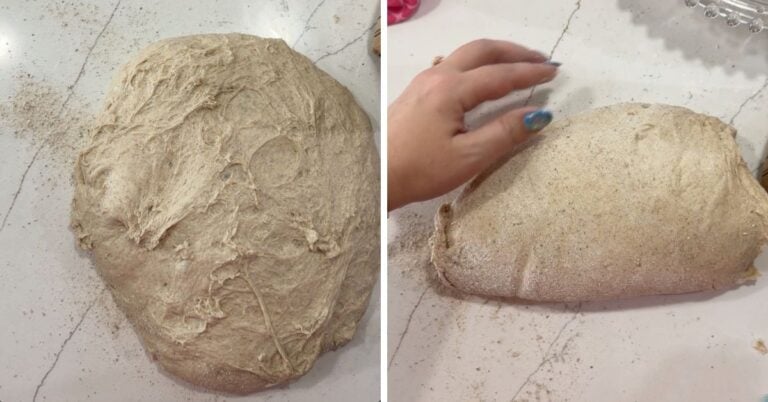
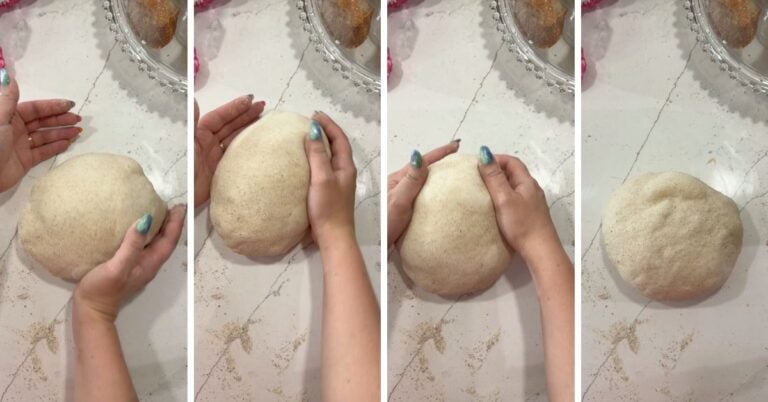
Lightly dust your dough and work surface with flour (I like using rye flour) and turn out the dough. Use your hands or a bench scraper to flip it so the smoothest side is facing up.
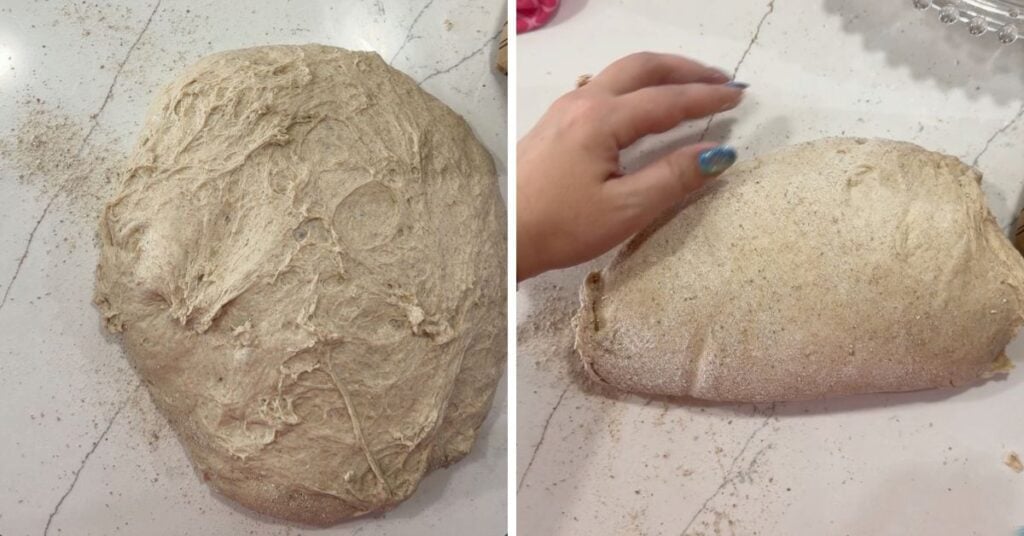
Push the dough up, around, and back toward you in a candy-cane motion — a gentle scooping motion that drags the dough across the counter to build surface tension.
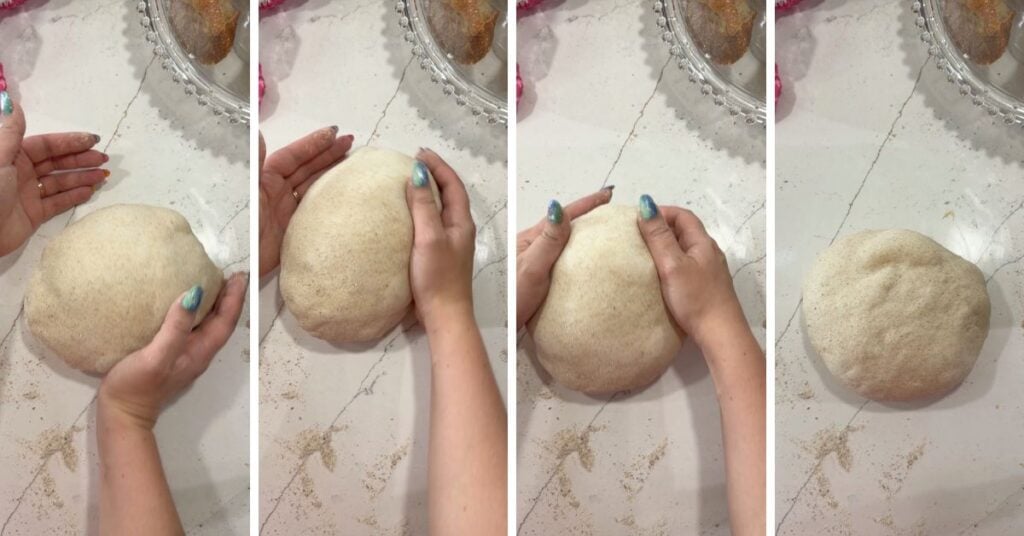
Continue gently until you’ve coaxed it into a taut round. Let it rest, uncovered, for about 10 minutes.
Step 7: Final Shape
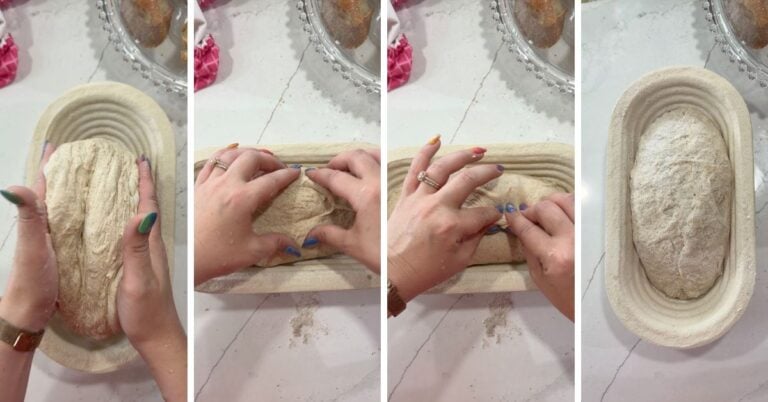
Use the caddy clasp technique to shape the dough:
- For a batard: Fold the dough like a book and place it in a floured banneton.
- For a boule: Do a double clasp (folding like a book in both directions), then flip it into a floured banneton.
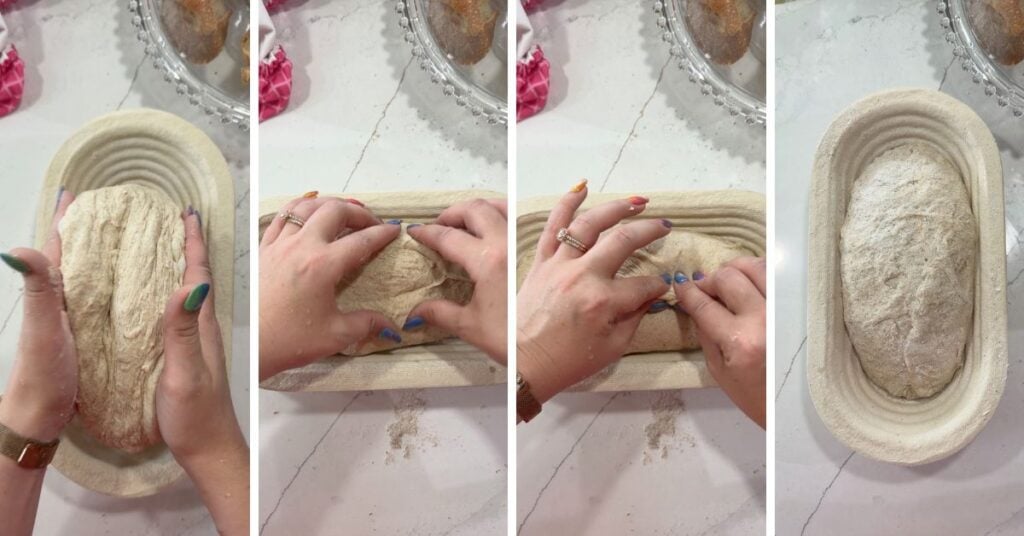
Pinch the seam closed and dust lightly with flour before covering.
Note: If your dough is acting a bit slack and you feel it needs a more structured shaping technique, don’t be afraid to deviate from the recipe instructions here. I often switch up methods based on how my dough is behaving that day, but the caddy clasp seems to fit the bill most of the time.
Step 8: Second Proof (Choose Your Timeline)
- Overnight (cold) proof: Refrigerate the shaped dough and bake anytime the following day. This is what 75% of testers chose — it’s flexible and adds a lovely, slightly tangier flavor.
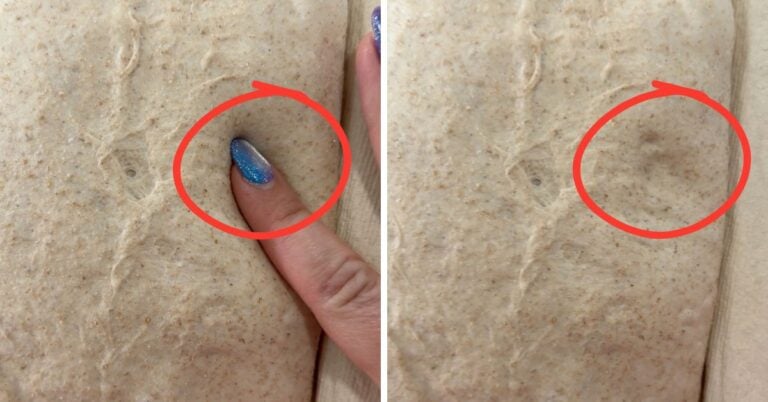
- Same-day (warm) proof: Place the dough in a warm spot and bake when it has puffed up and passes the poke test (see below), about 1.5 hours at 80°F (26.5°C).
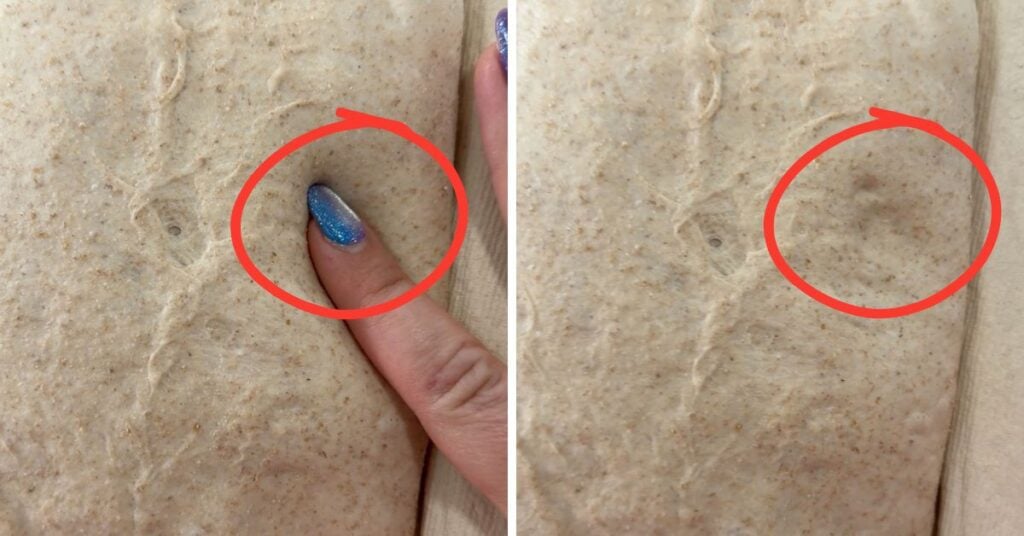
Poke test: Lightly flour a finger and poke the dough. If it springs back quickly and fully, it needs more time. You’re looking for an indent that stays put and springs back only very slightly and slowly. Note that the poke test only works on dough that has proofed at room temperature — it won’t give accurate results on cold dough straight from the fridge. This short video has more visuals if needed.
Step 9: Score and Bake
Preheat your oven to 450°F (230°C) convection — or 475°F (250°C) conventional — with a Dutch oven inside. Let it come fully up to temperature.
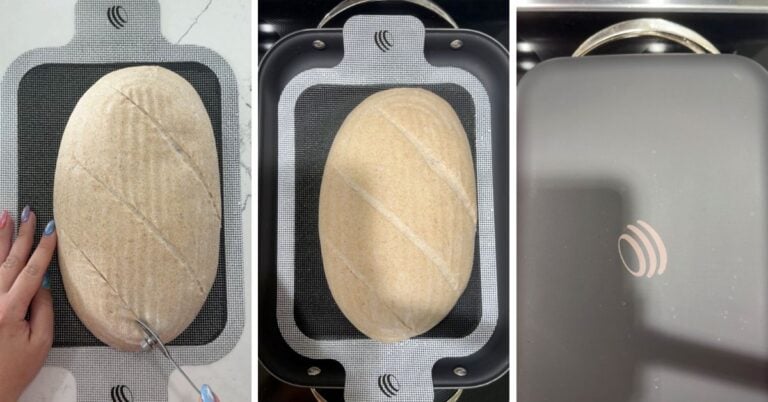
Transfer the dough to parchment paper or a bread sling and score it. I like doing three shallow, diagonal slashes, but choose any design you like! Place it in the hot Dutch oven. For a blistered crust, add 1–2 ice cubes under the parchment or bread sling before covering.
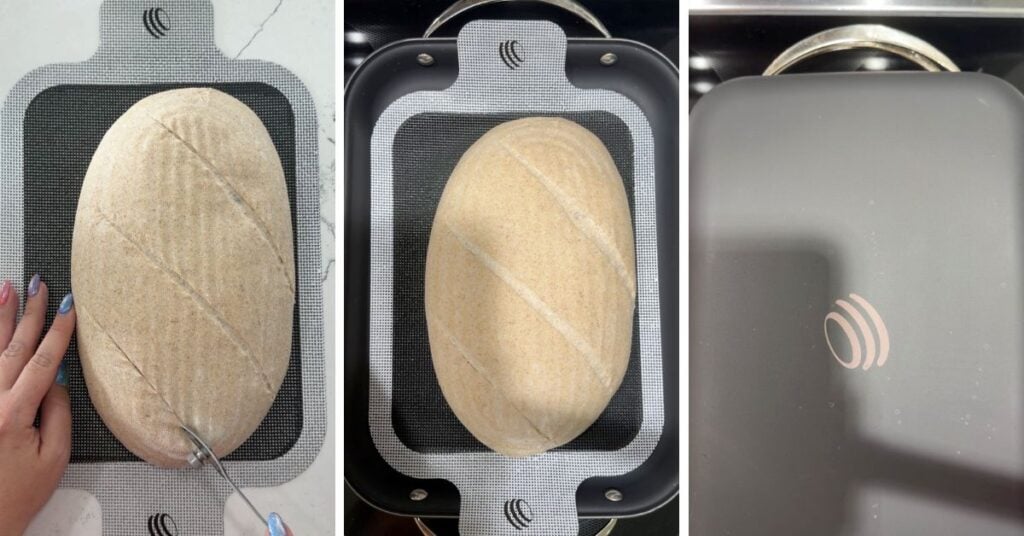
Bake with the lid on for 25 minutes. Remove the lid and bake 10–15 minutes more, until golden brown and the internal temperature reaches 205–210°F (96–99°C).
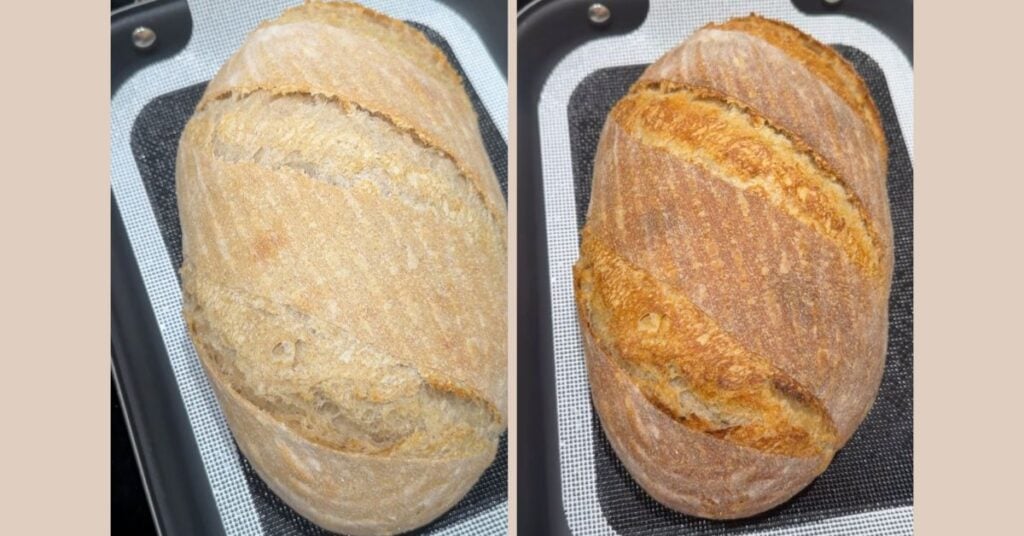
Tip: If your oven runs hot or you’re baking conventional, keep an eye on the bottom crust in the final minutes. A sheet pan on the rack below the Dutch oven helps prevent over-browning on the bottom.
Step 10: Cool Before Slicing
Cool on a wire rack for at least 90 minutes before slicing. I know it’s tempting, but cutting too early can leave the crumb gummy — the loaf is still setting as it cools.
Storage and Reheating
Room temperature: Store the cooled loaf in a bread bag or under a glass cake dome for 2–3 days.
- I love these Doe a Deer bread bags — use code THATSOURDOUGHGAL for 15% off.
- These paper bread bags from Sis & Co Collective are also great for storing on your counter or gifting.
Freeze for longer storage: Slice the loaf and place it in a freezer-safe bag. It’ll keep well for up to 3 months.
Reheat from frozen: Toast slices straight from the freezer — this bread makes fantastic toast.
Revive a whole loaf: If it feels dry, mist the crust with water and warm the loaf at 325°F (165°C) for about 10 minutes to soften it back up.
Related: Why Freezing Your Sourdough Bread Makes It Healthier (Really!)
Troubleshooting Tips
FAQs
You can definitely bake this bread in a loaf pan — about a dozen recipe testers did! When you shape your dough, place it in the loaf pan (seam-side down) instead of a banneton. Testers used everything from a 9.5 x 5-inch to a 13 x 4-inch pan.
One tester’s method that turned out perfectly: bake at 450°F (230°C) for 40 minutes using the double-pan method — a second pan inverted on top to trap steam like a mini Dutch oven — then remove the top pan and bake about 10 more minutes at 430°F (220°C), until the internal temperature reaches 205–210°F (96–99°C).
The olive oil and sugar (or honey) are what give this loaf its signature thin, soft crust. You can leave them out, but expect a firmer, more traditional artisan crust as a result.
Several testers suggested them for a more classic rye flavor. If you love a deli-style rye, a tablespoon of caraway seeds stirred into the dough is a great optional addition.
Yes! Because whole grains ferment faster, this loaf can go from mixing to a cooled slice in about 9½ hours when you use the same-day warm proof option. You can also use an overnight cold proof for more flexibility.
Bread flour gives the best structure and rise for this loaf, especially with the whole grains pulling the crumb toward a denser texture. You can use all-purpose flour, but expect a slightly softer, less lofty loaf and watch the dough’s hydration since your flour may absorb water differently.
You can do an overnight bulk fermentation, but not with the recipe exactly as written — it would be overproofed by morning. One recipe tester, Janean B. Newton, developed an overnight bulk fermentation variation that worked well in her kitchen.
She reduced the active starter to 50 g and kept everything else the same, then nested her mixing bowl inside a larger container of ice to slow fermentation. With her kitchen at 73°F (23°C), she started bulk fermentation at 5 p.m., refreshed the ice around 8:30 p.m., and had a beautifully proofed, non-sour dough by 8:30 the next morning.
She bakes in loaf pans using the double-pan method in her gas oven: 450°F (230°C) for 40 minutes, then 10 more minutes with the top pan removed.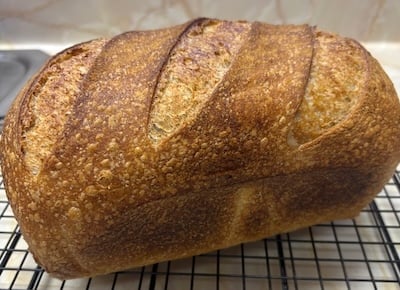
“I think this is going to become my everyday loaf.” —Recipe tester from Visalia, California
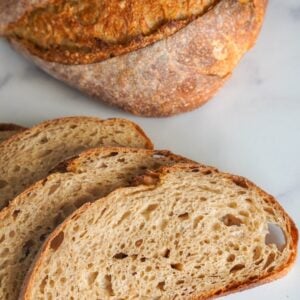
Hint of Rye Sourdough Bread
Equipment
- 3/4 L Weck jar for your starter
- Staub mixing bowl this is my favorite, but any large mixing bowl is great
- Bowl cover code THATSOURDOUGHGAL for 15% off
- Proofing box optional
- Banneton code TSG5 for 5% off; I'm using the Oval Spiral Large here
- Parchment paper or bread sling
- Bulka bread oven code TSG10 for 10% off; any Dutch oven works great
Ingredients
Feed Your Starter
- 13 g sourdough starter
- 65 g water
- 65 g bread flour or all-purpose flour
Main Dough
- 350 g water* may need to be adjusted; See Notes
- 10 g sugar or honey
- 10 g extra virgin olive oil
- 130 g active sourdough starter
- 325 g bread flour
- 100 g whole wheat flour
- 75 g rye flour
- 10 g salt
Instructions
- Feed your starter: Before bed, in a 3/4 L Weck jar (or similar-sized glass jar), feed your starter using a 1:5:5 ratio — mix 13 g sourdough starter, 65 g water, and 65 g bread flour or all-purpose flour until smooth. Loosely cover and let ferment on the counter overnight [10–12 hours at 68–75°F (20–24°C)]. This recipe uses 130 g, so you'll have 13 g left to maintain your starter.
- Mix the dough: In the morning, in a large mixing bowl, combine 350 g water* (See Recipe Notes), 10 g sugar, 10 g extra virgin olive oil, and 130 g active sourdough starter. Add 325 g bread flour, 100 g whole wheat flour, 75 g rye flour, and 10 g salt. Using a Danish dough whisk or your hands, mix until no dry flour remains. This is the start of bulk fermentation. Cover the bowl and let rest for 30–40 minutes.

- Stretch and fold: Wet your hands, grab one edge of the dough, and stretch it up before folding it back over the center. Rotate the bowl a quarter turn and repeat. Continue until the dough resists being stretched. This is usually around 8 folds total. Use a bowl scraper to clean up the sides of the bowl. Cover the bowl and let rest for 30–40 minutes.
- Coil folds (repeat every 30–40 minutes for a total of 3 rounds): Wet your hands and slide them under the center of the dough. Lift the dough up and let the ends fold underneath, then rotate the bowl 90° and repeat. Wet your hands as needed. Cover and rest between rounds.
- You should notice the dough smoothing out and getting stronger throughout this process.
- Finish bulk fermentation: Bulk fermentation began when you first mixed the dough. It's ready to shape when it has increased in volume, has lots of visible bubbles, jiggles when you shake the bowl, and shows minor webbing when you gently pull on the edge of the dough. At 77–80°F (25–26.5°C), expect about 5.5–6.5 hours total, but timing varies a lot with temperature — so trust the visual cues over the clock.
- Pre-shape: Lightly dust your dough and work surface with flour (I like using rye flour), then turn out the dough. Use your hands or bench scraper to flip it so the smoothest side is facing up.
- Push the dough up, around, and back toward you in a candy cane motion. Continue doing this gently until you've coaxed it into a taut round shape. Let rest, uncovered, for about 10 minutes.
- Final shape: Use the caddy clasp technique to shape the dough quickly and easily. For a batard, fold your dough like a book and place it into a floured banneton. For a boule, do a double clasp (folding like a book in both directions), then flip it into a floured banneton. Pinch the seam closed and dust lightly with flour before covering.
- Second proof: Choose one of two options: For an overnight proof, refrigerate the dough and proceed with the next step anytime the following day. For a same-day proof, place the dough in a warm spot and proceed when it has puffed up and passes the poke test (see Notes for explanation), about 1.5 hours at 80°F (26.5°C). Note that the poke test does not work on cold dough.
- Score and bake: Preheat your oven to 450°F (230°C) convection — or 475°F (250°C) conventional — with a Dutch oven inside.
- Transfer the dough to parchment paper or a bread sling and score it. I like doing three shallow, diagonal slashes, but choose any design you like! Place it in the Dutch oven. For a blistered crust, add 1–2 ice cubes under the parchment or bread sling before covering.
- Bake with the lid on for 25 minutes. Remove lid and bake for 10–15 minutes more, or until golden brown and the internal temperature is 205–210°F (96–99°C).
- Cool on a wire rack for at least 90 minutes before slicing.
Notes
Conclusion
This Hint of Rye Sourdough is proof that whole-grain bread doesn’t have to be dense or intimidating — just a little rye, a soft crumb, and a tender crust that even the pickiest eaters at my table reach for again and again.
If you give it a try, I’d love to see your loaves! Share them in the comments below and tag me on Instagram @thatsourdoughgal.
Other sourdough bread recipes you might love:




My dough rose beautifully, had lots of bubbles and was jiggly. When I went to preshape and shape it it was sticky. What did I do wrong and how could I fix it? It’s now in the refrigerator.
Bake it and let me know how it turns out. Sticky isn’t inherently bad. It can be related to overproofing, but I don’t know until I see the final result. It would mean a lot to me if you could refrain from leaving a negative star rating until you bake the loaf and see the final result, and ideally, giving me a chance to troubleshoot with you. The issue is not always due to the recipe, which is why I am here to help.
I love this loaf. I quit trying recipes with rye or whole wheat because they were always dense. This is perfect. Do you know the approximate amount of fiber per slice?
Oops, sorry, the nutrition facts were missing! Just added it. One slice has about 3g of fiber, assuming you get 10 slices out of one loaf.