
The Best Cinnamon Roll Sourdough Focaccia (Tested by 374 Bakers)
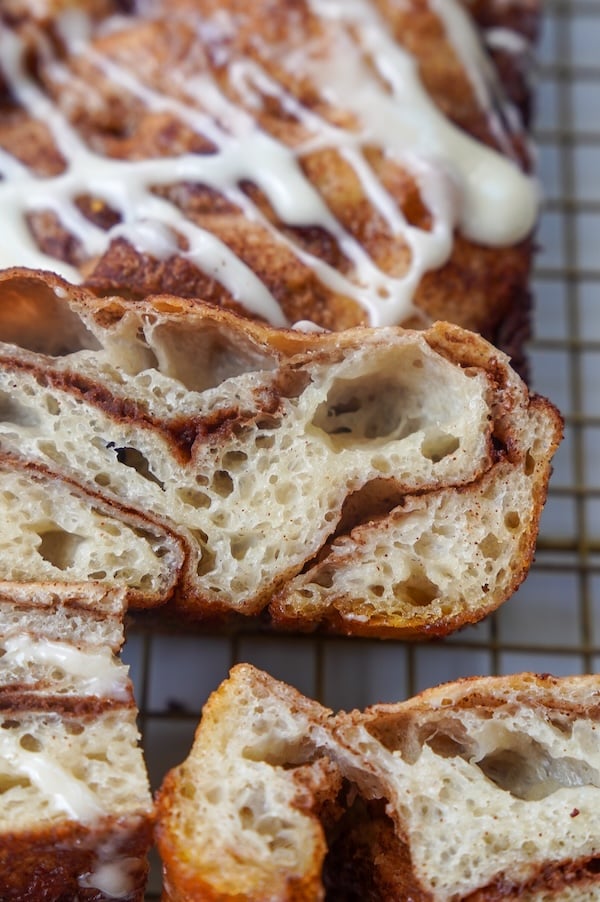
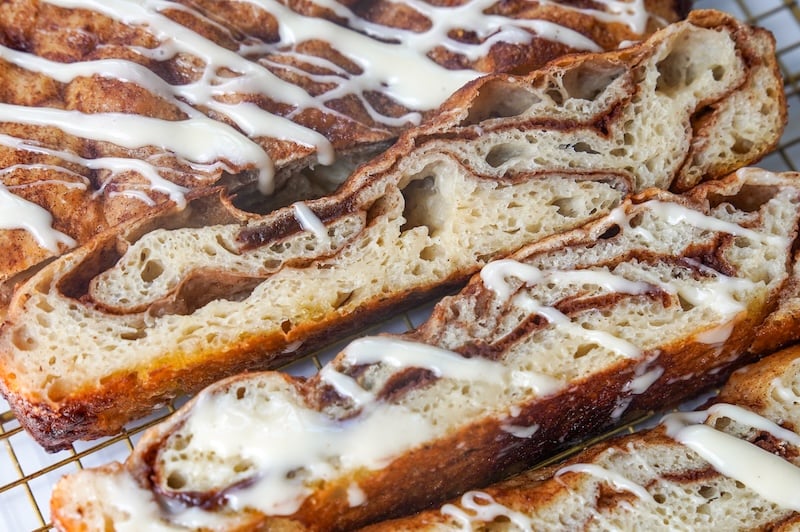
What if you could have all the cinnamon-sugar magic of a cinnamon roll without all the rolling and cutting? That’s exactly what this cinnamon roll sourdough focaccia is: a soft, airy focaccia with ribbons of cinnamon sugar marbled through the crumb and a buttery cinnamon top.
It took several rounds of testing to get there (more on the gummy interior saga below), but the payoff is a recipe that’s super fun to make and impossible to stop eating.
I sent it out to my recipe testers, and 374 home bakers tried it. The verdict? An average rating of 4.74 out of 5, with their feedback baked into every tip in this post.
“Cinnamon roll meets focaccia in the most delicious way!” —Recipe tester from Milwaukee, Wisconsin
Disclaimer: Some of the products I recommend in this post are affiliate links. If you choose to purchase through one of my links, I may earn a small commission, which helps fund this website, recipe development, and monthly giveaways. I sincerely appreciate your support.
Why You’ll Love This Cinnamon Roll Sourdough Focaccia
- All the cinnamon roll flavor with less work: No rolling pin, no cutting, no piping. You layer a dry cinnamon sugar mixture into the dough and dimple a buttery cinnamon topping over the top. Testers said it best:
“Cinnamon roll flavor without all the work!” —Recipe tester from Columbia, South Carolina
“So much easier than cinnamon rolls and just as delicious.” —Recipe tester from Gadsden, Alabama
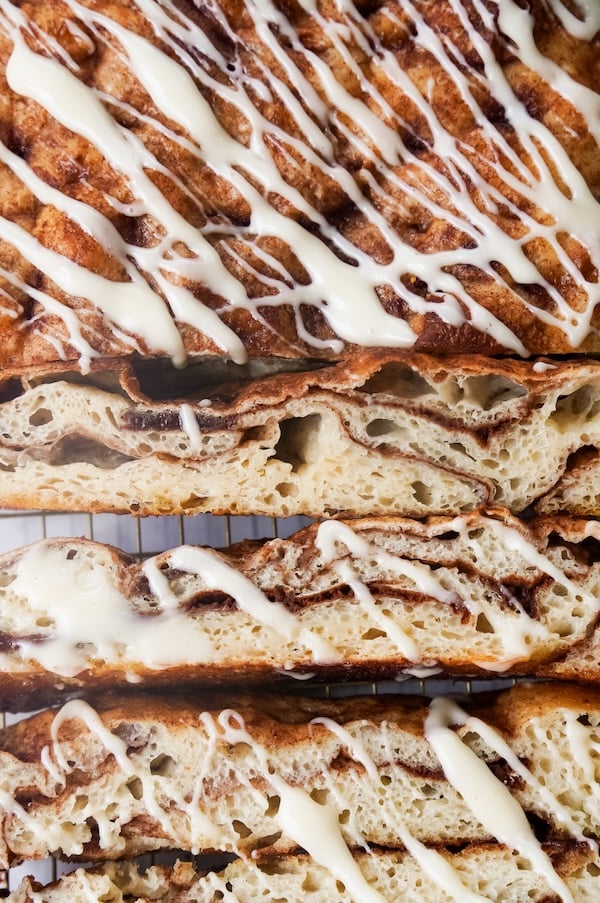
- The dough is SO FUN to handle: This is high-hydration focaccia dough, and 95% of testers (355 of 374) said they had no trouble working with it. It’s so therapeutic and satisfying to handle.
“The texture of the dough! It was like working with a marshmallow cloud. Absolutely dreamy!” —Recipe tester from Missouri
“The dough. It’s so pillowy and squishy and so much fun to play with.” —Recipe tester from Hinesville, Georgia
- Beginner-friendly: Nearly half of testers (172 of 374) rated this a beginner-level recipe, with only 8 calling it advanced.
“Very beginner friendly.” —Recipe tester from Bloomfield Hills, Michigan
- Same-day if you want it: You can have this start to finish in a day, or stretch it over two with an optional overnight cold proof, which some people find easier to digest. One tester had to stash hers in the fridge mid-process, and it still came out great:
“It gave me flexibility. I had to put my dough in the fridge and it did great in there.” —Recipe tester from Lynnwood, Washington
- Tested to within an inch of its life: Out of the 374 home bakers who tested this recipe, 320 said they’d make it again — and that’s before I folded all their feedback into the final version.
“Absolutely dangerous! Didn’t last more than 10 minutes in my house.” —Recipe tester from California
The Recipe Testing Process
This recipe drove me NUTS.
The first 5 recipe variations I tested came out with a gummy center, which quickly became the bane of my existence.

I made batch after batch, tweaking the formula with tips from my Instagram followers, and I finally cracked it with a combination of things:
- Simplifying the dough back to a plain focaccia base
- Layering in the cinnamon sugar as a dry mixture rather than as a wet paste that weighed down the interior
- Dimpling a lightly buttered cinnamon topping deep into the dough right before baking
- Reducing the butter — a LOT
I was so glad when testers reported almost no issues with a gummy interior. Only 31 of 374 testers (8.3%) reported any gummy spots, and most of those traced back to under-baking or cold ingredients rather than the recipe itself.
The other thing testers helped me improve was the marbling step. It can feel a little messy, so I rewrote the instructions to make it crystal clear: you’re not trying to fully incorporate the cinnamon sugar or make anything look neat.
You’re layering it in so it streaks through the dough. The messier it looks, the better the swirl.
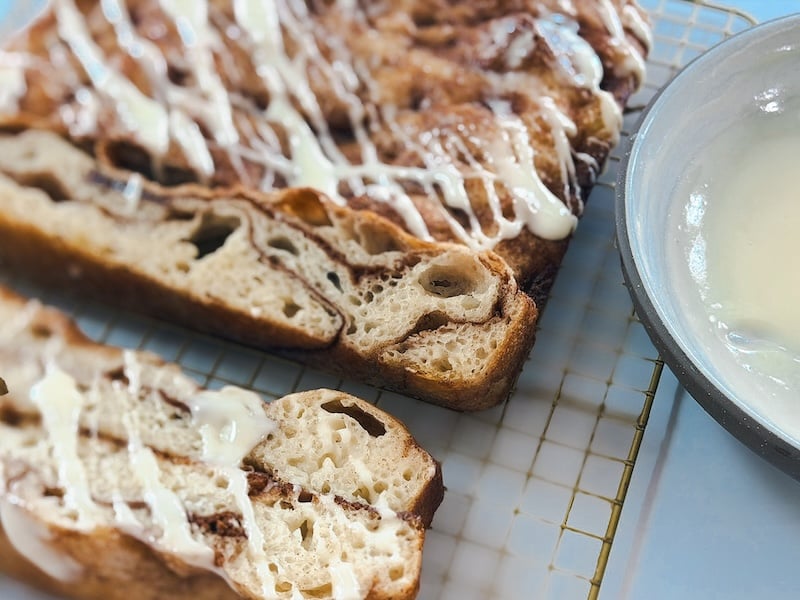
“I love the cinnamon swirl inside the bread, it’s beautiful.” —Recipe tester from Tehran, Iran
Meet the Recipe Testers
This cinnamon roll sourdough focaccia recipe was tested by 374 home bakers, and I’m so grateful to every one of them.
They baked all over the world — across the US and Canada, and as far as Iran, Australia, South Africa, Ireland, the Netherlands, the UK, and Germany. They used everything from King Arthur bread flour (the most popular by a mile) to fresh-milled wheat, and baked in USA Pans, glass casserole dishes, cast-iron skillets, Lloyd Pans, and more.
I don’t like to publish recipes unless they have an average rating of at least 4.5 out of 5 — this recipe earned a 4.74 on the first round, and I’ve made improvements to it since!
“I have made another version of this and yours is a million times better!” —Recipe tester from Middle Tennessee
“Fluffy, gooey, decadent, delicious!” —Recipe tester from Long Island, New York
“Very forgiving dough, easy to work with and beautiful results!” —Recipe tester from Mississippi
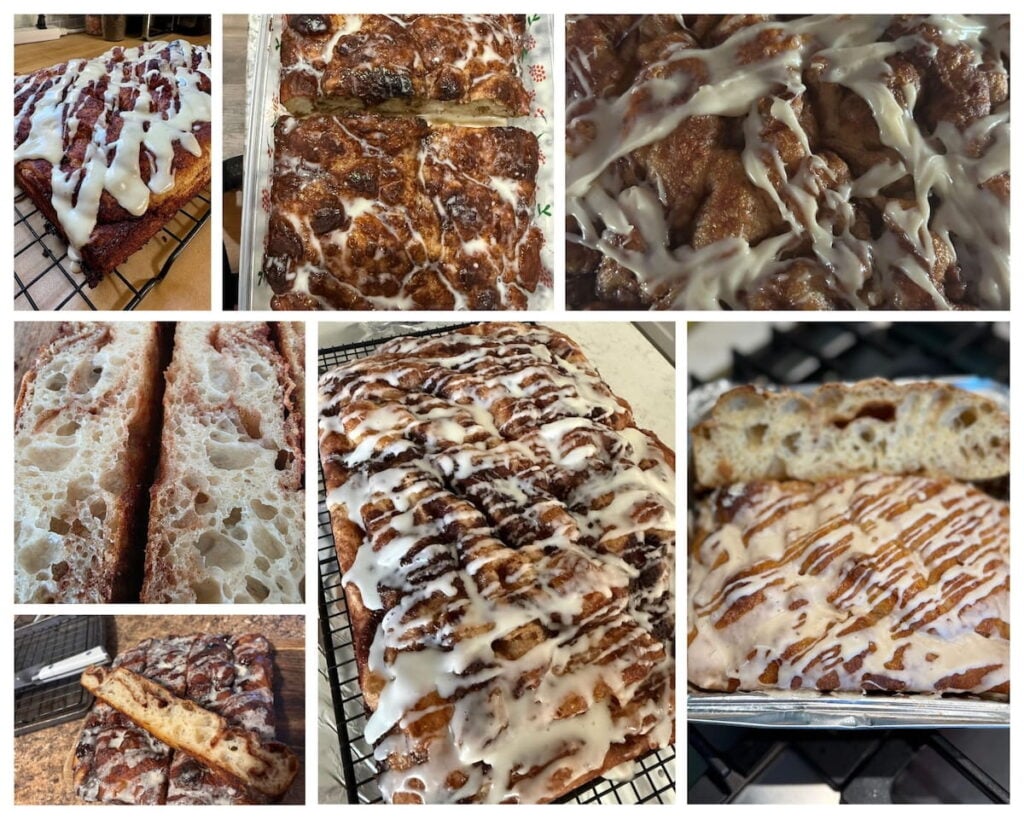
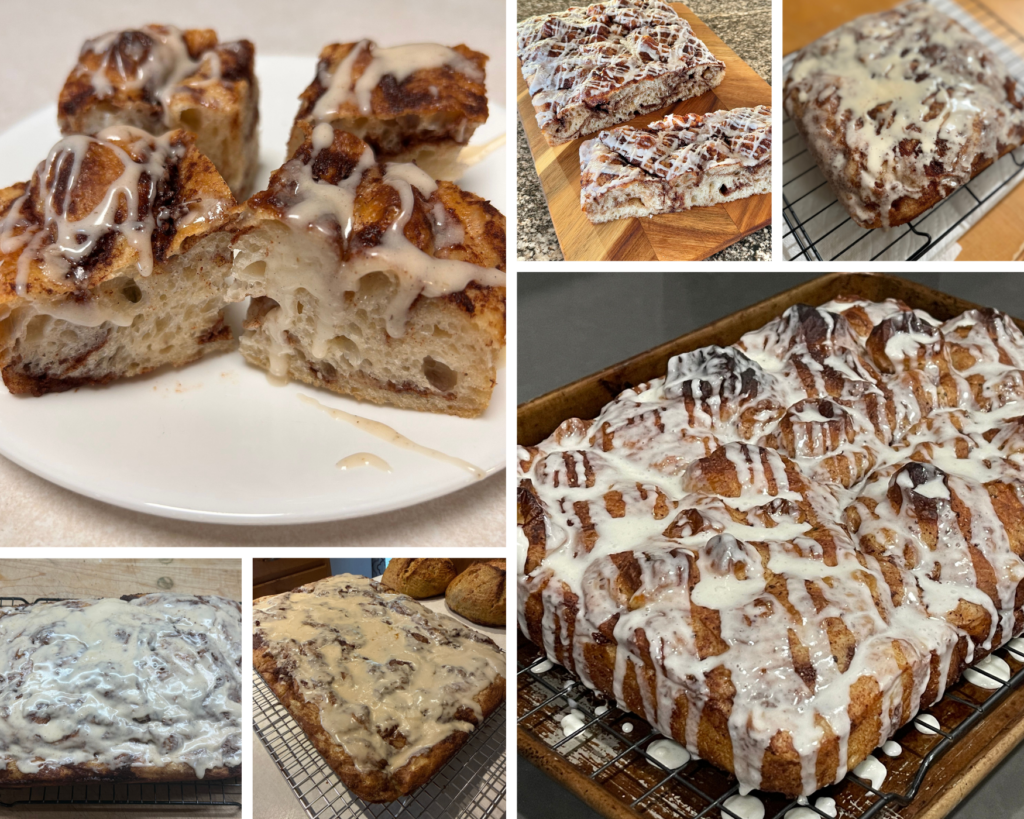
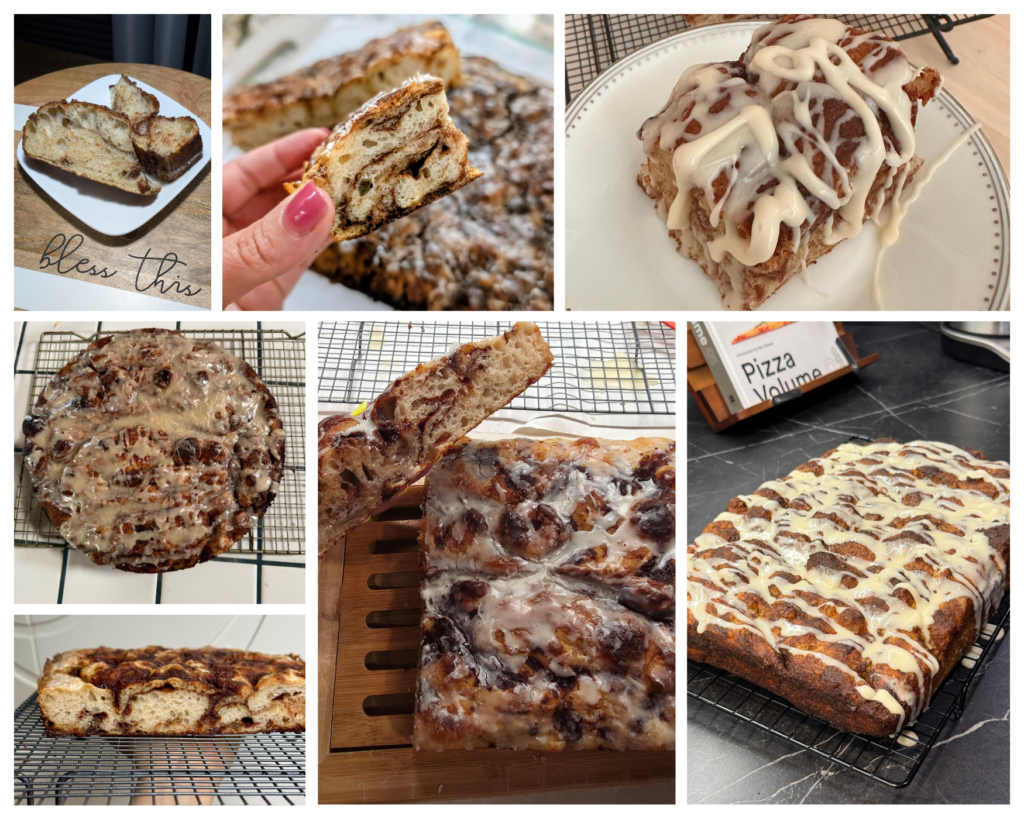
Here’s a look at some of the testers’ beautiful bakes:
Baker’s Timeline
This is the same-day timeline (my default). Times are flexible since this dough is forgiving. See the note below for the overnight option.
| Time | Step |
|---|---|
| Before bed (Day 1) | Feed your starter (10–12 hours at 68–75°F / 20–24°C) |
| Morning (Day 2) | Mix the dough |
| +30 min | First coil fold; continue about every hour |
| Through the morning/afternoon | Finish bulk fermentation (about 5.5–6 hours at 80°F / 26.5°C; longer if cooler) |
| When bulk is done | Fold in the cinnamon sugar, transfer to pan |
| +2–3 hours | Final proof until puffy and about 50% larger |
| End of proof | Add cinnamon topping, dimple, preheat oven |
| Bake | About 30 minutes at 400°F (205°C) on conventional bake |
| After baking | Cool at least 1 hour, then glaze and slice |
Want to split it over two days? After bulk fermentation, pop the dough in the fridge overnight (an optional cold proof). It develops a more complex, slightly sour flavor which some people find easier to digest. The next day, let it warm up 1–2 hours on the counter, then layer in the dry cinnamon-sugar mixture.
Equipment You’ll Need for Cinnamon Roll Sourdough Focaccia
- Kitchen scale: This recipe is written in grams and was developed using metric measurements. Volume conversions are untested — use a scale for best results.
- Large mixing bowl: A 3–4 quart bowl is ideal. A handful of testers used a smaller bowl for the full batch and had the dough climb over the rim during fermentation, which made the layering step messy. Give it room to double.
- Danish dough whisk: Great for the initial mix of this high-hydration dough.
- Bowl scraper: This is your best friend with this dough. Keep it wet.
- Bowl cover: I’m a huge fan of the bowl covers from Doe a Deer — they keep the dough from drying out and wash up beautifully. Use code THATSOURDOUGHGAL for 15% off.
- Proofing box or warming mat: You need a warm, consistent environment for bulk fermentation. If you do not have one of these tools, there are many other ways to create a warm spot! More details in the Recipe Notes.
- Your pan: A Lloyd Pans 10×14-inch Detroit-Style Pizza Pan, a 9×13-inch USA Pan, or a 12-inch cast-iron skillet all work beautifully. The USA Pan was the most popular among testers and the least likely to stick. Glass and ceramic dishes work too, but line them with parchment (see the steps).
- Cooling rack and bread knife: For cooling and slicing.
Ingredients for Cinnamon Roll Sourdough Focaccia
- Sourdough starter: Feed your starter the night before so it’s active and ready to use in the morning. A healthy starter fed within the last 24 hours gives you a reliable rise.
- Bread flour: A high-protein bread flour gives this high-hydration dough the structure it needs to stay light and airy. King Arthur bread flour was far and away the most popular among testers (224 used it). I tested with Central Milling High Mountain, while Bob’s Red Mill, Ballerina Farm, and several store brands all performed well, too. If you’re using a lower-protein flour, see the Ingredient Substitutions section.
- Warm water: Warm (not hot) water gets fermentation moving and keeps this a same-day-friendly recipe.
- Sugar and brown sugar: A little in the dough, more in the dry marbling mixture and wet topping. The brown sugar brings that warm, almost caramel note you want alongside the cinnamon.
- Salt: I use Redmond’s Real Salt (15% off with code TSG15), but any salt will work.
- Ground cinnamon: The star. It shows up in the marbling mixture and the topping. 85% of testers found the cinnamon level just right as written. If yours is on the older side, it may taste muted; if it’s fresh and potent, you may find it strong (a small number of testers did), so feel free to adjust to your taste.
- Butter: Softened butter to line the pan and melted butter in the topping. The topping butter helps carry the cinnamon sugar down into the dimples for that glossy, cinnamon-roll-like top.
- Optional toppings: The focaccia is fantastic as-baked, but for that true cinnamon roll flavor, testers opted for one of these toppings:
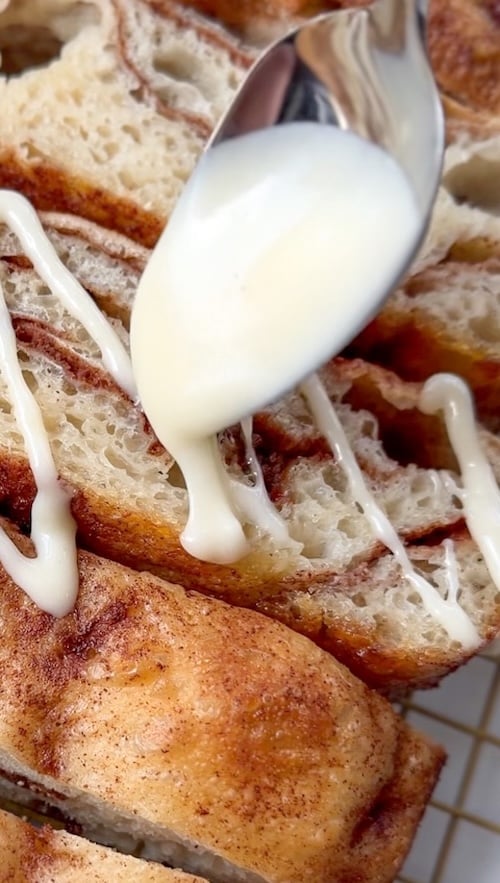
- Vanilla glaze: Powdered sugar, heavy cream, and vanilla.
- Cream cheese drizzle: Cream cheese, powdered sugar, cream or milk, and vanilla.
Ingredient Substitutions
- All-purpose flour: Plenty of testers used all-purpose flour successfully. About 45 reached for Costco/Kirkland AP or Central Milling ABC. Lower-protein flour absorbs less water, so you’ll likely want to add about 15–25g more flour or 1 tablespoon of vital wheat gluten to firm up the dough.
- Fresh-milled flour: Several testers used fresh-milled flour with great results, including one who replaced 40% of the bread flour with fresh-milled and another who milled hard white wheat. Fresh-milled flours absorb water differently, so be ready to adjust the hydration of the dough depending on how it behaves.
- Milk or non-dairy in the glaze: The vanilla glaze is forgiving on the liquid. Testers successfully swapped the heavy cream for whole milk, and a few used non-dairy options like coconut milk and almond milk with good results. One tester who was out of heavy cream used coconut milk and said it “actually worked great.” Just adjust the amount until the glaze ribbons off a spoon.
- Salted butter: A couple of testers used salted butter because it’s what they had on hand, which is totally fine.
- Add-ins: A few adventurous testers added pecans or cinnamon baking chips for extra texture and flavor. They’re fun additions but aren’t necessary for a great result.
- Gluten-free: I have not tested a gluten-free version of this recipe, and none of the testers did, so I can’t confidently recommend a gluten-free substitution yet.
How to Make Cinnamon Roll Sourdough Focaccia (Step-by-Step)
This is the detailed walkthrough; the streamlined version lives in the printable recipe card.
Step 1: Feed your starter
Before bed, feed your starter so that it’s ready to bake with in the morning.
Note: I include this step for anyone who needs help timing their starter. If you already have 200g of active starter ready to go, skip this step and jump right into mixing the dough.
In a 3/4 or 1 L glass jar, mix 20g starter with 100g water. Then, mix in 100g bread flour until smooth.
Loosely cover and let it ferment overnight, about 10–12 hours at 68–75°F (20–24°C).
Note: If your kitchen is warmer or cooler than this temperature range, you may need a different feeding ratio to ensure your starter is at peak in the morning. I’ve gone with 1:5:5 here, but for a warmer kitchen, try 1:10:10 (10g starter, 100g water, 100g flour). Use my feeding ratio calculator to find the best ratio for your kitchen. This recipe needs 200g of active starter, but I make a little extra so I have some left over to maintain my starter.
By morning, your starter should be bubbly and at peak.
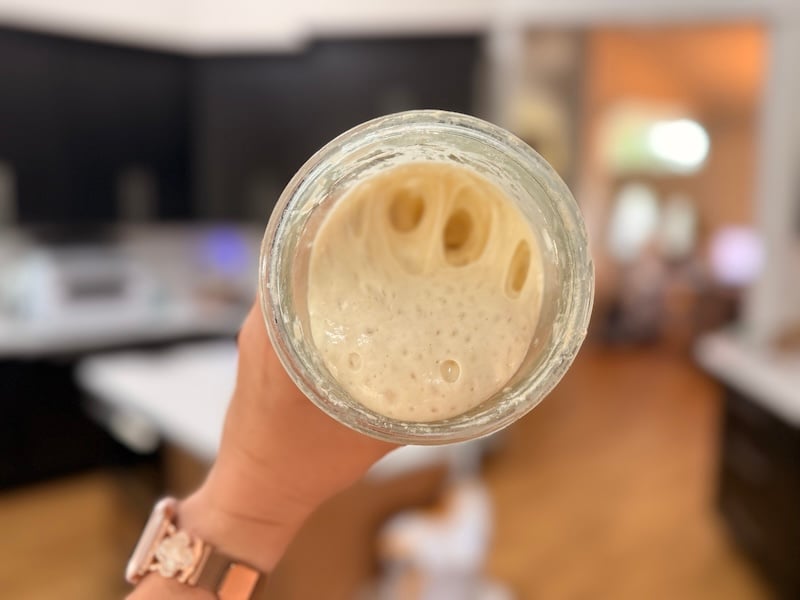
Not sure if your starter is at peak and ready to bake with? Check out this educational post: Is My Sourdough Starter Ready to Bake With? How I Can Tell
Step 2: Mix the dough
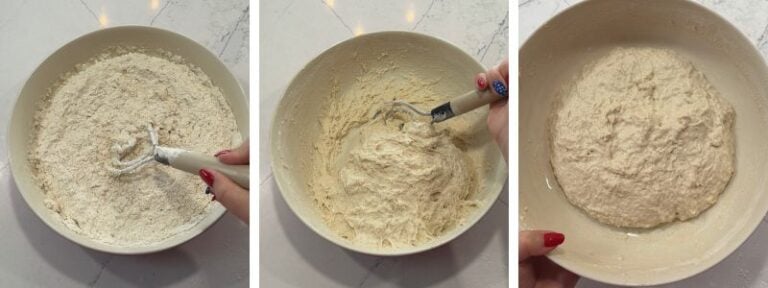
In the morning, whisk together 390g warm water, 10g sugar, and 200g active starter in your large bowl.
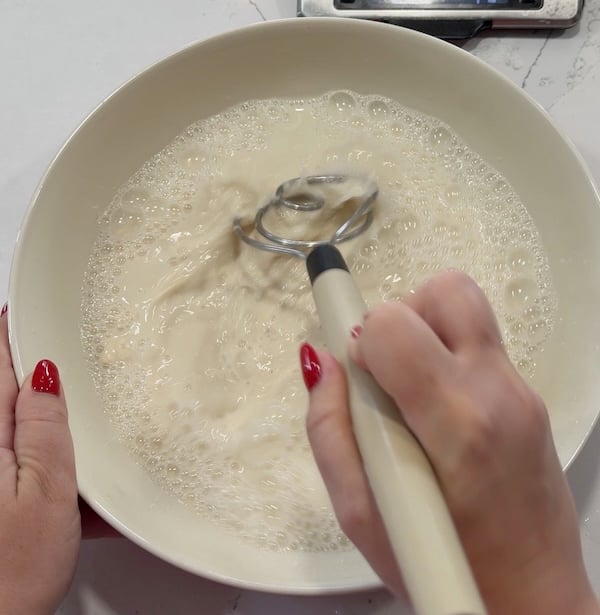
Add 500g bread flour and 10g sea salt and mix until no dry flour remains, using a Danish dough whisk or a wet bowl scraper.
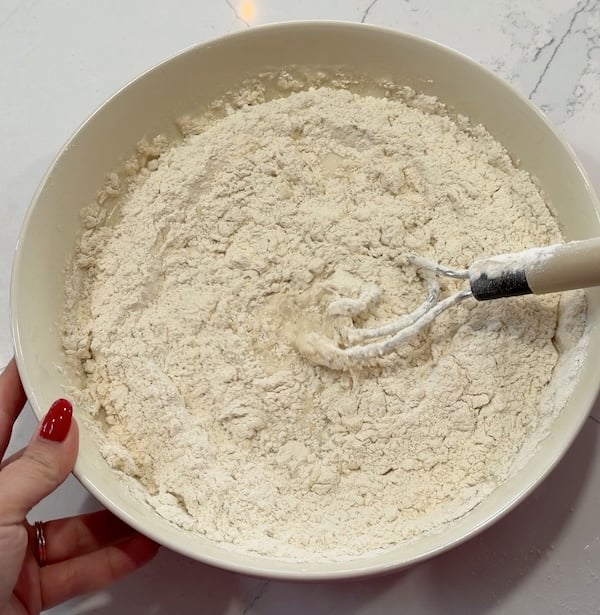
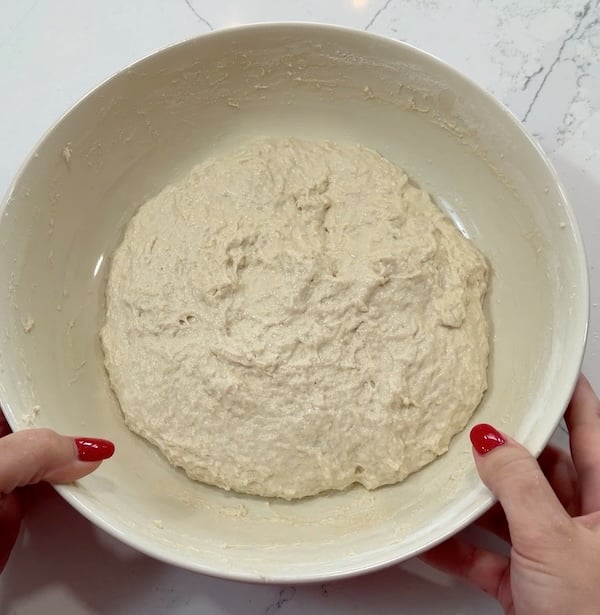
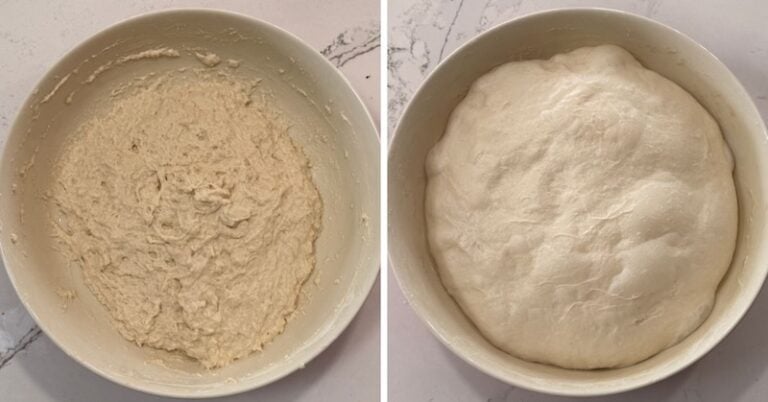
It’ll be really shaggy, and that’s exactly right. Bulk fermentation starts the moment everything is mixed.
Step 3: Put it in a warm spot
Cover the bowl and set it somewhere warm, ideally around 80–85°F (26.5-29.5°C).
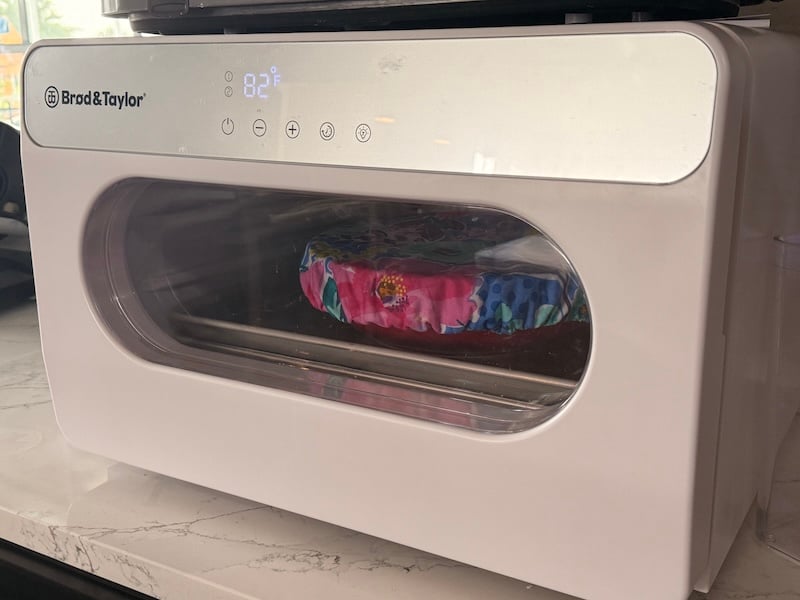
A proofing box or warming mat is great, but your oven with the light on or a microwave with a cup of boiling water inside can also do the job.
Note: If you opt to proof in your oven with the light on, double-check the temperature in there! It’s perfect for some but still too hot for others. It just depends on your oven. Anything over 85°F (29.5°C) is too warm.
Let the dough rest for 30 minutes.
Related: The Ultimate Sourdough Proofing Box Guide: Reviews, Tips, and DIY Options
Step 4: Coil folds
After that 30-minute rest, we’ll start our coil folds. How many rounds you’ll need is up to your dough — I usually land around 4 or 5, but treat that as a ballpark, not a rule. The dough will tell you when it’s ready.
This dough is wet and sticky, which is exactly what we want. But if doing coil folds on a super sticky dough makes you nervous, it’s easier to start with bowl-scraper-assisted stretch-and-folds.
This is the technique used in my plain focaccia recipe, because it’s so beginner-friendly.
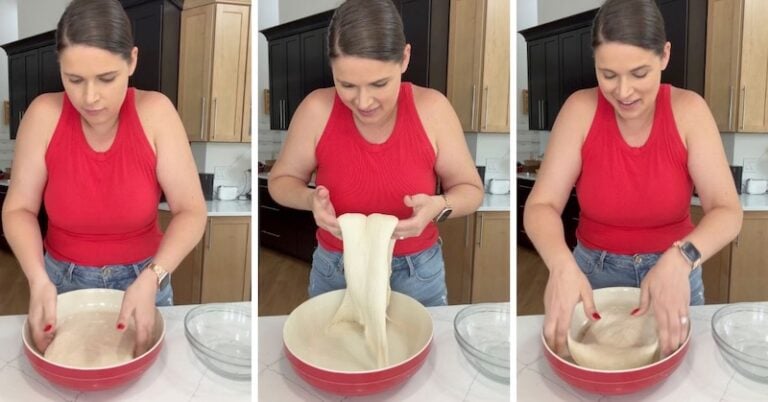
Wet your bowl scraper, slide it under a section of dough, and lift it up and over itself. Work your way around the bowl.
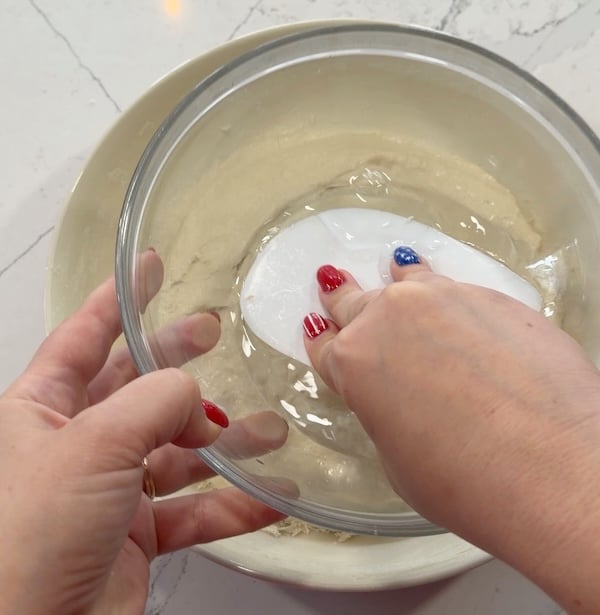
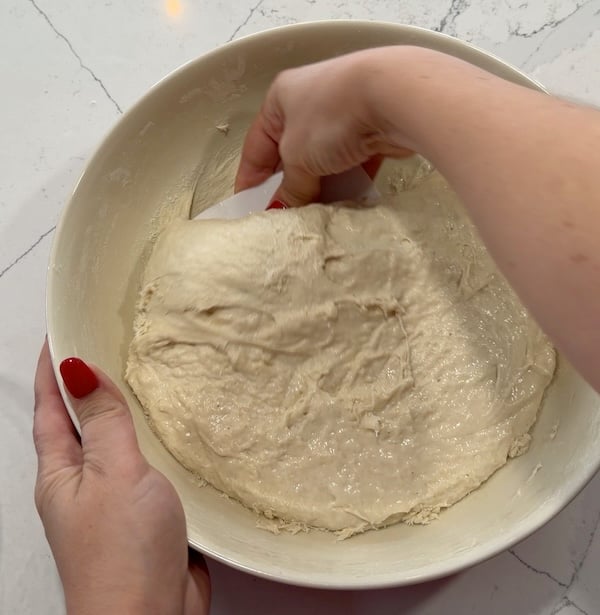
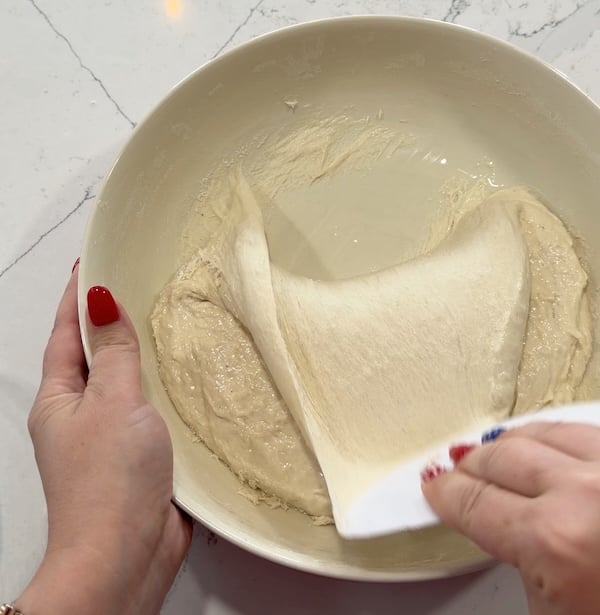
This allows you to start working the dough without getting your hands all covered in dough. After one or two rounds of this, the dough will have smoothed out and become much more elastic, making coil folds so much easier.
If you’re comfortable with such a high-hydration dough, you can do regular ol’ coil folds instead. Wet your hands, slide them under the center of the dough, lift, and let the ends fold under themselves. Rotate the bowl 90° and repeat a few times, wetting your hands often.
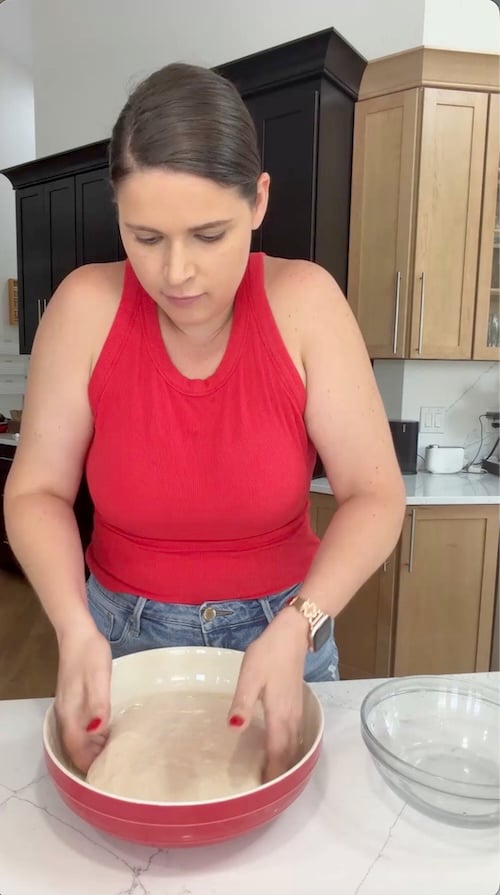
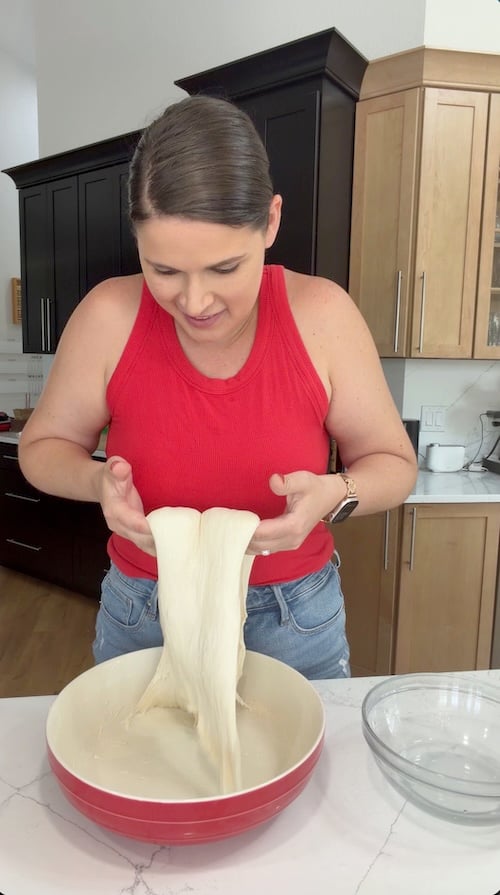
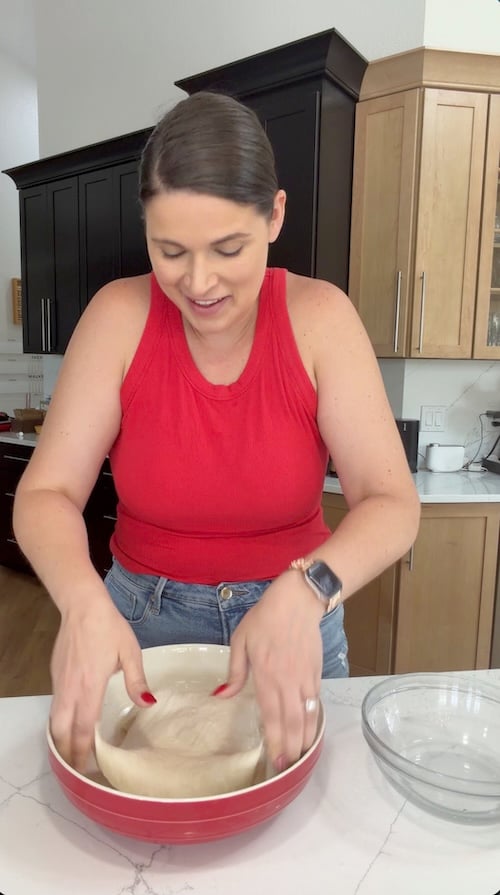
How to know when to stop coil folds: after you perform a round of coil folds, check the dough about 30 minutes later. If it’s holding its shape instead of spreading flat across the bowl, you’re done — no need to wait out the full hour and do another round. If the dough has puddled back out, let it finish resting (about an hour from your last fold), do another round, and check again in the same way. For me, it’s usually 4 or 5 rounds total.
After each round, you’ll notice the dough smoothing out, strengthening, and rising.
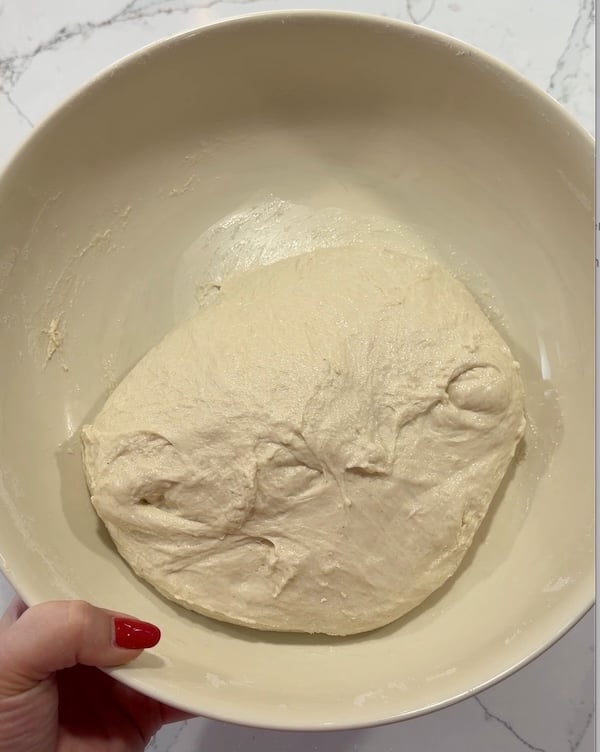
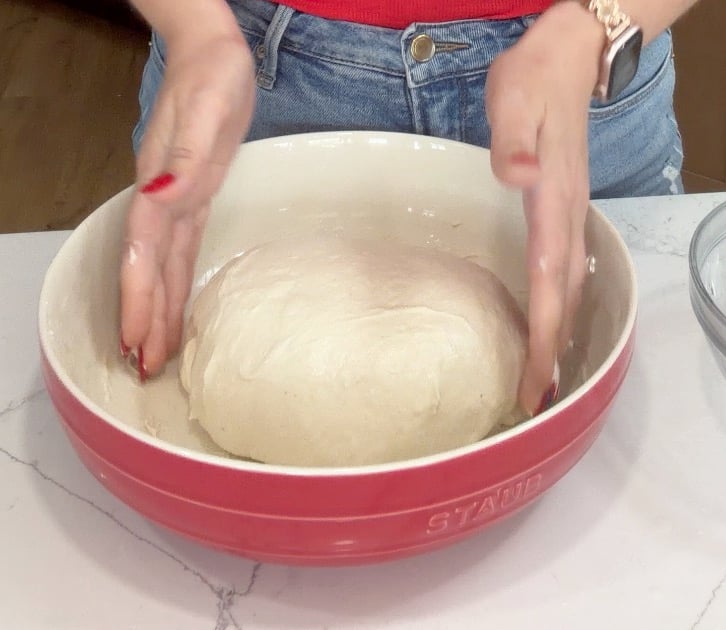
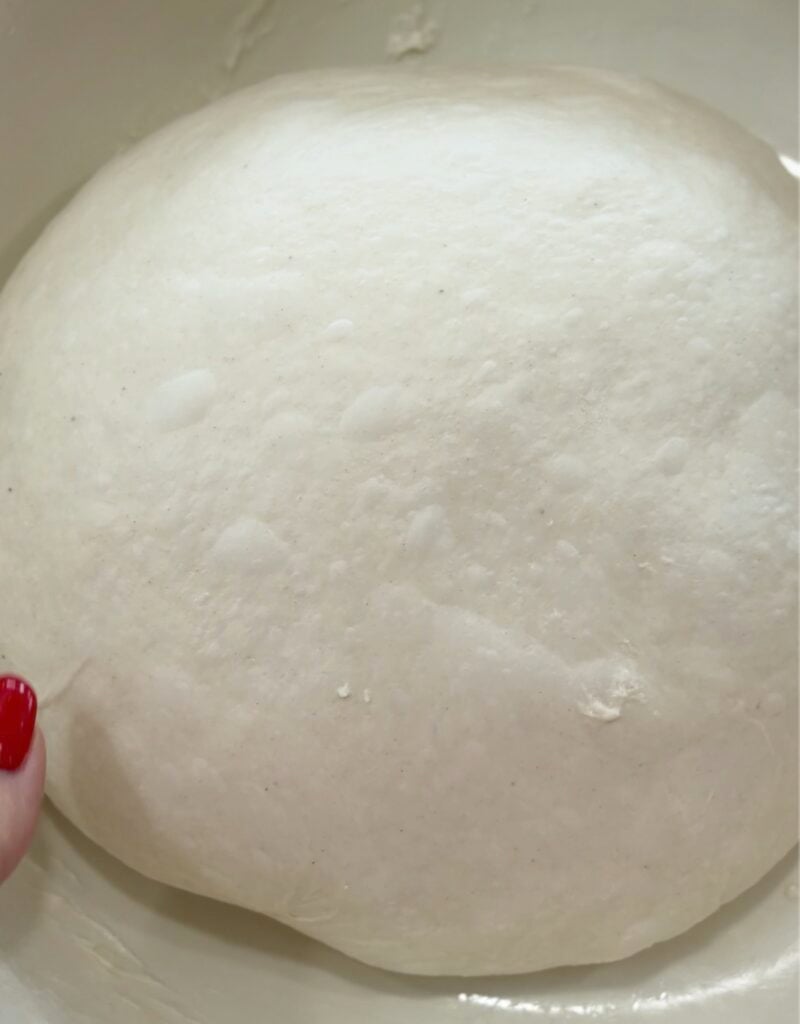
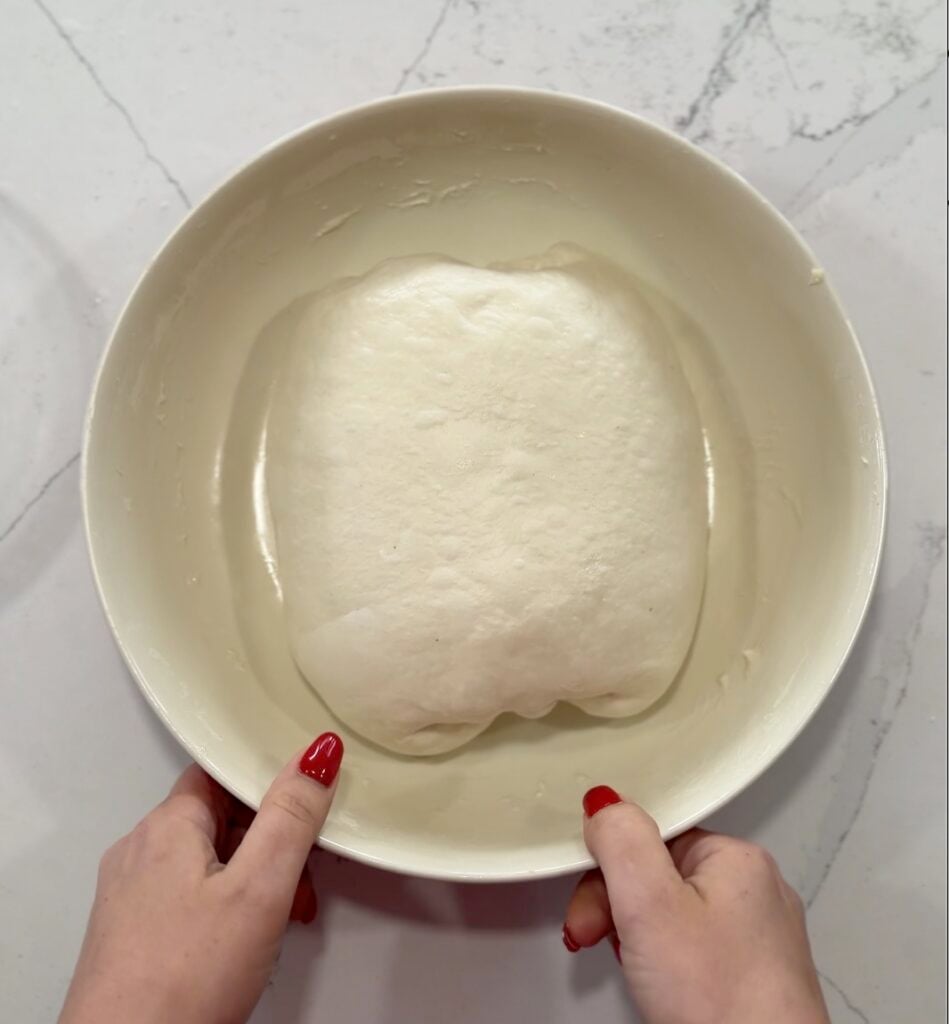
“Coil folds were the best! Focaccia has become my favorite dough.” —Recipe tester from Bloomfield Hills, Michigan
Step 5: Finish bulk fermentation
Remember: bulk fermentation started back when you first mixed the dough. It’s ready for the next step once it’s roughly doubled in size and is covered in bubbles.
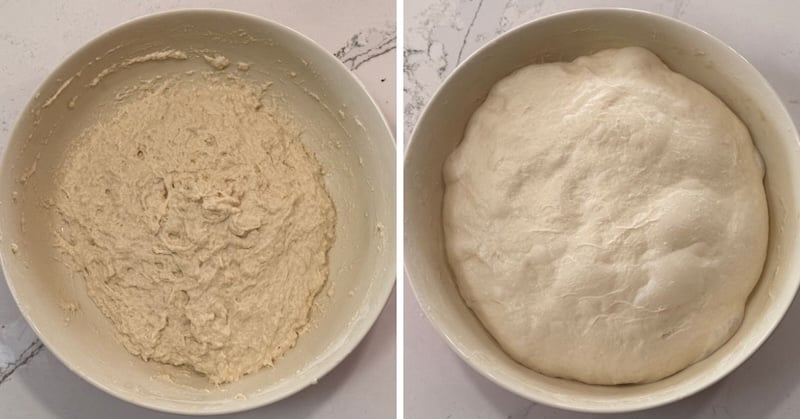
If you happen to have the same bowl as me – the Staub 11.5-inch bowl (which is AWESOME, by the way) — you can use my photos as a reference for fermentation. Once your dough fills the bowl about as much as the photo on the right, bulk fermentation is finished.
For me, this takes 5.5–6 hours at about 80°F (26.5°C), but timing can vary, so watch the dough, not the clock.
Step 6 (optional): Overnight cold proof
If you’d rather split this over two days, pop the dough in the fridge overnight. When you’re ready to move on to the next step, let it warm up on the counter for 1–2 hours, then continue.
Note: I’ve made this recipe both ways and noticed virtually no difference in flavor, for what it’s worth. For me, the optional cold proof is most useful for scheduling purposes. Use the fridge as a “pause” button if you need it!
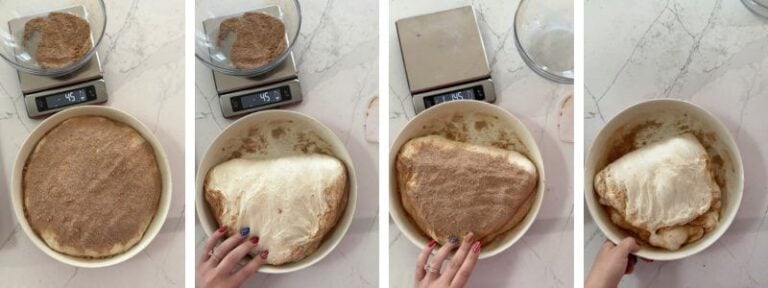
Step 7: Layer in the dry cinnamon-sugar mixture
This step is a little messy and imperfect, but just embrace it.
In a small bowl, combine 48g sugar, 24g brown sugar, 15g bread flour, and 10g cinnamon.
Sprinkle half the mixture (about 48g) evenly over the dough, then stretch and fold the dough over it.
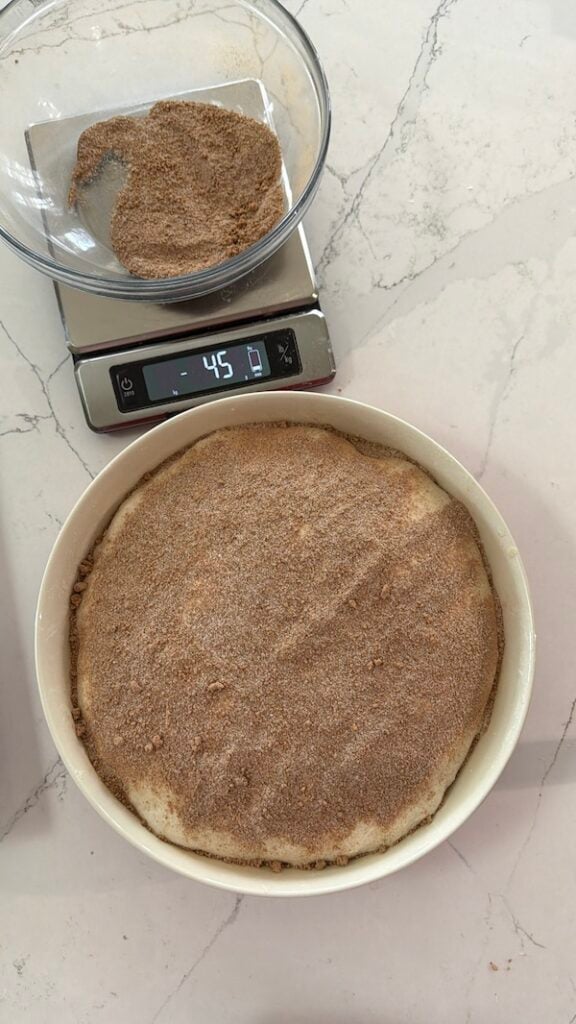
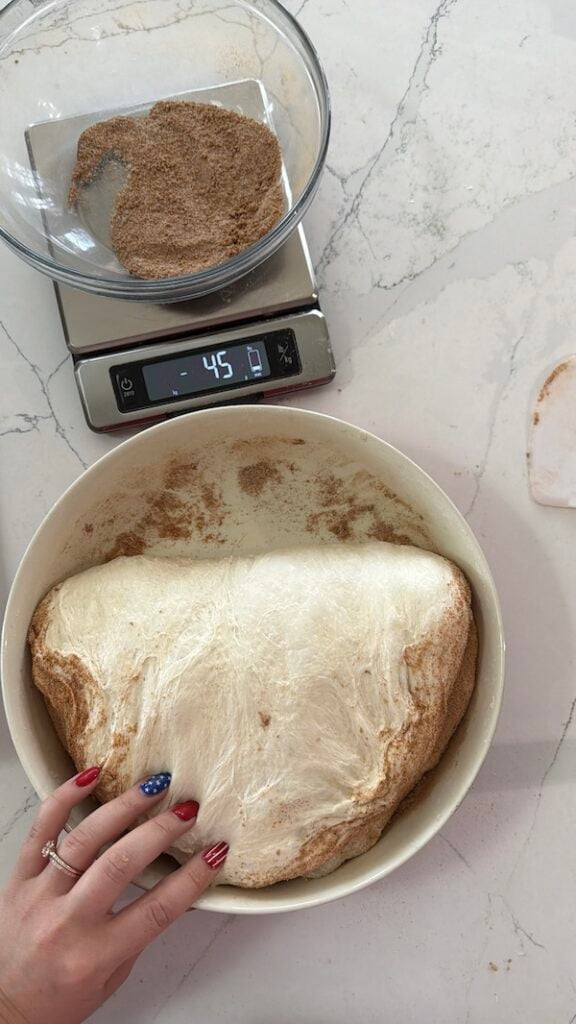
Sprinkle the remaining half over the top and stretch-and-fold again.
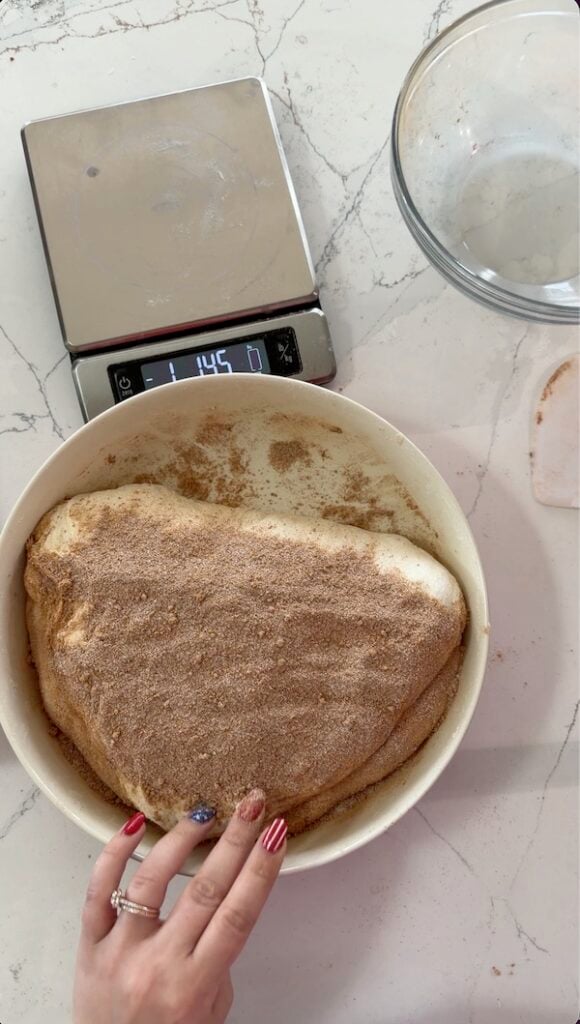
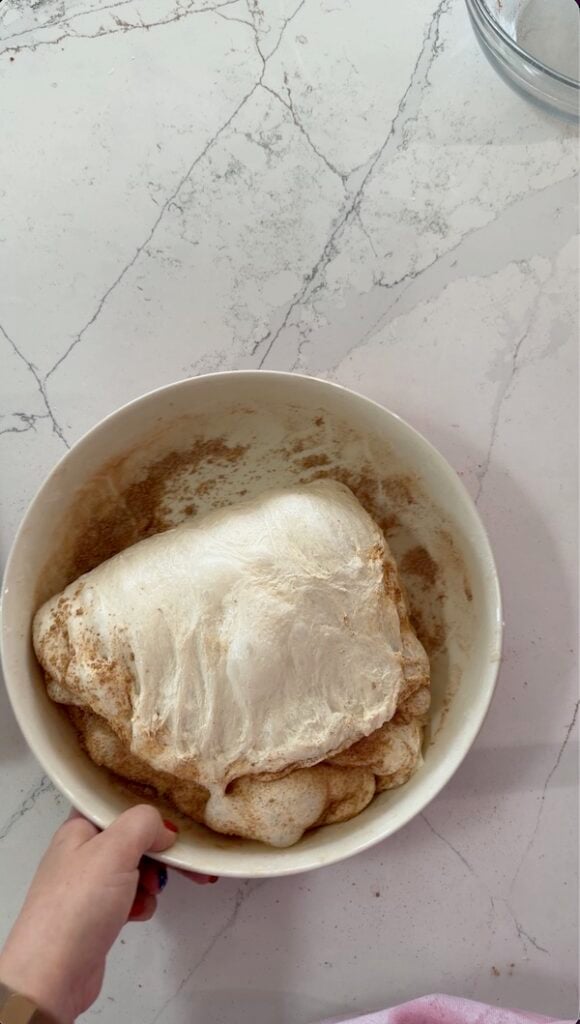
It’ll look a bit messy, and the dough won’t seal back to itself. That’s OK! Those layers create the marbled cinnamon-sugar swirl inside the focaccia.
“I love the layering of the cinnamon layer and how soft and fluffy the end result was.” —Recipe tester from South Australia
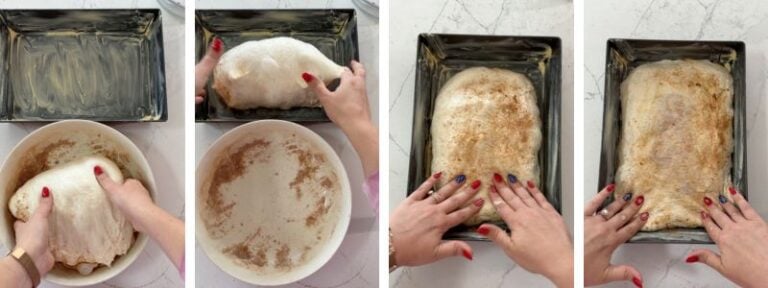
Step 8: Transfer to the pan
As soon as the dry mix is folded in, prepare your pan. The amount of butter you’ll need depends on the pan material:
- 30g softened butter for a Lloyd Pan or 12-inch cast-iron skillet
- 10g for a non-stick USA Pan
- 20g for glass, ceramic, or other pans — spray with non-stick oil or coat with butter, then line with parchment and add the butter on top of the parchment.
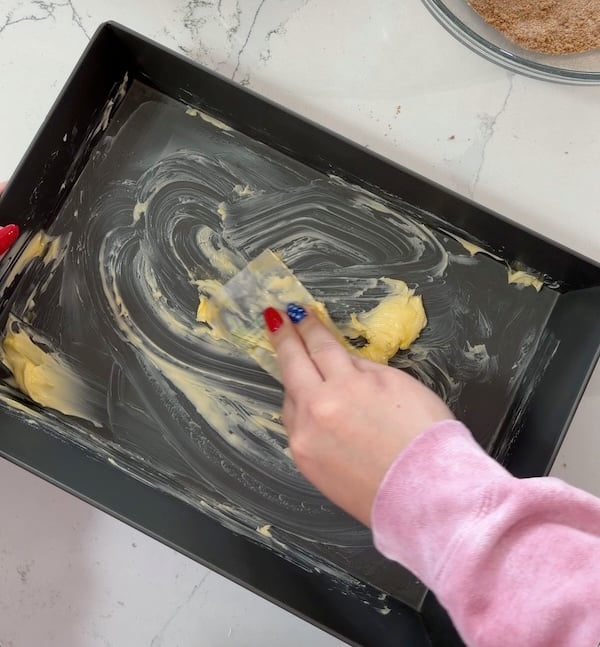
Lay the dough over the butter and gently press and stretch it to fill the pan.
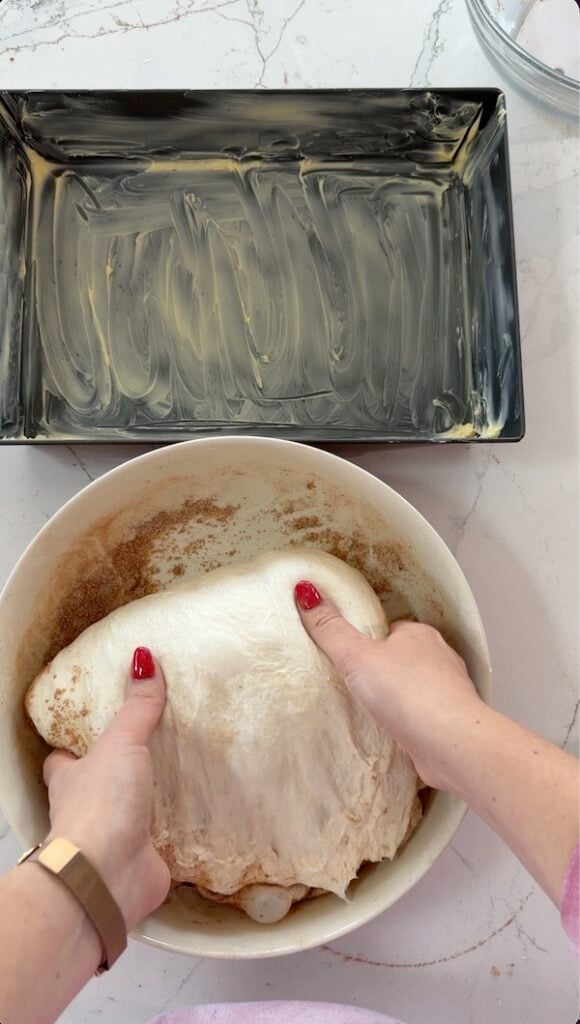
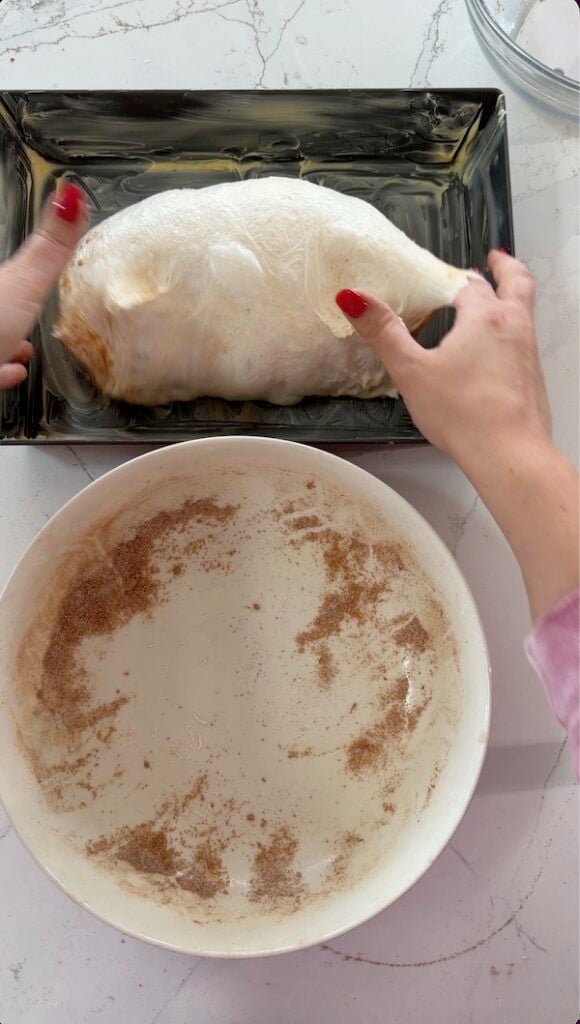
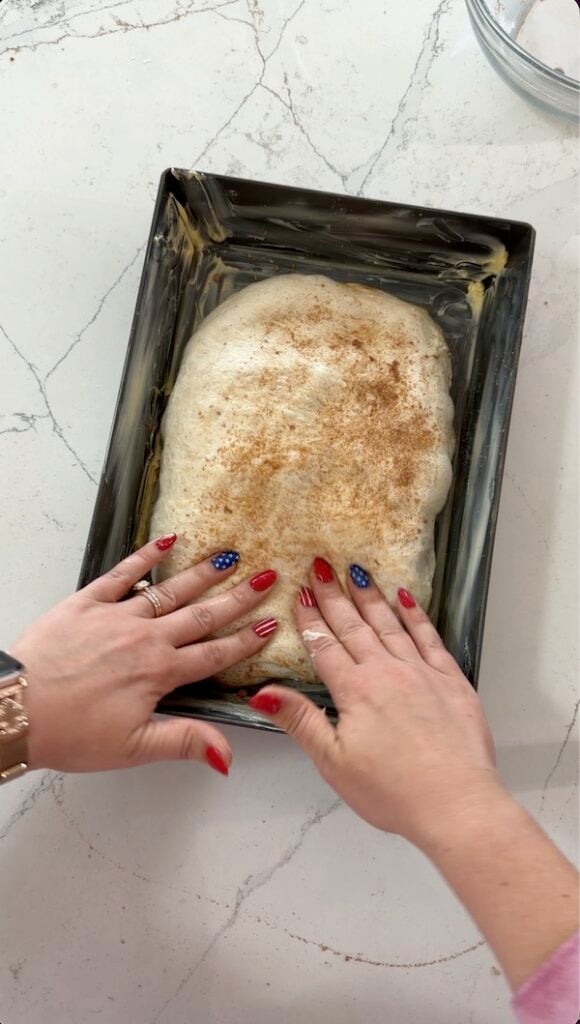
Cover the pan and let the dough rest for about 20 minutes to relax. Then, finish pressing and stretching the dough until it fills the pan.
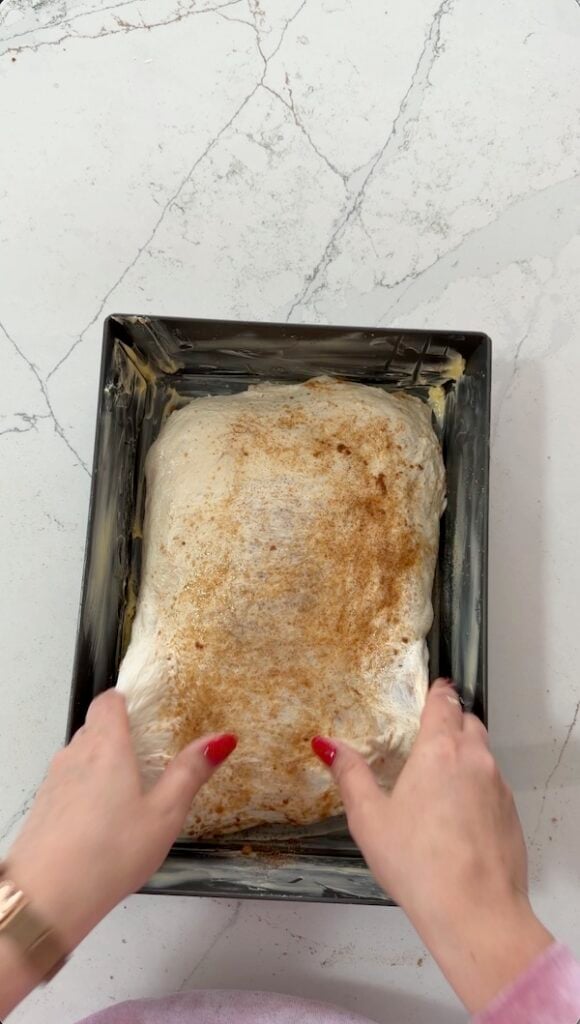
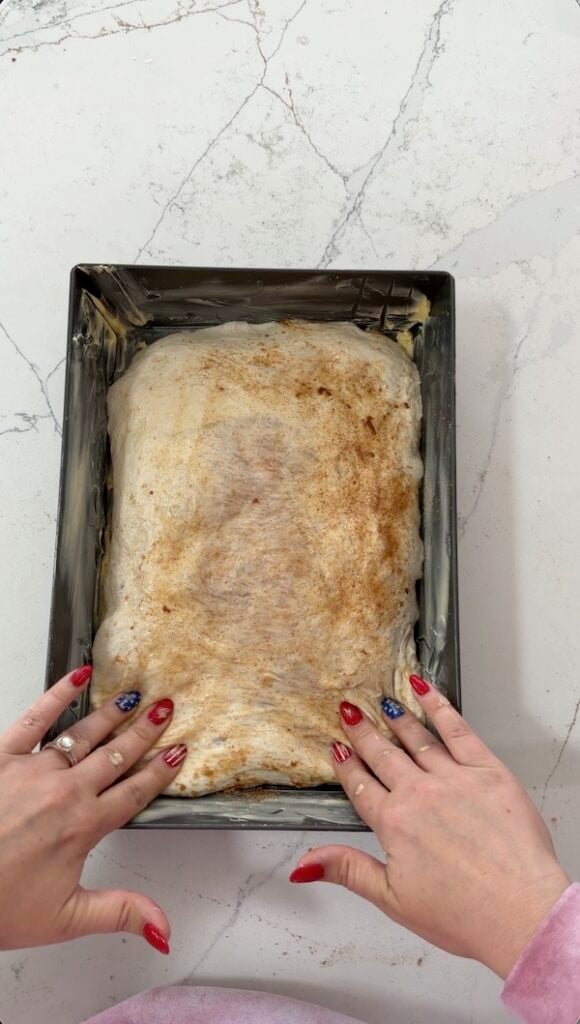
Cover and return to your warm spot for the final proof.
Step 9: Add the cinnamon topping (wet mix) and preheat
About 2–3 hours later, or once the dough looks puffy, is around 50% larger, and has filled the pan, prepare the wet topping.
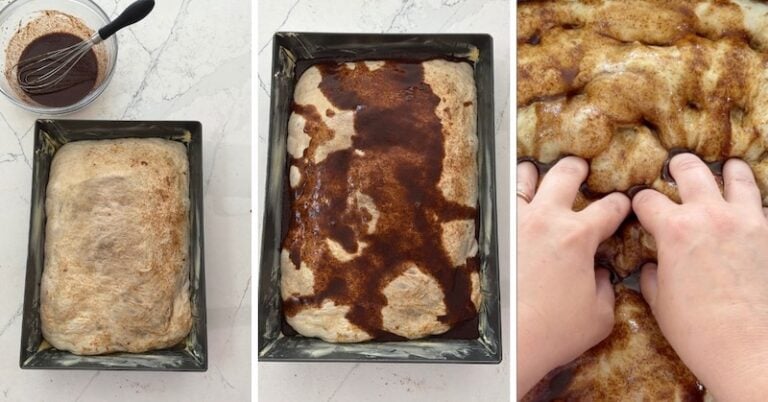
Combine 30g melted butter, 50g sugar, 20g brown sugar, 10g cinnamon, and 30g water (yes, water — it makes the topping pourable without adding more butter).
Pour it evenly over the dough, then dimple the entire surface deeply with your fingers, pressing all the way down to the pan.
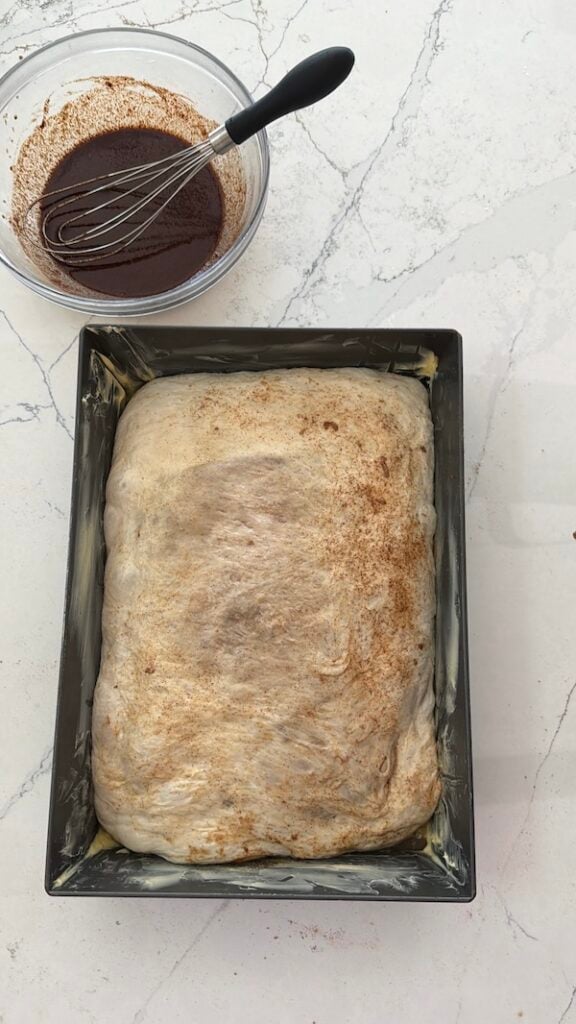
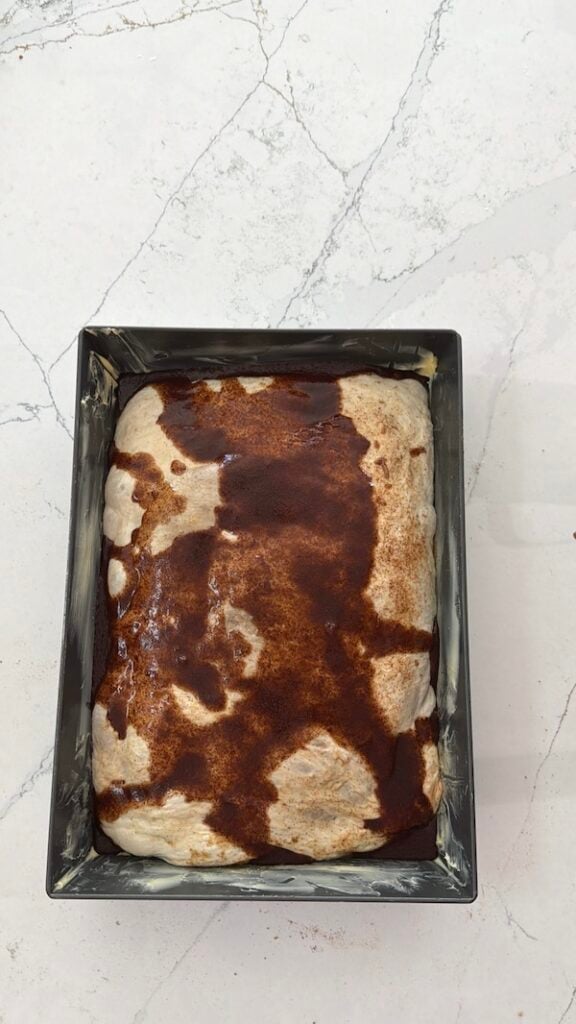
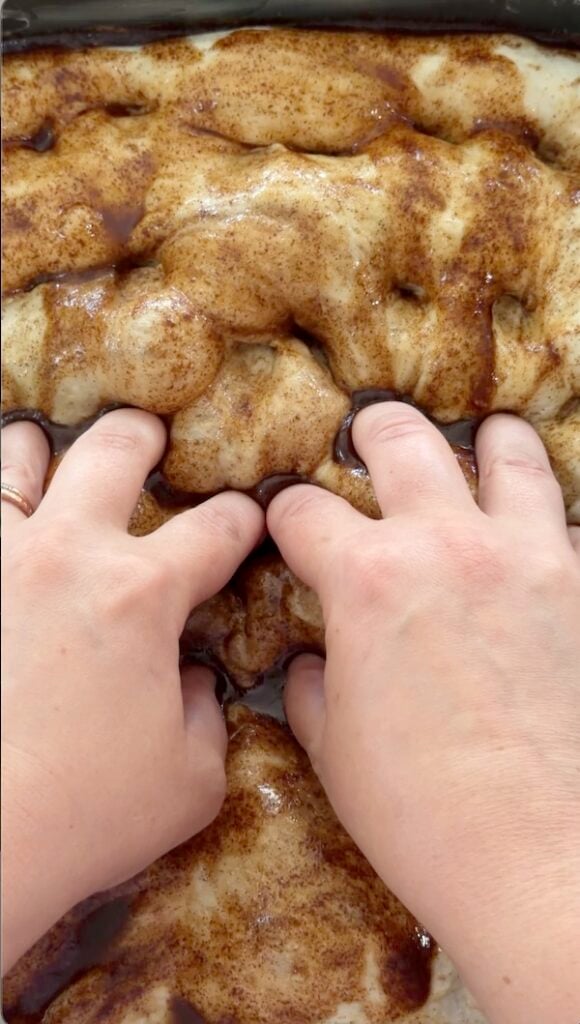
Note: As you dimple in the wet mixture, you may feel some stiff spots in the dough as you press down. That’s just the dry mix layered inside — nothing to worry about!
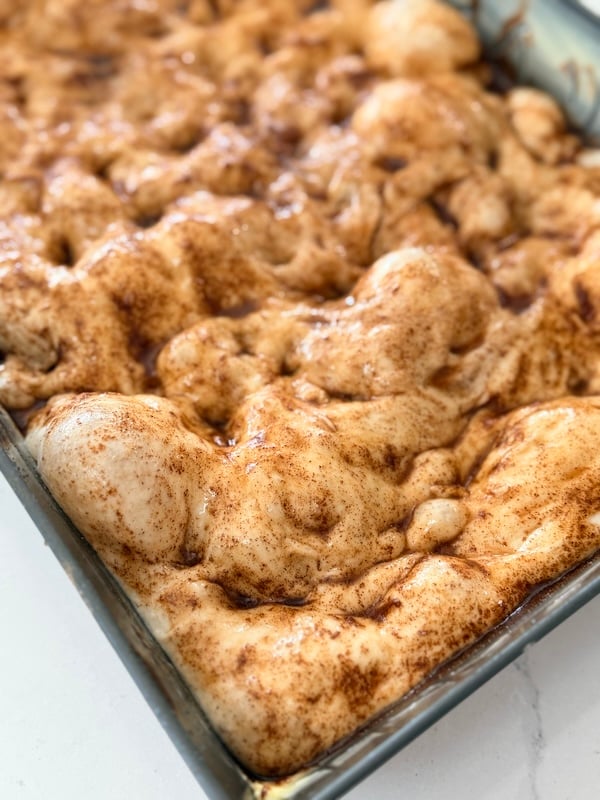
Return the pan to your warm spot. Move your oven rack to the lower third and preheat to 400°F (205°C) on conventional bake.
Step 10: Bake
Once the oven is preheated, place the focaccia on the lower third rack and bake for about 30 minutes, rotating halfway through.
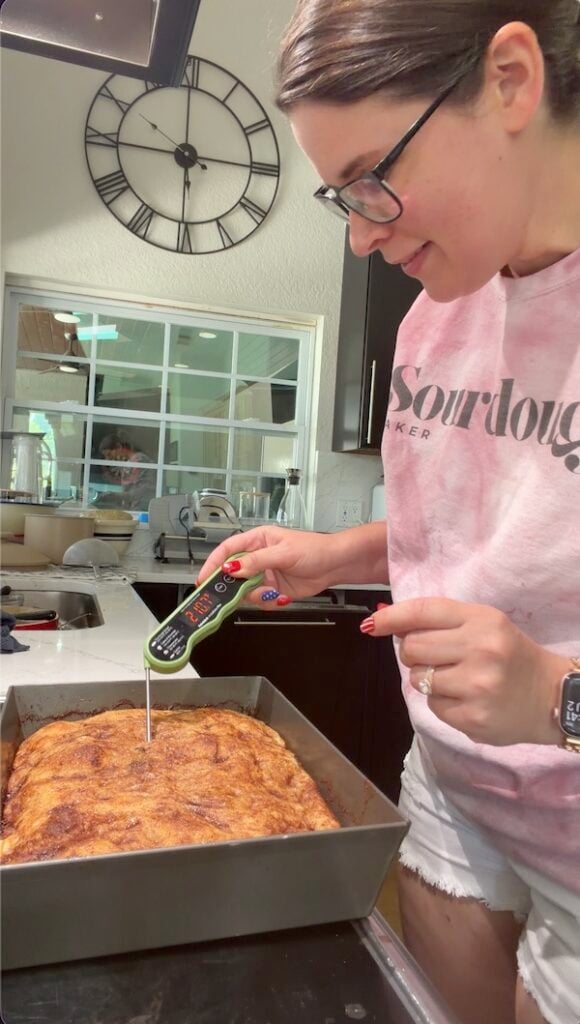
Pull it when the top is a deep golden brown and the interior reaches 205–210°F (96–99°C).
“I loved the crispy bits on the bottom and edges.” —Recipe tester from Yellville, Arkansas
Step 11 (optional): Make the vanilla glaze or cream cheese drizzle
Whisk up whichever one you like — I love the simplicity of the vanilla glaze (no cream cheese to soften), but I have a serious sweet spot for that cream cheese drizzle. Both are fantastic!
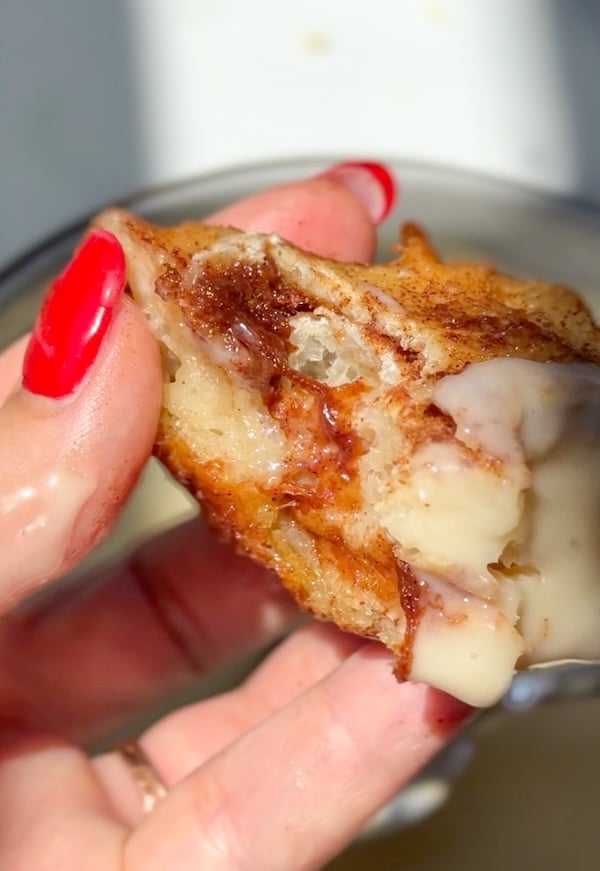
For the vanilla glaze, combine 120g powdered sugar, 30g heavy cream, 5g vanilla extract, and 1/2 tsp sea salt.
For the cream cheese drizzle, whisk together 60g softened cream cheese, 85g powdered sugar, 15g whole milk (or heavy cream), 5g vanilla extract, and 1/2 tsp sea salt.
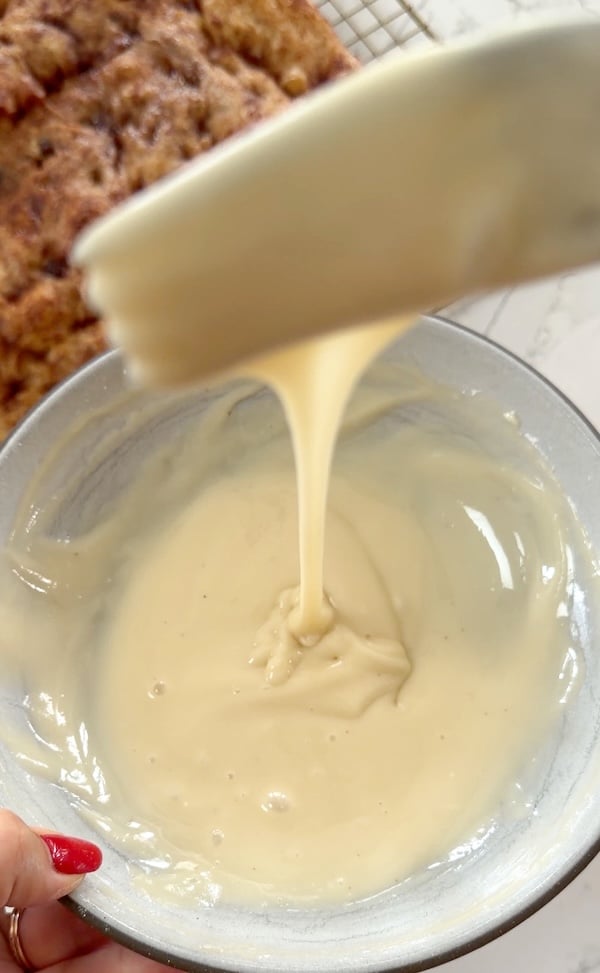
Quick tip: if you’re an icing person, I highly suggest doubling the quantity. That’ll give you enough to dip individual slices of focaccia in the icing.
You can adjust the consistency of either topping option to taste. Thin with a little more liquid or thicken with a little more powdered sugar.
Step 12: Cool, then add the glaze or drizzle
Let the focaccia cool in the pan for 5 minutes, then move it to a cooling rack and let it cool for at least 1 hour. This allows the interior to finish setting for cleaner slices.
Once it’s cooled, add your vanilla glaze or cream cheese drizzle and slice. Don’t add it while the focaccia is warm, or it’ll melt right off.
“Light and airy bursting with cinnamon flavor!” —Recipe tester from Laveen, Arizona
Storage and Reheating
Best on day one: Like all focaccia, this cinnamon roll sourdough focaccia is at its absolute best the day it’s baked, when the crumb is super soft and squishy.
Room temperature: Keep it in an airtight container or bread bag for 2–3 days.
- I love these bread bags from Doe a Deer — use code THATSOURDOUGHGAL for 15% off.
- These paper bread bags from Sis & Co Collective are also great for storing on your counter or gifting.
Reheating: I like to pop individual focaccia slices in the microwave for about 20 seconds. That softens it right up!
Freezing: If you won’t finish the focaccia within a couple of days, slice it and freeze. It reheats beautifully. I usually opt for a quick burst in the microwave, but wrapping it in foil and reheating in a 350°F (175°C) oven for about 5-10 minutes would give you a better texture.
A quick note from the data: a few testers found it got a little moist or chewy after sitting a day. Freezing extra slices on day one is the easy fix.
Troubleshooting Tips
FAQs
Yes. Once your starter is active, you can mix, ferment, proof, and bake this cinnamon roll sourdough focaccia in a single day. I feed my starter the night before so it’s ready to use in the morning. If you’d prefer to split the process over two days, use the optional overnight cold proof after bulk fermentation as a pause button.
Some testers expected the gooey softness of a cinnamon roll and were surprised by the more bread-like focaccia texture, so it’s worth setting that expectation: think “cinnamon roll meets focaccia,” not a gooey cinnamon roll. Add the vanilla glaze or cream cheese drizzle for extra sweetness and that cinnamon roll finish.
No, a wet, sticky dough is expected for this high-hydration focaccia. 95% of testers said they had no trouble working with it once they kept their hands and tools wet. Resist the urge to add a lot of extra flour; the coil folds will strengthen the dough over time, making it easier to handle.
Do a round of coil folds about every hour during bulk fermentation; you can stop once the dough holds its shape after a 30-minute rest. There’s no magic number; it depends on how your dough is behaving. If the dough puddles back out, it needs another round. I often do coil folds throughout the entire bulk fermentation, though it’s definitely not required.
Yes. Many testers successfully used all-purpose flour. Because it’s generally lower in protein and may absorb less water than bread flour, add about 15–25g more flour to firm up the dough, or add 1 tablespoon of vital wheat gluten for more strength.
Yes, you can freeze cinnamon roll sourdough focaccia. It’s best fresh, but slice and freeze any extras and reheat straight from frozen. It toasts up wonderfully.
More cinnamon sourdough recipes to bookmark for later:
- Cinnamon Raisin Swirl Sourdough Bread Recipe (Pepperidge Farms Copycat)
- Overnight Cinnamon Raisin Swirl Sourdough Bagels (Advanced Recipe)
- Wildly Soft Sourdough Cinnamon Rolls (No Tang)
Cinnamon Roll Sourdough Focaccia
Equipment
- Large mixing bowl a 3–4 qt bowl is ideal
- Warming mat or proofing box or DIY option – see Recipe Notes
- Lloyd Pans 10×14-inch Detroit-Style Pizza Pan or a 9×13-inch USA Pan or a 12-inch cast-iron skillet
Ingredients
Feed Your Starter
- 20 g sourdough starter
- 100 g water
- 100 g bread flour
Main Dough
- 390 g warm water
- 10 g sugar
- 200 g active sourdough starter that you made, from above
- 500 g bread flour
- 10 g sea salt
To Line the Pan
- 30 g unsalted butter (softened) amounts vary by pan, see step 8
Dry Cinnamon-Sugar Mixture
- 48 g sugar
- 24 g brown sugar
- 15 g bread flour
- 10 g ground cinnamon
Cinnamon Topping (Wet Mix)
- 30 g unsalted butter (melted)
- 50 g sugar
- 20 g brown sugar
- 10 g ground cinnamon
- 30 g water
Simple Vanilla Glaze (Option 1)
- 120 g powdered sugar
- 30 g heavy cream
- 5 g vanilla extract
- 1/2 tsp sea salt
Cream Cheese Drizzle (Option 2)
- 60 g softened cream cheese
- 85 g powdered sugar
- 15 g whole milk or heavy cream
- 5 g vanilla extract
- 1/2 tsp sea salt
Before You Begin

Instructions
- Feed your starter: Before bed, in a 3/4 or 1 L glass jar, mix together 20 g sourdough starter and 100 g water. Then, mix in 100 g bread flour until smooth. Loosely cover and let ferment on the counter overnight [10–12 hours at 68–75°F (20–24°C)].
- Mix the dough: In the morning, in a large mixing bowl, whisk together 390 g warm water, 10 g sugar, and 200 g active sourdough starter. Add 500 g bread flour and 10 g sea salt, and mix until no dry flour remains, using a Danish dough whisk or a wet bowl scraper. It will be really shaggy; that's normal. (Note: Bulk fermentation starts as soon as the ingredients are mixed.)

- Put it in a warm spot: Cover the bowl and place it somewhere warm, ideally around 80-85°F (26.5-29.5°C) – see Notes for proofing options. Let the dough rest for 30 minutes.
- Coil folds (about every hour): After the first rest, do a round of coil folds. Wet your hands and slide them under the center of the dough, lift, and let the ends fold under. Rotate the bowl 90° and repeat a few times, wetting your hands often. Cover, rest about an hour, then do another round.You can stop doing coil folds once the dough holds its shape after a 30-minute rest. If it's puddled back out, keep doing a round every hour or so until it holds. Most doughs are ready after 4-5 rounds.

- Finish bulk fermentation: Remember, bulk started when we mixed the dough. It's ready for the pan once it's roughly doubled and covered in bubbles. Mine took 5.5–6 hours at about 80°F (26.5°C), but timing varies. Watch the dough, not the clock.
- Optional — overnight cold proof: Pop the dough in the fridge overnight to pause the process. When you're ready to continue, let it warm up on the counter for 1–2 hours, then move on to the next step.
- Layer in the dry cinnamon-sugar mixture: In a small mixing bowl, combine 48 g sugar, 24 g brown sugar, 15 g bread flour and 10 g ground cinnamon. Sprinkle half of the dry cinnamon-sugar mixture (about 48g) over the dough and do a single stretch-and-fold to layer it in. Sprinkle the remaining mixture on top and fold again.Don't worry about making this neat. It'll look messy, and the dough won't seal back to itself. That's what we want; those layers are what give you the marbled swirl.
- Transfer the dough to the pan: As soon as the dry mix is folded in, prep your pan:• Lloyd Pans or 12-inch cast-iron: coat bottom and sides with 30 g unsalted butter (softened).• Nonstick USA Pan: coat with 10 g unsalted butter (softened).• Glass, ceramic, or other: spray with nonstick oil or coat with butter, line with parchment, then add 20 g unsalted butter (softened) on top of the parchment.Lay the dough over the butter and press to fill the pan. If it springs back, cover and rest 20 minutes, then stretch again. Cover and return to your warm spot for the final proof.
- Add the cinnamon topping (wet mix) and preheat: About 2–3 hours after transferring to the pan, or once the dough looks puffed up and around 50% larger, prepare the topping. In a medium mixing bowl, combine 30 g unsalted butter (melted), 50 g sugar, 20 g brown sugar, 10 g ground cinnamon, and 30 g water (yes, water!). Pour it evenly over the dough's surface, then dimple the entire surface deeply with your fingers, pressing all the way down to the pan. Return to your warm spot. Move your oven rack to the lower third and preheat to 400°F (205°C) on conventional bake.
- Bake: Once the oven is preheated, place the focaccia on the lower third rack and bake about 30 minutes, rotating halfway through. Pull it when the top is deep golden brown and the interior is 205–210°F (96–99°C).
- Make the vanilla glaze or cream cheese drizzle (pick one): Simple Vanilla Glaze (Option 1): In a medium mixing bowl, whisk together 120 g powdered sugar, 30 g heavy cream, 5 g vanilla extract, and 1/2 tsp sea salt. To make it thinner, add additional heavy cream. To make it thicker, add additional powdered sugar.Cream Cheese Drizzle (Option 2): In a medium mixing bowl, whisk together 60 g softened cream cheese, 85 g powdered sugar, 15 g whole milk, 5 g vanilla extract, and 1/2 tsp sea salt. To make it thinner, add additional whole milk. To make it thicker, add additional powdered sugar.
- Cool, then add the glaze or drizzle: Let the focaccia cool in the pan for 5 minutes, then transfer to a cooling rack and let it cool for at least 1 hour — this allows the interior to finish setting for cleaner slices. Once it's cooled, add the glaze or drizzle and slice.
Video

Notes
- Cozy Bread Original Proofing Mat — Use code THATSOURDOUGHGAL for 10% off
- Brod & Taylor Folding Proofer
- Giyudot Folding Bread Proofing Box
- DIY — Your oven with the light on
- DIY — Your microwave with a cup of boiling water inside
Conclusion
This cinnamon roll sourdough focaccia checks all the boxes for me:
- The cozy flavors of a cinnamon roll
- The playful, squishy joy of focaccia dough
- A fraction of the fuss
Whether you finish it with the simple vanilla glaze or the cream cheese drizzle, it’s the kind of bake that disappears fast.
“You must try this, it’s like a giant cinnamon roll you can share.” —Recipe tester from Gadsden, Alabama
If you make it, I’d love to see it. Drop a comment below and tag me on Instagram @thatsourdoughgal so I can cheer you on.
Other sourdough bakes you might love:



This recipe is phenomenal. Best thing I’ve baked in a while. The photos and detail in recipe were very helpful 🙂 thanks!
YAY! I am happy to hear you are loving this recipe!
Good morning Rebecca!! would I change anything if I wanted to add little apple chunks?
Ooooooh… I’d probably use raw apples and fold them in with the cinnamon sugar mixture – they’ll cook while the focaccia cooks!
Sorry, I misspelt your name!!! Rebekah!!
No worries at all!
I started my sourdough journey a couple of months ago. You know how it goes, ups and downs. This was my first try at focaccia ever and it is now my new favorite. It turned out amazing! Love it. Thank you for putting in the hard work to come up with this awesome recipe.
Aww thank you for being here! I am so glad this recipe turned out great for you!
Oh my goodness, Rebekah. This has to be the best sourdough recipe ever. Everyone made me put the vanilla glaze on before it had completely cooled. It is now half gone. Am making another one tomorrow so my son-in-law can take it to work on Monday. Wow wow wow. It’s a winner.❤️❤️❤️
Aww thank you so much, Jane!! I am so glad you all are loving this recipe, we are obsessed too!
I love your recipes! I used this recipe as a base and made an apple pie foccacia! I used a cinnamon butter and sauted aplles in a butter cinnamon mixture. It’s magical!
Yum!!!